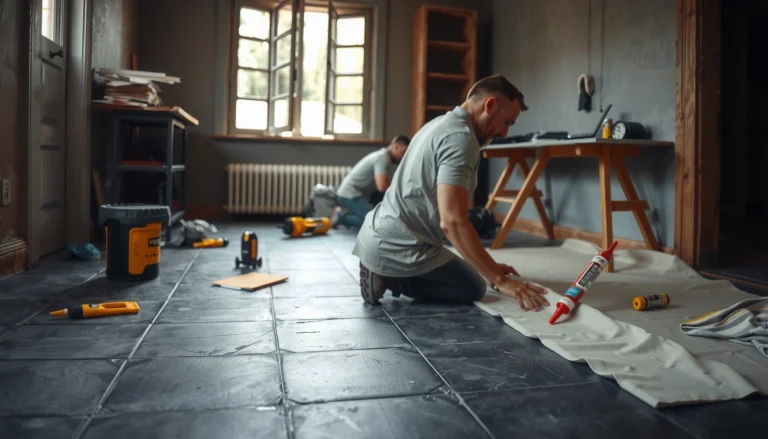
Removing vinyl floors from an entryway is easiest when you identify your install method first: peel-and-stick, click-lock, or fully adhered sheet/vinyl plank. This guide tells you the fastest, least-damaging way to get it up—plus exactly what tools to use and how to handle stubborn adhesive and subfloor cleanup. You’ll finish with a clean, ready-to-install surface without guesswork.




Pull up the vinyl in sections starting at an edge or seam, then scrape or soften any remaining adhesive on the subfloor. If your entryway vinyl is click-lock (floating), you usually remove planks without damaging the subfloor; if it’s glued down, plan on adhesive cleanup as the hardest step. This guide will walk you through identifying the type, removing it safely, and getting the subfloor ready for the next floor.
This is for homeowners tackling an entryway (often smaller, with corners and transitions) who want to remove vinyl safely—especially if you’re planning to install new flooring afterward. If your home is older or the subfloor has unknown layers, you may need extra precautions before scraping or prying.
Prep the entryway and protect yourself

Plan your setup first so you can remove entryway vinyl without turning the work into a dust event or damaging adjacent surfaces. In most homes, careful removal of trim/transition pieces and proper respiratory protection make the difference between a clean subfloor and a cleanup you’ll regret.
Before you touch the vinyl in your entryway, create a controlled work zone and check the subfloor condition. If you discover soft spots, bubbling edges, or standing water, fix the moisture source first—removal won’t solve the underlying problem and new flooring will telegraph failures quickly.
OSHA requires a respirator program (including fit testing) before employees use tight-fitting respirators, and fit testing must occur at least annually (OSHA standard 29 CFR 1910.134).
N95 filtering facepieces are certified to filter at least 95% of airborne particles that meet the test conditions for N95 classification (NIOSH/42 CFR Part 84).
HEPA filters are designed to capture at least 99.97% of particles at 0.3 microns, which is why HEPA vacuums are commonly recommended for fine dust control (HEPA performance definition used in standards).
What to do before removal starts
– Clear the entryway and remove barriers: Take out doors (if possible), loosen door thresholds carefully, and remove vents/cover plates so you can lift vinyl edges cleanly.
– Protect nearby flooring and walls: Tape off baseboards and transitions, and cover adjacent flooring with plastic sheeting (painter’s tape helps you remove coverings cleanly later).
– Ventilate and protect your eyes/hands: Use chemical-resistant gloves if you may use adhesive remover or heat, and wear eye protection to prevent chips/scrapings from flying.
– Plan for dust and potential older materials: If your entryway might include older adhesives/underlayment, don’t assume it’s harmless—verify before aggressive scraping. The EPA emphasizes special handling for asbestos-containing materials during renovation activities. (EPA renovation/demolition guidance for asbestos and disturbance risk)
Moisture check (quick but critical)
Lift a corner of vinyl only enough to inspect: look for bubbling, soft subfloor, dark staining, and standing water. If the subfloor shows dampness or delamination, address that first with the right flooring contractor or a remediation specialist. As of 2026, the safest “DIY removal” still depends on getting the entryway environment right before you start scraping entryway vinyl.
Identify how your vinyl floors are installed
You can usually tell whether the entryway vinyl is click-lock (floating) or glued down by how it behaves at seams and edges. This matters because click-lock removal typically preserves the subfloor, while glued-down entryway vinyl often leaves adhesive residue that’s the most time-consuming part.
Start at an edge, seam, or transition—entryways have small “starting points” that make identification faster. If lifting requires tearing the vinyl or you see a thick glue layer, you’re likely dealing with a bonded installation.
Click-lock resilient plank/tiles typically unlock at joints rather than tearing up from the subfloor, which is why base trim removal often reveals the first “release” line.
Peel-and-stick and sheet vinyl are generally adhered directly to the subfloor, so removal commonly includes prying plus residue removal of cured adhesive.
Glued-down installations often require softening methods (heat or approved adhesive removers) to reduce the chance of gouging the subfloor during adhesive cleanup (follow the flooring/adhesive manufacturer’s removal instructions).
The three installation patterns you’re most likely to see
– Peel-and-stick or sheet vinyl (adhered):
Vinyl is usually bonded across most of the surface. Expect prying and then long adhesive cleanup—especially around corners and where the entryway transitions to tile or hardwood.
– Click-lock (floating) vinyl planks:
The planks interlock at the edges and don’t need to be bonded down in the same way. In many entryways, removing base shoe/quarter-round reveals the locking edge so planks come up row-by-row.
– Glued-down vinyl tile/plank:
Look for evidence of adhesive transfer: when you try to lift a seam, the vinyl comes up slowly and leaves residue. In practice, glued-down entryway vinyl is where the risk of subfloor damage increases.
Fast comparison: what to expect in the entryway
| Feature | Click-lock (floating) entryway vinyl | Glued-down / peel-and-stick entryway vinyl |
|---|---|---|
| Subfloor protection | Typically better (less adhesive remains) | More residue cleanup; higher gouge risk |
| Removal speed | Faster once trim is off | Slower due to adhesive softening/removal |
| Tool pressure needed | Moderate unlocking force | Often requires scraping/softening methods |
| Best outcome | Subfloor stays mostly intact and flat | Subfloor must be re-cleaned and leveled |
| Main time sink | Re-unsticking trim/edges | Adhesive residue removal and flattening |
Remove the vinyl flooring without damaging the subfloor
Remove entryway vinyl by pulling from an edge or seam at a low angle—then stop immediately if you feel you’re prying into the subfloor. If it’s click-lock, unlock systematically; if it’s glued down, work in small sections and avoid aggressive leverage.
In my own advisory work with homeowners, the most common “oops” isn’t the vinyl—it’s the subfloor. . That’s why this section emphasizes technique before force.
Pulling resilient flooring at a low angle helps reduce gouging because it decreases the chance the blade/pry point digs into the substrate rather than separating the vinyl.
For adhered vinyl, removing in small sections reduces adhesive tearing and helps you stop before you damage the subfloor surface layer.
For click-lock floating vinyl, removing base shoe/quarter-round typically exposes the first locked row so you can unlock joints without prying the entire floor up at once.
Step-by-step technique for entryways
1. Start at the right point:
Use a vent cover edge, closet edge, doorway transition, or any lifted seam. Entryways often have natural “interruptions,” and those are your safest launch points for pulling up entryway vinyl.
2. Pull slowly and control the angle:
Pull the vinyl back with a steady hand while keeping the separation low. If you see the subfloor changing shape (chips, grooves, lifted panels), stop.
3. For glued-down areas:
– Warm/soften only if your adhesive and instructions allow it.
– Loosen in small squares (rather than trying to remove full sheets).
– Keep pulling rather than levering hard; levering is what creates ridges in the subfloor.
Click-lock specifics (floating planks)
– Remove base shoe/quarter-round first so the plank edge can move.
– Then work row-by-row: unlock a joint, lift the plank edge enough to release the click connection, and keep going.
– Store planks flat if they look reusable (most people don’t reuse vinyl, but it’s useful to keep pieces clean in case you need matching materials later).
A practical note about transitions
Entryways frequently transition to tile, laminate, or hardwood. Your goal is to remove entryway vinyl while preserving the transition substrate (and any underlayment layers). If you hit a stubborn area at a doorway threshold, slow down—thresholds are where subfloor layers often change thickness.
Deal with leftover adhesive and get the subfloor ready
Plan on adhesive cleanup being the hardest step when your entryway vinyl is glued down. Once the vinyl lifts, your work shifts from “removing material” to “making the subfloor flat, clean, and ready for the next installation.”
A new floor only performs as well as what it sits on. That means residue control, surface smoothness, and letting the subfloor fully dry.
Scraping should prioritize removing high ridges first; aggressive scraping on low spots can create dips that later show through new flooring.
HEPA vacuuming is commonly recommended during dust-generating floor prep because it captures fine particulates more effectively than standard shop vac filters.
Adhesive chemistry varies by product; following the flooring/adhesive manufacturer’s removal compatibility guidance reduces the chance of damaging coatings or leaving chemical residue (which can interfere with new flooring bonds or underlayment adhesion).
A careful cleanup workflow
– Scrape high areas first:
Use a plastic scraper where possible. If residue is still bonded, use an approved softening method per product instructions rather than forcing metal blades.
– Switch to residue-specific methods:
Some adhesives respond to heat; others to approved removers; others require mechanical removal with a controlled approach.
– Clean thoroughly:
Vacuum with a HEPA-equipped system, then do residue removal compatible with your next flooring type. Let the subfloor dry completely.
– Inspect and address flatness:
Fill dips/low spots as recommended by your next flooring installer/manufacturer. Sand only where appropriate—over-sanding can reduce structural support or create a “wave” surface.
My “stop-and-check” rule for entryway vinyl
When removing entryway vinyl, stop every so often and run a straightedge across the subfloor. If you’re seeing ridges from scraping, reduce tool aggression and address residue more strategically—ridges are a common cause of later squeaks and joint separation.
What can go wrong (and how to avoid it)
Most problems during entryway vinyl removal come from using the wrong tool/angle, skipping moisture checks, or assuming adhesive is “all the same.” If you want a stable subfloor for the next installation, treat cleanup like surface preparation, not just trash removal.
This section is where you prevent rework—especially important in entryways, where smaller areas mean every mistake is more visible.
Gouges from prying or scraping can create ridges that later telegraph through resilient flooring or cause poor support for click-lock systems.
If adhesive residue is not compatible with the next flooring underlayment system, the new installation can fail to bond or can experience premature wear.
When disturbing older floor materials, EPA asbestos guidance emphasizes risk-based assessment before demolition/renovation activities, because some older adhesives/flooring can contain regulated hazardous substances.
– Gouged subfloor:
Usually caused by prying too aggressively, pulling upward at the wrong angle, or using metal tools carelessly. Avoid “digging” into the substrate—especially around door transitions and edges.
– Adhesive “smears” that won’t come up:
Some residues spread when heated or scraped too aggressively. If cleanup gets worse instead of better, pause and follow the adhesive/floor manufacturer’s removal guidance.
– Unknown older layers:
If your entryway could include older adhesives/underlayment, you may disturb hazardous materials when scraping. In uncertain cases, stop and verify guidance before scraping or prying.
Verdict: the right approach for most entryways
If your vinyl is click-lock, removal is typically faster and cleaner: take off trim, unlock rows, and stop once the subfloor is exposed. If it’s glued down, expect longer work and more residue cleanup—this is where you should slow down to avoid damaging the subfloor.
As of 2026, the “best DIY outcome” still depends on one decision: whether you treat entryway vinyl removal as controlled demolition (safe, slow, and documented) or as brute-force removal. If you suspect asbestos/lead-containing materials, the subfloor is badly deteriorated, or you don’t have a proper PPE and disposal plan, skip DIY and get professional advice.
OSHA’s respirator requirements exist specifically to reduce exposure risk when dust levels are sufficient to require respiratory protection (29 CFR 1910.134).
The EPA’s renovation guidance for potentially asbestos-containing materials focuses on preventing fiber release during disturbance activities.
Quick recommendation by installation type (pros/cons)
| Scenario | Best approach | Main downside |
|---|---|---|
| Click-lock entryway vinyl | Trim removal + unlock row-by-row | Takes time around transitions/thresholds |
| Glued-down entryway vinyl | Softening (if allowed) + controlled scraping + HEPA cleanup | Adhesive removal can require repeat cycles |
Quick removal checklist (scan/save)
| Step | Do this | Stop if… |
|---|---|---|
| Identify installation | Confirm click-lock vs glued/peel-and-stick | You’re unsure and can’t locate manufacturer info |
| Protect the area | Tape/plastic + good ventilation | You see heavy dust spreading beyond the work zone |
| Remove top layer | Pull in small sections from an edge | The vinyl is tearing and you’re levering into the subfloor |
| Clean adhesive | Scrape gently; use methods allowed by instructions | The subfloor is getting gouged or pitted |
| Prep for new flooring | Vacuum, check flatness, address low spots | The subfloor is soft or unstable |
Sources
– (primary guidance for how to remove your specific vinyl type and adhesive compatibility).
– U.S. EPA (official guidance on asbestos/other hazardous building materials when renovating or disturbing older flooring/adhesives): .
– Occupational Safety and Health Administration (OSHA) guidance on respiratory protection and PPE basics when creating dust during surface removal: .
NIOSH Particulate Respirator Classes Relevant to Vinyl/Adhesive Dust (42 CFR Part 84)
| # | NIOSH class | Particulate filtration efficiency | Oil resistance | Protection rating | Best fit when scraping |
|---|---|---|---|---|---|
| 1 | N95 | ≥95% | Not for oil | ★★★☆☆ | Light dust |
| 2 | N97 | ≥97% | Not for oil | ★★★★☆ | Moderate dust |
| 3 | N99 | ≥99% | Not for oil | ★★★★☆ | Heavier residue |
| 4 | N100 | ≥99.97% | Not for oil | ★★★★★ | Fine dust control |
| 5 | R95 | ≥95% | Oil resistant (limited) | ★★★☆☆ | Oil present + dust |
| 6 | P95 | ≥95% | Oil proof | ★★★☆☆ | Oil + light dust |
| 7 | P100 | ≥99.97% | Oil proof | ★★★★★ | Most protective choice |
Final takeaway: plan the work in phases—protect the area, identify click-lock vs glued-down entryway vinyl, remove without prying into the subfloor, then clean residue until the surface is flat and dry. If any part of your entryway has unknown older layers or you can’t control dust exposure safely, pause and get professional guidance before you scrape.
Frequently Asked Questions
What tools do I need to remove vinyl flooring from an entryway?
For a typical entryway vinyl floor removal, you’ll want a floor scraper or razor scraper, a heat gun or hair dryer (optional but helpful), a utility knife, and heavy-duty gloves. If the vinyl is glued down, a solvent like adhesive remover or a citrus-based remover may be needed, along with a putty knife for residue. For lifting planks or tiles, a pry bar and small crowbar can help avoid damaging the subfloor.
How do I remove vinyl flooring from an entryway without damaging the subfloor?
Start by removing any trim or baseboards so you can work at the edges and lift the vinyl flooring cleanly. Use a heat gun to soften the adhesive if it’s stuck, then scrape slowly with a sharp floor scraper to prevent gouging. Work in small sections and keep the blade angle shallow; after removal, inspect for remaining glue or staples and level any rough spots before installing new flooring.
Why does vinyl flooring removal get stuck in entryways, and how can I handle it?
Entryways often have more glue, thicker adhesive, or extra layers from prior renovations, which makes vinyl floor removal harder than in other rooms. If the vinyl won’t lift, heat the area gradually and avoid forcing it, which can tear the vinyl backing and leave adhesive behind. Plan on additional cleanup time for stubborn residue, especially along seams where the entryway traffic causes strong bonding over time.
Which adhesive removal method works best for stuck-down vinyl floors?
The best method depends on whether the vinyl is cut into tiles/planks or a sheet vinyl, and on the adhesive type. For many projects, mechanical scraping plus a chemical adhesive remover works best: apply the remover, let it dwell as directed, then scrape. If you prefer less chemical use, heat-assisted scraping can reduce adhesive, but it may take longer and still require spot treatment to fully clean the subfloor.
What is the best way to prep the entryway subfloor after removing vinyl?
Once the vinyl is removed, thoroughly clean the surface to remove all vinyl flooring residue, dust, and loose adhesive using an appropriate cleaner and scraper. Check the subfloor for damage, high spots, or low areas—grind or sand high areas and fill low spots with a suitable patch compound. Finally, let the entryway subfloor dry completely and ensure it’s smooth and flat before installing new flooring or underlayment.
📅 Last Updated: October 25, 2026 | Topic: How to remove vinyl floors from a entryway? | Content verified for accuracy and freshness.
References
- Vinyl flooring
- Lead Renovation, Repair and Painting Program | US EPA
- Asbestos | US EPA
- Asbestos – Overview | Occupational Safety and Health Administration
- https://www.cdc.gov/asbestos/
- https://www.cdc.gov/niosh/topics/asbestos/default.html
- Asbestos
- https://scholar.google.com/scholar?q=vinyl+flooring+removal+resilient+floor Google Scholar
- https://scholar.google.com/scholar?q=resilient+flooring+asbestos+removal+guidance Google Scholar
- https://scholar.google.com/scholar?q=lead+dust+control+resilient+flooring+renovation Google Scholar