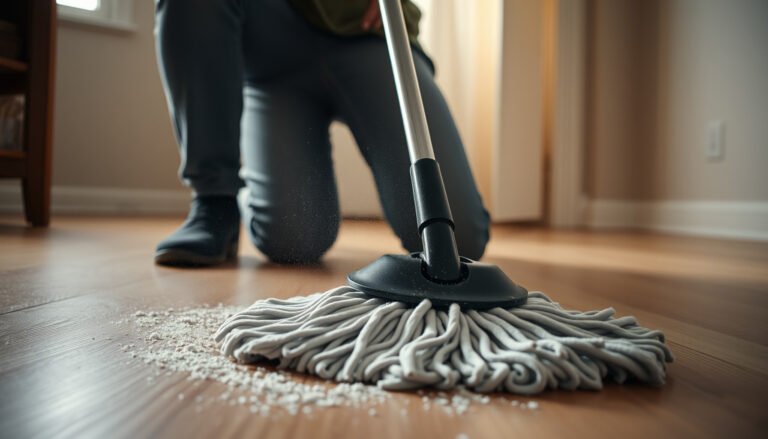
Need to remove laminate floors from a patio safely? This step-by-step guide gives you the fastest, lowest-damage method to lift planks cleanly, protect the patio surface, and handle underlayment and trim without surprises. If you follow the order of operations—from prep and tools to cutting, prying, and cleanup—you’ll finish with a patio ready for the next install.




To remove patio laminate safely, start by removing edging/trim, then work from a corner using the right method for your installation type—either release click-together boards or cut out glued sections. This minimizes damage to the patio base underneath and keeps adhesive/underlayment mess under control. You also avoid unnecessary scraping, because scraped underlayment and residue can be hard on the subfloor and difficult to clean later.
If your laminate is click-lock, you can usually pull it up in larger pieces after you loosen the first few rows. If it’s glued down, plan on cutting boards apart and scraping residue—slower, but more predictable than brute-force prying.
This guide is for homeowners dealing with laminate installed outdoors (or on a patio) and who need a practical removal approach without damaging the patio base underneath. Before you start, confirm whether the boards are floating/click-lock or glued-down, because the removal method changes a lot.
Who this is for (and when it applies)

This step-by-step method is best when you can access the perimeter and you can clearly identify where laminate seams start. It also works well for smaller patio areas where controlling dust and debris is practical, especially if you’re preparing the surface for new flooring or repairs.
– Best for small-to-medium patio areas where you can access edges and corners easily.
– Works when you can see/identify the laminate seam lines near the perimeter (the “starting point” matters).
– Different approach if the laminate is part of a bonded waterproof system—protecting that layer may be the priority.
“Floating” laminate (often click-lock) is designed to separate at seams when the first rows are released, which is why starting at an accessible corner matters.
Outdoor patio installs are more likely to have moisture-driven edge lifting, so perimeter access usually gives you the best chance to remove boards intact.
If the laminate sits on a bonded waterproof membrane system, demolition work should prioritize protecting that membrane from gouges and chemical residue.
Get ready: tools, safety, and patio protection
You’ll remove patio laminate more safely and with less cleanup if you stage tools for dust control and surface protection before the first cut or pry. As of 2026, the safest baseline is eye protection plus respiratory protection when cutting or scraping, because fine dust can become airborne quickly.
– Plan on dust control: wear eye protection and a good dust mask/respirator when cutting or scraping, and use a shop vacuum if you have one.
– Gather the basics: pry bar or flat pull tool, utility knife, scraper, and a tapping block (for click-lock) or a multi-tool/oscillating saw (for glued boards).
– Protect the patio: lay down plastic/old cardboard for debris, and avoid levering directly against waterproofing or expansion joints.
OSHA’s respirable crystalline silica PEL is 50 µg/m³ as an 8-hour TWA (effective requirements under 29 CFR 1910.1053) when silica dust hazards are present.
NIOSH-certified N95 respirators are designed to filter at least 95% of airborne particles at a 0.3 µm test size.
HEPA media is defined as capturing at least 99.97% of particles at 0.3 µm, making HEPA-equipped vacuums useful for dust-heavy laminate removal.
PPE and dust-control context (why it’s worth doing right)
Laminate demolition isn’t just “messy”—it can create respirable dust depending on what’s underneath (for example, thin mortar beds, concrete patches, or cementitious residue). When you cut glued boards or scrape hardened underlayment, the action can aerosolize fine particles. That’s why OSHA’s silica standard and dust-control expectations matter even when you’re not cutting concrete directly.
Dust-Filtering Respirator Classes Used for Outdoor Floor Demo (NIOSH)
| # | Respirator class | Minimum filtration (0.3 µm) | Oil resistance | Typical laminate demo use | Efficiency rating |
|---|---|---|---|---|---|
| 1 | N95 | 95% | Not oil-resistant | Light scraping/cutting with strong dust control | ★★★☆☆ |
| 2 | N99 | 99% | Not oil-resistant | Moderate cutting/scraping dust reduction | ★★★★☆ |
| 3 | N100 | 99.97% | Not oil-resistant | Higher dust exposure during board removal | ★★★★★ |
| 4 | R95 | 95% | Oil-resistant | Dusty work where light oils may be present | ★★★☆☆ |
| 5 | R99 | 99% | Oil-resistant | Extended scraping runs with dust capture | ★★★★☆ |
| 6 | R100 | 99.97% | Oil-resistant | Heaviest dust tasks during adhesive removal | ★★★★★ |
| 7 | P100 | 99.97% | Oil-proof | Peak protection when cutting/scraping outdoors | ★★★★★ |
Start strong: remove trim and find your laminate type
You’ll get the least damage when you remove perimeter trim/edge pieces first and then confirm whether your patio laminate is click-lock (floating) or glued down. Trim blocks the first row from lifting, and misidentifying the install method is the fastest path to cracked boards and gouged patio surfaces.
– Remove any perimeter trim/edge pieces first; they’re usually what blocks the first row from lifting.
– Determine removal method:
– Click-lock/“floating”: look for seams that can be separated and boards that lift without cracking badly.
– Glued-down: expect firm bonding to the substrate—prying will tear boards and leave adhesive.
– Find the safest entry point: begin at the edge/corner where the first row has the most clearance.
Perimeter trim typically clamps or covers the expansion gap (the small space around edges that lets laminate move) and must be removed before seam separation.
Click-lock laminate relies on interlocking profiles at board ends and edges; if you can’t separate a seam with gentle pressure, the section is likely glued.
Glued-down laminate is designed to transfer load through adhesive to the patio substrate, so prying tends to destroy boards and contaminate the surface with residue.
Click-lock vs glued-down: choose the right attack (so you don’t “pay twice”)
Below is a practical comparison for patio laminate removal, based on how these systems behave during demolition.
| Feature | Click-lock / floating | Glued-down |
|---|---|---|
| Primary bond | Mechanically locks at seams (boards interlock) | Adhesive bonds to the substrate |
| Best entry point | Perimeter corner after trim removal | Cut lines that isolate smaller sections |
| Expected board condition | Often salvageable in larger pieces | Usually damaged; reuse is unlikely |
| Tools that work best | Thin pry bar/pull tool, tapping block | Oscillating saw/multi-tool, scraper, utility knife |
| Dust profile | Less dust if you avoid snapping tabs | More airborne dust from cutting and scraping |
| Surface cleanup burden | May be limited to underlayment removal | Includes adhesive residue scraping and smoothing |
| Primary risk | Cracked locking tabs from forced prying | Gouging patio base and spreading adhesive mess |
| How to “test” without damage | Try releasing the first few seams with gentle leverage | Cut a small test grid; if residue remains, plan scraping |
| Best workflow | Row-by-row removal for control | Cut → lift sections → scrape → repeat |
| Waterproof layer considerations | Check for bonded edges; protect any membrane | Extra care: scraping can damage membranes and seams |
| Best For | DIY homeowners aiming for fastest, cleaner removal | Situations where boards can’t lift and you must predictably separate them |
Remove click-together laminate boards (usually comes up in rows)
If your patio laminate is click-lock, the safest removal is to unlock seams and lift in controlled rows—not to pry up the whole patio at once. This method preserves locking tabs, reduces splintering, and limits adhesive/underlayment disturbance.
– Loosen the first accessible row: use a thin pry tool gently under the edge and separate boards at the seam.
– Work across in order: once the first few boards release, continue row-by-row rather than trying to lift the whole patio at once.
– If a board won’t release: stop and re-check the seam—force can crack locking tabs and reduce salvageable pieces.
Click-lock seams are the “weakest point” for removal, so working along seam lines lets boards release without brute-force prying.
When a click-lock board resists removal, the most common cause is a locked tab that hasn’t been fully separated—stopping and re-checking usually prevents permanent cracking.
Starting from a corner after trim removal typically provides more clearance and reduces the leverage needed to lift patio laminate.
A practical row-by-row approach (what it should feel like)
In my own renovation tear-downs, the moment the first seam releases is usually the signal to switch from “searching” to “progressing.” The first few rows are where you learn what’s actually locked and what’s already loose due to outdoor moisture cycles. If the first row lifts cleanly, you can typically continue in larger pieces by keeping tension low and moving along the seam rather than against it.
How to proceed:
1. Remove trim/edge pieces fully so the first row isn’t constrained by an edge cap or base molding.
2. Insert a thin pull tool under the board edge closest to a corner and apply gentle upward leverage.
3. Separate at seams first, lift second. If the seam separates, the next lift usually comes quickly.
4. Use a tapping block (lightly) only if the board needs persuasion at the lock line—avoid striking the laminate surface directly, which can create micro-cracks.
5. Keep debris off the patio base. Use a plastic drop sheet or cardboard layer so you don’t drag underlayment particles across the substrate.
If something feels wrong: stop immediately if you hear cracking that sounds like the board is failing rather than the seam releasing. Forcing click-lock removal often means tabs break, which then turns “row removal” into “board-by-board salvage” with extra cleanup.
Remove glued-down laminate floors (cut, lift, then scrape)
If your patio laminate is glued down, the reliable strategy is to cut boards into sections, lift them, and then scrape residue without gouging the patio base. This reduces surprises and gives you a predictable workflow—even though it’s more labor and produces more dust.
– Cut boards into manageable sections: slice through in a grid pattern so you can lift smaller pieces without tearing.
– Lift section-by-section: remove the laminate pieces, then move to the adhesive layer.
– Scrape carefully: use a scraper to remove residual glue/underlayment without gouging the patio surface; smooth leftover residue as much as practical for the next installation.
Glued-down laminate is designed to resist seam separation, so cutting into a grid prevents tearing and limits how far adhesive is disturbed.
After laminate removal, adhesive residue typically remains as a thin film or lumps, and residue unevenness can transfer into the next floor installation.
A scraper should be used with controlled pressure near waterproofing transitions, because gouges in membrane areas can become long-term failure points.
Cutting safely (and reducing the “dust cloud”)
For glued sections, an oscillating multi-tool or oscillating saw works well because you can follow lines and isolate areas. As of 2026, the most effective dust-control combo is HEPA-equipped vacuum capture at the tool plus respiratory protection appropriate for fine particles. If you’re cutting anywhere near concrete or cementitious patches, dust control matters even more because respirable silica risks can increase.
Workflow that avoids damage:
1. Mark a grid across the laminate (small enough that each section lifts with minimal force).
2. Cut through the laminate boards (and only as deep as needed). Avoid plunging deeper than necessary into the patio base.
3. Lift sections carefully. If a section resists, cut again to isolate adhesive “edges” rather than prying harder.
4. Scrape adhesive systematically, working from larger ridges down to smoother residue.
5. Vacuum as you go so residue doesn’t get ground into the patio surface by foot traffic.
Scrape technique (what “careful” actually means)
A common mistake is to scrape like you’re removing paint—too aggressively. Instead:
– Keep the blade angle shallow.
– Take thin passes.
– Pause to inspect the substrate after each small area.
– Stop and reassess if you see the patio surface changing texture (for example, signs of waterproofing layer exposure or aggregate damage).
What can go wrong (and how to avoid it)
Most removal problems come from treating click-lock and glued-down installs the same way. The fix is to match your method to the installed bonding system and protect the patio substrate during leverage and scraping.
– Cracking or splintering: usually caused by prying too hard before locks release (click-lock) or cutting too aggressively (glued-down).
– Damaging the patio substrate: levering close to expansion gaps, drains, or waterproof membranes can cause long-term issues.
– “Hidden glue” surprises: some installs mix floating sections with glued areas—test a small area near a corner before committing.
– Health and disposal concerns: cutting/scraping creates fine dust; if you suspect older coatings/adhesives contain hazardous materials, get it assessed before disturbing anything and follow local disposal rules.
Prying before a click-lock seam releases commonly fractures the locking profile, which turns “controlled removal” into irreversible board damage.
Gouging a patio base during scraping can create uneven high spots or weak points that later flooring systems can telegraph or fail over.
Composite installs can include mixed bonding (floating plus glued areas), so a quick test peel near a corner helps prevent wasted labor.
Failure modes and the prevention playbook
Cracking / splintering
– Cause: forced leverage on a locked seam (click-lock) or aggressive blade depth (glued-down).
– Prevention: loosen perimeter constraints first, cut grid sections smaller if resistance appears, and stop when you hear “board fracture” instead of “seam release.”
Substrate damage
– Cause: levering against waterproofing transitions, expansion joints, drains, or embedded hardware.
– Prevention: use plastic/wood shims where possible, avoid direct contact with membrane edges, and keep scrap tools away from gaps.
Mess escalation
– Cause: scraping adhesive without vacuuming and containment.
– Prevention: work in zones, vacuum often, and keep debris on a drop sheet so residue doesn’t spread into low areas.
Health and disposal
– Cause: fine dust from cutting/scraping and unknown older adhesive chemistry.
– Prevention: use appropriate PPE, consider a HEPA vacuum, and follow local construction debris rules. If the adhesive might be an older hazardous product, get it assessed before demolition.
Verdict / tip (what I’d recommend—and who should skip DIY)
DIY removal is usually reasonable when you can confirm click-lock installation and you have clear perimeter access, because you can lift boards in controlled pieces with less cleanup. If the patio laminate is fully glued down, expect more time, more dust control needs, and a higher chance of substrate wear from scraping—so plan accordingly or bring in help.
Skip DIY (or at least get help) if:
– You can’t identify whether a waterproofing layer exists underneath,
– The patio area is large and you don’t have dust-control setup,
– The underlayment/adhesive seems severely bonded or uneven.
If seams separate cleanly after trim removal, click-lock laminate can often be removed in larger sections with minimal substrate disturbance.
When boards stay firmly bonded and resist separation, glued-down laminate generally requires cutting into sections followed by adhesive residue removal.
If there’s a bonded waterproof system underneath, membrane protection becomes a priority because demolition damage can undermine future waterproof performance.
Balanced pros/cons for decision-makers
| Option | Pros | Cons / risks |
|---|---|---|
| DIY click-lock removal | Less dust, faster board removal, improved odds of keeping pieces intact | Can still crack tabs if you force seams; still requires careful cleanup |
| DIY glued-down removal | Predictable method: cut → lift → scrape with controlled sections | More labor, heavier dust control needs, higher risk of gouging substrate |
Quick checklist (scan before you start)
Use this scan to keep your patio laminate removal predictable and safe—especially in 2026, when compliance expectations around dust control are increasingly enforced at job sites.
A short pre-check (trim off, install type identified, dust capture ready) prevents most DIY laminate removal mistakes.
If boards crack near seams, pause and reassess your install type—click-lock and glued-down removal strategies are fundamentally different.
Clearing residue enough to create a smooth, stable substrate reduces risk of unevenness in whatever goes down next.
| Step | Quick check | Stop if you notice… |
|---|---|---|
| Remove trim | Perimeter pieces are off | Boards won’t lift anywhere near edges |
| Identify install type | Locks vs firm bonding is clear | Boards shatter when you try to separate |
| Control dust | Vacuum/mask ready | Thick dust cloud during scraping/cutting |
| Lift method | Lift rows/sections in sequence | You’re tearing locking tabs (click-lock) |
| Clean substrate | Adhesive residue reduced | Gouges, damaged membranes, or deep pits |
Sources
– OSHA 29 CFR 1910.1053 (Respirable Crystalline Silica standards)
– NIOSH respirator certification guidance (N95 minimum filtration performance at 0.3 µm)
– U.S. Department of Energy (HEPA definition/performance: 99.97% at 0.3 µm)
If you tell me whether your patio laminate is click-lock or glued down (and roughly how big the area is), we can narrow this to the fastest removal method for your exact situation.
Removing patio laminate safely comes down to one decision: match the method to the bonding system. Strip trim first, start at a perimeter corner, remove click-lock in rows by releasing seams, and handle glued-down areas with controlled grid cuts followed by careful scraping—while using dust control to protect your health and the patio base.
Frequently Asked Questions
What tools do I need to remove laminate floors from a patio?
You’ll typically need a pry bar, floor scraper, utility knife, hammer, oscillating multitool (optional), and a circular saw or jigsaw for trimming boards. For cleanup, have a shop vacuum, contractor bags, and plastic sheeting to control dust. If the patio laminate is glued down, plan to use a laminate floor adhesive remover or a manufacturer-recommended solvent to soften the glue.
How do I remove patio laminate flooring that’s glued down?
Start by scoring along seams and cutting through any trim pieces or baseboards so the planks can be freed without cracking. Use a floor scraper to lift sections, then apply an adhesive remover to soften residual laminate adhesive before scraping again. Work in small sections and keep the area ventilated—glue removal on outdoor surfaces often requires patience and multiple passes.
How do I remove patio laminate flooring without damaging the subfloor?
Begin at a cut edge or seam and pry upward slowly, keeping the pry bar flat to reduce the chance of gouging the subfloor. If the laminate is click-lock floating, disconnect boards one by one by lifting at the proper angle rather than yanking. For glued laminate, use an oscillating multitool or scraper carefully around the subfloor, and stop as soon as you reach adhesive residue that needs chemical removal.
Why does removing laminate from a patio get difficult, and how can I prevent it?
Patio laminate often swells, warps, or loosens due to moisture exposure, so boards may break during removal and adhesive may become stubborn. Prevent extra damage by checking for moisture-related bubbling and addressing any underlying water issues before reinstalling. Keep the removal process slow—cutting through fasteners and seams usually reduces splintering compared to forceful prying.
Which is the best method for removing laminate patio flooring—pry, cut, or scrape?
The best method depends on the installation type: click-lock laminate is usually best removed by prying and lifting boards from seams, while glued laminate requires cutting into sections and then scraping with adhesive remover. If boards are tightly bonded, use a utility knife or oscillating tool to cut plank edges, then scrape gradually to avoid damaging the patio subfloor. Always finish with thorough cleaning so any remaining laminate adhesive doesn’t interfere with future patio flooring installation.
📅 Last Updated: October 24, 2026 | Topic: How to remove laminate floors from a patio? | Content verified for accuracy and freshness.
References
- Laminate flooring
- Lead Renovation, Repair and Painting Program | US EPA
- https://www.epa.gov/lead/renovation-repair-and-painting-program/renovate-right
- Asbestos | US EPA
- https://www.cdc.gov/niosh/topics/asbestos/
- Lead – Overview | Occupational Safety and Health Administration
- https://www.cdc.gov/nceh/lead/default.htm
- https://scholar.google.com/scholar?q=how+to+remove+laminate+flooring+outdoor+patio Google Scholar
- https://scholar.google.com/scholar?q=laminate+flooring+removal+tips+click+lock+glued+down Google Scholar
- https://scholar.google.com/scholar?q=lead+asbestos+floor+removal+renovation+repair+repair+and+painting+program Google Scholar