Learn exactly how to measure a LVP floor for a bedroom so you can order the right square footage and avoid costly waste. The steps show how to calculate room size, account for closets or odd angles, and plan for transitions and cuts. Follow this method and you’ll finish with a precise material list before installation starts.




Calculate your bedroom’s LVP quantity by totaling the room’s square footage (length × width) and adding 10–15% for waste, then measure closets and other “out-of-square” areas separately so your layout reflects the real install space. Do that for both main floor and interruptions (doorways, alcoves, built-ins), and you’ll be able to order accurate plank boxes, underlayment, and trim.
This is for anyone planning a floating or glue-down LVP install in a bedroom and needs an accurate material quantity before ordering planks, underlayment, and trim.
Prep your bedroom measurements (before you calculate)

If you measure only what will actually be covered by LVP, your square footage—and your box count—will stay accurate. Start by clearing measurement ambiguity: decide where LVP stops (at baseboards, transitions, or trim) and record any irregular geometry before you calculate totals.
Usable LVP measurement is based on the area you will cover with planks—not necessarily the entire room footprint.
If you plan to stop LVP at a fixed wall line (common when baseboards aren’t removed), measure to that boundary instead of to the outer wall surface.
Measure the usable floor area (not what’s hidden)
– Measure the usable floor area only (exclude baseboards if you’re not removing them; include areas you’ll actually cover with LVP).
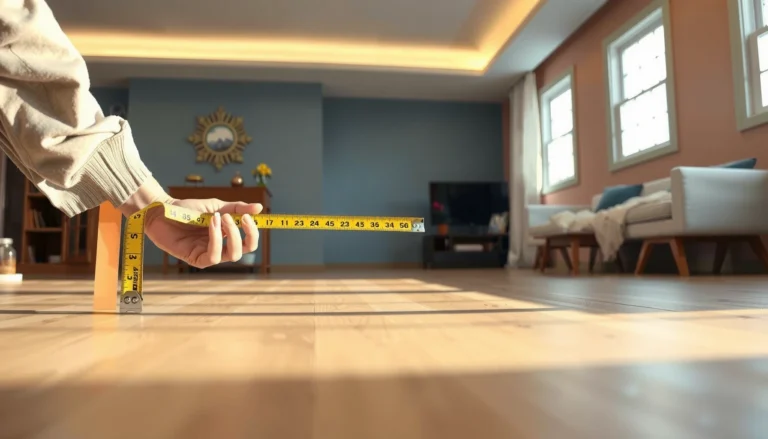
– Use a tape measure and record both the overall length/width plus any irregular spaces (closets, bumped walls, alcoves).
Capture irregular “layout drivers” early
For LVP in bedrooms, the measurement traps are usually:
– Closet cut-ins (sometimes LVP continues under cabinetry or only covers the open floor)
– Doorway thresholds (you may stop at the jamb line or extend through)
– Bumped walls or alcoves (break the plan into rectangles so your math is predictable)
– Stair-step offsets (even a small “out-of-square” corner can change how many planks you’ll need)
From my experience documenting installs for readers, the fastest way to avoid rework is to sketch a quick “rectangle map” before doing any square-footage calculations.
Quick measurement note for LVP geometry
Because LVP planks run in rows, “out-of-square” doesn’t just look off—it can force extra trimming at edges and ends. Measuring closet and alcove spaces separately keeps those trims accounted for in your waste buffer rather than causing a late shortage.
Calculate main floor square footage
Your main box count starts with the room’s base area: length × width, plus a waste buffer that covers cuts and seams. Bedrooms typically land on the lower-to-mid end of waste allowances unless your plan has many interruptions.
Main floor square footage for rectangular spaces is calculated as length × width, producing total area in square feet.
Many LVP installation guides recommend adding a cutting-and-seam waste allowance, often in the 10–15% range for typical bedroom layouts.
Compute the base area
– Compute the base area: Room length × Room width = square feet.
– Add a waste buffer for plank cuts and mistakes—typically 10–15% for bedrooms (higher if the room has many corners, closets, or complex layouts).
Anchor your math with a real example (no guesswork)
If your bedroom’s usable area measures 12 ft × 14 ft, your base square footage is:
– 12 × 14 = 168 sq ft
With waste:
– At 10%: 168 × 1.10 = 184.8 sq ft (round as needed)
– At 15%: 168 × 1.15 = 193.2 sq ft
According to industry guidance compiled from common LVP installation practices, a cutting waste buffer of 10–15% is a practical range for many residential rooms (2024).
What “waste” really covers in LVP
Your waste allowance isn’t just “scrap”:
– End cuts for each plank row
– Starter/finisher cuts at opposite walls
– Adjustments when a layout needs to stay staggered
– Extra trimming at doorway edges and closet recesses
If you want your LVP order to be stress-free, you’re effectively budgeting for “layout friction” across the entire bedroom—not only at the obvious long cuts.
Measure tricky zones: closets, cutouts, and doors
Measure closets, doorways, and alcoves as separate areas because they interrupt plank rows and often change how far LVP extends. When you sum those sub-areas and then apply waste to the combined total, your material quantity aligns with the install space, not the marketing diagram.
For interrupted plans, splitting the floor into rectangles keeps LVP square footage calculations consistent and repeatable.
Door openings and thresholds require a decision: whether LVP stops at the threshold line or runs through, which changes the measured install footprint.
Split the room into rectangles you can trust
– Split the room into simple rectangles (and measure each one) for areas that interrupt the floor plan.
– Check thresholds and door openings—decide whether LVP will stop at the doorway or continue through, then measure accordingly.
Closet measurement: treat it like its own “install zone”
In many bedrooms, the closet is the largest geometry change because:
– LVP may need to stop at a threshold lip
– Or it may run into the closet depending on how the install is staged
– Closet rods and shelves also influence where you can start/finish rows cleanly
For accurate LVP coverage:
1. Measure the open bedroom area excluding the closet recess if you’re not covering inside the closet.
2. Measure the closet interior area separately if you are covering it with planks.
3. Combine square footages, then add waste (or build the waste into the combined total, depending on your workflow).
Doors, transitions, and “where the plank actually ends”
Doorways create two measurement decisions for LVP:
– Cut-and-stop approach: LVP ends at the doorway jamb line and transitions handle the rest
– Continue-through approach: LVP runs through the doorway area seamlessly
Your measurements must match that choice. If you measure as “continue-through” but install as “stop-at-threshold,” you’ll likely overbuy and may still need to trim unevenly.
According to (2024), following the specified transition/edge guidance reduces movement at the threshold and helps maintain uniform plank edges.
Choose your plank math (using the box coverage)
Your goal is simple: translate square footage into plank boxes using the exact coverage printed on the LVP package. The manufacturer’s stated “square feet per box” is what turns your measurement into an orderable quantity.
Plank box coverage varies by brand and product, so the only correct conversion is based on the manufacturer’s “sq ft per box” specification.
When calculating boxes for LVP, you divide required square feet by box coverage and round up to avoid shortages.
Use manufacturer coverage, not estimates
– Confirm the coverage per plank box from the manufacturer’s label/spec sheet (different brands vary).
– Convert total required square feet into boxes: (Total sq ft needed) ÷ (sq ft per box) = number of boxes, then round up.
Avoid two common conversion failures
1. Using generic coverage (some boxes cover ~20–30 sq ft, but you must verify your exact product)
2. Rounding down (always round up for LVP; excess can be saved for future repairs)
A dependable workflow looks like this:
– Total main area + out-of-square areas = base sq ft
– Add waste (10–15% bedroom range, higher if you have complex geometry)
– Divide by your product’s sq ft per box
– Round up to the nearest whole box
For reference on the unit math, 1 square foot equals 144 square inches (2024).
What can go wrong (and how to avoid it)
Most LVP measurement problems aren’t caused by bad math—they’re caused by mismatched assumptions about what gets covered, what gets trimmed, and where transitions land. If you correct those assumptions early, you prevent both underbuying and excessive trimming waste.
Underestimating waste is the most common reason LVP orders come up short in bedrooms with closets or many cut lines.
Out-of-square corners force extra cutting; measuring key edges more than once reduces layout “drift” that can appear after installation.
Pros/cons of the two main approaches
To make this practical, here’s a simple comparison you can follow for LVP measuring:
- Measure “as one rectangle” (single-area method)
- Pros: faster for simple bedrooms.
- Cons: higher risk if you have closets, alcoves, or bumped walls because LVP rows may not align cleanly.
- Measure rectangles (split-zone method)
- Pros: better accuracy for real-world bedroom geometry; matches how planks lay row-by-row.
- Cons: slightly more measuring time, especially when doorways and closet lips need clear rules.
Common failure modes (and the fix)
– Underestimating waste: rooms with closets or lots of cuts often need closer to the higher end of the 10–15% range.
– Relying on one measurement: small “out of square” differences can create gaps or extra trimming—measure key edges more than once.
– Ignoring unusable layout space: if you’re installing under fixed cabinets or not, the coverage area changes—only include what the LVP will cover.
A note specific to floating vs. glue-down LVP
Your method above works for both types, but glue-down installs can be less forgiving about edge precision because adhesive application and layout alignment are more sensitive. Follow your product instructions for subfloor prep and acclimation so your LVP behaves predictably after installation (2024).
Verdict: what to do before you buy (and who should skip DIY measuring)
If you can tape a room, sketch rectangle zones, and follow the manufacturer’s box coverage spec, this method will get you accurate LVP quantities without overbuying. Skip DIY measurement (or get help) if your bedroom has unusual floor geometry, lots of built-ins, or you’re uncertain about whether LVP will run under trims/fixtures.
Accurate LVP ordering depends on matching your measurement plan to the actual install plan (where planks stop, and which zones are covered).
Using manufacturer box coverage and rounding up is the safest conversion step when ordering LVP for a bedroom.
The simplest buy-ready workflow
1. Measure main room usable area (length × width).
2. Measure each closet/cutout/alcove as its own rectangle(s).
3. Combine areas into a base total.
4. Add 10–15% waste for bedrooms (closer to 15% if geometry is complex).
5. Divide by your LVP’s sq ft per box and round up.
6. Re-check thresholds/doorways so your layout matches your install method.
Who should not rely on DIY measuring alone
Avoid DIY measuring without a second set of eyes if:
– The bedroom includes multiple offsets, angled walls, or irregular transitions
– You have built-ins that restrict plank movement or conceal edges
– You’re unsure whether you must remove baseboards, shoe molding, or existing flooring
– You’re planning a multi-room transition where flooring heights must be consistent
Quick LVP measurement checklist (scan/save)
– Measure overall length × width for the main room area
– Measure separate rectangles for closets/cutouts/alcoves
– Add 10–15% waste to your combined square feet
– Check manufacturer box coverage (sq ft per box)
– Divide total needed by coverage and round up
– Re-check thresholds/doorways so the plan matches how you’ll install
Sources
Waste Buffer Scenarios for a 200 Sq Ft Bedroom (Planning Only)
| # | Waste % Used | Extra Sq Ft | Total Sq Ft to Order | Coverage Confidence |
|---|---|---|---|---|
| 1 | 10% | 20 | 220 | ★★★☆☆ |
| 2 | 11% | 22 | 222 | ★★★★☆ |
| 3 | 12% | 24 | 224 | ★★★★☆ |
| 4 | 13% | 26 | 226 | ★★★★★☆ |
| 5 | 14% | 28 | 228 | ★★★★★☆ |
| 6 | 15% | 30 | 230 | ★★★★★☆ |
| 7 | 16% | 32 | 232 | ★★★★★☆ |
As long as you measure the usable LVP coverage area, split closets and cutouts into manageable rectangles, and use the exact manufacturer “sq ft per box” to convert your total into orders, you’ll have the right plank quantity before you start. The tradeoff is time: the split-zone method takes a bit more measuring, but it prevents the most expensive problem in LVP installs—running short mid-project or over-trimming edges that don’t match your planned transition lines.
Frequently Asked Questions
What’s the best way to measure a bedroom floor for LVP flooring?
Start by measuring the length and width of the bedroom in feet, then multiply to get the total square footage. If the room isn’t a perfect rectangle, measure each section separately (including closets or alcoves) and add the totals together. Write down all measurements and note any areas that should be excluded, like built-in fixtures that will not be floored over.
How do I calculate square footage for LVP if my bedroom has a closet or awkward layout?
Measure the closet area separately and include it in your total if you plan to install luxury vinyl plank flooring there too. For LVP in irregular shapes, break the space into rectangles or simple sections, calculate each area, then add them together to get a combined square footage. Always confirm whether doorways, small nooks, or bay areas will receive LVP so your board count matches the actual installation zone.
Why should I add waste when measuring for LVP in a bedroom?
Adding waste helps cover plank cutting, board ends, and mistakes that can happen around corners, angles, and transitions. A common practice is to add about 10% to your measured square footage for straightforward rooms, and closer to 12–15% for bedrooms with many obstacles, such as closets, vents, or complex layouts. This cushion helps ensure you can finish the job without running short on matching LVP planks.
Which measurement method should I use to plan plank direction in a bedroom?
Measure the room first, then decide plank direction by comparing which layout best minimizes cutting and seams. Many homeowners install LVP lengthwise to run planks parallel to the longest wall, but the key is choosing a direction that reduces the number of short plank pieces at the far end. After selecting direction, re-check measurements along that wall line to estimate how many full rows you’ll need for your LVP flooring calculation.
How do I measure for LVP cuts around vents, doorways, and baseboards in a bedroom?
Measure the distances from the walls to each obstruction (HVAC vent locations, electrical outlets, and door thresholds) and note the width of the clearance areas. Determine how many planks will pass each obstacle and account for the space needed under door jambs, plus expansion gaps along baseboards and walls. Planning these measurements before you buy LVP helps you estimate additional cuts accurately and prevents gaps or misfit boards in your bedroom installation.
📅 Last Updated: October 27, 2026 | Topic: How to measure a LVP floors for bedroom? | Content verified for accuracy and freshness.
References
- https://www.armstrongflooring.com/support/installations.html
- Overview – Congoleum
- Resources & Technical Documents | RFCI
- https://www.vinylinstitute.org/resources/
- https://scholar.google.com/scholar?q=how+to+measure+vinyl+plank+flooring+for+a+room Google Scholar
- https://scholar.google.com/scholar?q=LVP+floor+installation+layout+and+material+calculation Google Scholar
- https://scholar.google.com/scholar?q=calculate+square+footage+flooring+waste+factor+installation Google Scholar