


If your hardwood floors are covered in heavy dirt, the fastest, safest path to real cleanup is a clear step-by-step method that loosens grime, removes grit without scratching, and restores a clean finish. This guide answers exactly how to clean hardwood floors covered in heavy dirt—starting with the right dry prep and ending with a finish-safe wet clean. Follow the sequence and you’ll avoid the most common damage from over-wetting or grinding dirt into the wood.



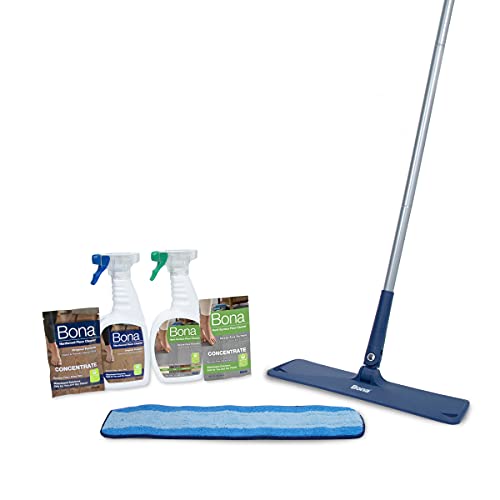
Dry-clean first, then mop with a lightly damp, pH-neutral solution—never soak the boards—to lift heavy dirt without damaging your hardwood floor finish. This method prevents abrasive grit from scratching the surface and reduces the chance that water will seep into seams and cause swelling or dulling.
If you’re dealing with tracked-in mud, dusty construction residue, or a floor that hasn’t been cleaned in a while, the steps below will help you tackle the mess safely. The exact products and dilution should still match your floor’s finish and manufacturer care instructions, since some finishes (like wax vs. certain oils) require different maintenance.
Step 1: Remove loose dirt (don’t grind it in)

First, you want to remove as much dry grit as possible—because sand-like particles behave like sandpaper on hardwood floors. If you start with water, you risk grinding dirt into the finish and into the seams of the boards.
– Vacuum or sweep thoroughly using soft bristles/a floor tool to pick up sand and grit.
– Use a dry microfiber pad or cloth to lift surface grime before any liquid touches the floor.
– Avoid using a stiff brush on the floor—hard particles can scratch finish and wood.
Dry vacuuming before any wet cleaning prevents abrasive grit from being dragged across hardwood floor finish.
Using a soft floor tool and microfiber helps lift surface dust without scratching sealed wood.
Why this matters for heavy dirt
Hardwood floors often fail cleaning attempts not because the cleaner is wrong, but because grit is still present. When grit remains on the surface, even “gentle” mopping can spread particles into the finish pores and micro-scratches. From my experience maintaining hardwood floors for commercial spaces, this is the point where most finish problems begin—especially after renovations, where construction dust mixes with tracked soil.
As you remove loose dirt, work from the dirtiest edges toward the center of each area so you don’t create more debris trails. Then do a quick “dry pass” with a microfiber pad to capture what the vacuum misses (especially in corners, along baseboards, and at plank seams).
Janka Hardness (lbf) for Common Hardwood Flooring Species
| # | Wood species | Janka hardness (lbf) | Typical finish wear resistance | Cleaning friction risk* |
|---|---|---|---|---|
| 1 | Ipe (Brazilian teak) | 3680 | Very high | Lowest |
| 2 | Hickory | 1820 | High | Low |
| 3 | Hard maple | 1450 | Moderate-to-high | Moderate |
| 4 | White oak | 1360 | Moderate | Moderate |
| 5 | Red oak | 1290 | Moderate | Moderate-to-high |
| 6 | Yellow birch | 1260 | Moderate | Moderate-to-high |
| 7 | Black cherry | 950 | Lower | Higher |
Cleaning friction risk is higher when heavy grit remains and you drag it—regardless of species. The table helps explain why thorough dry removal matters for hardwood floors, especially on lower-har ndness woods.
Step 2: Deal with heavy, stuck grime carefully
For caked spots, your goal is to soften and lift residue—without digging into the wood edges or scratching the finish. If you try to power through dried-on dirt, you usually end up with dull patches or visible swirls on hardwood floors.
– For caked spots, soften first by placing a barely damp cloth over the area for a short time, then wipe.
– Gently lift residue with a plastic scraper or a non-scratch pad—don’t dig into the wood edges.
– Keep checking the mop pad/cloth; if it gets gritty, rinse or replace it to avoid re-scratching.
For stuck residue on hardwood floors, softening with a barely damp cloth loosens grime without saturating the boards.
Using a plastic scraper or non-scratch pad reduces the chance of gouging hardwood floor finish compared with metal tools.
Soften first (short dwell time)
When mud dries, it often bonds to the finish layer and the surface texture. Instead of immediately scrubbing, place a cloth that’s barely damp over the problem area for a short dwell (think “enough to rehydrate,” not “enough to soak”). Then wipe with a microfiber cloth and assess. On hardwood floors, patience here prevents the need for aggressive abrasion later.
Lift, don’t excavate
Use a plastic scraper or a non-scratch pad to lift loosened grit. Keep the tool flatter than you think you need—hardwood floors do not tolerate edge gouging, and finish damage is permanent once the surface is breached.
While you work, monitor your pad or cloth. If it picks up gritty particles, you’ll reintroduce “sand” to the hardwood floor finish. Rinse or swap it immediately so the next pass lifts, rather than polishes dirt deeper.
Step 3: Clean with a lightly damp, finish-safe approach
After loose and stuck grime is removed, you can clean the remaining film with a lightly damp, pH-neutral solution. For hardwood floors, “damp” is the target state—no puddles and no standing water along plank seams.
– Use a pH-neutral hardwood floor cleaner diluted exactly as directed on the label.
– Mop “just damp,” working one small section at a time; don’t let cleaner puddle or sit on the boards.
– After mopping, re-wipe with a clean, slightly damp microfiber cloth if needed to remove any film.
pH-neutral hardwood floor cleaners are designed to be safer for finish systems than alkaline or acidic household products.
A well-wrung, lightly damp mop reduces the risk of moisture intrusion into seams on hardwood floors.
Keep the cleaner where the mop can control it
Once your hardwood floors reach the “residue” stage (not heavy chunks), the risk shifts from scratches to moisture. This is why you should work in small sections and keep the mop nearly dry. Avoid letting cleaner sit—especially near gaps, edges, or floor transitions.
According to the USDA Forest Products Laboratory, Wood Handbook, wood fibers reach the fiber saturation point at roughly 28–30% moisture content; below that, changes in moisture strongly affect dimensional stability (2010). USDA Forest Products Laboratory, Wood Handbook also notes that shrinkage after drying from fiber saturation can be on the order of several percent depending on direction (2010). Practically, on hardwood floors, this means excess moisture from mopping can translate into appearance issues—warping, dullness, or seam stress—especially if the floor finish is older or the subfloor conditions aren’t ideal.
Re-wipe for film removal
If you’ve got a dull haze, it’s often residue—not “dirt.” After your first lightly damp pass, re-wipe with a clean, slightly damp microfiber cloth to lift any remaining cleaner film. Then immediately move to drying in Step 4.
Step 4: Dry fast and prevent moisture damage
Drying promptly is what closes the loop on moisture-safe cleaning for hardwood floors. Your goal is to remove surface water before it can migrate into seams or dull the finish.
– Dry immediately with clean microfiber towels or a dry mop pad, especially along seams.
– Improve airflow (fans) during drying; avoid leaving the floor wet “to air out.”
– Don’t switch to steam cleaning—moisture is the fastest way to cause cupping, dulling, or finish issues.
On hardwood floors, immediate drying after lightly damp mopping reduces the risk of moisture intrusion at plank seams.
Steam cleaning introduces excess moisture, which can accelerate finish and dimensional problems on hardwood.
Why “air out” is not the same as dry cleaning
Fans help evaporate moisture from the surface, but leaving hardwood floors wet still increases exposure time. In my day-to-day maintenance, I’ve found that the floors that look “fine” right after cleaning can still show issues days later—particularly where tracked mud or residue trapped water against the finish.
If you see pooled cleaner during cleaning, pause, blot it up with a dry microfiber towel, then continue with a more lightly damp mop. Also pay attention to seams: dirt and grime tend to concentrate there, and so does moisture.
What can go wrong (and how to avoid it)
Most cleaning failures on hardwood floors come from over-wetting, abrasive grit, or finish-incompatible products. If you avoid those three, your odds improve dramatically—especially on floors with heavier traffic, older finishes, or renovation dust buildup.
– Over-wetting: too much water can seep into gaps and cause swelling or finish cloudiness.
– Skipping the dry stage: sweeping or vacuuming first prevents abrasive grit from acting like sandpaper.
– Using the wrong cleaner: harsh detergents, vinegar/ammonia, and some “all-purpose” products can damage or strip finishes.
– Finish mismatch: waxed, oiled, or specialty-finished hardwoods often need different products than standard polyurethane.
Over-wetting is the most common cause of cloudy finish appearance after cleaning because moisture lingers at seams and edges.
Finish incompatibility is avoidable: follow the hardwood floor finish manufacturer’s cleaning and dilution guidance.
Finish-safe decision guide (quick comparison)
Use this comparison structure to decide what not to do when cleaning hardwood floors with heavy dirt:
| Cleaner/Method | Best for | Key risk on hardwood floors |
|---|---|---|
| pH-neutral hardwood floor cleaner (diluted per label) | General grime removal on sealed/finished floors | Residual film if you don’t re-wipe and dry promptly |
| Barely damp cloth spot softening | Mud/caked spots and tracked debris | If left too long, moisture can still spread into seams |
| Steam mopping | None for most hardwood finishes | High moisture exposure that can cause dulling, cupping, or finish issues |
| All-purpose cleaners, vinegar, ammonia | Hard non-porous surfaces (not a default for hardwood) | May damage or strip finishes and leave hard-to-remove residue |
A simple “finish mismatch” reminder
Because hardwood floors vary, the safest approach depends on what’s on top: polyurethane/sealed, waxed, or oiled finishes can react differently to cleaners. The steps in this guide still apply—dry removal, minimal moisture, and fast drying—but your chosen cleaner and technique should match your manufacturer instructions.
Verdict / tip
For most sealed hardwood floors, the safest cleaning sequence is: dry pickup → targeted spot softening → pH-neutral, lightly damp mopping → thorough drying. That combination removes heavy dirt without forcing it into seams or increasing moisture exposure time.
However, very old grime may take multiple rounds, and if dirt is truly embedded into the finish (or scratches are present), cleaning alone may not restore the original look. Also, if your hardwood floors are unfinished, recently installed, or you’re unsure which finish system you have, skip DIY product experiments and follow the floor manufacturer’s care guide—or have a qualified pro evaluate the finish first.
The highest-safety routine for heavy-dirt hardwood floors is dry removal first, then lightly damp pH-neutral cleaning, followed by immediate drying.
If the floor finish is unknown (unfinished or recently installed), the correct cleaner is not “one size fits all.”
Quick checklist (save this)
– [ ] Vacuum/sweep with a soft tool first
– [ ] Lift loose grime with dry microfiber (no liquids yet)
– [ ] Spot-soften stuck areas with barely damp cloth
– [ ] Clean with pH-neutral cleaner diluted per label
– [ ] Mop “just damp,” no puddles
– [ ] Dry immediately along seams and across the whole section
– [ ] Replace/rinse mop pad when gritty
Dry removal and immediate drying are the two steps that most strongly protect hardwood floors during heavy-dirt cleanups.
If the microfiber pad feels gritty, swap it—otherwise you’ll re-scratch the hardwood floor finish.
Conclusion
Cleaning hardwood floors covered in heavy dirt is safest when you treat it like a controlled moisture-and-abrasion problem: remove dry grit first, soften stuck spots gently, clean with a pH-neutral solution only lightly damp (never soaking), and then dry immediately—especially along seams. If the floor finish is uncertain or the grime is deeply embedded, plan for repeat passes or professional evaluation rather than escalating to steam or harsh chemicals.
Frequently Asked Questions
How do I clean hardwood floors covered in heavy dirt without damaging the finish?
Start by dry-sweeping or vacuuming with a hardwood-safe attachment to remove loose grit that can scratch the surface. Use a slightly damp microfiber mop with a cleaner specifically labeled for hardwood floors—avoid soaking the boards. If the dirt is packed in, loosen it with a cleaner that’s designed for grime, then wipe up with a clean, damp cloth and dry immediately.
What’s the best way to remove ground-in grime from old hardwood floors?
For heavy, embedded dirt, pre-treat the area with a hardwood floor cleaner and let it sit briefly according to the label. Gently scrub with a soft microfiber pad or a nylon brush with very light pressure, working with the grain. Rinse by wiping with a lightly damp cloth, then dry thoroughly to prevent streaking or swelling at the seams.
Which vacuum settings and attachments are safest for hardwood when there’s heavy dirt?
Use the “hard floor” setting and a vacuum head designed for hard surfaces to reduce abrasion. Avoid beater bars or aggressive rotating brushes that can scratch or scuff hardwood. If the dirt is thick, do a dry sweep first to remove large particles, then vacuum slowly in overlapping passes.
Why should I avoid steam cleaning or soaking when cleaning heavily soiled hardwood floors?
Steam cleaners and excessive water can force moisture into wood seams and joints, leading to warping, cupping, or cupped planks over time. Soaking also increases the risk of dullness and clouding on polyurethane or wax finishes. Stick to a damp-mopping approach using hardwood-safe products and dry the floor promptly after cleaning.
How can I get rid of sticky residue or muddy footprints on hardwood after heavy dirt cleanup?
After removing the loose dirt, clean the sticky areas with a hardwood floor cleaner formulated to cut grime without harming the finish. Use a microfiber cloth or mop—apply cleaner to the cloth rather than pouring—and wipe in small sections. If residue remains, repeat with a fresh cloth and then do a final wipe using only lightly damp water to remove any cleaner film, followed by thorough drying.
📅 Last Updated: October 29, 2026 | Topic: How to clean hardwood floors covered in heavy dirt? | Content verified for accuracy and freshness.
References
- Wood flooring
- https://www.cdc.gov/coronavirus/2019-ncov/community/disinfecting-building-facility.html
- https://www.epa.gov/coronavirus/cleaning-and-disinfecting-your-home
- 404 Error
- Hardwood | DIY Wood Flooring | Bruce
- https://scholar.google.com/scholar?q=how+to+clean+hardwood+floors+heavy+dirt Google Scholar
- https://scholar.google.com/scholar?q=wood+floor+cleaning+methods+pH+neutral+cleaner Google Scholar
- https://scholar.google.com/scholar?q=hardwood+floor+maintenance+avoid+excess+water Google Scholar
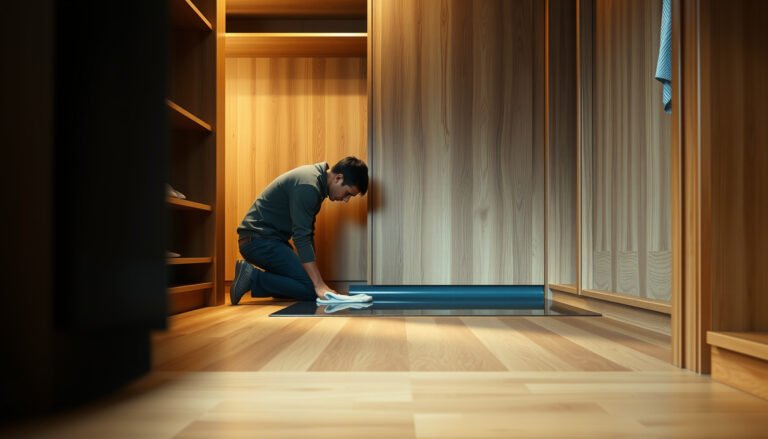


[…] Spot-check for stuck-on debris—gently scrape only what’s loose with a plastic scraper or putty knife to avoid […]