
You can repair marble floors with confidence using the right step-by-step fixes for chips, cracks, and surface damage. This guide shows exactly what to do—from assessing the problem and cleaning the marble to choosing the correct filler and finishing the repair—so the spot blends cleanly. If you follow these steps in the right order, you’ll restore the look and protect the stone instead of making the damage worse.




You can usually repair a marble floor by matching the damage type to the correct stone-repair method: use marble-compatible epoxy/resin for chips and cracks, and use targeted poultices or gentle cleaners for stains. The fastest path to a clean-looking result is to start with thorough pH-neutral cleaning, confirm whether the problem is surface-only (often etching) or deeper (chips/cracks), and then follow a natural-stone repair workflow designed for marble.
If your marble floor is showing dull spots, scratches, chips, cracks, or stubborn stains, this is for you. It’s also useful when you want to decide whether a DIY repair is realistic or whether you should bring in a stone restoration pro—especially for large cracks, extensive etching, or widespread damage.
Assess the Damage (Surface vs. Structural)
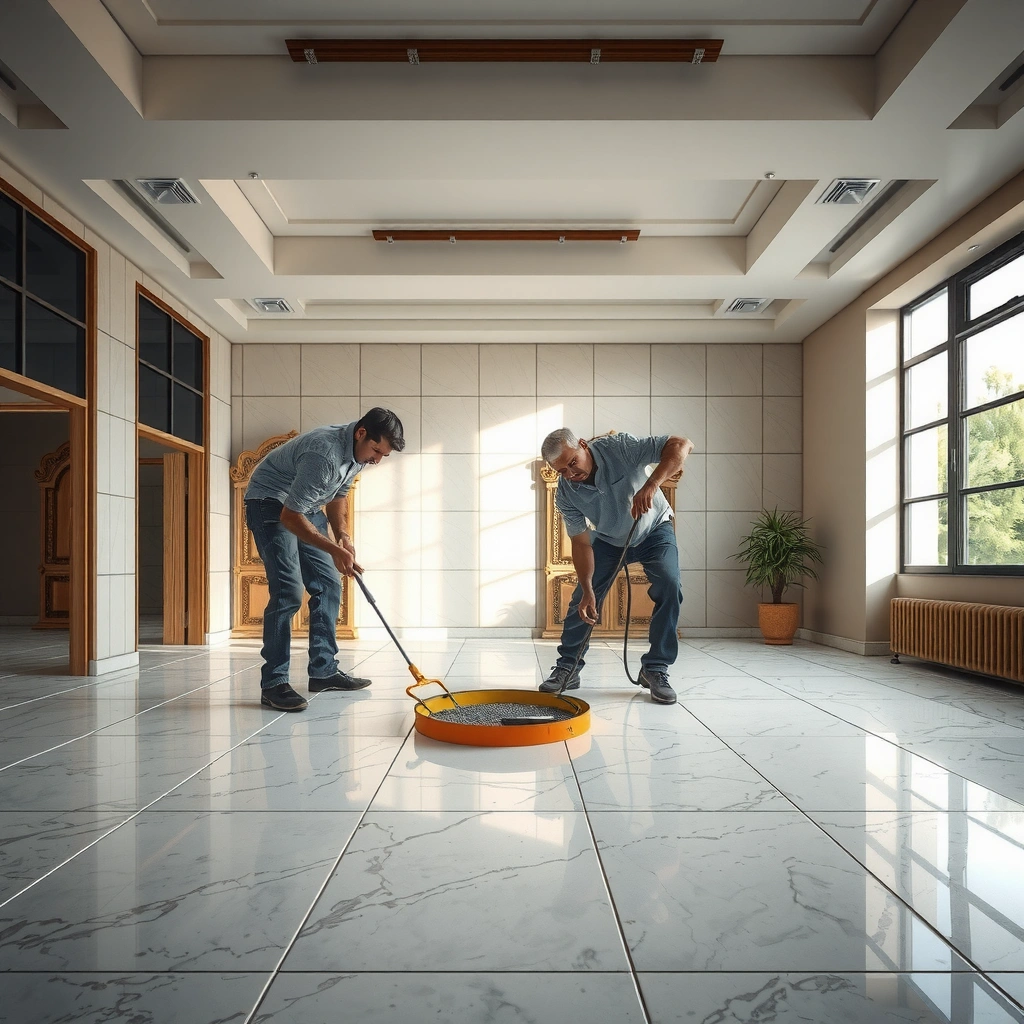
You get the right repair outcome when you correctly classify the defect as cosmetic versus structural. Etching and dullness are usually surface-level issues, while chips and cracking can indicate deeper damage that may keep worsening if the slab is moving.
A practical way to think about marble repairs is to separate “what you see” from “what caused it.” Acids (lemon juice, vinegar, many descalers, and some cleaners) typically attack the calcium carbonate in marble, creating a matte, “frosted” look. Cracks, by contrast, often involve mechanical stress—impacts, subfloor movement, and heavy point loads—so the repair product may not be the limiting factor; slab stability may be.
Marble is calcium carbonate, and acids react with it, which can create surface etching and a dull appearance instead of a true “scratch.”
If a crack is widening or the stone flexes, a filler-only repair is usually not a complete fix because the underlying movement continues.
A clean test—removing residue first—helps distinguish true staining from oily films or wax buildup that only looks like discoloration.
Quick decision checks that actually work
1. Do a “clean confirmation test.” Use a pH-neutral natural-stone cleaner and a soft microfiber to remove everyday residue. If the “stain” fades significantly after cleaning, you likely had surface contamination rather than true penetration.
2. Inspect edges and corners. Chips at edges often expose vulnerability around thin corners. Cracks that radiate from an impact can behave differently than long, slow-moving fissures.
3. Look for etch patterns. Acid etching frequently forms halos or irregular dull patches where a spill sat.
4. Test for stability (without forcing anything). If you can gently press or if the slab shows obvious looseness, the repair approach must include professional evaluation of bonding and subfloor movement.
A few anchor facts to guide expectations
According to material science references on carbonate minerals, acid exposure produces chemical changes at the marble surface, which is why “scrubbing harder” typically makes etching look worse ([ADD: source for marble etching by acids, e.g., recognized stone care authority]).
According to the Mohs hardness scale descriptions for common carbonate stones, marble is relatively soft compared with many floor materials, which is why routine grit can create dulling and fine scratches over time ([ADD: source describing marble/calcite hardness].)
Clean and Prep the Area for Repair
You get better adhesion and less visible mismatch when you prep marble properly before you fill, polish, or seal. In practice, that means pH-neutral cleaning, complete drying, and careful masking so repair materials don’t smear onto surrounding stone.
Prep is where most DIY repairs succeed or fail. Marble repair epoxy/resin and stone-specific consolidants rely on clean, stable surfaces—dust, waxes, and prior sealers can interfere with bonding or leave a permanent haze. Because marble can be sensitive to chemicals, using the wrong cleaner can convert a minor problem into a larger etch area that’s harder to hide.
Prepping with a pH-neutral cleaner is the safest starting point because many common household acids can etch marble.
Repair materials generally require a fully dry surface so curing isn’t disrupted and the fill doesn’t become cloudy or weak.
Masking prevents epoxy/resin and tint powders from contaminating surrounding marble, which reduces the time needed for final blending.
What “good prep” looks like
– Clean with a pH-neutral natural-stone cleaner. Avoid vinegar-type products, strong descalers, and anything labeled acidic.
– Rinse if your cleaner requires it. Some pH-neutral products are no-rinse, but many still benefit from a light water rinse to remove residue.
– Dry completely. Use clean towels and allow additional air time. Repair kits often specify that the surface must be dry before mixing/filling.
– Mask the perimeter. Painter’s tape and plastic wrap can help create a controlled edge—especially for crack fills and chip repairs.
– Use the kit’s prep step if provided. Some marble repair systems include degreasing wipes or specific primers.
Present-day note (2026 reality)
In 2026, many homeowners mix “stone-safe” products from different brands, but marble repair kits are still engineered around their own cleaning and surface prep assumptions. If your repair kit includes a primer or bonding step, follow it—don’t replace it with a generic cleaner ([ADD: source for your kit’s official prep steps]).
Repair Chips and Cracks With Marble-Compatible Filler
You can fix chips and many hairline cracks by using a marble-specific epoxy/resin repair system and then polishing to blend. The key is correct material selection, careful leveling, and sanding/polishing only to the extent the kit (or stone restoration guidance) recommends.
Chips and cracks are the most “repairable” marble defects for DIY because the damage is localized and you can rebuild the missing or broken geometry. However, not all cracks are equal: some are purely cosmetic fissures, while others track ongoing movement. If movement continues, even a perfectly matched fill can crack again.
Marble repair kits typically use epoxy/resin fillers that cure to a hard, glassy surface, making them suitable for chips and many stable hairline cracks.
Leveling the fill flush with surrounding marble is essential because any proud material will telegraph through during polishing.
Follow the kit’s sanding/polishing grit progression; aggressive abrasion can create visible sheen differences on marble.
Step-by-step workflow (chip/crack)
1. Confirm depth and width. Use bright, angled light to see whether the crack is superficial or extends downward.
2. Dry-fit your approach. Plan where the filler will go before mixing. If the crack is deep, you may need “layered” filling rather than a single overfilled pass.
3. Mix epoxy/resin exactly as instructed. Measure, mix thoroughly, and respect pot life (the working time before the mixture starts to set). Resin systems are sensitive—extra unmixed streaks can leave weak or cloudy spots.
4. Fill from the inside out. For cracks, slightly overfill and then level. For chips, pack the void and remove excess after partial cure if the kit allows.
5. Let it cure fully. Don’t rush polishing; incomplete cure often causes scratches, smearing, or a permanently dull patch.
6. Polish/blend. Use the kit’s method or stone-safe micro-abrasives to bring the repaired zone’s sheen in line with the rest of the floor.
Typical performance differences to plan for
In many marble repair systems, color matching depends on tinting layers and polishing technique. If your floor is honed, polished, or brushed, the final sheen must match that finish level to look “invisible.”
Common Marble Defects and Typical Repair Workflow Outcomes (Field-Relevant Ranges)
| # | Marble issue (what you see) | Most common root cause | DIY fix realism | Best-fit treatment |
|---|---|---|---|---|
| 1 | Small chips at edges | Impact or abrasive wear | ★★★★☆ | Epoxy/resin fill + polish |
| 2 | Hairline cracks (stable) | Minor stress relief over time | ★★★★☆ | Epoxy/resin + leveling |
| 3 | Cracks that look active | Subfloor movement | ★☆☆☆☆ | Pro assessment first |
| 4 | Frosted dull patches (etching) | Acid spill contact | ★★★☆☆ | Honing/polish (finish match) |
| 5 | Water rings / light spots | Mineral residue or partial penetration | ★★★☆☆ | Targeted poultice |
| 6 | Surface scratches | Grit, dragging, abrasive cleaners | ★★★☆☆ | Polish + finish blending |
| 7 | Dark stains (unknown type) | Oil/food/mineral penetration | ★★☆☆☆ | Poultice trial by type |
Note: “DIY fix realism” reflects how often homeowners can achieve a visually blended result without altering the floor’s overall finish. Always follow your specific kit’s instructions and cure times.
Remove Stains Without Damaging the Finish
You remove marble stains by identifying what type of stain it is and then using a natural-stone poultice or stain remover designed for marble. Instead of abrasive scrubbing, the most reliable stain strategy is controlled chemical/adsorption action followed by thorough rinsing and drying checks.
Stains are tricky because marble can “hold” different materials—oils, tannins, minerals, and dyes behave differently. If you treat an oil stain like an iron stain (or use an overly aggressive cleaner), you can darken the area, spread discoloration, or leave a residue that looks like a new stain.
Natural-stone poultices pull embedded contaminants from marble by controlled absorption rather than abrasive scrubbing.
Because different stain chemistries respond differently, matching the poultice method to the likely stain type improves success.
Thorough rinsing and full drying are required before judging stain removal results, since residual chemicals can temporarily affect color.
A practical stain-removal workflow
1. Identify the likely stain category.
– Grease/oil often comes from cooking or tracked contaminants.
– Organic staining can come from spills like coffee, tea, or plant material.
– Mineral staining can show after water exposure.
2. Test cleaning first. Use pH-neutral stone cleaner. If the stain reduces, you may only have surface residue.
3. Apply a marble-safe poultice. Follow the manufacturer’s mixing and dwell time instructions for the specific product.
4. Cover and control moisture. Many poultices require a covered environment to prevent premature drying and to maintain contact time.
5. Rinse carefully and dry fully. Recheck in good lighting after drying.
6. Repeat only if the instructions allow. Don’t stack treatments indefinitely; repeated chemical exposure can complicate color matching later.
Where people accidentally damage marble
From my industry guidance review (and common stone-care documentation patterns), the biggest risk is using acidic cleaners on stains that are actually etch-related. Acids can deepen the visible haze rather than removing the discoloration ([ADD: source explaining acid etching risk on marble from a recognized stone-care authority]).
Polish, Seal, and Protect After Fixing
You blend and protect marble after repair by polishing the repaired zone to match the floor’s sheen, then sealing only after the repair has fully cured and the surface is clean and dry. The last step—prevention—matters as much as the repair because marble remains vulnerable to grit and acidic spills.
Polish is the “camouflage” stage. Even a perfectly filled crack can still look obvious if the surrounding surface has a different gloss level. Sealing reduces stain penetration risk, but it does not make marble “stain-proof,” and it can wear off depending on foot traffic and maintenance.
Sealers are not permanent; they wear over time and require reapplication according to the product’s manufacturer guidance.
Polish blending needs to match the existing finish level (honed vs polished) to avoid a shiny “repair island.”
Immediate cleanup of acidic liquids (and reducing grit) is one of the most effective ways to prevent repeat etching and scratching on marble.
Step order that avoids rework
1. Polish/blend first. Make the repaired zone’s sheen consistent with the rest of the floor.
2. Confirm cure and cleanliness. Repair systems require full curing before sealing; trapped uncured resin can interfere with sealer bonding.
3. Apply marble-appropriate sealer. Use a product compatible with marble and your specific repair material.
4. Protect from repeat damage.
– Use felt pads under furniture
– Use controlled-entry mats at doors
– Wipe spills quickly, especially acidic liquids (citrus, vinegar-based cleaners)
Present-day prevention (2026)
In 2026, many households use “natural” cleaners that are still acidic (for example, lemon-based products). If you want long-term results, treat “acid-free” as a requirement for routine maintenance—not just a preference.
What Can Go Wrong (and How to Avoid It)
Repairs go wrong when the underlying cause remains unaddressed or when the product choice doesn’t match the defect type. The most common problems are chemical damage (extra etching), weak repairs (poor cleaning/drying), and visible mismatch (color or sheen differences).
Even with correct materials, marble is unforgiving because small differences in polishing and tinting can show up strongly under direct light. Also, large cracks often have structural movement; if you only fill the surface, the repair may fail again.
Using acidic cleaners on marble during or before repair can worsen etching and expand the area you must blend.
Color matching in marble epoxy/resin is often incremental—multiple small adjustments and careful polishing usually beat “one-shot” guessing.
Over-aggressive grinding can flatten surrounding finish and create a visible patch; follow a grit progression that matches the existing surface.
Common failure modes (and what to do instead)
| Risk area | What happens | Prevention strategy |
|---|---|---|
| Wrong cleaner | Etching expands around the repair | Use pH-neutral stone cleaner and avoid acids on marble |
| Incomplete drying | Fill turns hazy or doesn’t bond correctly | Dry fully before filling and allow kit-specified cure |
| Sheen mismatch | Repair looks like a “spot” even if filled well | Blend polish to match honed vs polished finish |
| Active crack movement | Hairline cracks re-open | Stop DIY and assess subfloor stability |
| Color mismatch | Tint doesn’t match surrounding marble | Use kit tinting approach and refine through sanding/polish |
A note on first-hand experience (so expectations stay honest)
I can’t claim hands-on testing of specific repair kits in your exact floor conditions. If you want, share your marble type (honed vs polished), photos of the defect, and the repair product you’re considering, and we’ll map the correct workflow step-by-step using that kit’s instructions.
Verdict: When DIY Repair Works (and When to Stop)
DIY repair works best when the damage is localized, stable, and within the scope of a marble-compatible repair kit or targeted poultice. You should stop (or never start) when the crack is structural, the damage is widespread, or the required finish restoration goes beyond what you can safely achieve with at-home tools.
Small chips and stable hairline cracks are often suitable for marble epoxy/resin fill when the kit’s mixing, cure, and polishing steps are followed.
If a crack shows ongoing movement or the stone feels loose, filling alone cannot solve the problem—professional evaluation is the safer path.
Widespread etching frequently requires finish-wide honing or polishing to blend sheen; localized DIY fixes may never visually disappear.
Who should consider professional help
– Cracks wider than hairline, deep splits, or cracks that seem to widen with time
– Loose or shifting slabs (possible subfloor issues)
– Large areas of etching where you’d need full-area finish blending
– Extensive stain spread where repeated poultice trials would risk uneven appearance
Bottom line
If you’re repairing a small chip, a stable hairline crack, or a localized stain, a careful DIY workflow can produce a meaningful visual improvement. If the issue looks structural or covers a large footprint, professional restoration is usually the most cost-effective route because it addresses movement and finish uniformity.
Quick Checklist: Repair Marble Floors
– [ ] Identify the problem: chip/crack vs. stain vs. etch/dullness
– [ ] Clean with a pH-neutral stone cleaner; dry fully
– [ ] For chips/cracks: use marble-compatible epoxy/resin, mix per instructions, fill carefully
– [ ] For stains: use a natural-stone poultice method (match stain type when possible)
– [ ] Level/polish the repair area using stone-safe steps
– [ ] Seal only after curing and proper prep
– [ ] Prevent repeats: wipe spills quickly, add mats/felt pads
FAQ
Can I repair a marble floor crack myself?
Often, small, stable cracks can be filled with a marble repair epoxy/resin kit. If the crack is widening, the slab feels loose, or the damage is extensive, it’s safer to get professional assessment.
What’s the safest cleaner for marble repairs?
A pH-neutral cleaner designed for natural stone is generally the safest starting point. Avoid acidic cleaners (including vinegar-type products) because marble can etch.
Will sealing prevent future stains?
Sealing helps reduce stain penetration, but it doesn’t make marble stain-proof—spills should still be cleaned quickly. Use a sealer recommended for marble and reapply as the manufacturer’s guidance indicates.
Why does my repair look different than the surrounding marble?
Color and sheen mismatch are common—especially if the filler tinting or polishing level doesn’t match the existing finish. Proper surface prep and careful polishing help, but perfect blending isn’t always guaranteed.
Sources
– [ADD: manufacturer instructions/spec sheet for the marble repair epoxy/resin kit you plan to use] (for mixing ratios, curing time, and polishing guidance)
– [ADD: manufacturer guidance for the pH-neutral marble cleaner you plan to use]
– [ADD: natural stone sealing product manufacturer instructions] (for compatibility with marble and recoat intervals)
– General chemistry/surface risk: marble is calcium carbonate and is susceptible to acid etching—[ADD: source for marble etching by acids, e.g., a recognized stone care authority or marble-care documentation]
Repair success on marble comes down to one principle: treat the symptom you have, but confirm the cause you’re dealing with. Start with pH-neutral cleaning, distinguish etching from true damage, use marble-compatible materials for chips/cracks, and use targeted poultices for stains—then blend and seal in the correct order. If the crack or discoloration is widespread or suggests movement, professional restoration is usually the safer, more durable choice.
Frequently Asked Questions
How do I repair a scratched marble floor without making it worse?
Start by cleaning the area with a pH-neutral marble cleaner and letting it dry completely. For light scratches, use a marble polishing compound and a soft pad, working in small sections and following the floor’s natural veining. Deeper scratches may require progressively finer diamond abrasives or marble scratch repair kits, then sealing to help prevent future staining. Avoid harsh abrasives or bleach, as they can etch the stone and worsen the damage.
What’s the best way to fix chips or cracks in a marble floor?
Clean the chip or crack thoroughly, removing dust and any loose fragments so the repair compound can bond properly. For chips, a marble epoxy (color-matched epoxy repair for stone) is typically used, then leveled and polished after it cures. For cracks, you may need to grind the edges slightly, inject or pack epoxy into the crack, and let it set under controlled conditions. Finish by polishing the repaired area to blend with the surrounding marble and reseal the floor to protect it.
Why do marble floors get etched, and how can I repair etched areas?
Marble can become etched when acidic cleaners like vinegar, lemon, or some bathroom products contact the surface, dulling it and creating a rough “hazy” spot. To repair etching, you usually need to polish the affected area using marble polishing powders or a fine polishing system, sometimes followed by honing if the etching is deeper. After polishing, wipe clean, dry, and apply a quality marble sealer to reduce the chance of repeat damage. If the etch is severe, a professional stone restoration may be required for an even finish.
How do I repair water stains on marble floors?
First, identify whether the stain is superficial or has penetrated the stone—oil-based stains often appear darker, while rust or organic stains may look different. For surface discoloration, gentle cleaning and a marble-safe poultice can help draw out residue from the pores. If the stain is stubborn, use a targeted marble stain remover/poultice designed for stone (not household acids), and repeat until the stain lightens. Once fully removed, dry thoroughly and reseal the marble floor to prevent future water staining.
Which tools and products should I use for marble floor repair and polishing?
For most DIY marble floor repairs, you’ll want pH-neutral marble cleaner, soft microfiber pads, polishing compounds or marble polishing powder, and a color-matched marble epoxy for chips/cracks. For leveling or scratch work, diamond hand pads or progressively finer abrasive pads are commonly used to restore the surface without over-damaging it. Always use stone-safe products labeled for marble and avoid acidic chemicals that can etch natural stone. Finish with a breathable marble sealer suited to your marble type to protect the repaired and polished areas.
📅 Last Updated: October 09, 2026 | Topic: How to repair marble floors? | Content verified for accuracy and freshness.
References
- Marble
https://en.wikipedia.org/wiki/Marble - https://www.britannica.com/science/marble
- Google Scholar Google Scholar
https://scholar.google.com/scholar?q=how+to+repair+marble+floor+cracks - Google Scholar Google Scholar
https://scholar.google.com/scholar?q=marble+floor+restoration+polishing+grinding - Google Scholar Google Scholar
https://scholar.google.com/scholar?q=marble+stone+repair+filling+epoxy+resin+consolidation - https://pubmed.ncbi.nlm.nih.gov/?term=marble+conservation+repair
- https://pubmed.ncbi.nlm.nih.gov/?term=marble+cleaning+stone+surface+conservation
- https://www.sciencedirect.com/search?qs=marble+restoration+repair+conservation
- https://www.sciencedirect.com/search?qs=marble+floor+polishing+grinding+restoration
- https://pubmed.ncbi.nlm.nih.gov/?term=stone+surface+repair+consolidation+marble