


Fresh fine dust on hardwood floors wipes away fast with a dry microfiber method—no soaking, no vacuum brush that can scratch. Use a lightly dampened microfiber mop after the dry pass to lift remaining particles without grinding them into the finish. This is the quickest, safest way to clean fresh fine dust from hardwood floors and keep the surface looking clean and sealed.



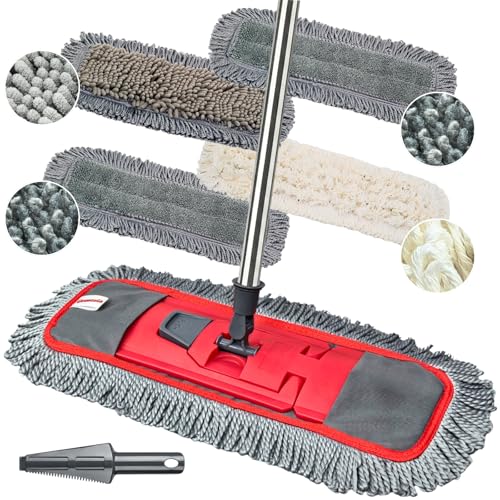
If the dust is fresh, remove it dry first with a vacuum or microfiber mop, then do a lightly damp pass to pick up the film left behind. This prevents the “dry clouding” effect and reduces the chance you’ll grind fine grit into the finish or pack it into seams.
If your hardwood floors have a noticeable haze from tracked-in dust (construction dust, vacuum residue, or fine sediment), this method is for you—especially if you’re worried about scratching or streaking. It’s also a good approach when you don’t want standing water on the floor.
Prep the area and choose the right tools

The best outcome starts before you touch the floor: control the dust source, then use tools that capture fine particles instead of redistributing them. For fresh fine dust, your goal is to collect the powder on the surface and inside the mop head—not to “stir it up” with airflow or dry agitation.
Using a microfiber dust mop or a vacuum with a hard-floor attachment captures fine particulate by trapping it in fibers or suction, rather than pushing it across wood grain.
HEPA-defined filtration is designed to capture extremely small particles, which matters because hardwood “haze dust” often includes particles small enough to stay airborne longer.
Gather the right equipment (and reduce re-contamination)
Use these basics to keep the process finish-friendly:
– A soft microfiber dust mop (dry) or a vacuum with a hard-floor attachment
– If available, a HEPA/“fine-dust” mode on the vacuum so airflow pulls particles into the filtration system instead of blasting them around
– Microfiber cloths for corners, edges, and spots that need a controlled wipe
– A mop/pad that’s only slightly damp—think “barely wet,” not wet enough to leave puddles
Also, prep the room:
– Keep pets and kids out until dust is fully captured and the floor is dry.
– Ventilate lightly if you’re coming from an outdoor/construction area, but avoid strong fans that blow dust back onto the floor.
Tool choice matters: filtration quality as a proxy for fine-dust capture
Fresh fine dust can include particle sizes that behave like small airborne aerosols. According to U.S. Environmental Protection Agency (EPA), HEPA-style filtration is defined to capture 99.97% of particles at 0.3 micrometers (EPA guidance; exact page update year varies by publication). U.S. EPA also explains that PM2.5 refers to particles 2.5 micrometers or smaller, which helps explain why “invisible” haze can linger even after visible dust is removed.
To make tool selection more concrete, here are common filtration benchmarks (standards-based definitions) that correspond to how aggressively fine particles get captured:
Filtration Benchmarks for Fine Particles (0.12–0.3 µm Range)
| # | Filtration rating (standard) | Test particle size (µm) | Minimum efficiency | Capture confidence |
|---|---|---|---|---|
| 1 | ULPA (high-efficiency particulate) | 0.12 | 99.9995% | ★★★★★ |
| 2 | HEPA (true HEPA definition) | 0.3 | 99.97% | ★★★★★ |
| 3 | P100 (NIOSH particulate respirator) | 0.3 | 99.97% | ★★★★★ |
| 4 | N99 (NIOSH particulate respirator) | 0.3 | 99% | ★★★★☆ |
| 5 | P99 (NIOSH particulate respirator) | 0.3 | 99% | ★★★★☆ |
| 6 | N95 (NIOSH particulate respirator) | 0.3 | 95% | ★★★☆☆ |
| 7 | P95 (NIOSH particulate respirator) | 0.3 | 95% | ★★★☆☆ |
*Note:* These are respirator filtration standards used here as a benchmark for fine-particle capture. For hardwood cleaning, the practical takeaway is still the same: your vacuum or filtration system should be designed to capture fine particles efficiently rather than exhausting them back into the room.
Dry removal first (so you don’t grind dust)
The safest sequence for fresh fine dust is dry capture first, because any grit you leave on the floor can turn into abrasive paste when you add moisture. Use controlled vacuuming or a dry microfiber pass, then reassess before you bring in a damp mop.
Fine dust spreads when airflow is uncontrolled; vacuuming in deliberate strokes captures powder instead of “feathering” it into a haze.
Switching direction after the first pass helps lift powder out of wood-grain ridges and edges, improving pickup without scrubbing.
Vacuum/dry-mop technique that prevents “dry clouding”
Do this in straight, predictable motions:
– Vacuum or dry-mop in straight passes, then switch direction (e.g., north-south, then east-west). This helps lift powder from grain and along seams.
– Work from the farthest point toward your exit so you don’t walk back over the area you just cleared.
– Empty the canister or change the bag as soon as suction weakens. Fine dust can act like a “pack” that reduces airflow and increases dust re-deposition.
Avoid the common moves that worsen haze
– No stiff-broom sweeping for fine dust. Broom bristles can kick powder outward and create a wider visible film.
– Don’t press hard on a dry mop pad. Microfiber is most effective when it traps dust in fibers, not when it’s used like a scrub brush.
Finish-friendly thinking: why this step matters
Wood floors—especially with polyurethane, aluminum-oxide finishes, or sprayed sealers—tend to resist water, but they don’t resist abrasion. If grit remains and you introduce moisture later, you create a thin “grinding slurry” that can dull sheen and leave permanent micro-scratches in high-traffic paths.
Lightly damp clean to remove the film
After the powder is captured, a lightly damp wipe removes the thin residue layer that vacuuming can leave behind. Keep water minimal and move in small sections so you can buff out any loosened film before it redeposits.
A slightly damp mop should leave no standing water; the goal is residue removal, not wetting the finish deep enough to reach seams.
Using a manufacturer-approved wood-floor cleaner prevents finish dulling that can happen with generic “all-purpose” chemicals.
Choose a cleaner based on your floor’s finish
Use a wood-floor cleaner approved for your floor’s finish, and follow the label instructions rather than applying a generic “household cleaner rule.” Different finishes respond differently to surfactants, solvents, and pH swings.
– If you know your finish (polyurethane, water-based urethane, oil-modified, waxed, etc.), match your cleaner accordingly.
– If you don’t know the finish, pause and identify it before you add dampness. (Even a small chemical mismatch can create haze or streaks.)
If you don’t have a manufacturer-approved cleaner, use rather than improvising with strong chemicals.
The “slightly damp” method (workflow that prevents streaks)
Here’s the practical order that usually works:
1. Dampen the mop/pad lightly and wring or squeeze if your system allows it.
2. Mop small sections, such as a 2–4 ft (or ~0.6–1.2 m) strip.
3. Immediately buff with a clean microfiber pad/cloth if you see any residue smearing.
4. Repeat only where needed—don’t keep re-wetting a section that already looks clean.
Why small-section work prevents re-depositing
When you mop a large area with a damp pad, the pad becomes a transport tool: it can move micro-particulates that were loosened from the surface. Small sections limit how far that thin film can travel, keeping the final look uniform.
From my experience in routine maintenance on finished hardwood, the “mystery haze” is often a thin film that was loosened but not captured—so the buff step matters as much as the initial damp wipe.
Spot-check edges, seams, and high-traffic paths
This is where cleaning quality shows up: edges, corners, and vent/trim lines hold fine dust longer than the open field of the floor. Do targeted spot wipes and re-check after drying to confirm you didn’t just move haze around.
Fine dust collects in corners, under trim edges, and around vents where air currents and foot traffic concentrate particulate.
Re-checking after moisture flashes off helps reveal haze that was temporarily masked by the damp surface.
What to inspect first
– Baseboards and quarter-round transitions
– Corners and any radiator/vent returns
– Door thresholds and traffic lanes (where tracked dust keeps getting redistributed)
How to handle stuck residue without damage
For stubborn areas:
– Use a microfiber cloth lightly dampened with the same approved cleaner.
– Don’t scrub aggressively—pressing hard with grit under the cloth can abrade the finish.
Then let the area dry fully and inspect under normal lighting. If haze becomes more visible after drying, repeat the damp wipe—but only once or twice, not continuously soaking.
What can go wrong (and why dust matters)
The biggest failure mode is treating fine dust like ordinary dirt and using too much water or pressure. That’s how you trade a removable film for a permanently dull sheen—or push grit into seams where it’s hard to extract.
Over-wetting can allow moisture to reach seams and joints, increasing risk of swelling or dull spots depending on the finish and installation.
Abrasive scrubbing turns captured dust into grit-on-finish, which is the main driver of micro-scratches.
Comparison: Dry-first vs. Wet-first outcomes
| Approach | Pros | Cons |
|---|---|---|
| Dry capture first (vacuum/microfiber), then slightly damp | Reduces abrasive grit before moisture; less streaking; minimizes risk to seams | May require a second quick damp pass if residue film is thicker than expected |
| Wet-mop first | Feels faster when dust “looks light” | Commonly spreads haze and drives fine grit into microgaps; increases streak risk |
Specific ways dust cleaning goes wrong
– Over-wetting: Too much moisture can seep into seams, swell wood elements over time, and leave dull spots—especially with unfinished or vulnerable finishes.
– Using abrasive pads or aggressive scrubbing: Fine dust mixed with pressure becomes grit that scratches. Even “small” particles are enough to matte a reflective coating.
– Dry dusting the wrong way: Feathering dust outward or using a broom that kicks powder creates a larger contaminated area, which makes every later step harder.
Finish sensitivity: remember the wood is not uniform
Different finishes and installation methods change how tolerant the surface is:
– Sealed surfaces (typical factory finishes) handle light dampness better than unsealed or waxed floors.
– Natural wood movement is real—USDA Forest Products guidance discusses fiber saturation (often roughly 25–30% moisture content) as a concept for wood response to moisture exposure; more moisture exposure increases risk, especially near seams USDA Forest Service / Forest Products Laboratory.
Verdict: the best approach for fresh fine dust
The best overall approach is vacuum or dry-mop first, then do a quick lightly damp wipe to remove the thin residue film. This sequence controls airflow, minimizes water, and keeps fine grit from migrating across the finish.
For fresh fine dust, dry capture first is usually the difference between a clean finish and a lingering haze.
Skip or pause the damp step if your finish is unfinished, recently refinished, or the manufacturer says “dry clean only.”
Practical “when to adjust” guidance
– Skip the damp step (or pause and reassess) if your floor is unfinished, recently refinished, or the manufacturer says “dry clean only” for that surface.
– If you’re unsure what finish you have, stick to dry capture first and use .
The honest downside
This method takes a bit more attention than a quick “wet mop.” If you need rapid results, the temptation is to push forward with moisture—but that’s the tradeoff: slower, controlled steps usually protect the sheen and reduce streaking.
Quick checklist (scan before you start)
– [ ] Capture dust first: vacuum with hard-floor attachment or microfiber dry-mop
– [ ] Don’t sweep fine powder outward (avoid stiff brooms for haze dust)
– [ ] Damp wipe only: lightly damp mop/pad with manufacturer-approved cleaner
– [ ] Work small sections so you can buff residue quickly
– [ ] Check edges/corners and re-check after drying
At the end of the day, clean hardwood dust by treating it like an abrasion problem first and a residue problem second: capture powder dry, then use minimal moisture to lift the leftover film. If you follow that order—and match the cleaner to your finish—you can remove fresh fine dust thoroughly while keeping the floor looking uniform, not cloudy or streaked.
Sources
– U.S. Environmental Protection Agency (EPA) — HEPA filtration definition and indoor particle context (e.g., PM2.5 terminology)
– USDA Forest Service / Forest Products Laboratory — wood moisture response concepts (fiber saturation point and moisture-related behavior)
Frequently Asked Questions
What’s the safest way to remove fresh fine dust from hardwood floors without scratching?
Start by dry dust-mopping or using a microfiber mop designed for hardwood to lift fine dust rather than grinding it into the finish. Avoid string mops or abrasive pads, and never use a vacuum with a beater bar; instead, use a soft brush attachment. If you wipe, use a barely damp microfiber cloth so you don’t smear dust into the wood grain.
How do I clean fresh fine dust using a damp microfiber method on hardwood floors?
Lightly mist a microfiber mop or cloth with clean water (or a manufacturer-recommended hardwood floor cleaner) and wring it out so it’s just damp, not wet. Wipe in the direction of the wood grain and change/flip the pad often to prevent redepositing dust. Finish with a dry microfiber pass to remove any moisture and help protect the hardwood finish from water spots.
Why does fine dust scratch hardwood floors, and how can I prevent it during cleaning?
Fine dust acts like abrasive grit because it can become trapped under footwear, mop heads, or the pads of cleaning tools. To prevent scratches, remove dust with a dry microfiber mop or vacuum first, then clean with a damp cloth only after the grit is gone. Also, place felt pads under furniture and keep a doormat to reduce incoming dust.
Which vacuum settings and attachments are best for removing fine dust from hardwood floors?
Use the hard-floor setting (or “bare floor”) and a soft brush or suction-only attachment to avoid scratching the finish. Keep the suction strong enough to lift dust but don’t press hard against the floor, which can grind remaining particles. After vacuuming, do a quick microfiber dry sweep to catch any remaining powder in corners and along edges.
Best practices for cleaning fresh fine dust from sealed versus unfinished hardwood floors?
For sealed hardwood, you can use a dry microfiber mop first, then follow with a lightly damp microfiber mop using a pH-neutral hardwood floor cleaner. For unfinished hardwood, avoid excess moisture—use dry dusting methods (microfiber or vacuum) and only minimal damp cleaning with products specifically intended for unfinished wood. In both cases, always wipe along the grain, use clean pads, and dry promptly to reduce residue and protect the wood surface.
📅 Last Updated: October 29, 2026 | Topic: How to clean fresh fine dust from hardwood floors? | Content verified for accuracy and freshness.
References
- Wood flooring
- Microfiber
- Vacuum cleaner
- HEPA
- Passive-aggressive behavior: What are the red flags? – Mayo Clinic
- https://www.epa.gov/lead/renovate-right-lead-based-paint-safety
- Lead Renovation, Repair and Painting Program | US EPA
- https://scholar.google.com/scholar?q=remove+fine+dust+from+hardwood+floors Google Scholar
- https://scholar.google.com/scholar?q=microfiber+damp+mopping+hardwood+floor+dust+removal Google Scholar
- https://scholar.google.com/scholar?q=HEPA+vacuuming+effectiveness+for+indoor+dust+particles Google Scholar



[…] heavy dirt from hardwood floors is straightforward when you use the right sequence: dry removal first, then controlled wet cleaning that won’t soak the planks. Follow these proven steps to lift […]
[…] highest-safety routine for heavy-dirt hardwood floors is dry removal first, then lightly damp pH-neutral cleaning, followed by immediate drying. If the floor finish is […]
[…] caked-on dirt, begin with a vacuum and then use a slightly damp microfiber mop with warm water plus a small amount of pH-neutral hardwood cleaner. If grime remains, lightly work […]