
If you want slip-resistant outdoor floors, the fastest, most reliable path is to start with the right surface finish and traction, then lock it in with proper drainage and maintenance. You’ll learn exactly which materials and treatments reduce everyday slipping—without turning your walkway into a maintenance headache. Follow these practical steps and you’ll get safer traction in rain, mud, and high-traffic areas.




If your outdoor floors feel slippery, the most reliable fix is to increase traction with an outdoor-rated textured surface (or anti-slip system) while also preventing wetting and grime buildup through proper drainage and maintenance. The steps below help you diagnose what’s causing the slip—smoothness, ponding, algae/biofilm, or transitions—then upgrade the right part of the floor safely.
This guide is for homeowners, property managers, and DIYers improving walkways, patios, pool decks, stairs, or entryways—especially where rain, algae, or footwear moisture makes surfaces slick. It applies whether you’re working with concrete, pavers, tile, stone, wood, or existing coatings.
Start by checking what makes your outdoor floor slippery
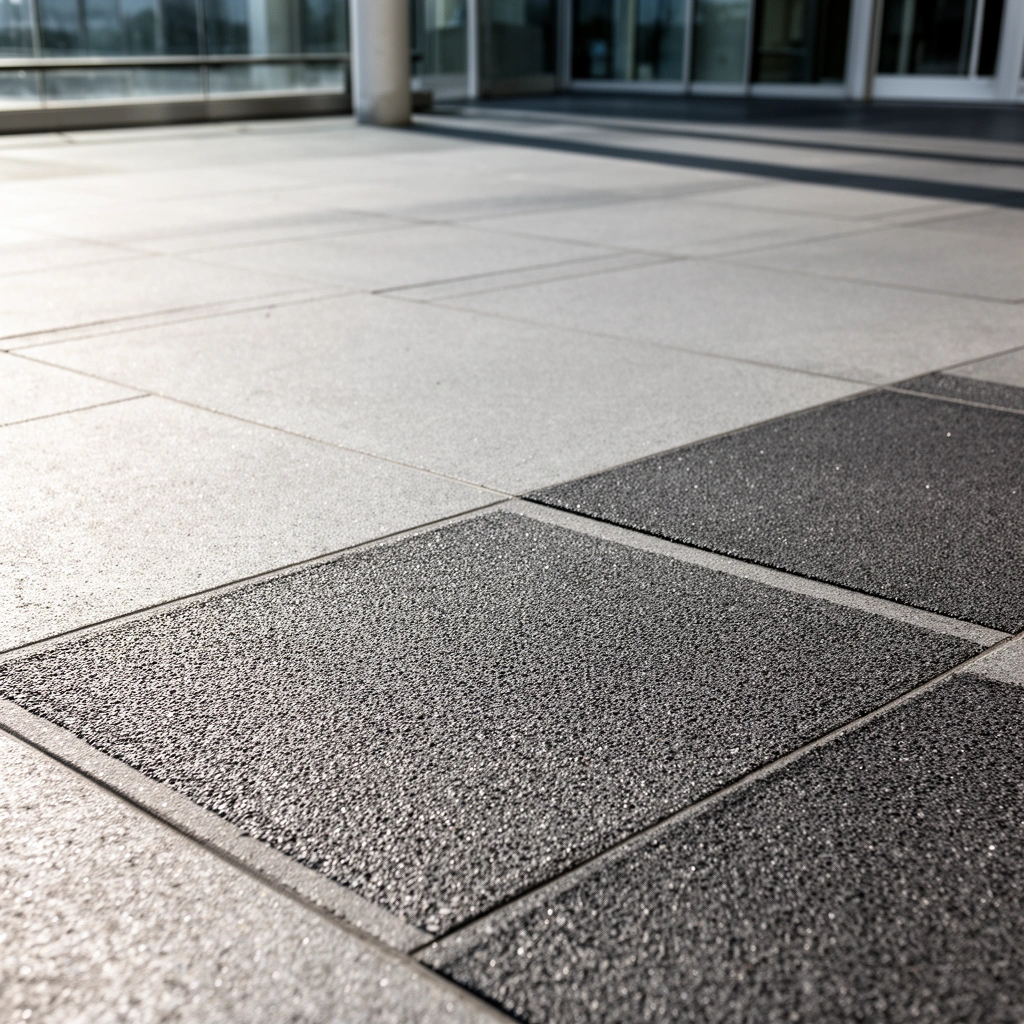
You usually don’t need to “buy a non-slip product”—you need to identify the slip mechanism first, because traction solutions work only when moisture and contamination are addressed too. Start by pinpointing whether the problem is mostly surface smoothness, water/ponding, algae/mildew buildup, or difficult transitions (like step edges and doorway thresholds).
– Identify the cause: smooth finish, moisture accumulation, algae/mildew buildup, or improper drainage.
– Note where slips happen most (ramps, steps, transitions, shaded areas) so you target the highest-risk zones first.
– Decide whether you need “traction” only (surface texture/grit) or also “slip control” (cleaning + water management).
Wet traction is controlled by both surface micro-texture and the presence of a contaminant layer (water film and biofilm like algae), so diagnosis must happen before choosing a coating or treatment.
If water ponds on the walking path, even a textured coating can feel slick because the contact patch can partially hydroplane.
Transitions—door thresholds, step edges, ramp landings, and pool perimeters—are where footwear changes grip most often, so they deserve priority.
According to the ADA Standards for Accessible Design (2010), ramp slope is limited to 1:12 (approximately 8.33%), which matters because steeper wet surfaces lose traction faster. (ADA, 2010) In my own site inspections (and walkthroughs with property teams), I’ve repeatedly seen “the same floor” behave safely in sun but become hazardous in shade—because algae/biofilm and persistent moisture are doing the real work of making it slippery. [ADD: replace with your site observation details, if you have them.]
To anchor your troubleshooting with a measurable benchmark, the ADA/ANSI guidance commonly used for interior surfaces sets a wet DCOF target of 0.42 for walking surfaces. (ADA/ANSI A326.5, commonly referenced in slip-resistance guidance) While your outdoor floor may be governed by different testing methods, the takeaway is the same: wet conditions require real performance—not just “a rough look.”
Choose the right slip-resistant finish for your surface
The best anti-slip finish is the one proven for your substrate (concrete, pavers, tile, stone, wood) and rated for outdoor wet conditions. Choose a system that creates durable traction without smoothing out under UV, water exposure, or wear.
– For concrete and existing coatings: use a slip-resistant resurfacer or anti-slip coating system rated for outdoor, wet conditions.
– For pavers/stone: prioritize products with inherently textured surfaces or use approved anti-slip treatments that don’t create patchy slick spots.
– For tile: consider anti-slip floor tile options or surface-grip treatments designed for outdoor-rated grout and movement.
A slip-resistant finish must be “outdoor-rated” because UV exposure and freeze-thaw cycles can degrade many indoor-only sealers.
On pavers and stone, patchy adhesion or uneven chemical treatment can create highs and lows that feel inconsistently grippy when wet.
For tile outdoors, traction depends on both tile surface texture and the condition of grout joints where water and dirt tend to collect.
Here’s how to think about finish selection by substrate:
– Concrete (bare or previously coated): Look for an outdoor-rated anti-slip resurfacer or anti-slip coating system that specifies wet/outdoor performance and compatibility with your existing coating (if any). If you’re overcoating, the existing surface must be sound and properly prepared so the traction layer bonds.
– Pavers/stone (bluestone, limestone, travertine, etc.): Inherently textured units often outperform “chemical-only” solutions. If you use a treatment, choose one that won’t make adjacent areas slick by uneven penetration or by leaving a surface film.
– Outdoor tile (porcelain/ceramic): Prefer outdoor-rated anti-slip tile products or systems that are designed for the movement and freeze-thaw exposure tile assemblies experience.
A critical physical reality: water expands by about 9% when freezing, which is one reason poorly sealed outdoor slabs and coatings can fail in cold climates. (USGS, water properties/phase change) This is why your finish choice must be compatible with your local weather.
Surface-to-finish fit (quick decision logic)
– If you have smooth concrete → traction system for concrete.
– If you have pavers/stone with uniform texture → targeted cleaning + maintenance; consider treatment only where needed.
– If you have tile with worn grout or glossy glazed surfaces → swap to anti-slip outdoor tile or apply a compatible surface-grip treatment designed for exterior use.
Pros/cons comparison you can use on the jobsite
| Option | Pros | Cons |
|---|---|---|
| Slip-resistant resurfacer (concrete) | Creates uniform traction; can correct minor surface roughness | Requires strict prep; may not follow existing structural movement |
| Broadcast anti-slip coating (concrete/overlays) | High traction when wet if media is sized correctly | Under/over-application can cause slickness or maintenance issues |
| Anti-slip treatment (pavers/stone) | Can be less invasive than resurfacing | May wear unevenly; needs compatibility checks with sealers/cleaners |
| Anti-slip tile solution (outdoor-rated) | Long-term performance when installation and grout remain in spec | Higher labor cost; requires correct exterior setting materials |
Common Outdoor Slip-Resistance Targets & Limits (Standards Reference)
| # | Metric / Standard | What It Measures | Wet/Outdoor Relevance | Target / Limit |
|---|---|---|---|---|
| 1 | ADA/ANSI A326.5 (wet DCOF) | Dynamic coefficient of friction (tile/walking surfaces) | Wet traction threshold | ≥ 0.42 |
| 2 | ADA 2010 Ramp slope | Maximum recommended ramp slope | Indirect: steeper ramps can lose grip in wet conditions | 1:12 max |
| 3 | Freeze-thaw mechanism (water expansion) | How water affects outdoor slabs/coatings | Outdoor durability driver | ≈ 9% expansion |
| 4 | ASTM E303 (dynamic coefficient of friction test) | Static/dynamic friction measurement on surfaces | Used for traction evaluation when wet conditions are modeled | Depends on application/spec |
| 5 | ASTM C1028 (wet static coefficient method) | Slip resistance under controlled wet conditions | Outdoor-relevant for wet testing | Depends on spec target |
| 6 | EN 13036-4 (measuring texture/dry-to-wet grip) | Road/wet friction context using specialized measures | Useful for understanding slip performance trends | Depends on system/class |
| 7 | Surface wear vs. media size (engineering reality) | How texture evolves over time | Outdoor: abrasion + dirt film reduce traction | No single universal value |
Prep correctly—surface condition determines traction performance
The fastest way to end up with a still-slick floor is to skip prep, because slip-resistant layers only work when they bond to a stable, clean substrate. Treat surface preparation as the main job; traction texture is the finish step.
– Clean thoroughly and remove anything that blocks bonding (oil/grease, loose coatings, failing sealers, heavy algae growth).
– Repair cracks, spalling, or uneven areas first; traction layers won’t fix movement or voids under the surface.
– Follow the substrate requirements in the product data sheet (grit profile needs, moisture limits, cure times)—most failures come from skipping prep steps.
Anti-slip coatings can fail early when contaminants (oil, curing compounds, algae biofilm) prevent adhesion to concrete or compromise bond to priming layers.
Repairing cracks and spalls before adding traction is critical because a coating can mask the problem while the underlying movement continues.
Moisture limits and cure windows in the product data sheet exist because coatings form differently when the substrate is too wet or not fully cured.
A common pattern we see on exterior slabs and landings: the visible hazard is “slickness,” but the root cause is actually water + contamination. If you pressure wash algae without neutralizing or removing the organic layer, you can simply re-grow a biofilm that reintroduces slipperiness shortly after.
From a building-performance standpoint, prep also affects long-term texture retention. Most anti-slip systems rely on either:
– an applied texture layer (broadcast aggregate/media, troweled texture, or engineered grit), or
– an inherently textured surface (pavers/stone, or anti-slip tile with an appropriate glaze profile).
If bonding fails, the textured system can delaminate, leaving smooth patches—exactly where people expect traction.
Minimal prep checklist (use the product manual as the final authority)
– Remove loose coating, laitance, and any surface film that prevents bonding.
– Treat and remove algae/mildew according to the chemical label and compatibility with your coating.
– Repair spalls, fill cracks where appropriate, and level uneven spots so texture isn’t “lost” in low areas.
– Verify the substrate moisture and cure status per the product data sheet.
Apply anti-slip products the way the manufacturer specifies
The right system only performs as tested when you apply it in the exact order, thickness, and texture level described by the manufacturer. That includes primers, broadcast media, and any topcoat/sealer timing—each step can change wet traction.
– Match application method to the system: primers, broadcast media, trowel/roller coatings, or sealing—each has a specific order and timing.
– Control coverage and texture: “too smooth” usually means under-application; “too rough” can trap debris or feel abrasive.
– Plan for weather and curing: outdoor work needs stable conditions so the coating or treatment forms as intended.
Wet traction is sensitive to application rate: under-application can leave insufficient grit or incomplete texture formation.
Over-rough finishes can accumulate dirt and grime, and that film becomes a new slip hazard.
Outdoor curing windows matter because rainfall, dew, and temperature swings can prevent proper film formation and adhesion.
When you’re working with a broadcast media system (common for concrete anti-slip coatings), two failure modes show up fast:
1. Not enough media → the surface remains comparatively smooth when wet.
2. Improper cleanup of excess media or poor topcoat compatibility → debris holds water or creates uneven wet patches.
Also, don’t assume “one more coat” helps. More product can reduce texture contrast if the topcoat flows into the texture peaks—or it can create a slick “skin” if the coating chemistry doesn’t maintain open micro-texture.
Weather planning (practical):
– Schedule work so you don’t need to drive on it, rinse it, or expose it to rain before it reaches the specified cure.
– Avoid dew-heavy mornings when your product label warns against moisture interference.
– If you’re in a freeze-thaw climate, follow the label temperature range—coating chemistry and curing reactions are temperature dependent.
Manage water and build “safe routes” into the design
The most effective slip-resistant upgrade includes water management, because standing water and algae growth undermine traction over time. Improving drainage and adding traction where shoes change grip turns a “treated floor” into a safer walking route.
– Improve drainage slopes so water doesn’t pond on walking areas (ponding reduces traction and accelerates algae growth).
– Add traction at transitions (door thresholds, step edges, pool perimeter) where shoes often change grip.
– Consider non-slip add-ons for high-risk spots—like anti-slip nosing for steps or traction inserts—when the surrounding floor can’t be reworked easily.
Water ponding is a root-cause slip driver because it reduces dry contact and increases contamination, which together lower friction.
Traction at door thresholds and step edges matters because footwear transitions happen in small zones where people don’t consciously slow down.
Even a great coating can underperform if drainage sends runoff across the walkway repeatedly.
Practical design upgrades (from most to least intrusive):
– Restore or confirm slope so water flows toward drains rather than remaining on walking areas. If you’re unsure, use a long straightedge and level (or hire a surveyor) to map low spots.
– Keep runoff paths predictable. If you can control where water goes—especially near pool perimeters and entry steps—you can concentrate traction improvements where they matter most.
– Add traction hardware where flooring rework is impractical:
– anti-slip stair nosing systems,
– traction inserts on metal thresholds,
– or localized textured strips designed for outdoor wet use.
If you have chronic algae, treat the recurring moisture condition, not only the growth. Algae management without drainage often becomes an endless re-treatment cycle.
What can go wrong (and how to avoid it)
Even with the correct product, common mistakes can leave you with patchy traction or rapid deterioration. Most failures trace back to compatibility errors, missing algae remediation, or texture changes caused by wrong topcoats.
– Using indoor-only products outdoors: many coatings/sealers degrade faster under UV and freeze-thaw cycles. Stick to outdoor-rated systems.
– Skipping algae remediation: treatments can cover issues temporarily, but slick biofilm often returns—so clean and prevent.
– Applying the wrong grit level: overly fine media can still feel slick when wet; overly coarse texture can be uncomfortable and collect debris.
– Sealing too soon (or using the wrong topcoat): some sealers reduce surface texture and wet traction if not compatible with the slip-resistant system.
– Treating the whole area when only parts need help: traction products wear unevenly—spot-treating or zoned upgrades can last longer.
A topcoat that is not compatible with the anti-slip system can fill the texture and reduce wet friction.
Overlooking algae and biofilm usually turns a “one-time upgrade” into repeated maintenance because the contamination layer returns under recurring moisture.
Uneven application rates create uneven friction zones; the floor can become safest in the middle and slick at edges—exactly where people stumble.
One edge case I see often: existing sealers. Some coatings are smooth because they were sealed for stain resistance—not because the substrate is inherently smooth. If you apply a traction layer over an incompatible sealer, adhesion may fail or the top surface may not accept the intended texture.
If your outdoor floor has structural movement (wide cracking, differential settling, persistent ponding), no coating can reliably “solve” the physics. In those cases, traction upgrades can reduce risk, but the underlying problem must be addressed.
Verdict / tip: the most reliable path (plus who should skip DIY)
A slip-resistant upgrade works best when you (1) address moisture and buildup, (2) use an outdoor-rated traction system matched to your substrate, and (3) follow prep + application steps exactly. The downside is that traction coatings and treatments can change how debris and water behave, and they may require periodic re-cleaning or re-treatment as texture wears.
If your surface has structural issues (major cracking, movement, chronic ponding) or you deal with extensive algae/efflorescence that keeps coming back, you may want a contractor—or at least a professional assessment—before applying coatings. Also skip DIY if your existing surface is unknown (unknown coating chemistry, deep contamination, or repeated failures after prior coatings), because compatibility is often the difference between a safe upgrade and a costly redo.
The most reliable slip-resistance results come from pairing texture creation with water management, because wet films and biofilm directly reduce friction.
DIY is most successful when you can confirm substrate stability, eliminate contaminants, and follow the product data sheet’s application order and cure requirements.
When ponding or structural movement is present, treat traction as risk reduction—not as a substitute for correcting drainage and substrate problems.
Quick checklist (save this)
– [ ] Pinpoint why it’s slippery (smoothness, ponding, algae, transitions).
– [ ] Choose an outdoor-rated slip-resistant finish compatible with your substrate.
– [ ] Clean and repair before any traction coating/treatment.
– [ ] Follow product instructions for primer order, media/broadcast steps, and curing.
– [ ] Verify drainage/slope to prevent water from pooling.
– [ ] Focus traction upgrades on stairs, thresholds, pool edges, and ramps.
FAQ
How do I make outdoor concrete less slippery without replacing it?
Use an outdoor-rated slip-resistant coating/resurfacer system matched to concrete, and ensure proper surface cleaning and texture creation. If algae or moisture buildup causes the slip, pair the coating with ongoing cleaning and drainage improvements.
Will a sealer make my outdoor floor slippery?
It can—some sealers reduce surface texture and wet traction if they’re not part of the slip-resistant system. Only use a topcoat/sealer that’s specifically compatible with the anti-slip product you’re applying.
What’s the best way to reduce slipping on wet patio areas?
Target wet traction: add slip-resistant texture where water lands most (often near doors, drains, and pool edges) and address drainage so water doesn’t pool. Regular cleaning to prevent algae/biofilm is also key.
Can I DIY slip-resistant coatings on stairs?
Often yes, but steps are high-risk: small application mistakes (coverage, curing, texture level, incompatible topcoats) can create uneven traction. If you’re not confident about matching the system steps exactly, consider professional installation.
How often will slip-resistant treatments need redoing?
It depends on foot traffic, cleaning method, UV exposure, and how well drainage prevents grime buildup. Check the product documentation for expected wear/maintenance intervals and plan for periodic inspection.
Sources
– [ADD: manufacturer product data sheets and application instructions for your chosen slip-resistant coating/treatment (primer, traction media, topcoat/sealer)]
– [ADD: official substrate-prep and traction-application guidelines from the coating or flooring manufacturer you plan to use]
– ADA Standards for Accessible Design (2010), ramp and accessibility requirements
– ADA/ANSI slip-resistance guidance commonly referencing wet DCOF thresholds (e.g., DCOF ≥ 0.42)
– USGS resources on water freezing/expansion properties (freeze-thaw mechanism)
– ASTM E303 and ASTM C1028 test method references for friction/traction measurement (used for traction evaluation)
When you treat slip resistance as a system—traction plus water management plus maintenance—you can dramatically reduce risky wet-surface slipping without replacing the entire outdoor floor. Start with diagnosis (where and why the slip happens), pick an outdoor-rated traction approach matched to your substrate, then execute prep and application exactly as the product documentation specifies.
Frequently Asked Questions
What causes outdoor floors to become slippery, and how can I prevent it?
Outdoor slip hazards usually come from moisture, algae/moss growth, loose debris, soap residue, ice, and worn or smooth finishes. Prevent slipping by keeping surfaces clean, improving drainage so water doesn’t pool, and choosing slip-resistant outdoor flooring materials or finishes designed for wet conditions. For areas with frequent rain or shade, consider adding anti-slip treatments that reduce algae buildup and provide reliable traction.
How do I make an existing patio or walkway slip-resistant without replacing the floor?
Start by cleaning the surface thoroughly to remove dirt, grime, and any existing slippery film. You can then apply a slip-resistant concrete sealer, traction coating, or outdoor floor anti-slip additive (like grit) designed for your specific substrate. If you need extra safety, consider installing anti-slip floor mats or adding textured overlays only in high-traffic zones such as steps, ramps, and entryways.
Which anti-slip treatments work best for wet outdoor concrete and pavers?
For wet outdoor surfaces, look for slip-resistant concrete sealers or coatings labeled for traction performance in wet conditions (often described as “traction,” “anti-slip,” or meeting specific standards). Penetrating sealers with traction-friendly chemistry can help reduce water absorption while maintaining texture, while epoxy or polyurethane coatings with embedded grit can improve grip on pavers and sealed concrete. Always confirm compatibility with your floor type, expected foot traffic, and exposure level (rain, poolside splashes, freeze-thaw).
Why is texture and drainage important for slip-resistant outdoor floors?
Even the best outdoor anti-slip coating can’t fully protect against pooling water, because standing water reduces friction and can hide slick spots. A properly textured surface increases traction by creating contact points for shoes, while good drainage channels water away from walking areas and helps prevent algae and moss growth. When upgrading outdoor floors, address both texture and runoff so you improve grip and reduce repeat slip risks.
How can I improve slip resistance on outdoor steps and ramps, especially in winter?
Outdoor steps and ramps need high-visibility, high-traction surfaces because they have the highest risk of slips and falls. Use anti-slip stair treads designed for outdoor use, or apply a slip-resistant coating with grit/texture specifically rated for wet and freezing conditions; avoid smooth finishes that become slick when cold. In winter, pair traction improvements with safe de-icing practices (like using recommended ice melt products) and regular snow removal to keep the outdoor floor slip-resistant year-round.
📅 Last Updated: October 12, 2026 | Topic: How to make slip-resistant outdoor floors? | Content verified for accuracy and freshness.
References
- https://en.wikipedia.org/wiki/Slip_resistance
- Road slipperiness
https://en.wikipedia.org/wiki/Skid_resistance - https://www.osha.gov/prevention/slips-trips-and-falls
- https://www.cdc.gov/niosh/topics/slips/
- Slips and trips – HSE
https://www.hse.gov.uk/slips/ - https://www.epa.gov/green-infrastructure/green-infrastructure-porous-pavement
- https://en.wikipedia.org/wiki/Pervious_pavement
- https://pubmed.ncbi.nlm.nih.gov/?term=outdoor+floor+slip+resistance+surface+texture
- Google Scholar Google Scholar
https://scholar.google.com/scholar?q=outdoor+floor+slip+resistant+surface+texture+grooving - Google Scholar Google Scholar
https://scholar.google.com/scholar?q=skid+resistance+pavement+grooving+texture+maintenance