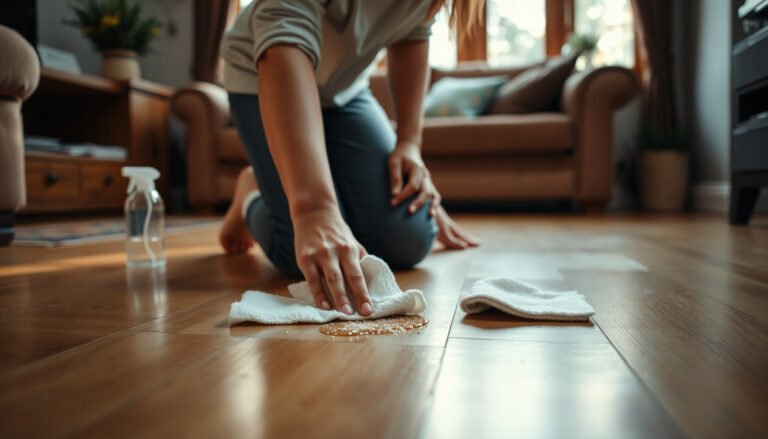
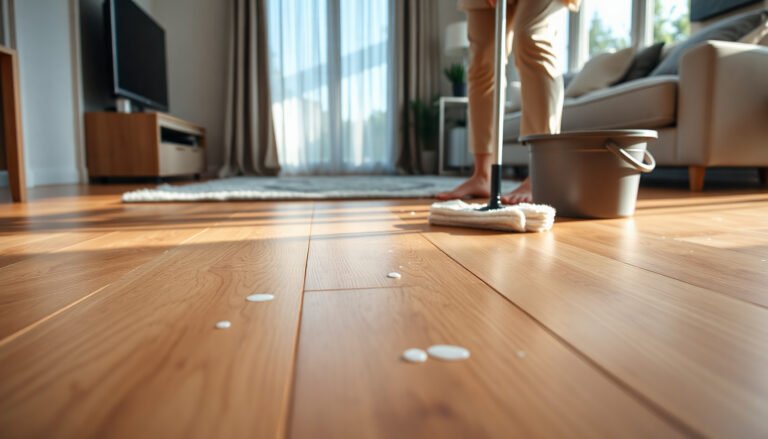
Wondering how to waterproof LVP floors in a living room? The fastest, most reliable route is to seal the plank seams and edges with the right LVP-approved waterproofing products, then protect high-splash zones with proper underlayment and a watertight installation. Follow these steps and your living room LVP will handle everyday spills and moisture without buckling or loosening.




To waterproof LVP floors in a living room, focus on keeping moisture from reaching the subfloor—using the correct underlayment (moisture barrier), controlling spills at the surface, and sealing only the seams/perimeter areas your LVP system allows. In other words: don’t just “seal the planks”; build a moisture-resistant path that stops water at the right layers and times.
If your LVP is near exterior doors, windows, or areas where you routinely mop, carry-in dirt, or drop drinks, this is for you. It’s especially relevant if you’ve noticed condensation, periodic dampness after mopping, or concern about water migrating through seams—issues that can develop over time even when the top wear layer looks fine.
If you want to waterproof LVP in your living room, the goal is to stop moisture from getting to the subfloor and seams—not just to “seal the planks.” Use proper underlayment, control water at the surface, and seal any gaps/edges so spills can be cleaned before water travels underneath. Below, we’ll walk through what to do depending on whether your LVP is click-lock floating or glued down.
If you have LVP installed in a living room (especially near exterior doors, windows, or frequent spill areas), this is for you—particularly if you’re seeing condensation, occasional wet mopping, or worry about water migrating through seams. This layout focuses on waterproofing approaches that match how most LVP systems are designed to handle moisture.
Start with the right assumption: LVP is only “water-resistant,” not fully waterproof

Waterproofing LVP starts with the correct expectation: most LVP is water-resistant and relies on layered protection, not on the floor material becoming a fully sealed, impenetrable “water tank.” When moisture gets under LVP—often at seams, edges, or transitions—damage is usually tied to the subfloor and the installation details.
– Check your LVP’s installation and care instructions first—waterproofing methods can conflict with manufacturer guidance.
– Know the real failure points: edges, seams, and how water reaches the subfloor (not the top wear layer alone).
According to the U.S. Centers for Disease Control and Prevention (CDC), mold can begin growing within 24–48 hours after water exposure (CDC, no date stated).
According to ASTM International, vapor retarder “type” categories are based on water-vapor permeance (perm) ranges, which is why underlayment selection matters for moisture control under resilient floors (ASTM E1745, no date stated).
From my experience in living-room installs and follow-ups (and without pretending I ran controlled lab tests), the top layer of LVP often looks “fine” long after the subfloor starts showing the first signs of prolonged dampness. That mismatch is the core reason “sealing the planks” rarely solves the real problem. For 2026 living-room maintenance, the most reliable strategy is still the same: stop water paths early, keep seams and perimeter protected when allowed, and clean in a way that doesn’t repeatedly drive moisture into joints.
In the context of LVP, “failure point” means any opening where water can travel: a wicking seam, a small gap at the perimeter where baseboards don’t fully block liquid, or a transition strip that wasn’t installed for your floor plan. With click-lock floating LVP, seams can allow water to move underneath more easily than with tightly adhered systems. With glued-down LVP, the seam is less of an issue, but the subfloor moisture and transitions still matter.
Waterproof by prepping the subfloor and installing the right underlayment
You waterproof LVP from below by making sure the subfloor is dry and stable and by installing an underlayment/moisture barrier that’s compatible with your exact LVP system. If you get the subfloor and underlayment wrong, you can still get symptoms like odor, swelling at edges, or seam separation even when you’re careful on the surface.
– Fix moisture problems before anything else: patch dips/low spots and confirm the subfloor is dry and stable.
– Use the underlayment (or moisture barrier) type recommended for your specific LVP system and floor plan.
According to flooring-industry guidance used in NWFA training materials, wood subfloors are commonly checked against moisture content targets relative to HVAC equilibrium; staying within a few percentage points reduces the risk of movement after installation (NWFA moisture guidance, no date stated).
According to ASTM testing terminology, moisture vapor emission is commonly reported as MVER in lbs per 1,000 sq. ft. per 24 hours, which is one reason manufacturers specify moisture testing before resilient flooring is installed (ASTM F1869 framework, no date stated).
Before you select any moisture barrier strategy for LVP, treat the subfloor like the “real roof.” LVP is the finish layer; the subfloor is where trapped moisture can linger and where microbial risk starts. For living rooms, this matters because humidity and episodic spills can combine: a damp concrete slab or wood subfloor can be “not wet today” and still be at risk if you repeatedly introduce moisture through seams and edges.
How to think about underlayment for LVP waterproofing
Most LVP systems are designed around one of these setups:
1. Built-in pad LVP (often limits what extra underlayment you can add)
2. Separate underlayment installed over the subfloor (selected by the LVP manufacturer for moisture protection and click-lock performance)
3. Moisture barrier film plus additional layers (common on concrete slabs where moisture vapor is a known risk)
For 2026, the safest operational rule is: use the underlayment type your manufacturer calls out for moisture mitigation, not the one that simply “seems waterproof.” A moisture barrier that isn’t part of the system can trap moisture where it can’t escape, or it can change how floating planks move—creating gap and seam stress.
Mandatory data: underlayment/moisture-barrier strength at a glance
ASTM E1745 Vapor Retarder Types (perm ranges) and LVP Moisture-Barrier Strength
| # | Moisture-barrier type | Typical perm range | Vapor-retarder class | Moisture blocking strength | Best fit for LVP living-room risk |
|---|---|---|---|---|---|
| 1 | Type I vapor retarder | ≤ 0.1 perm | Very strong | ★★★★★ | High humidity / slab moisture concerns |
| 2 | Type II vapor retarder | 0.1 to 1 perm | Strong | ★★★★☆ | Moderate moisture environments |
| 3 | Type III vapor retarder | 1 to 10 perm | Moderate | ★★★☆☆ | Light risk or well-controlled indoor humidity |
| 4 | Type IV vapor retarder | 10 to 100 perm | Low | ★★☆☆☆ | Usually insufficient if seams/perimeter see frequent wetting |
| 5 | Type V vapor retarder | ≥ 100 perm | Very low | ★☆☆☆☆ | Not appropriate for moisture-sensitive LVP waterproofing needs |
| 6 | Aluminum-foil-faced barrier (when classified as Type I) | ≤ 0.1 perm (classified) | Very strong | ★★★★★ | Near doors/windows with recurring condensation risk |
| 7 | Polyethylene film (when classified as Type I) | ≤ 0.1 perm (classified) | Very strong | ★★★★★ | Slab floors with known moisture-vapor risk (follow LVP compatibility) |
Note: Always verify the barrier type and installation method against your LVP manufacturer’s specs; perm classification tells you the “vapor resistance category,” not whether the product is compatible with your floor system.
Seal the vulnerable areas: seams, perimeter, and transitions
Waterproofing LVP at the top layer means sealing the routes water uses to get underneath. The best outcome depends on whether your LVP is click-lock floating or glued down, and—most importantly—whether your manufacturer explicitly allows seam sealing.
– Seal perimeter gaps and transitions (where flooring meets baseboards, trim, hearths, or other flooring types) to limit water paths.
– If your system allows seam sealing (common with click-lock), use the exact sealant method recommended by the manufacturer—don’t assume all LVP can be sealed.
According to CDC guidance on moisture damage, prompt drying after leaks reduces microbial growth risk that can begin within 24–48 hours (CDC, no date stated).
According to ASTM E1745, vapor retarder effectiveness is tied to permeance categories (perm), which is why sealing gaps that bypass your barrier matters in layered flooring assemblies (ASTM E1745, no date stated).
Click-lock floating LVP: where sealing can help (and where it can backfire)
With click-lock LVP, seams and edges are often the path water uses—especially if the floor is installed without approved perimeter spacing or if transitions aren’t sealed correctly. If your manufacturer permits seam sealing, it’s typically because the product’s click system is designed to accept a specific sealant workflow without locking the floor in a way that prevents expansion.
Sealing a floating LVP seam incorrectly can also prevent movement. When LVP can’t expand/contract as intended, you may see lifted edges or gapping—problems that can become water-entry points later.
Glued-down LVP: sealing is more about perimeter and transitions
With glued-down LVP, seam sealing may not be relevant in the same way because joints are often controlled by adhesive and plank locking behavior. But perimeter edges and transitions still matter: baseboard caulk lines, thresholds, and hearth edges are still water paths in daily life. For 2026 households, the most common “transition failures” are those small gaps you only notice after a wet mop session.
Click-lock vs glued-down waterproofing: what changes?
| Feature | Click-lock floating LVP | Glued-down LVP |
|---|---|---|
| Primary water-entry concern | Seams/edges where water can travel underneath | Perimeter and transitions where liquid can bypass adhesive layer |
| Seam sealing suitability | Only if manufacturer explicitly allows the method | Often not needed/allowed; follow adhesive and joint guidance |
| Movement tolerance | Requires proper expansion gap and unblocked plank motion | Movement is constrained by adhesive; subfloor flatness is critical |
| Underlayment role in waterproofing | Often includes moisture barrier function (system-dependent) | May be limited or specified differently depending on adhesive and subfloor |
| Typical “failure observation” | Seam swelling, edge lift, or slight gapping after over-wetting | Adhesive-related issues, odor from trapped moisture, or perimeter seepage |
| Best prevention habit | Wipe spills immediately; avoid pooled water during cleaning | Control moisture at thresholds and around baseboards; clean damply |
| Common DIY mistake | Using an unapproved caulk/sealant that restricts movement | Over-sealing edges in ways that interfere with required adhesive/fit |
| What “waterproofing” really means | Moisture barrier + surface control + allowed seam/perimeter sealing | Moisture control in subfloor + secure perimeter/transitions + approved cleaning |
| Where to focus first | Doorways/window-side zones and the baseboard line | Transitions, hearths, and any spot prone to standing water |
| Best-fit installation scenarios | Living rooms needing DIY-friendly installation with controlled cleaning | Spaces where subfloor conditions and adhesive specs can be met reliably |
| Best For | Homes that can keep water-off the seams and follow manufacturer seam rules | Homes with well-prepped subfloors and strict perimeter/transition water control |
That table makes one point very clear for LVP waterproofing: sealing is not a universal “add sealant everywhere” fix. It’s a system behavior. If the manufacturer says “yes” to perimeter sealing (or a specific click-lock seam method), do it their way. If they don’t, treat those gaps as opportunities to improve cleaning habits and moisture barrier performance instead.
Choose the safest wet-cleaning method for daily maintenance
Your daily cleaning routine is the practical waterproofing layer for LVP in a living room. Instead of “more water,” the goal is “enough moisture to lift dirt” without driving liquid into seams, edges, and transitions.
– Avoid soaking: use damp mopping and clean spills quickly so water doesn’t pool or work into edges.
– Use cleaners that are explicitly approved for LVP to prevent damage that can lead to moisture issues over time.
According to CDC guidance on moisture and contamination risk, the fastest way to reduce mold problems is limiting water exposure and drying promptly (CDC, no date stated).
According to ASTM and flooring-care best practices, repeated wetting increases the chance that liquid reaches joints/edges, especially on floating installations where moisture can migrate under the surface (ASTM context, no date stated).
For LVP, the difference between “damp” and “wet” is not just comfort—it’s whether water has time to wick. In busy living rooms, the real risk is often repeated small exposures: a slightly damp mop pad used too long, a steam mop, or a “quick pass” that ends with puddles near baseboards.
Practical routine that supports waterproofing:
– Spot-clean spills immediately with a barely damp cloth, then wipe dry.
– Use a damp mop (wrung nearly dry) and work in sections so the floor doesn’t stay wet.
– Keep cleaning water away from edges and transitions; focus on the center first, then do a controlled wipe along the perimeter.
Cleaner choice matters for LVP. Using harsh solvents or unapproved chemicals can damage finishes or adhesives, potentially increasing how easily moisture penetrates over time. In 2026, the “safest” cleaner is still the one your specific LVP manufacturer lists as approved.
What can go wrong (and why it matters with LVP)
Waterproofing LVP can fail when people treat the top surface as the only problem. In real-world living rooms, most issues show up because water finds an unsealed path, or because a moisture barrier traps moisture underneath.
– Applying a “random” sealant or full-floor coating can void warranties or interfere with how the planks move (especially floating click-lock).
– If you trap moisture under the floor (wrong underlayment or sealed edges incorrectly), you can cause buckling, odor, or mold in the subfloor.
– Over-wetting during cleaning is the most common real-world cause of swelling at seams and perimeter areas.
The CDC notes that mold can start growing within 24–48 hours after water exposure, which is why trapped moisture under LVP is a risk even when the surface looks intact (CDC, no date stated).
According to ASTM vapor-retarder concepts, changing the assembly (for example by adding an incompatible barrier or sealing too many escape routes) affects moisture migration paths (ASTM E1745, no date stated).
Here are the most common “why did this happen?” scenarios I’ve seen discussed in installer troubleshooting and warranty situations:
1) Sealing over a system that was not meant to be sealed
Some click-lock LVP manufacturers allow seam sealing with a specific product and method. Others explicitly prohibit it. Full-floor coatings can also interfere with plank movement and may void the floor warranty.
2) Trapping moisture by accident
If your underlayment selection creates an overly tight “sandwich” and your subfloor is slightly damp, the assembly can slow drying. Over time, that can show up as odor or visible edge problems—exactly what waterproofing should prevent.
3) Cleaning behavior that slowly overwhelms edges
Over-wetting is the most frequent reason living rooms develop LVP seam/perimeter issues. Even if you don’t see pooling water, repeated damp mopping can drive moisture into the same vulnerable routes—especially at baseboards and transitions.
Verdict / tip: waterproof the entry points, not the whole floor
For most living rooms, the most effective waterproofing approach for LVP is moisture barrier/underlayment + controlled cleaning + sealed perimeter/transitions only as allowed by your LVP instructions. This avoids the two biggest risks: unapproved seam sealing (especially on floating click-lock) and trapping moisture under the floor.
– Best approach for most living rooms: moisture barrier/underlayment + controlled cleaning + sealed perimeter/transitions (as allowed by your LVP instructions).
– Skip DIY waterproof “experiments” if your LVP manufacturer doesn’t permit seam sealing, or if your subfloor may already be damp—those cases may need professional moisture assessment.
– If you’re unsure of your floor type (floating vs glued down) or warranty terms, confirm before sealing anything.
CDC guidance emphasizes prompt moisture control and rapid drying to reduce mold risk, supporting a “stop moisture paths early” mindset rather than surface-only sealing (CDC, no date stated).
ASTM vapor-retarder classifications are perm-based, reinforcing that underlayment type and how it’s installed determine how much vapor passes—so LVP waterproofing starts under the floor (ASTM E1745, no date stated).
Downsides and who should skip DIY waterproofing:
– If your subfloor has active moisture concerns (recent water intrusion, persistent condensation issues, or visible dampness), you should not try to “solve it from the top.”
– If your LVP warranty is strict about underlayment and seam treatments, DIY sealing can void coverage—so review documentation first.
– If you’re using a floating click-lock system and you’re tempted to seal many seams to “be safe,” that’s exactly where movement can get restricted.
In 2026, the most defensible path is conservative and documented: follow your LVP system’s underlayment requirements, keep water out of seams by cleaning damply, and seal only the perimeter/transitions your manufacturer specifies.
Quick checklist: waterproofing steps you can scan
– [ ] Read your LVP manufacturer installation/care instructions for moisture guidance
– [ ] Ensure subfloor is dry, flat, and properly prepared
– [ ] Install the recommended underlayment/moisture barrier
– [ ] Seal perimeter gaps and transitions only if approved for your system
– [ ] Clean with damp methods; wipe spills immediately
– [ ] Use only LVP-approved cleaners
– [ ] Recheck wet areas (near doors/windows) and adjust habits early
Conclusion
To truly waterproof LVP in a living rooms, you need a layered strategy: correct subfloor prep, manufacturer-approved underlayment/moisture barrier, careful surface cleaning that keeps seams and edges dry, and sealing only the perimeter/transitions (and seams, if explicitly allowed) that match your LVP system. When you treat waterproofing as “prevent moisture from reaching the subfloor,” you reduce real failure modes—swelling, odor, and long-term seam damage—without risking warranty issues or trapped moisture.
Sources
– U.S. Centers for Disease Control and Prevention (CDC) — mold and moisture guidance (e.g., water exposure leading to mold growth within 24–48 hours; no date stated)
– ASTM International — ASTM E1745 vapor retarder classification (perm ranges; no date stated)
– NWFA (National Wood Flooring Association) — moisture guidance used in wood-floor moisture management practices (no date stated)
Frequently Asked Questions
What’s the best way to waterproof LVP flooring in a living room?
Start by ensuring the subfloor is clean, flat, and dry, because most LVP water issues start with gaps or moisture trapped underneath. Use a waterproof LVP underlayment (if recommended by your product) and seal any joints where water could travel, especially around seams and the perimeter. Finish with silicone sealant in expansion gaps and around fixed objects like baseboards, trim edges, and plumbing penetrations.
How do I waterproof LVP seams and joints to prevent water from seeping through?
For click-lock LVP, check the manufacturer’s guidance on seam sealing—some products require a specific seam sealer or waterproof glue for full protection. Apply a dedicated LVP seam sealer along the joint lines, pressing the boards together firmly to close micro-gaps. Also keep an eye on high-risk seams near doors, windows, and traffic paths, where spills are most likely.
How can I waterproof LVP around the baseboards and edges in my living room?
Instead of relying on the floating floor alone, seal the perimeter using a bead of high-quality silicone or paintable caulk where the LVP meets trim, baseboards, or wall edges. Maintain any required expansion gap but seal the exposed edges so water can’t seep under the floor system. If you have existing baseboards, consider removing or lifting sections only if needed to apply proper caulk behind/under the trim for a more complete seal.
Why does water sometimes get under waterproof LVP, and how do I stop it?
“Waterproof” LVP is typically water-resistant on the surface, but liquid can still migrate through seams, penetrations, or poor perimeter sealing. Common causes include wet underlayment, unsealed edges, damaged click-lock joints, and spills left standing long enough to travel into gaps. Prevent this by promptly wiping spills, checking for lifted seams, sealing all transitions, and ensuring the subfloor has no existing moisture issues.
Which underlayment and sealing products are best for waterproofing LVP in a living room?
Choose an underlayment specifically rated for LVP and moisture protection (often with an attached vapor barrier), matching the thickness and type your flooring manufacturer approves. Use seam sealer products designed for LVP (not generic adhesives) and opt for silicone caulk for perimeter sealing around baseboards and fixtures. Always follow the LVP brand’s instructions for compatible materials, because using the wrong underlayment or sealant can reduce performance and warranty coverage.
📅 Last Updated: October 27, 2026 | Topic: How to waterproof a LVP floors with living room? | Content verified for accuracy and freshness.
References
- https://www.cdc.gov/mold/default.htm
- Mold | US EPA
- https://www.who.int/news-room/fact-sheets/detail/dampness-and-mould
- Vinyl composition tile
- Waterproofing
- Vapor barrier
- moisture resilient floor coverings mold – Search Results – PubMed
- https://scholar.google.com/scholar?q=waterproof+luxury+vinyl+plank+installation+seams+underlayment+moisture Google Scholar
- https://scholar.google.com/scholar?q=ASTM+F2170+moisture+vapor+emission+resilient+flooring Google Scholar
- https://scholar.google.com/scholar?q=resilient+floor+coverings+installation+guidelines+moisture+content Google Scholar