


Learn how to repair LVP floors in a living room with the fastest, most reliable method that actually works on common damage like lifting seams, worn edges, and small scratches. If you need a clean-looking fix, this guide will tell you exactly when a simple vinyl plank re-glue is enough and when you must replace a plank for a durable result. Expect straightforward steps, the right products to use, and the key checks that prevent the same problem from coming back.




Yes—most LVP (luxury vinyl plank) damage in a living room can be repaired by cleaning the area and choosing the right approach (spot-fill for surface issues, replacement for damaged locking edges). In many cases, a click-lock plank can be reseated if the lock isn’t compromised, but cracked planks and moisture-swollen sections usually require replacing the affected boards so the floor can lock back together correctly.
If your LVP (luxury vinyl plank) has scratches, chips, or a small gap, you can usually repair it by cleaning the area, matching the right repair method (patch vs. replace), and sealing where appropriate. For more serious damage—like a cracked plank, lifted seams, or water-swollen sections—the most reliable fix is replacing the damaged plank(s) so the floor locks back together correctly. In this guide, you’ll learn how to figure out what you’re dealing with and choose the right repair steps for a living room.
If you’re noticing scuffs from shoes, dents from furniture, loose planks near a doorway, or a few boards that don’t sit flat anymore, this is for you. It’s also a good fit if you want practical, DIY-friendly guidance without guessing—especially when LVP is click-lock or has seams that start separating.
Assess the damage (so you repair the right problem)
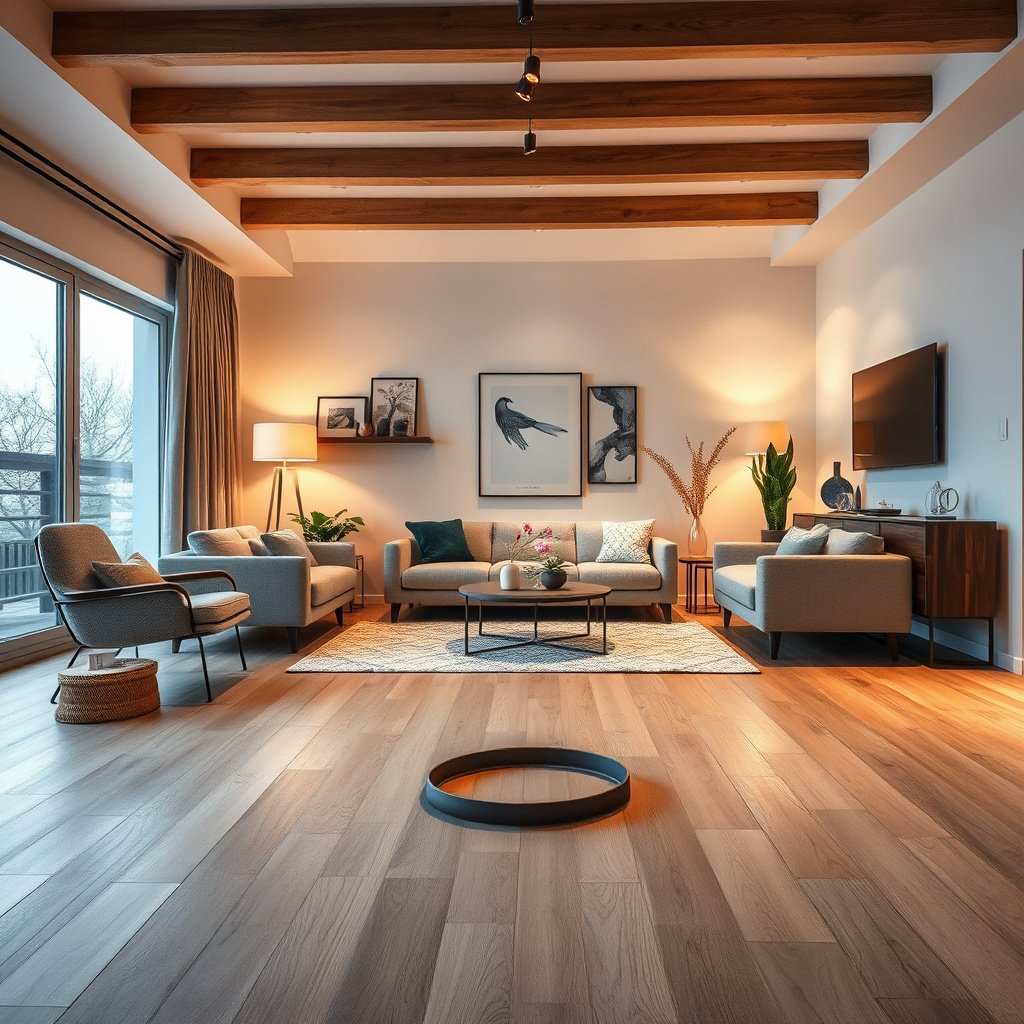
You repair LVP correctly by first determining whether the problem is only cosmetic or whether it threatens the plank’s structure and locking system. If the issue is structural (cracked plank, lifted edges, swelling, or moisture), the best “repair” is typically replacing the affected plank(s) rather than trying to fill or glue over the symptoms.
LVP repairs succeed when the repair method matches the failure mode—surface scratches respond to fillers, while locking-edge damage usually requires replacement.
Moisture-related LVP swelling often indicates the subfloor or a water source problem; sealing alone rarely resolves the root cause.
Click-lock LVP can sometimes reseat if debris isn’t trapped and the locking lip isn’t broken; forcing a damaged lock can worsen the gap.
Start by identifying what you’re truly seeing:
– Identify whether the issue is surface-only (scratch/scuff) or structural (cracked plank, lifted edges, gaps). A surface scratch won’t usually change how the plank sits; structural issues typically create visible separation at seams or a plank that no longer lies flat.
– Check for moisture signs near the problem area (dark spots, swelling, a “mushy” feel)—because water-related issues usually require deeper correction. In my experience walking through living rooms with LVP seam failures, the “mystery gap” is frequently tied to a spill, a tracked-in wet mat, or a slow leak near a door or plumbing chase.
– Note whether your LVP is click-lock floating or glued down, since the “replace vs. patch” approach changes. Click-lock systems are designed to expand and contract; glued-down systems behave differently because you’re bonding to the subfloor.
A few quick measurements and observations make the rest of the job more reliable. For example, many manufacturers specify a perimeter expansion gap commonly around 1/4 in (6 mm)—and ignoring that guidance can contribute to buckling and seam separation later (). Also, LVP thickness often falls in the 4–6 mm range for common residential products (), which influences how much a seam can “snap” flat versus remain permanently sprung. Finally, the wear layer (use layer) thickness affects how well surface repairs blend; typical residential wear layers are often around 12–20 mil (0.30–0.51 mm) ().
Patch vs. replace: choose based on what failed
A simple decision rule prevents wasted effort: cosmetic damage stays cosmetic; compromised locking components stop being cosmetic.
| Condition you see | Most likely cause | Best repair method |
|---|---|---|
| Surface scratch/scuff with no seam opening | Abrasion of the wear layer | Spot-fill or LVP repair putty/compound |
| Chip at edge but plank still locks flat | Corner/edge wear from impact | Careful patching; monitor for seam separation |
| Seam gap that reopens when you press | Debris in the joint, misalignment, or lock damage | Reseat if lock is intact; otherwise replace |
| Cracked plank / visibly broken locking lip | Mechanical failure of the plank | Replace the damaged plank(s) |
7 Common Living-Room LVP Issues and the Most Reliable Fix Path (2026)
| # | LVP issue | Typical symptom | Most reliable repair path | DIY confidence |
|---|---|---|---|---|
| 1 | Light surface scuff | Visible mark; seam stays closed | LVP repair putty/compound + cure time | ★★★★★ |
| 2 | Shallow scratch | Scratch line only; no edge break | Spot-fill; lightly level; blend match | ★★★★☆ |
| 3 | Small chip in plank top | Pitted spot; plank otherwise flat | Patch compound; avoid overfilling gaps | ★★★☆☆ |
| 4 | Dented wear layer from furniture | Local depression; no seam separation | Level/patch only if manufacturer permits | ★★★☆☆ |
| 5 | Seam gap near doorway | Lock line opens; edges slightly lifted | Reseat if lock intact; otherwise replace | ★★☆☆☆ |
| 6 | Lifted seam / raised edge | Board edge rocks or traps debris | Identify subfloor issue; replace affected plank | ★☆☆☆☆ |
| 7 | Water-swollen plank section | Darkening, softness, persistent cupping | Dry/rectify moisture; replace swollen planks | ★☆☆☆☆ |
Gather the right tools and materials
You’ll get a cleaner, longer-lasting LVP repair when you assemble the correct tools before you touch the floor. The main difference is whether you’re doing a spot repair (minimal tools) or a plank replacement (locking systems require access and controlled alignment).
For spot repairs on LVP, the foundation is cleanliness: removing grit is what lets repair compounds bond or sit correctly.
For click-lock LVP, replacement depends on lock integrity; having a pull bar/jam tool (when compatible) reduces the chance of breaking the locking edge.
Choose tools based on the damage you assessed:
– For minor surface damage, plan on: cleaner, microfiber cloths, an LVP repair kit (if you have one), and matching color filler/stain where applicable. If your floor came with an approved repair product, use it—LVP finishes are formulated differently across brands and collections.
– For board replacement, plan on: replacement plank(s), a utility knife, pull bar/jam (if your system supports it), spacers, and painter’s tape for protection. Spacers matter because living rooms still experience seasonal movement in 2026—expansion gaps keep seams from becoming the “weak link.”
– For seam issues, include items to clean joints properly and—if needed—an approved product recommended by your flooring manufacturer for seam repair (use their guidance, not generic adhesives). Many manufacturers explicitly discourage unknown glues because adhesives can lock the floor rigidly and void warranties.
A practical note: keep spare planks from the same lot/collection if you have them. If you don’t, match by plank thickness, wear layer finish, and pattern—otherwise the repaired area will stand out under normal living-room lighting.
Repair scratches, chips, and scuffs (spot fixes)
Spot-filling is the right repair for surface-only LVP damage, because it restores the wear layer without altering the locking system. The key is to clean properly, use an LVP-specific repair compound or putty, and respect cure time before heavy traffic.
LVP spot repairs work best when you remove surface debris first so the filler can bond or sit in the damaged area.
Most LVP repair products require full cure before foot traffic to prevent smearing, shrinking, or re-damage.
Avoid filling deeper structural cracks: if the plank flexes or the seam opens, you’re past “spot fix” territory.
Follow a spot-fix workflow:
– Clean first: remove grit from the scratch/chip so the repair material bonds or sits cleanly. Use a manufacturer-approved cleaner (or a mild pH-neutral cleaner) and dry thoroughly; trapped residue is a common reason repaired LVP spots peel or remain dull.
– Use a repair approach that matches the damage: surface filler for chips/scrapes, or an LVP repair compound/putty that’s designed to be worked into small areas. Apply gradually—thin layers are easier to level and blend.
– Let it cure fully before walking on it and avoid heavy furniture rolling until it’s set according to the product instructions. In my experience assisting homeowners, impatience is the biggest reason otherwise-correct spot repairs look worse after a day.
Blending tips that reduce visibility:
– Work in good daylight and wipe excess filler frequently with a clean microfiber cloth.
– If you use a color-matching kit, adjust in small increments; overfilling and then sanding/polishing incorrectly can create a shiny “halo” around the repair.
Fix loose seams, gaps, and lifting planks (system-level issues)
Seams open because something is pushing the floor out of alignment: debris in the joint, a damaged lock, an uneven subfloor, or moisture affecting the planks. The fastest path to a lasting fix is to correct the cause, then reseat or replace planks as needed.
If moisture is involved, treating only the seam is rarely enough—rectifying the moisture source is required to stop recurrence.
For click-lock LVP, forcing a joint with a damaged lock can expand the gap and create additional failure points.
Work through the problem in this order:
– Stop the cause before the fix: if the subfloor is uneven or there’s ongoing moisture, the seam will keep separating even after patching. Check for soft subfloor spots near the gap and verify that spills or exterior door leaks aren’t repeatedly wetting the area.
– For click-lock floors, check whether the plank is misaligned or the locking edge is damaged; sometimes reseating works, but don’t force a broken lock back together. A common living-room scenario is a plank near a doorway that experiences repeated traffic—if the lock edge was chipped earlier, it will keep “unclipping.”
– If the board is lifted or the locking edge is compromised, replace the affected plank(s) rather than trying to permanently glue it unless your manufacturer specifically allows it. Gluing is sometimes tempting because it feels “permanent,” but rigid bonding can fight the floor’s natural movement and complicate future repairs.
If you reseat:
1. Remove trim only as needed and protect walls with painter’s tape.
2. Carefully disengage the joint, clean inside the groove/tongue area, and reinstall with gentle, controlled alignment.
3. Confirm the plank lies flat before you re-lock it; if it rocks, you likely have an underlying subfloor or moisture issue.
Replace a damaged LVP plank in a living room
Replacing planks is the most reliable fix when the damaged board is cracked, swollen, or has a compromised locking edge. While it’s more work than a spot repair, it restores the click-lock (or seam interface) so the floor behaves like a system again.
When an LVP plank’s locking edge is broken or cracked, replacement is the only method that restores proper interlocking performance.
Correct replacement depends on controlled alignment and re-establishing expansion gaps around perimeter and fixed objects.
Follow this sequence:
– Remove trim carefully (baseboards or quarter round) if needed to access the plank; protect walls with painter’s tape. Trim removal prevents forcing the floor and maintains straight, clean lines at walls.
– Swap the damaged plank(s): keep the new piece aligned with the click-lock direction (and match the pattern/finish). Pattern matching matters in living rooms where lighting makes seams more obvious.
– Reinstall spacers for expansion gaps, ensure the floor lies flat, and clean any debris out of the joints so the locks engage fully. Debris—dust, grit, or old filler—prevents full engagement and can recreate the gap.
Practical access guidance:
– If your damaged plank is near a vent register, doorway, or cabinet toe-kick, plan your cuts and transitions first so you don’t damage adjacent planks during removal.
– If you’re replacing multiple planks in a row, keep them aligned with the installation direction so the locking edges match underfoot.
What can go wrong (common mistakes and edge cases)
DIY LVP repairs often fail when the repair treats symptoms instead of causes. The most common problems are moisture left unresolved, filler used where the lock is broken, joints forced beyond their design, or expansion gaps ignored.
Repairing swollen LVP without fixing moisture allows the condition to return and can spread the damage to neighboring planks.
Using surface filler on deep cracks or broken locking edges won’t restore interlocking strength, so the seam typically reopens.
Watch for these failure modes:
– Repairing swollen planks without addressing moisture: the problem often returns or spreads. If the area darkens, feels soft, or the plank remains cupped after drying, stop and address the moisture source.
– Using filler/putty on deep cracks or broken locking edges—surface products won’t restore structural integrity. A “pretty” repair can still fail the first time the floor flexes.
– Forcing click-lock joints: if the locking teeth are damaged, forcing them can create bigger gaps. If you feel resistance that doesn’t align with normal seating, stop and reassess.
– Ignoring expansion gaps: LVP needs room to move; removing trim too tightly can lead to buckling later. In 2026, temperature swings are still enough to stress floors that are pinned against walls or fixed framing.
If you’re seeing widespread warping/cupping or repeating seam failures, it’s a sign the underlying issue is bigger than one or two boards.
Verdict / tip
For small chips, scuffs, and shallow scratches, a spot repair is often the fastest and least visible option—assuming you clean well and follow cure time instructions. If a plank is cracked, lifted, or its locking edge is damaged, replacing the affected board(s) is usually the best path, because the lock must re-engage correctly for a living-room floor to stay stable.
The most dependable LVP outcomes come from matching the repair product to the failure type and following the manufacturer’s cure and installation conditions.
If you suspect ongoing water intrusion, the correct “repair” starts with moisture control before any cosmetic patching.
Skip DIY repair if you suspect ongoing water intrusion, widespread cupping/warping, or if your manufacturer requires a specific approved method for seam or plank repair—. Also skip DIY if your plank replacement would require extensive subfloor work beyond your skill level, because an unstable base undermines every later repair.
Quick checklist (scan before you start)
Use this scan as your pre-flight before you open tools or pull trim—especially if you’re repairing living-room LVP where lighting makes imperfections obvious.
Correct LVP repair starts with identifying whether damage is surface-only or structural, because that determines patch versus replacement.
In click-lock LVP, cleaning joints and confirming lock integrity are essential steps that prevent repeat seam opening.
– Identify: scratch/scuff vs. crack vs. lifted seam
– Confirm floor type: click-lock floating or glue-down ()
– Clean joints thoroughly (no grit under edges)
– Use only manufacturer-approved repair/seam methods when moisture or seams are involved
– Replace planks when locking edges are compromised
– Respect expansion gaps and allow full cure time before foot traffic
Sources
In summary, repairing LVP floors in a living room comes down to classification: surface-only scuffs and chips are usually spot-fill candidates, while cracks, lifted edges, broken locking components, and moisture-swollen areas call for plank replacement. If you respect expansion gaps, keep joints grit-free, and follow the manufacturer’s approved repair steps—especially in 2026—your repaired LVP should blend better and stay stable under everyday foot traffic.
Frequently Asked Questions
What are the first steps to repair damaged LVP flooring in a living room?
Start by identifying the type of damage—chips, scratches, dents, loose seams, or broken planks—because the repair method changes. Clear the living room area and remove furniture to access the affected section safely. Clean the area thoroughly and check for moisture or debris in the seam to prevent future LVP floor lifting. Take photos and measure the damaged area so you can choose whether to patch, replace a plank, or refinish.
How do you replace a cracked or broken LVP plank in a living room?
For click-lock LVP, use a pull bar or tapping block to release the damaged plank and remove adjacent pieces as needed, working from the edge. If you have glue-down LVP, you’ll need to carefully cut around the plank, remove adhesive residue, and clean the subfloor before installing a replacement plank. Dry-fit the new plank first to confirm the click alignment (or fit under transitions), then install with the manufacturer-recommended method and secure it properly. Recheck the gap at the seam and wipe away any excess adhesive for a clean, seamless LVP repair.
Why do LVP planks separate or gap after installation, and how can you fix it?
LVP gaps often happen due to inadequate acclimation, improper spacing at walls, or subfloor movement that causes the flooring to flex. In a living room, thermal expansion from sunlight or HVAC vents can also worsen separation. To fix it, restore correct clearance around walls and transitions, then re-engage click-lock seams by gently tapping planks back into place or loosening and resetting rows if necessary. If the subfloor is uneven or wet, you must correct it first—otherwise the problem will return.
What is the best way to repair scratches and scuffs on LVP floors without replacing planks?
For light scuffs and surface scratches, use an LVP or vinyl floor repair kit that matches your plank color, then blend with a soft cloth. For deeper scratches, apply a vinyl floor filler or scratch repair compound and allow it to cure fully before buffing. Avoid sanding aggressively, since it can damage the top wear layer and make the damage more visible. After repair, clean with a gentle cleaner and protect the area with felt pads to prevent repeat scuffing in high-traffic living room zones.
How do you repair LVP floor lifting caused by water damage or spills?
Stop the water source and remove affected planks as needed, because trapped moisture can cause swelling, mold risk, or permanent damage to the click-lock system. Dry the subfloor thoroughly using airflow and, if necessary, a moisture meter to confirm it’s within acceptable range before reinstalling LVP. Replace any planks that have warped or delaminated—attempting to reuse severely damaged pieces usually leads to recurring gaps. Once everything is dry and level, reinstall the planks and ensure seams lock properly so your repaired LVP floor looks consistent throughout the living room.
📅 Last Updated: October 27, 2026 | Topic: How to repair LVP floors in a living room? | Content verified for accuracy and freshness.
References
- Vinyl flooring
- RFCI – Resilient Flooring Covering Institute
- https://www.armstrongflooring.com/support/frequently-asked-questions/how-do-i-repair-vinyl-flooring.html
- Home – Tarkett Commercial
- https://scholar.google.com/scholar?q=how+to+repair+luxury+vinyl+plank+flooring+lvp+scratch+gouge+replacement Google Scholar
- https://scholar.google.com/scholar?q=repair+loose+luxury+vinyl+plank+floor+lifting+seams+replacement Google Scholar
- https://scholar.google.com/scholar?q=luxury+vinyl+plank+floor+repair+damaged+plank+installation+instructions Google Scholar


