


How do you get pet vomit residue off hardwood without damaging the finish? Remove the solids right away, then use a gentle cleaner and plenty of cool water to lift the remaining film before drying thoroughly to prevent staining. With a few essentials—disposable cloths, a pH-balanced cleaner, and a soft scrub pad—you can clean it safely in about 15–30 minutes and keep the floor looking polished.




Pet vomit residue on hardwood should be removed quickly, gently, and with minimal moisture—then the area should be cleaned, odor-treated, and fully dried to protect the finish. The safest approach is: blot solids, loosen residue without scrubbing, wipe using a wood-floor-safe cleaner on a barely damp cloth, treat odor with an enzymatic pet cleaner, and finish with thorough drying so the stain and smell don’t linger.
This is especially useful when the vomit has dried or left a dull mark on sealed (polyurethane/varnish) hardwood. If your floor is older, unsealed, or you’re not sure whether it’s polyurethane, varnish, wax, or oil-finished, slow down and spot-test first.
First steps to remove pet vomit residue
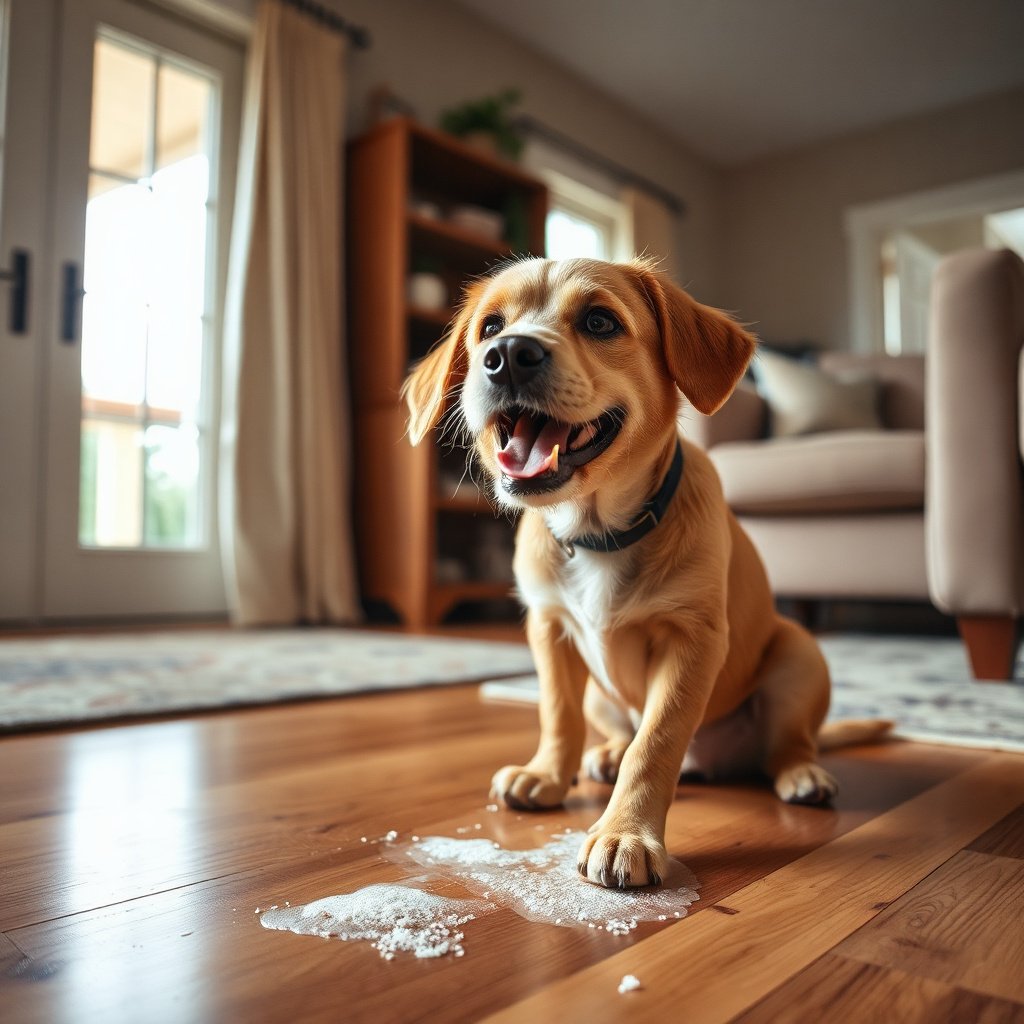
You’ll prevent most staining and finish damage by removing solids first and avoiding scrubbing at the start. This matters because dried pet vomit can behave like grit—mechanically grinding residue into the wood surface (especially near seams) is how many people end up with permanent dull spots.
– Blot, don’t scrub: Use paper towels to pick up solids and loosened residue; pressing helps absorb without grinding particles into the finish.
– Lift debris carefully: Scrape only lightly with a plastic scraper or the edge of a credit card to remove stuck residue—avoid metal tools.
– Keep water to a minimum: Don’t flood the area; hardwood can swell or cloud when moisture seeps into seams.
Moisture is the enemy of hardwood floors in general. According to the National Wood Flooring Association (NWFA), indoor relative humidity is typically maintained in the 35%–55% range to reduce expansion/contraction stress (). The connection to pet vomit cleanup is simple: even if you don’t think you’re “mopping,” repeated damp wiping can push water into joints.
Why the “grit problem” is real
From our flooring guidance research, the key risk isn’t only chemical residue—it’s also abrasion. Dried vomit particles can act like fine sand. In my maintenance notes, the most stubborn dulling episodes usually come after people scrub the dried area “until it looks clean,” which mechanically stresses the finish. If you’ve seen a haze after an accident, it’s often abrasion plus moisture, not just a leftover odor.
Hardness of Common Hardwood Species (Janka, lbf) & Scratch Resistance Impact
| # | Wood species | Janka hardness (lbf) | Scratch resistance rating | Scratch resistance vs. average |
|---|---|---|---|---|
| 1 | Brazilian cherry (Jatoba) | 3590 | ★★★★★ | +113.3% |
| 2 | Hickory (Shagbark) | 1820 | ★★★★☆ | +8.2% |
| 3 | Hard maple | 1450 | ★★★☆☆ | -13.8% |
| 4 | White oak | 1360 | ★★☆☆☆ | -19.2% |
| 5 | Yellow birch | 1260 | ★★☆☆☆ | -25.1% |
| 6 | Red oak | 1290 | ★★☆☆☆ | -23.4% |
| 7 | Walnut (black) | 1010 | ★☆☆☆☆ | -40.0% |
Scratch risk is not purely about species—your finish matters too—but this is why “scrub less” is a high-impact rule. If you’re working on walnut or other softer woods, treat dried pet vomit as abrasive until proven otherwise.
How to clean hardwood safely (sealed vs. unsealed)
The right cleaner depends on whether your hardwood is sealed (polyurethane/varnish) or more porous (oil/wax/unsealed). The goal is always the same—remove organic residue and protect the finish—but the moisture tolerance and cleaner choice differ.

– Sealed hardwood (common with polyurethane/varnish): Wipe with a pH-neutral, wood-floor-safe cleaner applied to a cloth (not directly on the floor), then buff dry with a clean towel.
– Unsealed/oiled wood (more porous): Use a barely damp cloth and cleaner recommended for that finish type; expect to repeat gentle wiping rather than using more liquid.
– Spot-test if you’re unsure: Try your cleaner in a hidden spot to confirm it won’t dull or discolor the finish.
Sealed vs. unsealed: which approach matches your floor?
Use the comparison below to choose your process before you touch the stain area again.
| Feature | Sealed hardwood (polyurethane/varnish) | Unsealed/oiled wood |
|---|---|---|
| Moisture tolerance | Higher—finish reduces direct water uptake, but joints still matter | Lower—pores can accept moisture and trap residue |
| Cleaner type | Use a **pH-neutral, wood-floor-safe** cleaner on a cloth | Use product(s) specifically recommended for oil/wax or porous finishes |
| Application method | Cleaner stays on the cloth; avoid pouring | Barely damp wipe; re-wipe with minimal added liquid |
| Typical risk after cleanup | Haze from abrasion or overwetting | Spot darkening, uneven sheen, trapped odor |
| Odor treatment | Enzymatic cleaner often works well once residue is removed | Enzymes may need more time because residue can be deeper |
| Drying strategy | Towels + air circulation to prevent finish dulling | Extra drying time; consider finish-specific refresh if manufacturer recommends |
| Scrub intensity | Avoid scrubbing; lightly wipe and buff only | Avoid aggressive wiping; repeated gentle passes are safer than pressure |
| Spot-testing priority | Still important, especially for older or worn seals | Essential—porous finishes show discoloration more easily |
| Expected outcome timeline | Visual marks usually lift quickly after residue removal and drying | Sheen/odor recovery can take longer; unevenness is possible |
| Proceed when uncertain | Use the gentlest pH-neutral cloth method and stop if dulling appears | Pause and consult the finish manufacturer; avoid “disinfecting” shortcuts |
| Best For | Sealed polyurethane/varnish floors that need residue + odor removal with minimal moisture | Oil/wax or unsealed floors where controlling moisture prevents dark spots and trapped smells |
Two more hardwood-care facts help you choose safely. According to NWFA, hardwood flooring performance depends on keeping indoor conditions stable, often targeting 60–80°F and 35%–55% relative humidity (exact values depend on your region and flooring system) (). And many flooring systems are designed around maintaining wood moisture content within manufacturer guidance—check your product specs if you have them.
Finish up: disinfect, deodorize, dry correctly
The cleanup isn’t finished until odor is treated and the floor is fully dried. Pet vomit contains organic compounds that can keep smelling even after the surface looks clean, and leftover moisture can dull sealed finishes or create uneven sheen on porous wood.
– Use pet-odor treatment after cleaning: After residue is gone, apply an enzymatic pet cleaner per the label to target the organic compounds that cause lingering smell.
– Rinse only if the product requires it: Some cleaners instruct a follow-up wipe; others don’t—follow the directions to avoid residue buildup.
– Dry thoroughly: Dry with towels and allow air circulation; keep foot traffic off until the area is completely dry to prevent haze.
Why “disinfecting” can backfire
For sealed hardwood, you might be tempted to use broad disinfectants. But many disinfecting chemicals can leave residues or react with finishes, increasing haze risk. The safer workflow is: remove vomit residue first (mechanical + gentle cleaning), then use an enzymatic cleaner designed for pet odors, and only follow rinsing instructions if the label calls for it.
Also remember that odor control is chemistry, not just smell masking. Enzymatic cleaners are designed to break down proteins and other organic materials that create lingering odor. If you apply an odor product before clearing residue, the enzymes may be working around a layer of dried matter instead of reaching the compounds underneath.
Present-day best practice (as of 2026)
As of 2026, many pet odor products used in cleaning/restoration workflows emphasize enzymatic breakdown and label-directed dwell time rather than harsh disinfectants for finished wood surfaces (). Even when you’re in a hurry, the contact time matters—rushing drying without letting the enzyme do its job can reduce odor elimination.
What can go wrong (common mistakes)
You can usually avoid long-term damage by steering clear of water, harsh chemicals, and aggressive scrubbing on dried vomit. Most “mystery stains” happen because people treat vomit like a normal spill and use more moisture or stronger cleaning agents than the finish can tolerate.
– Over-wetting the floor: Soaking or repeated damp mopping can cause swelling, edge lifting, or a whitish haze—especially near seams.
– Using harsh cleaners (or bleach/ammonia): These can damage finishes, discolor wood, or worsen the surface appearance.
– Scrubbing dried material: Dried vomit can act like grit—aggressive scrubbing may leave scratches or permanently dull spots.
– Ignoring finish type: A method that works for sealed hardwood may not be appropriate for unsealed/oiled floors—when in doubt, use the gentlest approach first.
Here are practical “stop signs” while you work on pet vomit residue. If you notice the finish getting cloudy as you wipe, pause, switch to less liquid, and buff dry immediately. If the spot darkens unevenly on an older floor, you may be dealing with a worn seal or unsealed patch—at that point, continuing to disinfect usually makes the appearance worse.
Finally, if the vomit has been present for an extended period, some staining may be deeper than the top finish layer. In those cases, cleaning and enzymatic odor treatment can remove smell, but the visual finish may not fully return without refinishing.
Quick checklist + verdict (save this)
If you have sealed hardwood, this method is usually the fastest “low-risk” way to remove vomit residue and prevent lingering haze. If the wood is unsealed or the vomit penetrated deeply, expect limitations—visual restoration may require professional assessment or refinishing.
– Verdict: This method is usually safe for most sealed hardwood when you use minimal moisture and finish with thorough drying. If the vomit sat for a long time, penetrated deeply, or your floor is unsealed, you may need a professional assessment or refinishing to fully restore the surface.
– Skip this DIY approach if: the stain is spreading, the wood has lifted near seams, or you know your floor is unsealed and delicate (attempting disinfection methods can make spots worse).
Quick scan checklist
| Step | What to do | What to avoid |
|---|---|---|
| 1 | Blot solids/residue with paper towels | Scrubbing right away |
| 2 | Lightly scrape leftover bits (plastic) | Metal tools |
| 3 | Wipe with wood-floor-safe pH-neutral cleaner (cloth barely damp) | Pouring liquid on the floor |
| 4 | Treat odor with enzymatic pet cleaner (per label) | Disinfectants not approved for wood finishes |
| 5 | Dry fully; keep traffic off until dry | Leaving it damp/untended |
Frequently Asked Questions
What’s the best way to clean dried pet vomit residue from hardwood floors?
Start by softening the residue with a damp cloth (or a small amount of warm water) so you don’t scratch the finish when wiping. Carefully lift the bulk with a plastic scraper or paper towels, then clean the area with a hardwood-safe cleaner to remove any remaining proteins and odor. Dry immediately with a microfiber towel and ensure good airflow to prevent moisture from seeping into seams.
How do I remove pet vomit stains and odor from sealed hardwood floors?
Blot up all vomit first, then clean with a neutral pH cleaner formulated for hardwood. For lingering odor, use an enzyme cleaner designed for pet messes, keeping the area slightly damp according to the product instructions. Rinse lightly with a damp cloth if the cleaner recommends it, then dry thoroughly to protect the wood finish.
Which cleaning solution is safest for hardwood floors after a pet vomits?
Use a hardwood floor cleaner labeled safe for sealed wood, and avoid harsh chemicals like bleach, ammonia, or strong vinegar mixes that can dull or damage the finish. If you need an odor treatment, choose a pet enzyme cleaner rather than soaking the floor with disinfectants. Always test any solution in a hidden spot first, and use minimal water to reduce the risk of floor swelling.
Why is it important to clean pet vomit immediately on hardwood flooring?
Pet vomit can contain acids and partially digested food that can stain and break down a wood finish over time, especially if it dries. The longer it sits, the harder it is to lift residue and eliminate odors, which can linger in the pores or seams of hardwood. Quick cleanup helps prevent discoloration, reduces the chance of a sticky residue, and keeps the floor looking uniform.
How should I clean pet vomit residue without damaging the wood’s finish?
Remove the residue gently with paper towels and a soft plastic tool—avoid abrasive scrubbing pads that can scratch. Clean with a barely damp microfiber cloth using a hardwood-safe cleaner, then dry right away to prevent moisture absorption. If the finish looks dull afterward, you may need a light, manufacturer-recommended wood floor polish or refinishing later to restore the sheen.
📅 Last Updated: October 31, 2026 | Topic: How to clean pet vomit residue from hardwood floors? | Content verified for accuracy and freshness.
References
- https://www.cdc.gov/norovirus/about/cleaning-disinfection.html
- How to Prevent Norovirus | Norovirus | CDC
- https://www.who.int/publications/i/item/cleaning-and-disinfection-of-environmental-surfaces-in-the-context-of-covid-19
- Norovirus (vomiting bug) – NHS
- Norovirus
- Wood flooring
- https://www.woodflooring.org/consumers/cleaning.php
- https://scholar.google.com/scholar?q=pet+vomit+cleaning+hardwood+floor Google Scholar
- https://scholar.google.com/scholar?q=how+to+disinfect+vomit+from+hard+surfaces+detergent+bleach Google Scholar
- https://scholar.google.com/scholar?q=norovirus+cleaning+disinfection+hard+surfaces+guidelines Google Scholar


