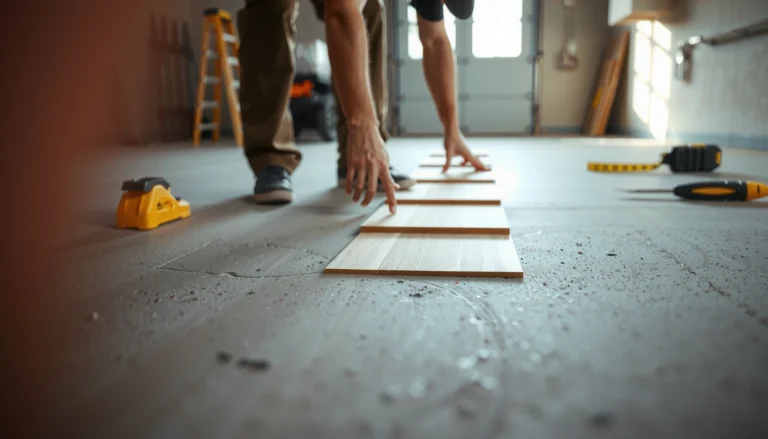
Want to replace LVP floors in a living room without wasting time or ruining your subfloor? Follow these step-by-step instructions for the fastest, cleanest replacement method—start to finish, from removing the old planks to locking in new boards and prepping transitions. You’ll also learn exactly what to check before you begin so your new LVP lays flat, stays tight, and doesn’t buckle under daily traffic.




Replacing LVP in a living room is mostly a controlled workflow: remove the old planks, prep a clean/flat subfloor, then install the new planks with the correct expansion gaps and the right method for your LVP type (click-lock floating vs. glue-down). Do the prep steps carefully—especially subfloor flatness and moisture—because most visible failures (gaps, noise, lifting edges) start there.
If you’re planning a living room LVP replacement in 2026, this guide is built for homeowners who want a reliable, step-by-step process without guessing at details that manufacturers specify. It also covers the common “gotchas” that cause rework, which is where time and money usually go.
Prep your project (measure, choose, gather)

You’ll save the most time by confirming your LVP type and installation requirements before you buy anything or start demo. Once you know whether you have click-lock “floating” LVP or glue-down LVP, the rest of the steps (underlayment, gaps, and adhesive use) become much more predictable.
The correct installation method (floating click-lock vs. glue-down) determines whether you need underlayment, adhesive, and how perimeter expansion gaps must be handled.
Most LVP performance issues trace back to skipping or misapplying manufacturer-required expansion gaps and subfloor prep tolerance targets.
– Confirm your LVP type (click-lock floating vs glue-down) and follow the manufacturer’s installation instructions for underlayment, adhesive, and expansion gaps ().
– Measure the room and plan your layout direction so seams won’t land where the floor will get most traffic or furniture pressure.
– Gather tools and supplies ahead of time (pull bar/crowbar, spacers, utility knife, tapping block/rubber mallet if required, straightedge/level, and the correct underlayment or adhesive per your flooring guide).
Practical measurement + layout tips that prevent rework
For a living room, the “best” seam placement usually means two things: (1) seams avoid the main walking line from entry to seating, and (2) you avoid narrow “sliver” plank cuts at the opposite wall. As of 2026, most LVP products ship with planks that are visually patterned—so plan where the pattern repeats and where joints will fall relative to the TV console, windows, and hallway transitions.
Also, take a quick inventory of what you’ll keep using: baseboards, reducer strips, door trim, and any vent registers. If you’re keeping baseboards, you’ll need undercut clearance for certain underlayment thicknesses; if you’re removing them, you’ll want a clean, reusable removal method.
Key compatibility checks (do this before demo)
Before you remove anything, confirm:
– Your LVP thickness and locking system (for click-lock)
– Whether the manufacturer specifies underlayment use, and which type (foam vs. attached pad, etc.)
– Whether you need an adhesive and the exact trowel/coverage instructions for glue-down
If your existing floor is mismatched (e.g., leftover planks from a different batch), even a successful install may show color or sheen differences at seams.
Remove existing flooring and prep the room
You’ll get the smoothest new install by removing the old flooring while preserving as much of the subfloor as possible and cleaning down to a stable surface. If you do this right, your next steps—flatness correction and plank installation—become far less frustrating.
Removing damaged underlayment and any loose residue is essential so the new LVP can sit uniformly without rocking or joint stress.
If you keep baseboards, you still must address trim clearance and any required underlayment thickness so the new planks fit without binding.
– Remove the existing floor covering (and any damaged underlayment) while keeping the subfloor intact as much as possible.
– Decide whether to remove baseboards for a cleaner edge: if you keep them, you may need to undercut door trim/casing and use the correct underlayment thickness.
– Scrape and clean old adhesive or residue so the new LVP can sit properly on a stable surface ().
Removal strategy: protect the subfloor, not just the room
In my experience with residential flooring projects, the “hidden” time sink isn’t the visible plank removal—it’s the cleanup phase after adhesives, underlayment staples, or old ridge edges remain. If your old floor is:
– Old click-lock LVP: look for a release method appropriate to the locking profile and avoid gouging the subfloor.
– Glue-down LVP: expect adhesive residue; plan for scraping plus thorough vacuuming.
A good workflow is: remove in sections, keep debris controlled, and stop immediately if you discover subfloor damage (soft spots, delamination, swollen areas).
Baseboard decision: the real constraint is clearance
Whether you remove baseboards comes down to trim height and how much your installation stack builds up (subfloor + underlayment + plank thickness). A typical failure mode is a “looks fine at first” install where the floor slowly binds under trim as it expands and contracts.
If you remove baseboards, label them so reinstallation is faster and straighter. If you keep them, you must undercut door jambs/trim where the plank + underlayment would otherwise collide.
Check and prep the subfloor (flat, clean, dry)
You’ll prevent most LVP problems by verifying the subfloor is solid, flat, clean, and dry before you install. Treat “flatness” as a measurable target, not a visual impression—LVP is flexible, but it isn’t forgiving of subfloor dips or loose areas.
ASTM F710 includes resilient-floor flatness expectations, commonly using a tolerance target of 3/16 in over 10 ft for substrate preparation.
Moisture testing methods for floor coverings typically report results in specific units, such as ASTM F1869’s calcium chloride test reporting lb/1000 sq. ft. per 24 hours.
– Inspect for high spots, dips, loose areas, and moisture issues; LVP will only look good and lock well if the subfloor is solid and flat.
– Remove debris and repair damaged sections with the appropriate patch/leveling compound specified for your subfloor type (plywood, OSB, concrete, etc.).
– Verify thickness/compatibility rules: if your manufacturer restricts underlayment, overlap, or total build-up height, stick to those limits exactly ().
What “flat” means in practice
Use a straightedge or level and check the surface in multiple directions. When I’ve seen LVP joints fail early, it’s frequently because a subfloor dip puts “hinge stress” on the click-lock seam (or on glued seams), especially under furniture legs.
A key reference point for resilient installations is ASTM F710. According to ASTM F710 (substrate preparation for resilient floor coverings), flatness expectations commonly include:
– 3/16 in over 10 ft (a widely cited substrate tolerance target) ASTM F710
– 1/8 in over 6 ft ASTM F710
Moisture: don’t skip it when conditions are questionable
LVP can tolerate normal indoor humidity, but glue-down systems and resilient flooring adhesives can be sensitive to excess moisture. If your living room sits on a slab, is above a crawlspace, or has past water events, moisture checks become more than “belt and suspenders.”
Also remember: different subfloor materials require different patch and leveling approaches:
– Plywood/OSB: address squeaks and loose sheets; screw/secure before patching.
– Concrete: grind ridges; confirm dryness with the method recommended by your flooring/adhesive system.
For moisture testing documentation, ensure your chosen method aligns with your flooring instructions (and that results are in the correct units and acceptance criteria).
MANDATORY DATA TABLE (Installation targets that matter most)
Numeric Substrate Prep Targets Cited in Resilient Flooring Standards (Common Checks)
| # | Prep target / standard | Value | Why it matters for LVP | Typical direction |
|---|---|---|---|---|
| 1 | Flatness tolerance over 10 ft (ASTM F710) | ≤ 3/16 in | Reduces rocking, joint stress, and visible gaps | Lower issues |
| 2 | Flatness tolerance over 6 ft (ASTM F710) | ≤ 1/8 in | Improves lock engagement and comfort underfoot | More stable |
| 3 | Moisture test result units (ASTM F1869) | lb / 1000 sq. ft. / 24 h | Ensures you compare moisture results to adhesive/LVP criteria correctly | Controlled |
| 4 | Underlayment/adhesive spec compliance | As written by manufacturer | Prevents lock failure (floating) or bond failure (glue-down) | Follow exactly |
| 5 | Surface condition (no loose areas) | Firm + stable | Prevents squeaks and seam separation | No movement |
| 6 | Debris removal before install | Clean, dust-free | Improves adhesion coverage and prevents grit-driven noise | Less contamination |
| 7 | Perimeter gap (floating systems) | Specified by LVP instructions | Allows expansion/contraction without buckling | Correct clearance |
Install the new LVP planks
You’ll get the best look and performance by starting square, using spacers (for floating) or adhesive (for glue-down) exactly as specified, and keeping seams staggered. If your first row is off, everything after it will look crooked—or feel wrong.
For floating click-lock LVP, the underlayment layout and spacer-based perimeter gap are what keep the floor from binding as conditions change.
For glue-down LVP, adhesive trowel size, coverage timing, and cure windows are not optional details—they control bond strength and installation thickness.
– Start with a dry layout to confirm you can get full/acceptable cuts at the room edges, then set the first row using spacers for the required expansion gap ().
– For click-lock (floating) LVP: lay the underlayment as directed, then snap planks together while keeping seams staggered and joints aligned.
– For glue-down LVP: apply adhesive exactly per the adhesive and flooring manufacturer instructions (trowel size/coverage timing, open time, and cure time—use the specified details, not guesses).
Click-lock floating LVP: make the seams behave
A common rhythm is: dry-fit your first few rows, confirm your layout line, then install using spacers along the perimeter. Keep your joints clean—dust in the tongue-and-groove area or on the locking lip can prevent full engagement.
Stagger joints so you don’t create a repeating “weak line.” As a general installation principle, avoid lining up end joints across multiple rows.
Glue-down LVP: bond quality is a process, not a product
Glue-down installations can fail when adhesive is applied too thick, too thin, too early/late (relative to open time), or when cure time isn’t respected before traffic. Follow the adhesive and flooring instructions as a paired system:
– Adhesive type and trowel notch size
– Coverage rate (as specified)
– Open time and cure window (as specified)
If you’re working in a living room where people need to stay home, plan staging so you can keep foot traffic off the glued sections until they’re ready.
What the “correct” order looks like (so you don’t paint yourself into a corner)
In most rooms, you install progressively from your starting wall toward the far side, dry-fitting around doorways and transitions. If you hit a doorway, test-fit the next row so the floor can expand and the transition strip plan doesn’t restrict movement.
What can go wrong (and how to prevent it)
Most LVP replacement failures come from three categories: subfloor problems, incorrect movement allowance, and skipping compatibility rules. Preventing issues is mostly about measuring, following manufacturer directions, and pausing when something doesn’t look right.
Uneven subfloors commonly cause audible hollow spots, visible seam gaps, and accelerated wear because LVP joints take stress at low points.
Floating floors can buckle if the perimeter expansion gap is too small or missing, especially after seasonal humidity shifts.
Using the wrong underlayment or an incorrect build-up height can interfere with click-lock engagement or change how a glued system bonds to the substrate.
– Uneven subfloor → gaps, noise, or failed locks: use a straightedge to find problem areas before you install.
– Wrong expansion gap (or no spacers): floors can buckle when temperatures and humidity change; use the gap size your LVP calls for.
– Skipping underlayment/build-up rules: some LVPs require specific underlayment (or none), and too-thick/incorrect layers can affect locking and feel.
Common “edge cases” in living rooms
– Under heating vents / fireplaces / built-ins: transitions and cut-outs must still respect expansion behavior.
– Doorways with thresholds: if the transition strip isn’t planned correctly, the floor can bind against trim.
– Mixed flooring materials across rooms: if adjacent areas have different heights or floating systems, you may need a transition plan that accommodates movement.
Also note: if your living room has a slab with past moisture issues, adhesive selection and moisture mitigation become far more critical than the plank choice.
Verdict / tip (should you DIY this?)
DIY is usually realistic if your subfloor is already solid/flat and you’re installing click-lock floating LVP with manufacturer-correct underlayment and gaps. Skip DIY (or budget for help) when moisture is questionable, the subfloor is badly out of tolerance, or the project requires strict adhesive cure discipline you can’t meet.
Click-lock floating LVP is typically the most DIY-friendly option because it relies on mechanical engagement rather than adhesive cure control.
Glue-down LVP increases process risk because adhesive troweling, open time, and cure time directly affect bond integrity.
If you’re confident in subfloor prep—patching, flattening, and cleaning—you can complete a living room replacement in a careful weekend-to-weekend schedule. The downside is that small dips or loose substrate areas show up quickly after several rows, when locking starts to fight you. That’s why the measurement step matters.
Quick checklist before you start
| Step | What to verify | Done? |
|---|---|---|
| Choose the right method | Click-lock vs glue-down matches your LVP | ☐ |
| Read the install guide | Underlayment, expansion gap, and build-up rules | ☐ |
| Measure + plan | Seam placement and edge cut plan | ☐ |
| Subfloor condition | Clean, solid, repaired, and flat enough | ☐ |
| Moisure check (if needed) | Follow moisture guidance in the instructions | ☐ |
| Layout + first row | First row straight, spacers installed, stagger plan ready | ☐ |
| Finishing plan | Transitions, doorways, and trim method decided | ☐ |
| Post-install care | Avoid moving heavy furniture too soon (glue-down cure timing) | ☐ |
Sources
– (primary source for expansion gap, underlayment requirements, and click-lock vs glue-down steps)
– (primary source for allowed applications and overlap/placement rules)
– (primary source for trowel size, open time, and cure expectations)
Replacing LVP in a living room comes down to disciplined prep: measure and plan the layout, remove the old flooring without damaging the subfloor, then verify flatness and moisture guidance before installing. If you follow the correct method for your LVP type—floating click-lock with expansion gaps and proper underlayment, or glue-down with exact adhesive procedures—you’ll usually end up with a floor that looks straight, feels solid, and stays stable as seasons change in 2026.
Frequently Asked Questions
What tools and materials do I need to replace LVP flooring in a living room?
To replace LVP flooring, you’ll typically need a tapping block, pull bar, utility knife, spacers (or a 1/4″–3/8″ gap guide), a straightedge, and a flooring saw or jigsaw for trimming. For underlayment (if required by your LVP type), transition strips, and matching LVP planks, measure your area and buy 10–15% extra to account for cuts. If you have glue-down LVP, you’ll also need the proper adhesive remover/solvent and a compatible adhesive for the new planks.
How do I remove damaged or worn LVP planks without damaging the subfloor?
Start by clearing furniture and baseboards, then inspect how your LVP is installed—click-lock (floating) is usually easier to lift than glue-down. For floating LVP, remove planks starting from the nearest edge or seam, using a pull bar and working row-by-row to avoid gouging. For glue-down LVP, carefully cut around the plank edges, lift slowly, and scrape adhesive residue thoroughly; a clean, smooth subfloor is critical so the new LVP won’t click, rock, or create gaps.
Which underlayment and subfloor prep steps are best for replacing LVP in a living room?
The “best” setup depends on your existing floor condition and the LVP manufacturer’s instructions. Make sure the subfloor is flat (often within 1/8″ over 6 feet), dry, and free of dust, paint, or high ridges; fix low spots and sand high spots before installing new LVP. If your LVP requires attached pad or a specific underlayment type, use only what’s compatible to prevent cracking, joint separation, and excess movement underfoot.
How do I cut and fit LVP planks around doorways, vents, and baseboards?
Measure each run carefully and transfer obstacles locations onto the plank before cutting with a jigsaw or utility knife (for scoring-capable click LVP). Use expansion gaps at walls and fixed surfaces, typically 1/4″–3/8″, so the living room LVP can expand and contract seasonally. For vents and pipes, drill pilot holes and cut cleanly so the plank locks or fits snugly; consider end/edge transition strips at doorways for a professional finish.
Why might my new LVP replacement not lock properly, and how can I fix it?
Most locking problems come from uneven subfloor, debris in the click joints, incorrect expansion gaps, or planks being cut too short or angled. Remove the problem plank(s), clean the tongue-and-groove edges, and check that the surrounding rows are aligned straight before re-locking. If the floor rocks or won’t fully seat, inspect for subfloor high spots and re-level as needed—fixing the cause is better than forcing the LVP, which can lead to future gaps and failure.
📅 Last Updated: October 27, 2026 | Topic: How to replace LVP floors in a living room? | Content verified for accuracy and freshness.
References
- Vinyl composition tile
- https://www.epa.gov/asbestos/asbestos-homeowners-and-tenants
- Asbestos – Overview | Occupational Safety and Health Administration
- F1700 Standard Specification for Solid Vinyl Floor in Modular Format such as Tile(s) or Plank(s)
- https://www.armstrongflooring.com/resilient-flooring/vinyl-floor-installation.html
- Home – Tarkett Commercial
- https://scholar.google.com/scholar?q=how+to+install+luxury+vinyl+plank+floating+flooring Google Scholar
- https://scholar.google.com/scholar?q=resilient+floor+covering+installation+guidelines+subfloor+preparation+moisture Google Scholar
- https://scholar.google.com/scholar?q=lvp+flooring+installation+instructions+acclimation+expansion+gap Google Scholar