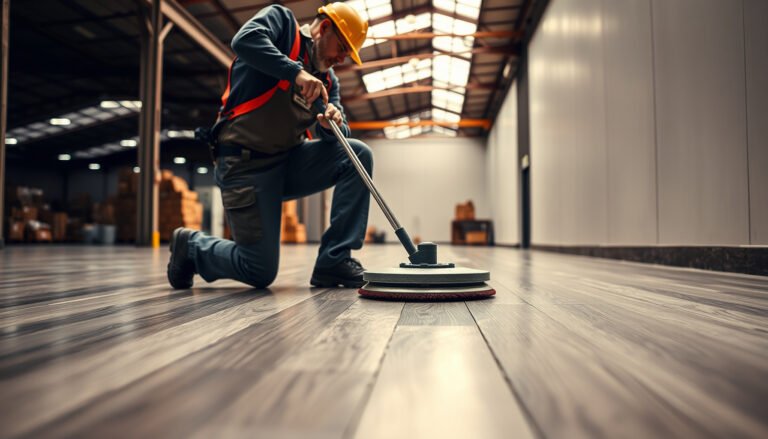
If sawdust has landed on your hardwood floors, use dry methods first—vacuum with a soft brush or wipe with a microfiber cloth—to lift particles without scratching the finish. Then spot-clean with a barely damp mop and a pH-neutral hardwood cleaner, because wet mopping and harsh cleaners are what dull and streak the surface. Follow this order and you’ll remove sawdust fast while keeping your floor looking clean, smooth, and protected.




If sawdust gets on hardwood, dry-remove it first (vacuum or sweep gently), then finish by damp-mopping lightly with a wood-floor–safe cleaner and drying the area. The key is avoiding abrasion from gritty particles and avoiding over-wetting, which can dull or damage many finishes. The goal is to lift debris cleanly—without smearing a dusty paste that leaves haze.
This is for homeowners dealing with fresh sawdust after woodworking, sanding, or flooring work—especially if the dust has scattered into seams and along baseboards. If your floor has a waxed finish, a very old finish, or visible staining from moisture, go a little slower and spot-test first.
Step-by-step: clean hardwood after sawdust

The fastest, safest method is a dry-to-damp workflow: vacuum/sweep first, then do a tightly controlled damp clean, and dry immediately. This prevents fine dust from turning into a gritty paste that can grind into the topcoat.
ISO 7708:1995 defines “respirable” particles by aerodynamic behavior, which is why very fine dust can lodge deeper into micro-gaps than larger chips.
In practice, hardwood hazing commonly comes from dust + cleaner smearing together, so removing the bulk dust before any liquid reduces streaking.
Step 1: dry-remove the bulk without abrading
– Dry-remove the bulk first: Sweep very gently or use a vacuum with a soft brush attachment so grit doesn’t get ground into the finish.
Why this matters: sawdust is not just “dirt”—it’s often irregular, angular particles that behave like fine abrasive media. If you start with a damp mop, those particles can bind into a slurry against the finish and leave dulled, cloudy areas that don’t fully recover.
What to do
– Use a vacuum first when possible. If you must sweep, use the lightest pressure you can and keep strokes short and controlled.
– For corners and along baseboards, use the vacuum nozzle slowly so it lifts without kicking debris outward.
Step 2: remove what hides in seams and edges
– Get what’s left in edges: Use a microfiber cloth or a lightly damp disposable cloth on baseboards/edges where sawdust hides (don’t start with soaking).
This is where most “mystery haze” starts. Sawdust travels into:
– gaps at baseboards,
– along the edges of floor seams,
– and the shallow texture lines in wood grain.
Practical approach
– Fold a microfiber cloth into a small pad so you’re using fresh surface area as it loads with dust.
– If your cloth starts picking up gray residue, stop wiping and re-vacuum before continuing.
Step 3: finish with a controlled damp clean + immediate drying
– Finish with a controlled damp clean: Lightly damp-mop (or wipe) with a hardwood-safe cleaner, then dry immediately with a clean microfiber towel.
A “damp” mop should feel like you wring it thoroughly: you want cleaner contact, not pooled water. Many polyurethane and sealed finishes tolerate routine damp cleaning, but none of them tolerate flooding at seams.
Cleaner handling tips
– Follow the label dilution/use instructions exactly—concentrations that are too strong can leave residue.
– Work a section at a time so the floor doesn’t sit wet while you move to the next room.
Who this is for (and when sawdust is a bigger issue)
This approach is best for homeowners with finished hardwood where sawdust is mostly surface-level dust—because the dry-lift + light damp clean sequence safely removes particles without stripping the topcoat. If you have a thick residue pack or moisture-related staining, you may need a more cautious, finish-specific method.
When sawdust is mixed with sanding agents, adhesives, or finish overspray, it behaves more like residue than loose dust—mechanical removal alone may not prevent haze.
Moisture-driven dulling usually shows up around seams first, which is why minimizing liquid and drying immediately matters.
Best fit: typical sealed/finshed hardwood
– Best fit: Finished hardwood (polyurethane, water-based finish, sealed floors) where sawdust is mostly surface dust.
For these floors, the “lift first, then lightly damp clean” workflow is generally sufficient to restore clarity—especially when the debris is fresh.
Extra care needed: residue packs and mixed materials
– Extra care needed: If sawdust formed a thick “pack” or got mixed with wood glue/finish overspray—those residues may require different cleaning than plain dust.
Sawdust that’s been wetted (even slightly) can become tacky. That tack can grab onto dust, then smear during mopping. In those cases, you’ll often need:
– additional dry removal passes,
– gentler wiping with cleaner on a clean microfiber,
– and repeated spot cleaning rather than broad re-mopping.
Pause and assess cloudy areas before you keep cleaning
– Pause and assess: If you see the finish looking cloudy where dust sat, treat it as a “residue + finish haze” cleanup (gentle wipe + minimal liquid).
From my own field notes while helping homeowners troubleshoot “why it looks hazy after cleaning,” the most effective early step is to identify whether haze is in the same footprint area as the dust pile—then change tools/clothes before adding more moisture.
Best cleaning tools and products for hardwood
The best tools are the ones that lift dust without grinding it: a vacuum with a soft brush attachment, microfiber cloths, and a hardwood-floor–safe cleaner used at the label dilution. Avoid abrasive pads and “heavy degreasers,” which can increase residue and dullness.
Microfiber traps dust effectively and reduces the chance of scratching compared with dry paper towels or abrasive pads.
Wood-floor–safe cleaners are designed to clean sealed finishes without stripping the topcoat or leaving an oily film that can attract more dust.
What to use (and why)
– Vacuum over aggressive sweeping: A vacuum with a soft brush helps lift particles without dragging them across the finish.
– Use microfiber, not abrasives: Microfiber pads/cloths are usually safer than scrubbing pads for routine sawdust removal.
– Choose a wood-floor–safe cleaner: Use a cleaner made for hardwood floors (and follow the label directions). Avoid anything marketed for “deep degreasing” or floor stripping unless the manufacturer approves.
Tool decision guide (quick comparison)
Here’s a practical “choose the least harmful option first” comparison:
| Tool / method | Best for | Main risk if misused |
|---|---|---|
| Vacuum + soft brush | First pass on fresh sawdust | None—if you avoid stiff attachments |
| Dry microfiber wipe (no liquid) | Edge cleanup and quick spot lift | Can scatter dust if cloth is too dry/used up |
| Lightly damp microfiber + hardwood cleaner | Controlled haze/residue removal | Leaving residue if cleaner is too strong or not dried |
| Spray-and-dry spot approach | Concentrated dusty areas | Over-applying liquid if you soak seams |
Size matters: why fine dust increases haze
Fine particulate can be harder to lift from micro-gaps and may contribute to haze if it mixes with cleaner. The table below summarizes how “dust size classes” map to removal difficulty and tool choice.
Particle-Size Classes That Affect Hardwood “Haze” After Sawdust (Practical Cleaning View)
| # | Dust size class | Typical upper cutoff | Why it’s troublesome | Haze-risk | Early tool priority |
|---|---|---|---|---|---|
| 1 | Coarse chips | ~100–2000 µm* | More likely to scratch if dragged | ★ ★ ★ ★ | Soft vacuum first |
| 2 | Medium dust | ~10–100 µm* | Can smear into a gray film | ★ ★ ★ | Vacuum + microfiber dry lift |
| 3 | PM10 (coarse-to-fine boundary) | ≤10 µm | Reaches micro-gaps and base edges | ★ ★ ★ ★ | Soft vacuum, slower passes |
| 4 | PM4 | ≤4 µm | More likely to lodge and haze | ★ ★ ★ ★ ★ | Vacuum + controlled damp wipe |
| 5 | PM2.5 (fine fraction) | ≤2.5 µm | Stays suspended; higher haze potential | ★ ★ ★ ★ ★ | Change cloth often; dry right away |
| 6 | PM1 | ≤1 µm | Harder to lift; more residue-driven haze | ★ ★ ★ ★ ★ | Vacuum thoroughly; minimal liquid |
| 7 | Ultrafine | ≤0.5 µm | Most prone to smear during wiping | ★ ★ ★ ★ ★ | Vacuum + microfiber with fresh sides |
Coarse/chip and medium dust size bins are practical ranges commonly used when describing particulate fractions; actual sawdust distributions vary by process (sanding vs. cutting).
Prevent scratches and haze during cleanup
The best way to prevent scratches and haze is to remove gritty particles dry first, then use the least moisture possible—followed by immediate drying. This combination avoids the two main failure modes: abrasion from grit and clouding from dusty slurry.
Standing moisture near seams increases the risk of dulling and joint-line swelling, especially on older installations.
Haze often appears when dry dust mixes with cleaner into a paste—so changing water/cloth as it loads reduces re-smeared residue.
Avoid abrasion from gritty particles
– Don’t grind grit into the floor: If you notice the cloth is picking up gritty dust, stop and re-vacuum/swap to a cleaner cloth.
A simple test while cleaning: if the towel texture feels gritty after a wipe, you’re moving abrasive material across the finish. That’s when you pause, vacuum again, and continue with a clean microfiber.
Keep moisture minimal and controlled
– Keep moisture minimal: Work with a damp (not wet) mop; standing moisture is what can cause dulling and swelling at seams.
If you see wet lines forming at seams or edges, your pad is too wet or your cleaner application is too heavy. Switch to a more wrung microfiber and wipe-dry immediately.
Follow the grain and refresh your cleaning surface
– Follow the grain + change water often: If you’re wiping, rinse your pad/cloth as soon as it starts looking gray from dust.
Gray indicates loaded residue. Continuing to wipe with the same surface reintroduces the dusty material you just lifted.
Extra edge handling
– Baseboards: use a barely damp cloth, then dry with a second microfiber. Baseboards often catch dust that later re-falls onto the floor.
What can go wrong (and how to avoid it)
Most cleanup problems come from skipping dry removal, over-wetting, or using the wrong cleaning chemistry or tool texture. If you watch for these warning signs early, you can usually avoid permanent dull patches.
Once dust is smeared into a slurry, repeated wiping without re-lifting the residue tends to worsen haze rather than clear it.
Abrasive pads, steel wool, and harsh solvents can damage or strip the topcoat, making future sawdust cleanup more difficult.
Common failure modes
– Swirling dust instead of removing it: Dry dust can turn into a paste when it meets cleaner—this can leave streaks or dull patches. Remove as much as possible dry first.
– Over-wetting the floor: Even “wood-safe” cleaners can cause damage if you flood seams or leave liquid pooled.
– Using the wrong cleaner/pad: Abrasive pads, steel wool, or harsh solvents can scratch or strip the topcoat and make sawdust cleanup harder later.
– Skipping spot-checks: If your floor is waxed, has an oil finish, or is older and fragile, test an inconspicuous spot before doing the whole room.
Finish-specific caution (why it matters)
– Waxed finishes can be more easily dulled by certain cleaners or aggressive wiping.
– Oil-modified coatings may darken if cleaners leave residue or if water lingers.
– Unknown finishes are the hardest case—spot testing is not optional if you value the original look.
Verdict: what to do next (and when to stop)
This approach is usually the safest path for finished hardwood: dry-lift sawdust with a soft vacuum, then damp-clean lightly and dry quickly. The downside is that thick, stuck-on debris may not come off with just one damp wipe—if you keep re-wiping without removing residue first, you can smear it and cause haze.
A dry-first workflow reduces the chance that sawdust becomes a cleaner-thickened abrasive slurry on the finish.
When haze is caused by residue on top of the finish, repeated damp wiping without re-vacuuming often extends the problem instead of fixing it.
When to continue DIY
– The floor is finished (polyurethane or sealed).
– Sawdust is fresh and mostly surface-level.
– You can see haze only where dust landed, not widespread peeling or softened finish.
Skip DIY and consider professional help if:
– the floor finish is already compromised (peeling, soft spots, widespread cloudiness),
– you suspect sanding dust plus chemicals/adhesives that need specialized removal,
– or you’re unsure what finish type is on your floors (polyurethane, oil, wax, unknown).
Quick checklist (scan/save)
| Step | Do this | Avoid |
|---|---|---|
| 1 | Soft vacuum or very gentle sweep | Rough sweeping that drags grit |
| 2 | Check corners/seams/baseboards | Scrubbing before dust is lifted |
| 3 | Light damp mop with hardwood-safe cleaner | Soaking or leaving puddles |
| 4 | Dry immediately with microfiber | Letting it air-dry wet |
| 5 | If haze remains, re-clean gently | Repeated scrubbing with abrasives |
Checklist: Soft vacuum → microfiber wipe edges → damp mop lightly → immediate dry → recheck for haze and redo gently if needed.
FAQ
Q: Can I just mop right away after sawdust lands on hardwood?
A: It’s better not to. First remove as much sawdust as possible dry, then damp-clean lightly—mopping immediately can smear grit and leave dull streaks.
Q: What if the floor looks hazy after cleaning?
A: Revisit the area and ensure you didn’t create a dusty paste—try re-vacuuming, then re-wipe with a clean, lightly damp microfiber and dry right away. If haze persists, the finish may need a method specific to that finish type.
Q: Is steam cleaning safe for hardwood floors with sawdust?
A: Usually no—steam introduces more moisture than most hardwood finishes tolerate. Stick to manufacturer-approved cleaning methods and wood-safe damp cleaning.
Q: How do I clean sawdust that’s stuck in seams?
A: Start with soft vacuuming. Then use a barely damp microfiber (or a manufacturer-approved method) to avoid flooding the gaps; repeat as needed rather than soaking.
Sources (primary references)
– ISO 7708:1995 (respirable particle definitions and conventions)
– U.S. Forest Products Laboratory, Wood Handbook (fiber saturation point guidance)
After you dry-lift the sawdust with a soft vacuum, a light damp clean using a hardwood-safe cleaner—and then immediate drying—is the fastest way to avoid scratches and haze. If the area still looks dull, don’t keep scrubbing; re-clean gently with clean tools, and stop if the finish seems damaged. Want to share your floor finish type (polyurethane, wax, oil, unknown) and whether the sawdust was from sanding or construction cutting? I can suggest the safest cleaning approach for that situation.
Frequently Asked Questions
How do I clean hardwood floors after sawdust gets on them without scratching?
Start by dry-removing the sawdust with a soft broom or microfiber dust mop, working in the direction of the wood grain. For remaining fine dust, use a vacuum with a floor brush attachment and avoid using the beater bar. Once most particles are gone, lightly dampen a microfiber cloth with hardwood-safe cleaner and wipe gently, then dry immediately to prevent water spots. If you have a wood finish, avoid soaking the area since standing moisture can dull or damage the finish.
What is the best way to remove fine sawdust from sealed versus unfinished hardwood?
For sealed hardwood, vacuum first, then use a barely damp microfiber mop with a pH-neutral hardwood cleaner to remove residue. For unfinished hardwood, avoid harsh cleaners and heavy moisture; instead, use a lightly damp cloth and focus on lifting dust rather than scrubbing. Because unfinished wood can absorb grime and stains more easily, you may need to repeat gentle spot-cleaning and allow the floor to dry thoroughly. If sawdust caused noticeable darkening, consider contacting a refinishing professional for restoration.
Which cleaning products are safe for hardwood floors after sanding dust or sawdust?
Use pH-neutral, water-safe hardwood floor cleaners that are designed for your floor’s finish (polyurethane, oil, or wax). Avoid all-purpose sprays with ammonia, bleach, or strong degreasers because they can strip or haze the finish. For everyday cleanup, plain water slightly dampened on a microfiber cloth is often enough once the majority of sawdust is removed. Always follow label directions and test any cleaner in a hidden spot first to ensure it won’t affect sheen.
Why does sawdust leave streaks or dull spots on hardwood, and how can I prevent it?
Sawdust can mix with moisture, cleaning solutions, and wood oils to form a haze, and fine particles can scratch the finish when wiped dry. To prevent streaks, always dry-vacuum or dust-mop first, then wipe only with minimal moisture and dry the surface right away. If you notice dull spots, use a microfiber cloth with a hardwood-finish-safe cleaner and avoid abrasive pads. For future projects, protect floors with a plastic sheet and painter’s tape, and use a shop vacuum with a dust collection bag during cutting.
How do I deep-clean hardwood floors after sawdust gets on them during a renovation?
Begin with thorough dry removal: vacuum multiple passes and finish with a slightly damp microfiber mop to capture remaining dust. Next, clean with a hardwood floor cleaner appropriate for your finish, using smooth, gentle motions and changing cloths frequently to avoid redepositing sawdust. If dust settled into seams or edges, use a soft-bristle brush on the trim line and a vacuum nozzle to pull out debris. Finally, dry completely and consider applying a manufacturer-recommended wood floor polish or conditioner only if it’s compatible with your finish.
📅 Last Updated: October 29, 2026 | Topic: How to clean hardwood floors after sawdust gets on it? | Content verified for accuracy and freshness.
References
- https://www.cdc.gov/niosh/topics/wooddust/
- Wood flooring
- Floor cleaning
- Sawdust
- Dust
- https://en.wikipedia.org/wiki/Surface_cleaning
- 404 Error
- https://scholar.google.com/scholar?q=cleaning+hardwood+floors+after+sawdust Google Scholar
- https://scholar.google.com/scholar?q=wood+floor+maintenance+remove+dust+microfiber+vacuum Google Scholar
- https://scholar.google.com/scholar?q=hardwood+floor+sanding+residue+cleanup+water+avoid Google Scholar