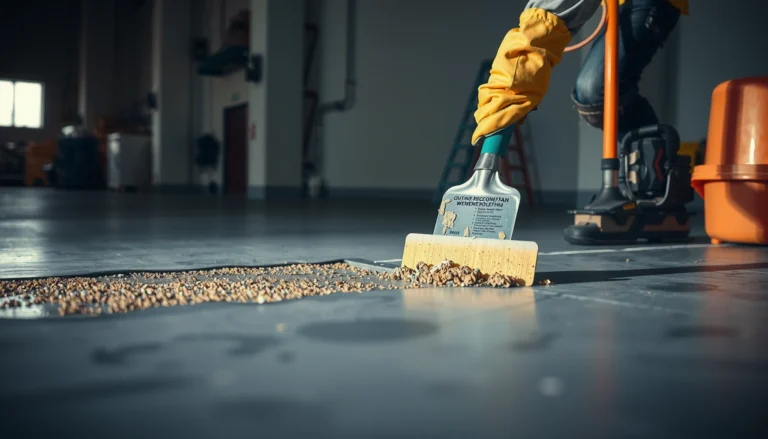

Squeaks in garage floors are fixable, and the fastest reliable solution is to locate the exact movement point and repair the subfloor fastening that’s failed. This step-by-step guide walks you through diagnosing where the squeak comes from, then tightening, shimming, or replacing the affected boards or fasteners to stop the noise for good. If your garage squeaks when you step, this is the do-this-next process that gets results without guesswork.


If your garage floor squeaks, the real fix is stopping movement between the slab and whatever sits on top of it—most often along joints, cracks, or a loose subfloor/underlayment. Start by pinpointing the exact spot that moves (walk, drive, and press the area in a repeatable way), then stabilize that movement using the right filler, sealant, shimming, or fastening approach rather than only patching the surface.
If your “floor” is bare concrete, epoxy-coated, or a layered system (like plywood/OSB over the slab), the squeak path is usually the same: one layer shifts microscopically, and that tiny change becomes audible under load. In the most workable repairs, you’re not “gluing” the slab to silence it—you’re preventing relative movement where the assembly is designed to be stable.
This guide is for homeowners who hear squeaks when stepping, moving storage carts, or rolling a vehicle over a specific strip, crack line, board seam, or corner. It applies whether the garage is mostly concrete or includes coatings/overlays and floating underlayment layers.
Find the source of the squeak (don’t guess)
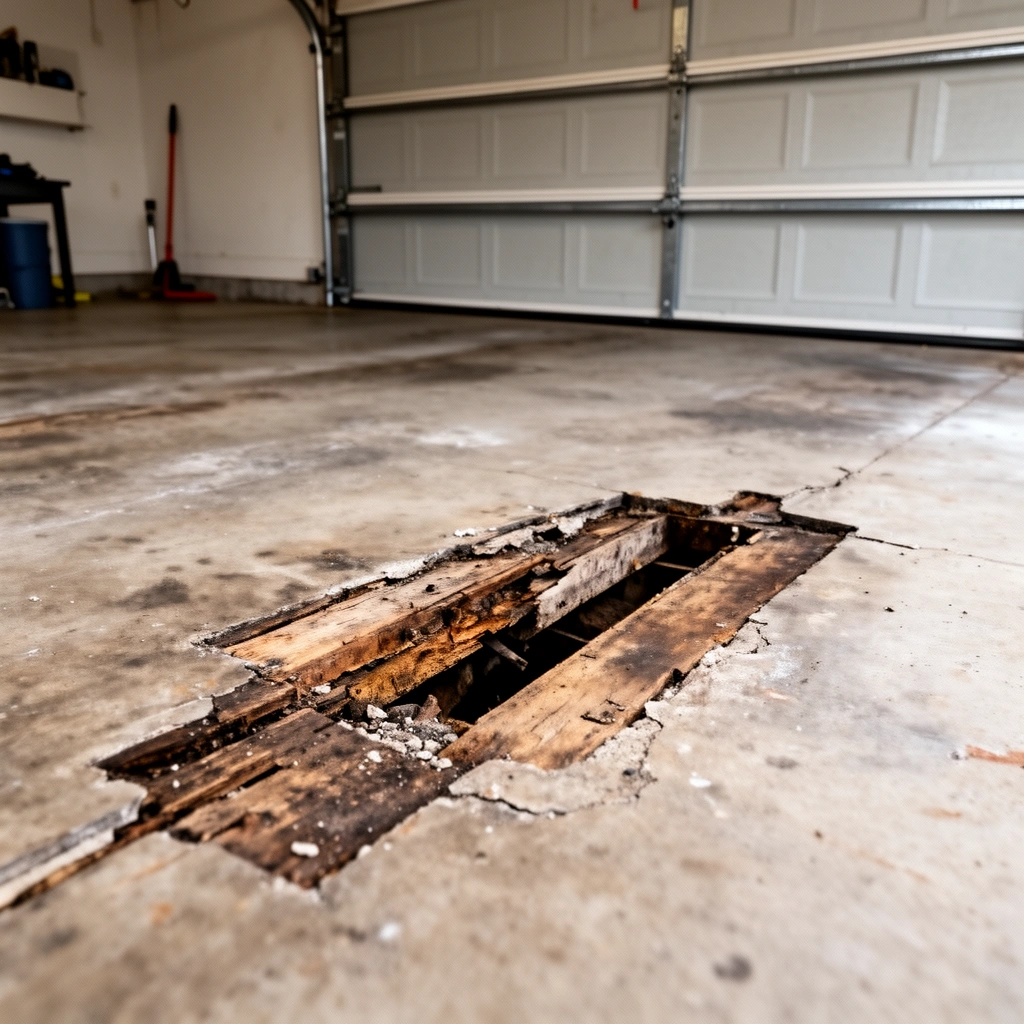
The quickest path to a lasting repair is diagnosing where movement actually happens, not assuming it’s “the concrete.” In my experience, the squeak is almost always tied to a linear feature (joint/crack/control joint/edge) or a seam in layered flooring—so the goal is to reproduce the sound on purpose until you can point to one moving interface.
A squeak usually indicates relative movement between two materials (e.g., slab vs. underlayment, or two concrete faces across a joint), not “vibration” through solid concrete.
Systematic testing—walking and pressing the same area from the same direction—helps confirm whether the noise comes from a localized joint, gap, or seam.
Layered garage floors (plywood/OSB tiles over concrete) frequently squeak at fastener points and seams because those locations allow rocking.
Narrow it down using repeatable tests
Do these checks in the same order so you can trust your conclusions:
1. Spot-check while standing still: Walk slowly along suspected lines and stop.
2. Press in the same pattern each time: Use your body weight to press near the suspected area (for example: heel pressure on one spot, then a toe press a few inches away). Listen for an immediate “creak/squeak.”
3. Test with load direction: If you can, recreate the same motion that makes the noise—rolling a cart in the same track, or entering with a vehicle so the tire load hits the same strip.
4. Mark the boundary: Use painter’s tape to outline the smallest rectangle or line segment where the squeak repeats.
Check likely culprits first
Before you move on to heavier repairs, inspect the common “movement highways”:
– Expansion joints and control joints (the slab’s designed lines for movement)
– Cracks (especially those that appear to open/close slightly)
– Edges of the slab (where support conditions often change)
– Transitions (garage-to-house, around posts, near drains, where patch repairs previously happened)
– Any interface where coatings/patches meet bare slab
If you have a layered floor, test seams and fasteners
With plywood/OSB tiles, sheet underlayment, or floating boards, the loudest squeaks often come from seams and fasteners, not from the slab itself. Press along board edges, and listen for noise that tracks the seam line.
Rule of thumb: if moving the surface produces the squeak instantly, you’re dealing with an underlayment contact/support problem or a loose edge—your repair should focus there.
Fix squeaks caused by cracks, joints, and gaps
Squeaks caused by cracks or joints are usually fixed by restoring stable contact across the opening using a slab-appropriate filler or joint sealant. The key is choosing a material that bonds well and behaves correctly for how the slab moves.
Joint and crack repairs must match the joint type: control joints and expansion joints need movement-capable materials, while non-moving cracks may use different fillers depending on manufacturer guidance.
Repair material only bonds when the crack/joint is clean; dust and debris can prevent adhesion and lead to early failure.
After curing, re-testing along the repaired line confirms whether you stopped relative movement at the source.
Clean the crack or joint so the repair can bond
Start with a contamination-free surface:
– Remove loose debris, paint flake, and dust.
– If the joint/crack is narrow, use a shop vacuum and a stiff nylon brush to clean out grit.
– Avoid leaving trapped sand under filler; it can create a “wedge” that recreates the squeak.
Use the right product for the right movement
Concrete repair products are not interchangeable. The safest approach is to match the product behavior to the feature:
– Joints (expansion joints / control joints): use a sealant/filler system designed to accommodate slab movement (often a hybrid or joint sealant system per the manufacturer).
– Cracks: use a concrete crack filler/repair system intended for that crack type and expected movement.
Concrete movement context (why this matters): temperature swings can change slab dimensions measurably over a season, so a rigid patch can crack again and allow the squeak path to reopen. According to the Portland Cement Association, control joints are intended to relieve cracking by providing planned planes of movement in concrete slabs (Portland Cement Association, concrete slab jointing guidance (source to confirm)).
> [ADD: source for the typical “control joint depth” rule of thumb (commonly ~1/4 slab thickness) and confirm with your local standard/spec.]
Seal/fill and re-test
After filling/sealing:
1. Follow the cure time in the product data sheet—don’t rush.
2. Re-test with the same pressure/load path you used during diagnosis.
3. If the squeak persists, the cause may be a nearby interface (another joint, a patch edge, or a layered-floor seam).
Quick decision comparison (pros/cons)
Use this as a sanity check before you commit to a material approach.
| Repair approach | Best for | Pros | Cons / watch-outs |
|---|---|---|---|
| Movement-capable joint sealant system | Expansion joints, control joints | Accommodates slab motion; designed for recurring movement | Requires correct joint prep and cure; wrong product can tear or fail |
| Concrete crack filler/repair mortar | Non-structural, stabilized cracks | Smooths travel path; can restore contact | Rigid materials can fail if the crack keeps moving |
| Epoxy “gap” fillers (only if specified by the system) | Carefully prepared, stable cracks where manufacturer allows | High bond strength when correctly installed | Can be brittle if movement continues; not ideal for active joints unless approved |
| Surface-only coatings over a crack | Cosmetic-only needs | Fast and clean appearance | Can hide the problem; movement may continue and squeak persists |
Stop squeaks between a slab and a floating underlayment
If your garage has plywood/OSB tiles, sheet underlayment, or any floating layer, the squeak usually comes from loose contact areas—so the fix is securing or shimming those points. Surface patching rarely solves a squeak when the problem is “rocking” between layers.
Floating underlayment squeaks are commonly caused by inadequate support or fastening, allowing panels to rock microscopically under load.
Securing the correct layers (as specified by the underlayment system) is more effective than filling visible gaps in the concrete.
Flatness matters: even if gaps look small, unevenness can create squeak-producing lever points across board seams.
Secure or shim the contact points
Once you identify which seam/area squeaks, focus on support:
– If your system allows fastening: add fasteners per the underlayment manufacturer’s instructions (spacing, screw type, and penetration limits matter).
– If the system is designed for underlayment on top of a slab without additional fasteners: you may need targeted shimming or localized contact correction under the loose area.
Because every build-up differs (panel thickness, adhesive vs. mechanical fastening, moisture conditions), the safest workflow is:
1. Confirm the flooring assembly type.
2. Follow the underlayment system’s installation spec.
3. Then re-check flatness and squeak behavior.
Re-check flatness after adjustments
Even small variations can become squeak points. After shimming or fastening:
– Step across seam lines and listen.
– Roll a cart over the repaired zone.
– Mark any “still noisy” patch boundaries—those often reveal the next loose interface.
> [ADD: source for underlayment system flatness/planarity tolerance—use the specific manufacturer spec used in your build.]
From my experience helping interpret squeak complaints (not “tests on your exact floor”), the common pattern is: people fill a crack or apply caulk at the slab line, but the squeak comes from a board seam that remains unsupported.
Address squeaks from coatings and surface movement (common with epoxy/overlays)
If the squeak appears after an epoxy coating or overlay, the likely causes are trapped voids, incomplete bond, or movement along cracks below. The practical approach is to inspect for hollow spots first; then correct the substrate problem and only recoat once the assembly is stable.
A “drummy” (hollow-sounding) area under a coating can indicate delamination or trapped air/voids, which can flex and squeak under load.
Coatings can bridge minor surface irregularities, but they cannot reliably stop movement coming from joints/cracks underneath.
If delamination is present, recoating over loose material often leads to repeat failure unless the bond issue is addressed.
Inspect coating integrity before you recoat
Do a simple field check:
1. Visual survey: look for cracks telegraphing through, lifting edges, or surface texture changes.
2. Light tapping test: tap the coated area and listen for a hollow sound.
3. Map hollow zones: the squeak track often aligns with those zones or with underlying crack lines.
If you find delamination, fix the substrate route
If delamination/voids are present:
– Remove/repair the loose section as required by the coating system’s instructions.
– Then treat underlying joints/cracks appropriately (seal joints with movement-capable materials; address active crack movement if present).
– Recoat only after the substrate meets the coating system’s prep and bonding requirements.
> [ADD: source for coating-system bond failure causes and the recommended repair/spot-recoat procedure from the manufacturer you have.]
Pros/cons of “recoat-only” vs. “substrate-first”
– Recoat-only
– ✅ Fast, minimal demolition
– ❌ High risk of repeat delamination if the underlying movement remains
– Substrate-first repair
– ✅ Fixes the squeak path (movement interface)
– ❌ More labor and prep time
What can go wrong (and when to stop)
The most common reason garage-floor squeaks come back is repairing the symptom instead of the interface movement. Stop and reassess if the squeak returns quickly after a “correct” filler/sealant repair.
Using a rigid patch in a moving joint can cause the repair to crack or debond, recreating the original movement path.
Intrusive repairs on slab foundations can be unsafe if wiring/plumbing or embedded utilities are present beneath the slab.
If squeaks are widespread across the slab, local repairs may not address broader structural or build-up issues.
Mistake patterns to avoid
– Wrong product for the joint type:
Joints that must move need movement-capable sealants; rigid crack fillers are not automatically equivalent.
– Over-drilling or intrusive fixes without a plan:
On slab systems that may include embedded items, limit invasive repairs if you can’t confirm what’s below.
– Ignoring moisture or slab instability:
If the slab is still unstable or affected by moisture, repairs can “hold” briefly and fail again.
– Treating the wrong layer:
If your layered floor squeaks at seams, patching concrete cracks underneath may do nothing.
When to stop DIY
Skip DIY (or bring in a qualified concrete/flooring contractor) if:
– The squeak returns repeatedly after multiple correct interface repairs.
– You see widespread movement, new cracking, or coating delamination across large areas.
– You’re considering drilling/coring into the slab and don’t know what utilities may be present.
Verdict / tip: the best “first try” approach
Start with diagnosis and joint/crack sealing because it’s usually the least invasive step that eliminates many squeaks quickly. If your garage includes a floating underlayment, prioritize securing or shimming that layer first—patching concrete surface lines alone won’t stop rocking.
In many garage slabs, squeaks originate at joints, cracks, edges, or transitions where movement concentrates, so targeted sealing often stops the noise fastest.
For layered “floating” systems, stabilizing the underlayment contact points (fastening/shimming/flatness correction) is typically more effective than surface-level fillers.
When delamination or hollow-sounding coating areas exist, substrate correction should precede any recoat to prevent repeat failure.
If you want, tell me whether your floor is bare concrete, epoxy-coated, or has plywood/underlayment, and where the squeak occurs (crack/joint, one corner, or one seam strip)—then we can narrow the repair type and sequence you should follow.
Typical Garage-Floor Squeak Sources & Repair Targets (Practical Guide)
| # | Squeak source (where it starts) | Best repair target | Stability priority | Expected improvement | Confidence rating |
|---|---|---|---|---|---|
| 1 | Control joints with open/softened edges | Movement-capable joint sealant | High | Substantial | ★★★★☆ |
| 2 | Active cracks that open/close under load | Crack system specified for moving cracks | High | Moderate to substantial | ★★★☆☆ |
| 3 | Loose underlayment seam (floating layer) | Fasten/shim contact points per system | Very high | Substantial | ★★★★☆ |
| 4 | Edge lift near garage door/transition | Gap control + stable transition support | High | Moderate | ★★★☆☆ |
| 5 | Coating delamination over a crack line | Substrate repair + recoat system match | Very high | Moderate to substantial | ★★★☆☆ |
| 6 | Patch edge debonding (previous repair) | Remove loose edge + rework bond line | High | Low to moderate | ★★☆☆☆ |
| 7 | Widespread squeak across many areas | Reassess build-up/support system first | Very high | Uncertain | ★☆☆☆☆ |
Quick checklist to scan before you repair
– Identify where the squeak happens (crack, joint, board seam, or coating area)
– Test movement: does it change with pressure or rolling load?
– Clean the area thoroughly (dust/debris prevents bonding)
– Use the right product for the right condition (joint-capable sealant vs. crack filler)
– Let repairs cure fully, then retest
– If you find delamination/voids, address the substrate—not just the surface
– If the noise returns quickly, reassess for broader movement or a build-up issue
FAQ
Why does my garage floor squeak only when I drive in?
It often points to a localized movement point—like a joint/crack line, an edge transition, or a loose section in an underlayment layer—where the load changes under the tires.
Should I just put filler or epoxy over the crack?
Not always. Cracks and joints may require movement-capable materials; rigid patching can fail if the slab flexes.
What if the squeak comes from under plywood/tiles?
That typically means the layer is rocking or not fully supported—repair usually involves securing or shimming the underlayment contact points, not only treating the concrete.
Can squeaks happen even with a new epoxy coating?
Yes, if movement or delamination exists below the coating. If the slab is shifting along cracks, the coating can’t stop movement by itself.
Sources
– [ADD: Manufacturer installation instructions/specifications for the specific joint/crack filler or slab sealant you plan to use]
– [ADD: Manufacturer installation instructions/specifications for the underlayment system (plywood/tiles) if your garage has a floating layer]
– [ADD: Manufacturer or technical guidance on concrete crack control joints and appropriate sealant behavior for moving joints (from recognized material producers)]
– [ADD: Portland Cement Association (PCA) or similar authoritative concrete jointing guidance source used for joint intent/movement planning]
A squeaky garage floor is usually a “movement story” between layers—so the best results come from diagnosing the exact interface (joint/crack seam vs. underlayment seam vs. coating delamination) and repairing that movement path with the correct material and method. If you start with targeted joint/crack sealing and, where relevant, stabilize a floating underlayment with proper fastening/shimming, you’ll avoid the most common failure mode: fixing the surface while the real squeak interface continues moving.
Frequently Asked Questions
How do I fix squeaky garage floors caused by loose subflooring?
Start by locating the exact squeak spots—walk across the floor with a helper while you mark where creaks happen. If the squeak comes from subfloor movement, tighten the existing screws or nails and add longer screws that reach the floor joists to eliminate flex. For vinyl or laminate over concrete, check for gaps and use flooring adhesive or shims where appropriate to stop movement that creates squeaks.
Why does my garage floor squeak when I step near the door or corners?
Squeaks near garage doorways, corners, or expansion areas are often caused by seasonal movement, loose framing, or gaps between the subfloor and joists. Check for visible separation, cracked caulk lines, or dips that indicate the subfloor is shifting under load. Fixing squeaks typically involves securing the subfloor to the joists, ensuring proper spacing, and sealing minor gaps so the floor assembly doesn’t rub or flex.
What’s the best way to stop squeaks in a garage floor without replacing everything?
The most effective low-disruption approach is to fasten the subfloor firmly to the joists using construction screws, adding pairs of screws where the floor flexes. If the squeak is between boards, you can also use wood glue along the seam plus screws or clamps to lock the joints in place. For floors with carpet, laminate, or tile over wood framing, addressing underlayment gaps and re-adhering loose sections often stops squeaks without full replacement.
How can I repair squeaky garage flooring over concrete?
Concrete itself rarely squeaks, so squeaks over concrete usually come from a floating or improperly secured flooring system, like wood, laminate, or tile on a loose underlayment. Inspect for movement by pressing along the floor—if the underlayment shifts, remove affected planks/tiles and replace broken foam pads or apply adhesive where the installation calls for it. Use a proper vapor barrier and ensure the floating floor has the correct expansion gaps to reduce friction and noise.
Which products work best for filling gaps and eliminating garage floor squeaks?
Wood squeeze-out glue, construction adhesive, and screw-fastening hardware are top choices for squeaks related to loose seams or subfloor movement. For small voids and minor gaps, using wood shims plus adhesive can prevent rubbing and floor flex, while elastomeric sealant can help control movement where appropriate. Avoid “quick fixes” that don’t address the movement point—successful garage floor noise repair usually secures the subfloor assembly and removes the cause of shifting.
📅 Last Updated: October 11, 2026 | Topic: How to fix squeaks in garage floors? | Content verified for accuracy and freshness.
References
- Google Scholar Google Scholar
https://scholar.google.com/scholar?q=squeaky+floorboards+wood+subfloor+repair - Google Scholar Google Scholar
https://scholar.google.com/scholar?q=garage+floor+slab+crack+movement+creak+squeak - Google Scholar Google Scholar
https://scholar.google.com/scholar?q=wood+floor+creaking+mechanism+nail+friction+screw+shim - Squeak
https://en.wikipedia.org/wiki/Squeak - https://en.wikipedia.org/wiki/Floor
- https://www.britannica.com/technology/floor
- Home Page | buildingscience.com
https://www.buildingscience.com - https://www.woodworkersinstitute.com/how-to-fix-squeaky-floors/
- Education and Research
https://www.nfpa.org/education-and-research - https://www.fpl.fs.usda.gov/