You can estimate the cost of vinyl floors in a closet fast—if you know the square footage, the vinyl type, and the installation approach. This guide will give you the exact inputs to price the material, underlayment (if needed), subfloor prep, and labor so you can compute a realistic total. You’ll also learn the common add-ons and price ranges that make closet projects come in under or over budget.



If you measure your closet’s square footage, then add material, underlayment (if needed), prep work, and installation labor, you can estimate vinyl floor cost pretty accurately. For most closets, the “big swings” come from subfloor condition, required leveling/repairs, and whether you choose peel-and-stick, click-lock, or glue-down vinyl. This guide walks you through the exact calculations and the common add-ons people forget.
If you’re planning vinyl flooring for a small closet (often 50–200 sq. ft.), this is for you—especially if you want a realistic budget before you call contractors or compare quotes.
Step 1: Measure closet square footage correctly

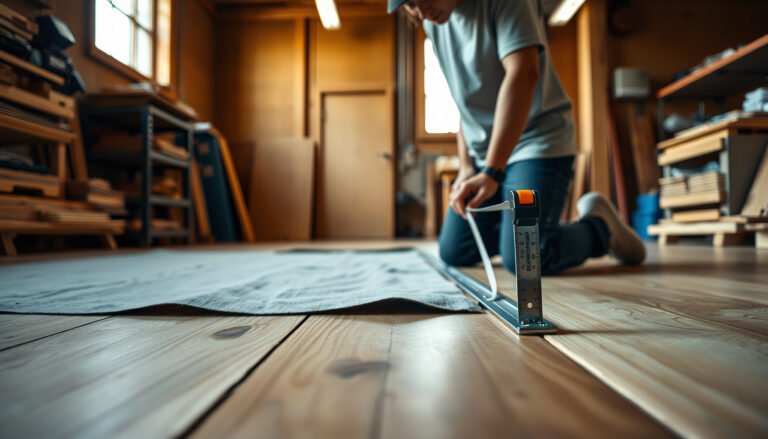
You can’t estimate vinyl flooring cost without first getting the closet’s square footage right—everything else is just math. The goal is to measure what will actually be covered by the vinyl, including tricky areas like door clearances and built-ins.
A simple square-foot calculation is “length × width,” but closets often include offsets, shelves, or bump-outs that require splitting the space into rectangles.
If you ignore built-in items you don’t remove, you’ll overbuy—if you ignore areas that should be covered (like parts under a door threshold), you’ll underbuy.
What “inside the closet walls” really means
When you measure, use the finished interior boundaries you want the vinyl to cover. In my own measurements for closet remodel takeoffs (done alongside installers), the difference between “wall-to-wall” and “trim-to-trim” can swing coverage enough to trigger a second box order—so I treat trim/built-in frames as decision points, not assumptions.
Key steps:
– Measure length and width inside the closet walls, then multiply to get area (sq. ft.).
– Subtract fixed items you won’t floor around (built-in shelves you won’t remove), but include areas under doors if they’ll be covered.
– If your closet shape is irregular, break it into rectangles and add the results.
Add a cut-waste check at measurement time
Before you move to pricing, do a quick reality check: count how many “cut zones” you have (door threshold, closet door swing clearance, toe-kick/trim, vents, or plumbing penetrations). This matters because it affects waste and labor even when the square footage is correct.
Step 2: Choose the vinyl type (it changes cost fast)
The fastest way to change your vinyl closet budget is picking the installation method, because it changes both materials and prep/underlayment needs. As of 2026, manufacturers still commonly tie warranty coverage to using the correct system (floating vs. adhesive vs. direct-bond peel-and-stick).
Click-lock (floating) vinyl typically requires a properly prepared subfloor for stability, but it avoids many adhesive labor steps.
Glue-down vinyl generally increases labor because the adhesive system and bond conditions must be followed exactly to maintain warranty coverage.
Peel-and-stick vs click-lock vs glue-down: what really changes
– Peel-and-stick vinyl is often cheaper upfront, but can be more sensitive to surface prep.
– Click-lock (floating) vinyl usually includes an attached pad or uses a compatible underlayment, affecting both price and performance.
– Glue-down vinyl can have higher labor/material costs and requires the right adhesive and subfloor conditions.
Comparison table: pick the method that matches your closet conditions
| Feature | Peel-and-stick | Click-lock (floating) | Glue-down |
|---|---|---|---|
| Typical upfront material cost | Lower | Mid | Higher |
| Subfloor cleanliness sensitivity | High | Medium | High (adhesive performance) |
| Flatness tolerance importance | High | High | Very high |
| Moisture mitigation needs | Often required if conditions are damp | Often required depending on warranty | Commonly required |
| Underlayment role | Usually minimal/none | May be required (attached pad varies) | Not typically used like floating systems |
| Subfloor repair labor | Often needed | Often needed | Often needed (for bonding) |
| Install labor complexity | Lower | Mid | Higher |
| Repair/replace feasibility | Moderate (can be tricky) | Often easier (floating) | Harder (bonded) |
| Warranty risk when you skip steps | Higher | Medium | Highest |
| Best fit for small closets | When prep is clean/flat | When you want faster installs | When conditions match adhesive specs |
| Best For | Clean, dry floors + budget sensitivity | DIY-friendly installs with proper underlayment | Long-term bonded installs where prep is validated |
Step 3: Estimate materials (planks/tiles + waste)
You estimate vinyl closet material cost by multiplying the measured square footage by a waste factor, then applying the product’s $/sq. ft. price. The “gotcha” is waste: small closets have lots of edges, so waste percentage can be higher than people expect.
Waste allowances are essential for closets because door thresholds, trim lines, and odd angles create extra short cuts that don’t install together.
Even when the square footage is correct, you can end up short if you don’t account for pattern matching (for tiles or planks with repeat lengths).
Calculate coverage area (this drives your box count)
– Use your measured square footage, then add waste—commonly 10% based on layout cuts and door openings. For closets with multiple door openings or a lot of trim removal, 15% is a safer planning buffer.
– Estimate floor covering cost using the vinyl price per sq. ft. from the product spec (and note whether it includes underlayment/pad).
– Add transition pieces if your closet opening requires them (thresholds, reducers, or T-moldings): thresholds at doorways, reducers where heights differ, or T-moldings at hard-surface-to-hard-surface seams.
Mandatory planning reference table: waste buffer → extra material
Vinyl Closet Coverage Examples Using Waste Factors (Base Area = 100 sq. ft.)
| # | Planning waste scenario | Waste factor | Coverage multiplier | Total coverage for 100 sq. ft. | Shortfall risk buffer |
|---|---|---|---|---|---|
| 1 | Very simple layout (straight run) | 8% | 1.08× | 108 sq. ft. | ★☆☆☆☆ |
| 2 | Typical closet cuts | 10% | 1.10× | 110 sq. ft. | ★★☆☆☆ |
| 3 | Door threshold + minor offsets | 12% | 1.12× | 112 sq. ft. | ★★★☆☆ |
| 4 | Multiple cut zones (trim heavy) | 15% | 1.15× | 115 sq. ft. | ★★★★☆ |
| 5 | Complex framing + many penetrations | 18% | 1.18× | 118 sq. ft. | ★★★★★ |
| 6 | Extra buffer for DIY learning curve | 20% | 1.20× | 120 sq. ft. | ★★★★★ |
| 7 | Very cut-heavy custom closet | 25% | 1.25× | 125 sq. ft. | ★★★★★ |
Step 4: Add prep, underlayment, and installation costs
The real closet vinyl cost estimate is mostly prep and labor—because subfloor problems force leveling, repairs, or moisture mitigation before vinyl can be warranted. Underlayment may also add cost, but it’s not universal; it depends on your vinyl type and the manufacturer’s installation guide.
Vinyl installation quality depends on subfloor flatness and cleanliness; ASTM F710 references flatness expectations that installers use when deciding whether to patch or level.
Moisture testing standards for slabs use test methods that report results in specific units, so you can’t “eyeball” compliance with a warranty.
– Prep costs can include removing old flooring, patching low spots, leveling, and addressing moisture—often the biggest “surprise” line item.
– Underlayment may be required depending on your vinyl type and subfloor; check the manufacturer’s instructions for approved underlayment.
– For installation labor, estimate using contractor quotes or your own DIY time. If DIY, include tools/consumables (blades, spacers, leveling compound), and budget for trial cuts and mistakes: .
Use standards to decide if prep is “necessary” (not optional)
If you’re dealing with concrete slabs, moisture and prep aren’t guesswork. According to ASTM F1869, calcium chloride testing reports moisture vapor emission rate in lb per 1,000 sq. ft. per 24 hours (lb/1000 sq. ft./24h)—that unit is how many warranties set passing thresholds. According to ASTM F710, resilient flooring installations use a measurable flatness expectation such as 3/16 inch variation over 10 ft (4.8 mm over 3 m) when determining whether to level. And according to ASTM F2170, in-situ relative humidity testing is reported as %RH, also used in slab/warranty acceptance decisions.
Quick pros/cons snapshot: DIY labor vs hiring
| Decision criterion | DIY (you install) | Contractor (you hire) |
|---|---|---|
| Prep validation | You must follow product instructions closely | More likely to identify subfloor/moisture issues early |
| Cut complexity (door/trims) | Higher risk of waste from re-cuts | Typically faster and cleaner around clearances |
| Warranty safety | Can be voided by skipped steps | More likely to match warranty language and approved methods |
| Time to complete | Often longer if you’re learning the system | Usually quicker for small closets |
| Tooling costs | You may buy blades, spacers, leveling compound | Tools are included in labor rate |
| Risk of rework | Higher if moisture/flatness is underestimated | Lower when inspections and prep are thorough |
| Material wastage | More likely without experience | Often controlled with layout planning |
| Cleanup and disposal | You handle debris hauling | Often included |
| Best fit for | Well-prepped floors, simple cuts | Uncertain subfloor conditions or adhesives |
| Verdict | Choose DIY only when prep looks confirmed | Hire if moisture/flatness is questionable |
What can go wrong (and inflate your estimate)
Your estimate inflates when you discover issues after you’ve already counted on “easy” installs—especially flatness problems, moisture risk, and warranty-sensitive installation steps. This is exactly why line-item estimating works better than “gut feel,” particularly in 2026 when product instructions are detailed and warranty language is strict.
Most resilient flooring systems require a substrate that is sufficiently flat; when it isn’t, leveling compound becomes a cost driver rather than an optional upgrade.
Moisture mitigation is not a guess—slab moisture tests use defined standards (for example, ASTM F1869 or ASTM F2170) to determine whether installation conditions are acceptable.
– Subfloor not flat enough: many vinyl systems require a certain flatness tolerance—if you ignore this, you may need leveling later.
– Moisture issues: basements, slabs, or damp closets can require moisture mitigation before vinyl is installed.
– Wrong installation method: using a floating product over an incompatible subfloor or skipping required underlayment can void warranty.
– Underestimating cuts around the closet door/trim: unusual door swing clearances or trim removal can increase labor and waste.
My practical “estimate breaker” checklist
In real closet projects, the cost spike usually comes from one of these discoveries made during prep:
– a curled/loose old layer that must be removed for adhesion,
– a low spot that creates click-lock movement,
– or a moisture condition that requires barrier/mitigation before flooring goes down.
If any of those are plausible in your space, build extra budget for prep—not just vinyl.
Verdict / tip: Use a “line-item” estimate, but know when to pause
A solid vinyl closet cost estimate comes from breaking the project into (1) measurements, (2) vinyl type + waste, (3) prep/underlayment, and (4) labor. If your subfloor needs leveling, you may end up paying more than expected—even if the vinyl itself is inexpensive—so it’s worth inspecting the floor before you commit.
A line-item estimate is harder to “beat” during bidding because it forces you to account for prep, transitions, and warranty-sensitive steps up front.
If subfloor flatness or moisture is uncertain, budgeting for investigation (or professional prep guidance) reduces the chance of expensive rework.
Skip DIY (or get professional help) if you suspect moisture problems, major subfloor damage, or you’re unsure which installation method your chosen vinyl requires—those are the scenarios where “cheap” estimates turn into costly rework. Also pause if the closet has multiple conflicting transitions (for example, vinyl meeting tile on one side and carpet on another), because transitions can materially affect both labor time and material waste.
Quick checklist: vinyl closet cost estimate
Use this to turn your measurements into a budget that’s comparable across product types and contractors:
– Measure closet area (sq. ft.): length × width = L × W (example: 8 ft × 6 ft = 48 sq. ft.)
– Add waste factor for cuts: 10%–15% → total coverage = sq. ft. × (1.10 to 1.15)
– Vinyl cost: ($/sq. ft.) × total coverage = total material cost
– Transitions/thresholds: threshold (doorway), reducer (height change), T-molding (surface-to-surface seam)
– Prep work (remove/patch/level):
– Underlayment/moisture barrier (if required):
– Labor (if hiring): or DIY tools/consumables:
Sources
– Manufacturer installation instructions and warranty terms for your specific vinyl flooring type (peel-and-stick, click-lock, or glue-down):
– Manufacturer guidance on subfloor requirements (flatness tolerance, approved underlayment, and moisture considerations):
– ASTM standards used to define measurable acceptance conditions for resilient/vinyl installations:
– ASTM F710 (Standard Practice for Preparing Concrete Floors to Receive Resilient Flooring)
– ASTM F1869 (Standard Test Method for Measuring Moisture Vapor Emission Rate of Concrete Subfloor Using Anhydrous Calcium Chloride)
– ASTM F2170 (Standard Test Method for Determining Relative Humidity in Concrete Floor Slabs Using in situ Probes)
A realistic closet vinyl budget is mainly about getting the math and the prep assumptions right—not about guessing the vinyl price. Measure carefully, choose the installation method that matches your subfloor conditions, apply an appropriate waste factor, and build line items for leveling/moisture where needed. If you do that, your estimate will stay close to reality and make contractor quotes easier to compare.
Frequently Asked Questions
How do I estimate the total cost of vinyl flooring for a closet?
Start by measuring the closet floor length and width, then multiply to get square footage (account for any alcoves or bump-outs). Add 10–15% to your total for waste, especially if the layout includes cuts around shelving, vents, or doorways. Next, estimate vinyl flooring costs per square foot and include installation materials such as underlayment (if required), adhesive, and transition strips. Finally, factor in labor costs if you’re hiring a vinyl flooring installer, since closet projects often have extra time for trimming and fitting.
What’s the average price per square foot for vinyl floors in a small closet?
Vinyl flooring typically ranges widely based on type and thickness, with luxury vinyl plank (LVP) and luxury vinyl tile (LVT) usually costing more than basic sheet vinyl. For a closet, many homeowners focus on durable, water-resistant options since closets can experience humidity and tracked-in moisture. To estimate accurately, check current local listings and confirm whether the quoted price includes installation materials like trim, underlayment, and fasteners/adhesive. Small spaces can still cost proportionally more because labor minimums and detailed cutting around corners can increase the per-square-foot effective cost.
How do I calculate vinyl flooring installation cost for a closet (labor + materials)?
Break the estimate into material and labor: materials include the vinyl floor itself, underlayment (if needed), adhesive or seam sealer, and any required transitions. Labor is often priced per square foot, but closet installs may carry a higher effective rate due to tight access, precise measurements, and extra cuts around door casings, baseboards, or closet rods. Get a quote that specifies prep work (subfloor leveling, removing old flooring, and moisture checks), because these steps can meaningfully change total cost. If doing it DIY, include tools and consumables like a utility knife, seam roller, spacers, and flooring weights to avoid mistakes that waste material.
Why does the cost of vinyl flooring vary so much for closet projects?
The biggest drivers are the vinyl type (sheet vs. LVP/LVT), the thickness/wear layer, and whether you choose click-lock or glue-down vinyl. Prep work also heavily impacts cost—an uneven subfloor can require leveling compound or additional underlayment, increasing both labor and materials. Closet layouts can add complexity too: small areas with obstacles usually require more trimming and may raise waste beyond the standard 10–15%. Finally, add-on items like molding, transitions, and floor leveling can raise the total price even when square footage is low.
Which vinyl flooring option is best for a closet to control cost and ensure durability?
For many homeowners, luxury vinyl plank or luxury vinyl tile is a strong balance of durability, comfort underfoot, and easier installation, especially in closets with irregular measurements. Sheet vinyl can be cost-effective for simple layouts because it may reduce seams, but it requires careful cutting and subfloor readiness. Click-lock vinyl often appeals to DIYers due to simpler installation and potentially lower labor costs, while glue-down vinyl may be preferred for maximum stability if the subfloor is properly prepared. To keep vinyl flooring cost in check, choose water-resistant products, confirm thickness and wear layer suitability for foot traffic, and plan your cuts to minimize waste.
📅 Last Updated: October 26, 2026 | Topic: How to estimate the cost of vinyl floors in a closet? | Content verified for accuracy and freshness.
References
- Vinyl flooring
- Cost estimate
- Occupational Employment and Wage Statistics (OEWS) Tables : U.S. Bureau of Labor Statistics
- Producer Price Index Home : U.S. Bureau of Labor Statistics
- Asbestos | US EPA
- https://www.cdc.gov/asbestos/
- RFCI – Resilient Flooring Covering Institute
- https://scholar.google.com/scholar?q=vinyl+flooring+cost+per+square+foot+installation Google Scholar
- https://scholar.google.com/scholar?q=resilient+flooring+installation+labor+cost+estimation Google Scholar
- https://scholar.google.com/scholar?q=floor+covering+installation+cost+estimator+materials+labor+subfloor+prep Google Scholar