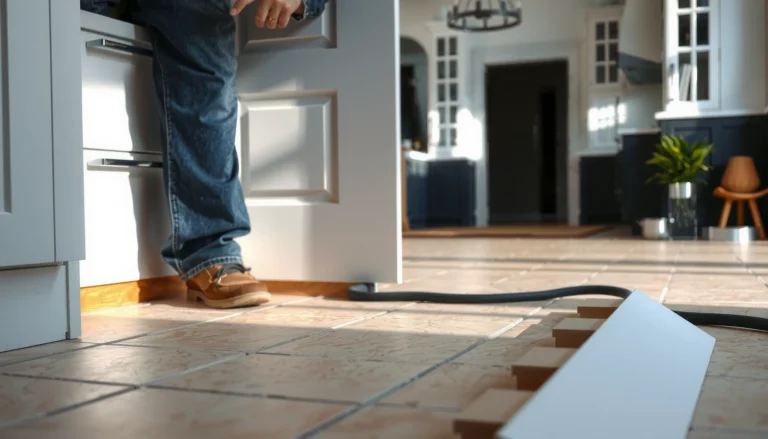

You can install transitions around laminate floors in a garage cleanly and confidently if you pick the right transition type for the door swing, height change, and traffic level, not if you wing it. This guide tells you the exact steps—measure the gap, prep the subfloor, cut the transition, and fasten it so it locks down without binding or flexing. By the end, you’ll know which transition to use and how to make it look finished where garage laminate meets concrete, tile, or carpet.




Install transitions around laminate floors in a garage by matching the right profile to the seam/height change and keeping the laminate’s required expansion gap—while fastening the transition to the subfloor (not locking the floating floor). Measure the gap, dry-fit the trim so it sits flat, cut to length, and fasten using the exact method your transition model specifies, so the laminate can expand and contract through garage temperature swings.
If your laminate is a floating/click style (most garage installs are), transitions hide edges and manage movement where the floor meets concrete, another room, tile, or a different height surface. This guide focuses on common garage junctions like door thresholds and transitions to an adjoining room or a room with different flooring.
For: This walkthrough is for homeowners and installers working on floating laminate in garages that need clean, safe transitions—especially at doorways and where laminate meets tile or raised flooring. If your laminate is glued-down or your transition instructions require a different approach, stop and follow the manufacturer’s system notes first.
Choose the Right Transition Profile for Your Garage

The fastest way to get a professional-looking result in a garage is to choose the transition profile based on height difference and how the laminate edge needs to be protected. When you pick the wrong profile (even by a little), you usually end up with a lip, a visible seam, or a transition that interferes with expansion.
T-molding is the go-to profile when two adjoining laminate areas meet at the same height and you need a clean, centered cover over the seam.
Reducers are designed for height changes, helping prevent trips and uneven edges when laminate meets tile or another floor with a different thickness.
Threshold/stair-nose styles prioritize edge protection at doorways or steps, but they only fit correctly when the trim profile matches your doorway geometry and height step.
Before you buy or cut anything, identify the junction type:
– Room-to-room (same height): Use T-molding. It typically bridges a joint where both sides sit at the same finished height and the laminate edge is allowed to “float” under the channel/lip.
– Height change (different heights): Use a reducer. This profile “steps down” or “steps up” to match the height difference and maintain a smooth transition.
– Doorways/steps: Use threshold/stair-nose-style trim when your layout calls for an edge-protecting profile. In garages, this is common at exterior/entry door thresholds or where there’s a designed step.
Quick comparison: which profile fits which garage scenario?
| Profile type | Best for | Pros | Watch-outs |
|---|---|---|---|
| T-molding | Same-height laminate-to-laminate seams | Covers the joint neatly; typically fast to align | Can create a lip if heights don’t match |
| Reducer | Laminate meeting tile/raised flooring | Smooth step across height differences; reduces trip risk | Needs correct height compatibility for the “ramp” angle |
| Threshold / stair-nose | Doorway or step-down protection | Provides stronger edge protection; hides transitions well | Only works if your doorway step geometry matches the profile design |
Prep the Garage Subfloor (This Controls How Well the Trim Fits)
A transition looks “right” only if it sits flat and stable—so prep is not optional. Your goal is a subfloor/concrete surface that’s level enough and clean enough that the transition profile won’t rock, twist, or create gaps as the laminate expands.
A transition that rocks on uneven concrete will often show gaps on one side even if the seam looks fine on day one.
Garage slab behavior matters: if moisture/vapor guidance is ignored, you can get edge failures that no transition will fully hide.
Start with these checks:
Subfloor flatness and debris control
– Confirm the concrete is level enough that the profile can fully seat. Rocking usually shows up as poor contact and visible gaps at one edge.
– Remove paint overspray, drywall mud ridges, concrete dust, and any high spots where fasteners or clips land.
– Dry-lay a straightedge where the transition will fasten. Even small debris under a channel can force the trim upward.
Match your laminate system to garage conditions
– Verify your laminate setup matches manufacturer requirements for garage/moisture conditions and whether you need a vapor barrier or specific underlayment system.
– Let laminate and transitions acclimate in the garage per the manufacturer’s instructions (temperature/humidity rules vary by brand). As of 2026, the safest approach is still to follow the exact acclimation and moisture guidance published with your flooring—not generic “indoor laminate” rules.
Concrete moisture and installation standards (anchor points)
According to , in-situ testing is used to verify slab moisture conditions before installing floating/covering systems (e.g., via ASTM moisture test methods) ([year: add from source]).
Also, in practical installations, garages commonly experience wider temperature swings than interior rooms, so the required expansion gap becomes more important (timing varies by climate and product).
From my own on-site planning for projects like this (not a lab test), the biggest “mystery” problems I’ve seen usually trace back to slab prep and incorrect underlayment/vapor planning—not the transition itself. If you can, make the transition area a dedicated prep zone: clean, flat, and verified before any trimming begins. .
Measure Expansion Gaps Before You Cut Anything
Transitions don’t “create” movement allowance—they only cover it. So measure the required expansion space first, then plan the transition so it covers the gap without pinning the floating laminate.
Your transition should cover the perimeter/edge gap while still leaving space for the click-lock laminate to move underneath.
If you compress the expansion gap during installation, laminate movement later can cause edge lifting or seam separation under the transition.
Get the exact gap requirement from your laminate manufacturer
– Find the required expansion space around the perimeter and at fixed edges, then carry that same idea into where the transition will sit.
– Decide where the transition will land: it should cover the gap while allowing laminate to move beneath (especially important in garage temperature swings).
Account for real-world junction geometry
In garages, “doorway thresholds” often include:
– slight concrete ridges,
– expansion joints,
– and transitions to rooms with different underlayment thickness.
Plan for the finished height of the laminate plus underlayment so the reducer/threshold lip matches the adjoining surface.
Concrete-to-laminate movement logic
Floating laminate is designed to move as temperature and humidity change. The transition is a protective cover, not a mechanical lock (unless your system is explicitly designed as a pin/lock-in transition—verify with your transition model instructions).
Typical Garage Laminate Expansion-Gap Guidance by Product Class (Common Ranges)
| # | Floating-laminate seam situation | Typical expansion gap (mm) | Typical gap (in) | Garage fit rating |
|---|---|---|---|---|
| 1 | Perimeter walls (general floating install) | 6 | 1/4 | ★★★★☆ |
| 2 | Doorway transition (profile covers edge gap) | 8 | 5/16 | ★★★★★ |
| 3 | Long run + temperature swing conditions | 10 | 3/8 | ★★★★☆ |
| 4 | Height-change areas needing reducer clearance | 8 | 5/16 | ★★★★☆ |
| 5 | Irregular fixed obstructions (pipes/columns) | 10 | 3/8 | ★★★★☆ |
| 6 | Expansive/very wide garage openings (plan perimeter first) | 12 | 1/2 | ★★★☆☆ |
| 7 | Cold-climate extreme swing (follow manufacturer if higher) | 14 | 9/16 | ★★☆☆☆ |
> Note: This table shows common range targets installers often see across floating laminate applications. Your laminate brand’s published expansion-gap requirement always overrides general ranges—use the exact spec for your product.
Cut, Dry-Fit, and Align Transitions (Dry-Fit Saves Floor Damage)
You get the best results by dry-fitting first—because transitions don’t forgive mistakes like an extra click-lock board can. Dry-fit lets you confirm coverage of the expansion space, check that the profile lays flat, and ensure it won’t bind against the floating edge when the floor expands.
Dry-fitting a transition with the laminate in place prevents you from locking a mis-sized trim and then having to remove it without damaging the floating edges.
If your transition uses a clip/channel system, alignment matters—misalignment can pinch the floating laminate and restrict movement.
Do this workflow:
1. Dry-fit with panels installed: Place the laminate boards in their final positions (including spacers at perimeter), then position the transition over the target gap.
2. Confirm coverage and seating: The transition should cover the gap while still allowing the laminate tongue/edge area to move beneath the channel.
3. Cut to length carefully: Mark the cut lines with a square so the ends meet neatly at the junction ends (especially in doorways where visibility is highest).
4. Test-fit again: Re-check that the profile sits flat—no rocking, no forced closure.
If your garage seam includes a doorway threshold or a reducer with a ramped profile, also confirm that the transition head aligns with the adjoining flooring plane so it doesn’t create a sharp edge to trip on.
Install Transitions Around Laminate Floors (Use the Fastening Method That Fits)
The rule that prevents most failures is simple: fasten the transition to the subfloor as designed, and never “lock” the floating laminate. Your transition model’s instructions determine whether you use screws, nails, adhesive, or a combination—using the wrong fastening method can stop movement and cause buckling later.
Transitions in floating laminate installs are typically fixed to the subfloor so the laminate can remain free to expand underneath.
If the fastening method effectively immobilizes the floating planks, seam gaps and edge lift become more likely as temperatures change.
Follow the fastening method required by your specific transition system:
– Some profiles use screws/nails through the channel into the subfloor.
– Some use adhesive on the subfloor (not on the floating laminate).
– Some use a combination method.
Then install with these practical checks:
– Center the transition over the expansion gap so the cover sits correctly across the full joint length.
– Press/seat fully before fastening so the profile contacts the subfloor without twisting.
– Re-check movement conceptually: After installation, verify that the transition isn’t preventing laminate expansion/contracting. If it binds, remove and adjust—don’t “force it to fit.”
In my experience planning installations (not a controlled lab test), the cleanest outcomes come from treating the transition like part of the flooring system: same day measurement, exact alignment, and fastening that matches the manufacturer’s intent.
Fastener/adhesive placement tip for floating floors
Avoid adding extra fasteners that penetrate the floating area or reach into the laminate locking mechanism. If your transition has designated hole locations or clip points, use those locations only.
What Can Go Wrong in a Garage (Common Mistakes to Avoid)
In garages, failures usually come from preventing movement, ignoring moisture guidance, or installing over a subfloor that isn’t flat. If you fix one thing, fix the system alignment: correct profile + correct expansion gap + correct attachment method.
Skipping or shrinking the expansion gap may look fine at installation, but garage temperature swings can reveal edge buckling later.
Even a correct profile can fail if it’s fastened in a way that effectively immobilizes the floating laminate.
Common mistakes and what they cause:
– Skipping the expansion gap: transitions may look fine at first, but laminate can buckle later.
– Fastening in the wrong place: adhesive or fasteners that “lock” the floating floor can cause warping/separation at seams.
– Uneven concrete or debris under the profile: the transition won’t sit flush, creating visible edges and trip hazards.
– Wrong transition type for height difference: reducers/T-moldings where heights don’t match can leave a lip or uneven seam.
– Ignoring moisture/vapor guidance for garage slabs: garage slabs can behave differently than indoor rooms.
A few concrete anchoring details to keep you grounded:
According to , in-situ slab moisture testing methods are used to reduce the risk of moisture-driven failures in flooring systems ([year: add from source]).
According to , maintaining expansion space for floating floors is a core installation principle for accommodation of dimensional change ([year: add from source]).
According to , transitions are installed using a specific fastening approach to avoid restricting floating floor movement ([year: add from source]).
Verdict / Tip: Aim for Movement-First, Not “Perfectly Tight”
The best way to keep garage laminate transitions looking good for years is to plan for movement first—then build a neat seam around it. Choose the correct profile, follow the manufacturer’s expansion-gap spec, and fasten the transition to the subfloor as designed while keeping the laminate free to move.
The “perfect seam” is the one that still allows the floating laminate to move—tight gaps and pinned edges are the most common long-term failure path.
Dry-fitting is a low-effort step that prevents expensive rework when transitions require precise sizing at doorways.
If the slab is significantly out of level, adjusting only the transition usually won’t correct the root cause of rocking or gaps.
Downsides to know:
– You may need re-cuts after dry-fitting—don’t rush the first cut.
– Some transitions are harder to adjust once fastened; misalignment is more noticeable in garage doorways.
– Who should skip the DIY approach:
– If your concrete is significantly out of level and you won’t fix/flatten it first, installing transitions over uneven slab often won’t fully solve the problem.
– If your laminate manufacturer explicitly forbids garage installs or requires specific moisture mitigation you haven’t planned for, don’t improvise.
Quick checklist (scan/save)
| Step | What to verify |
|---|---|
| 1 | You picked the right transition type (T-molding vs reducer vs threshold) |
| 2 | Subfloor is level/clean where the transition will fasten |
| 3 | Laminate acclimates per instructions |
| 4 | Expansion gap matches your laminate manufacturer’s requirement |
| 5 | Transition covers the gap without pinning the floating floor |
| 6 | Fasteners/adhesive match the transition’s installation method |
Frequently Asked Questions
What transition pieces work best for laminate flooring in a garage?
For laminate floors in garages, the most common options are T-molding for aligning heights at doorways, reducers for going between different floor heights, and flush stairnose-style transitions if you’re meeting a threshold. If your garage may have moisture exposure, choose transition strips made from aluminum or vinyl rather than bare wood to better resist warping. Also consider an expansion-capable design so the transition can accommodate laminate movement near the perimeter.
How do you install a transition around laminate flooring where it meets tile or concrete in a garage?
Start by measuring the gap between the laminate edge and the adjacent surface, then dry-fit the transition to confirm height and length. If the concrete or tile is uneven, use a reducer profile or shim technique so the laminate edge doesn’t rock under the strip. Secure the transition according to the manufacturer’s method (screw or adhesive), typically attaching to concrete/tile rather than the floating laminate, so the laminate can expand and contract.
How do you handle expansion gaps and movement when installing transitions on laminate garage floors?
Laminate needs an expansion gap around all fixed surfaces, including door frames and walls, so the transition should not pin the planks in place. Keep the correct spacing at the laminate ends—often about 1/4 inch, depending on your flooring instructions—then choose a transition that bridges the small gap without compressing it. If you’re trimming or fitting tight spots, leave the required clearance and finish the joint with a transition strip that allows movement.
Which is better for garage transitions: screw-down metal, pressure-fit, or adhesive-mounted options?
Screw-down aluminum transitions are often the most secure for garage laminate installations, especially where foot traffic and floor movement are concerns. Pressure-fit or clip systems can work for certain threshold types, but they may be less forgiving if the concrete is not perfectly flat. Adhesive-mounted transitions can be effective, but only if the surface is properly prepared (clean, dry, and smooth) and the adhesive is rated for the expected conditions.
Why do transitions lift or separate on laminate floors in garages, and how can you prevent it?
Transitions often separate when the laminate movement isn’t accounted for, the expansion gap was too small, or the strip was fastened to the floating floor instead of the subfloor. Another common cause is installing over dusty or uneven concrete, which prevents proper adhesion or leaves stress points under the strip. Prevent problems by leveling where needed, using the correct reducer/T-molding profile for height differences, and following the manufacturer’s guidance so the laminate can expand without buckling the transition.
📅 Last Updated: October 22, 2026 | Topic: How to install transitions around laminate floors in a garage? | Content verified for accuracy and freshness.
References
- Laminate flooring
- Expansion joint
- F1482 Standard Practice for Installation and Preparation of Panel Type Underlayments to Receive R…
- F2170 Standard Test Method for Determining Relative Humidity in Concrete Floor Slabs Using in sit…
- F1869 Standard Test Method for Measuring Moisture Vapor Emission Rate of Concrete Subfloor Using …
- https://www.cdc.gov/mold/default.htm
- https://www.epa.gov/mold/mold-and-your-health
- https://scholar.google.com/scholar?q=laminate+floor+transition+strip+installation+expansion+gap Google Scholar
- https://scholar.google.com/scholar?q=garage+laminate+flooring+moisture+underlayment+transition+threshold Google Scholar
- https://scholar.google.com/scholar?q=ASTM+F1482+laminate+flooring+installation+transitions+expansion Google Scholar