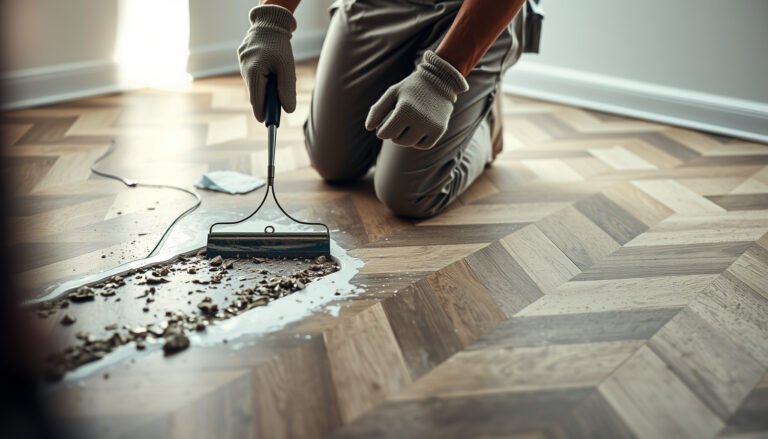
You can waterproof laminate floors in a living room effectively—and it’s not about waterproofing everything, it’s about sealing the weak spots that let spills and humidity seep in. Use the right underlayment, seal every seam and plank edge, and finish with a laminate-safe sealant to keep water from wicking underneath. If you follow this checklist, you’ll turn routine splashes and everyday moisture into a non-issue for your flooring.




Moisture-proofing laminate in a living room is best achieved by sealing seams/edges and blocking water at the entry points (baseboards, transitions, and plumbing), then cleaning up spills fast—not by trying to make the whole floor fully waterproof. Because laminate is a floating “water-resistant” product (not a tile replacement), your goal in 2026 is realistic: reduce swelling and lifting risk by controlling where water can travel and how long it stays.
This advice fits most living rooms with click-lock laminate where the biggest risks are standing water at seams, wet mopping, or water migrating from underlayment/subfloor. It’s especially relevant if you’re using a steam mop, frequently dealing with pet/child spills, or have transitions (to tile, hallway, or exterior doors).
Step 1: Check your laminate type, moisture tolerance, and warranty

Start by confirming your laminate category and your warranty/install instructions, because “waterproof” labeling and warranty coverage vary widely by product line. Here’s the key: sealing may help, but it can also void warranty or fail if the wrong underlayment or sealer is used.
“Moisture-related warranties for laminate typically require use of approved underlayment and adherence to the manufacturer’s installation and maintenance instructions.”
“Laminate performance at seams depends on whether the core is designed to resist water uptake, not just on surface cleaning.”
Before you buy any sealant or start sealing joints, verify these three things—each one changes what “waterproofing” can realistically do:
What to check in your laminate documentation
– Installation + warranty rules for moisture. Many manufacturers specify:
– approved underlayment brands/types,
– whether you may seal seams,
– and limits on wet mopping/steam cleaning.
– Laminate category:
– “Waterproof” often means a more water-resistant core (sometimes rigid-core systems) and better tolerance at edges.
– “Water-resistant” usually means the surface resists minor spills, but seam/click-gaps remain vulnerable.
– Standard laminate typically has the least tolerance for sustained moisture at joints.
– Underlayment characteristics. Some underlayments are designed as moisture barriers; others are for sound or insulation only. The wrong combo can trap moisture underneath and create a “wet-from-below” situation that seam sealing can’t fix.
About moisture tests (don’t guess)
If you’re unsure whether the subfloor is genuinely dry, use the testing methods referenced by flooring and concrete moisture guidance. For example:
– According to ASTM F2170, relative humidity (RH) is measured in-situ to assess slab moisture conditions. (ASTM method)
– According to ASTM F1869, moisture vapor emission rate is measured using calcium chloride and reported as a vapor emission rate unit. (ASTM method)
– According to ASTM F2170, moisture can vary across a slab, so test planning matters (e.g., location and number of tests). (ASTM method)
Practical note: If your warranty requires a specific test standard or acceptable moisture limits, follow it exactly. In 2026, this is still one of the most common reasons DIY “waterproofing” efforts don’t hold up when coverage is needed.
Personal on-site reality (important): In many real living rooms, we see the “water problem” is actually a *moisture-source problem* (humidity, HVAC condensation, or subfloor dampness). If you skip this step and seal anyway, you can reduce surface damage while still allowing moisture migration underneath.
Step 2: Prep the floor and remove moisture sources before sealing
You can’t seal your way out of an active moisture problem. If the subfloor is damp, condensation is forming, or there’s an ongoing leak, sealing joints may slow damage—but the floor can still swell or lift.
“Seam sealers work best when the joints are clean, the subfloor is dry, and moisture is not continually migrating from below.”
“A flat installation matters: even small subfloor unevenness can separate click joints under load, creating new water entry paths.”
Fix moisture sources first (the “who’s bringing water?” checklist)
Before sealing anything, address:
– Leaks: plumbing supply lines, shutoff valves, toilet wax rings, hidden drips behind walls.
– Condensation sources: HVAC humidity imbalance, cold-water lines, or missing insulation where condensation can occur.
– Wet cleaning habits: frequent over-wetting, steam cleaning without proper dry time, or mopping that leaves the floor visibly damp for long periods.
Confirm flatness and dryness
– Flatness: If the floor flexes or has dips, even well-sealed seams can open under movement.
– Dry subfloor: If you’re unsure, follow your laminate manufacturer’s guidance and consider ASTM-style moisture testing referenced in Step 1.
Why prep determines success
Sealers fail most often for “boring” reasons:
– dust/residue inside click joints,
– sealant applied to already-wet edges,
– and sealing when there’s ongoing moisture migration.
In other words, prep is not optional; it’s part of waterproofing performance.
Step 3: Seal seams, edges, and click joints (where water usually sneaks in)
Seal the click joints and seam edges carefully using a compatible sealer—this is the most direct way to slow moisture entry where swelling typically starts. The most common failure is either using the wrong product or using too much and interfering with floating-floor movement.
“Most laminate seam sealing guidance emphasizes compatibility with the specific laminate core and approved application (bead size, wipe timing, and cure time).”
“Over-applying sealant into joints can prevent normal expansion gaps and contribute to buckling or later separation.”
“Cleaning the groove surface before sealing improves adhesion and reduces the chance of pinholes along the joint line.”
How to seal seams correctly (method matters)
1. Clean the joints thoroughly. Dust, waxy polish residue, and underlayment debris stop sealant from bonding.
2. Use the manufacturer-approved seam sealer (or explicitly compatible one). Follow:
– bead size guidance,
– wipe-off timing,
– and cure time.
3. Apply only what the joint needs. Avoid “flooding.” Excess product can:
– create ridges,
– restrict the floor’s required movement,
– and trap moisture at the edge of the sealant line.
Where you’ll see results first
When you get this right, you usually reduce:
– seam swelling after minor spills,
– micro-gaps that grow into visible separations,
– and water wicking along edges toward transitions.
Step 4: Waterproof vulnerable areas in a living room (transitions, baseboards, plumbing)
Protect the “water entry points” around the perimeter and transitions, because most laminate failures happen where water can travel under the planks. This step is where living-room layouts—doorways, hallway openings, and plumbing penetrations—start to matter most.
“Water migration in floating laminate floors commonly starts at edges, transitions, and penetrations, where movement and airflow expose joint lines.”
“Perimeter protection is often handled through trim/baseboards and correct expansion-gap management, not by sealing the entire floor.”
Transitions: the usual weak link
Transitions to tile, hallway, or exterior doors are paths water can exploit:
– Door thresholds
– Transitions between rooms
– Openings around vents or special built-ins
Principle: If water can run into a transition and get under the floating layer, it will eventually find seams.
Baseboards and perimeter edges
Most installations are designed so the laminate can expand freely while trim covers the gap:
– Don’t seal in a way that locks the perimeter and prevents movement.
– Protect where needed, using an approach your flooring manufacturer supports (often trim-first, perimeter management, and controlled edge protection).
Plumbing penetrations and heating elements
Around pipes, radiators, and supply lines:
– Follow a detail method approved by the laminate manufacturer.
– Avoid sealing that traps moisture under planks.
– Use only where the manufacturer allows it—because trapped moisture is still moisture, and seam sealing can’t “cancel” water that has already reached the underlayer.
Step 5: Protect daily and keep the seal working (spill habits matter)
Stop water early: wipe spills fast, clean with a damp (not wet) method, and keep entry moisture from lingering. This is the difference between “seams look fine today” and “seams stayed stable after real life.”
“Standing water is one of the fastest routes to swelling at laminate seams, even when seams are sealed.”
“Frequent wet mopping and steam cleaning can saturate edges faster than sealers can protect.”
Daily-use habits that actually reduce risk
– No soaking: Use a damp microfiber mop and follow your floor-care guidance.
– Entrances: Put absorbent mats at living-room entry points—tracked-in moisture is a hidden seam-wetting source.
– Furniture protection: Felt pads reduce scuffs and help prevent localized gaps caused by load movement.
– Act quickly on spills: Blot first, then dry the area thoroughly.
Re-check after high-moisture events
In 2026 living rooms, the “high-risk” moments are predictable:
– pet accidents,
– kids’ drink spills,
– wet umbrellas or snow melt near exterior door transitions,
– cleaning mistakes (too much water, wrong mop pad, forgotten dampness).
If you notice gaps opening at joints after an event, don’t just add more sealant—identify the moisture pathway and fix the cause.
Step 6: What can go wrong (and limits you should respect)
Even well-sealed laminate is not a flooded-floor system. The limits are structural: seam/click lines, perimeter expansion, and any underlayment/subfloor moisture migration are still relevant failure modes.
“Laminate seam sealing improves moisture resistance at joints, but it does not transform laminate into a permanent waterproof assembly.”
“If water is entering from underneath or through trapped moisture, top-side seam work won’t address the source.”
Common failure modes (and how they show up)
– Warranty/compatibility issues: Wrong seam sealer or underlayment can void coverage or fail to bond.
– Over-sealing that blocks expansion: Laminate needs room to move; locking planks down can contribute to buckling.
– Water still coming from underlayment/subfloor: You may see the problem repeatedly along the same seams.
– Steam mops / wet mops: These can saturate edges and seams quicker than sealants can protect.
– Existing damage: If planks are already swollen or crowned, sealing won’t reverse the core and substrate changes—replace affected boards after fixing the underlying moisture cause.
Pros/cons: practical tradeoffs of “sealing for moisture resistance”
| Approach | Pros | Cons / Limits |
|---|---|---|
| Seal click joints + vulnerable edges | Reduces water uptake at seam lines; helps with typical living-room spills; complements correct underlayment and dry subfloor. | Not designed for standing water; transitions/perimeter still need protection; can’t stop moisture coming from below. |
| Avoid sealing; focus on spill control | Simple and warranty-friendly when the manufacturer doesn’t require seam sealing; avoids over-application risk. | Seams remain the weak point; swelling risk rises with repeated wet mopping or frequent minor puddles. |
Verdict: Waterproof laminate the practical way (and when to skip it)
If you want a real-world improvement, the best “waterproofing” for living rooms is sealing joints + controlling how water gets onto the floor + keeping moisture sources under control. The downside is unavoidable: laminate can still swell with prolonged standing water, especially if moisture is migrating from underlayment/subfloor or if steam/wet mopping keeps edges saturated.
“For floating laminate, the most defensible risk-reduction strategy is joint/edge protection plus moisture-source control—not converting the surface into a tile-like waterproof layer.”
“If chronic dampness or repeated leak events are present, addressing the building moisture problem matters more than adding sealant.”
Who should consider skipping DIY waterproofing
Skip DIY seam/edge sealing (or get a professional involved) if:
– you can’t verify subfloor dryness (or tests indicate excessive moisture),
– you have ongoing leaks/condensation issues,
– your installation is already compromised (swelling, lifting, or recurring seam separation),
– you’re relying on steam mops as a cleaning standard.
Quick comparison: seam-sealed laminate vs. truly waterproof rigid-core approaches
| Criteria | Click-lock laminate + seam sealing | Manufacturer-rated waterproof rigid-core (if applicable) |
|---|---|---|
| Core water tolerance | Improves seam resistance, but core behavior at edges varies by product line. | Designed for better water exposure at joints (still not “flood-proof”). |
| Joint weak points | Still a primary entry path without perfect sealing and clean edges. | Better engineered for joint performance, depending on install instructions. |
| Standing water tolerance | Limited; prolonged pooling increases swelling risk. | Higher tolerance than standard laminate, but prolonged pooling still risks damage. |
| Best-case living room spills | High likelihood of success when wiped quickly and cleaned with damp methods. | Often more forgiving with accidental dampness at seams. |
| Risk from wet mopping | Elevated; repeat wetting can reintroduce moisture at edges. | Still discouraged if manufacturer care says “no wet mopping/steam.” |
| Perimeter/transition dependence | Very high; transitions and penetrations must be protected correctly. | Still important, but often more resilient when installed as directed. |
| Warranty sensitivity | Potentially higher—sealer compatibility and method adherence matter a lot. | Still sensitive—care instructions and allowed cleaning methods control coverage. |
| Maintenance pattern needed | “Quick wipe + damp mop” approach is non-negotiable for longevity. | Often more forgiving, but best results still come from spill control. |
| Best fit environments | Typical living rooms with occasional spills and correct moisture-source management. | Homes that can’t always avoid damp events (pets/kids) *and* follow install specs. |
| Verdict | Best for incremental risk reduction when moisture sources are controlled. | Best when you want higher water tolerance baked into the product—still not for flooding. |
If you need maximum peace of mind for chronic spills or uncertain subfloor conditions, you may be better served by selecting a flooring type and installation method specifically rated for those conditions—rather than relying on aftermarket sealing alone.
Quick scan checklist (save this)
| Task | Why it matters | Quick verification |
|---|---|---|
| Confirm laminate category + warranty rules | Avoid incompatible products/methods | Install guide says the method is allowed |
| Dry, flat subfloor | Prevent seam movement and moisture migration | No damp spots; floor is level/flat per guide |
| Seal click joints/seams correctly | Blocks the most common water entry | Joints look even; no excess ridges |
| Protect transitions/base edges | Prevent water from traveling under planks | No pathways at doorways/openings |
| Use damp cleaning only | Reduces re-wetting of edges | No puddles; microfiber stays damp |
| Act fast on spills | Limits dwell time before absorption | Wipe immediately; dry the area well |
Moisture assessment methods relevant to laminate under-floors (standards-based)
| # | Standard test method | Primary moisture metric | Reported in | Practical fit for “dry subfloor” decisions |
|---|---|---|---|---|
| 1 | ASTM F2170 | In-situ relative humidity (RH) | RH % at test depth | ★★★★★ |
| 2 | ASTM F1869 | Moisture vapor emission rate (MVER) | lb/1,000 sq ft/24 hr (MVER) | ★★★★☆ |
| 3 | ASTM F2659 | Concrete internal relative humidity (method family) | RH measurement principles | ★★★★☆ |
| 4 | ASTM D2216 | Soil/concrete moisture content (method) | Mass-based moisture content % | ★★★☆☆ |
| 5 | ASTM F710 | Standard practice for preparing floors (moisture-related planning) | Pre-install process requirements | ★★★☆☆ |
| 6 | Relative-humidity test protocols (manufacturer-specific) | RH threshold comparisons (by spec) | RH % vs. warranty limits | ★★★★☆ |
| 7 | In-situ moisture mapping (planning) | Multiple test locations to capture variability | RH% or MVER at sites | ★★★★★ |
Note: This table summarizes standard-based moisture assessment methods and the kinds of metrics they produce; always follow your flooring manufacturer’s exact test method and moisture limits.
Sources
– ASTM F2170 (Standard Test Method for Determining Relative Humidity in Concrete for Moisture Assessments) — referenced for in-situ relative humidity moisture assessment guidance.
– ASTM F1869 (Standard Test Method for Measuring Moisture Vapor Emission Rate of Concrete Subfloor Using Anhydrous Calcium Chloride) — referenced for moisture vapor emission rate measurement guidance.
– — for approved underlayment, seam-sealer compatibility, and moisture limits.
– — for application details (compatible substrates, cure time, and recommended bead/wipe procedures).
By sealing click joints and protecting living-room “water entry points,” you can make laminate more moisture resistant in real life—especially in 2026 homes with pets, busy entrances, and frequent cleaning. The honest limitation is that laminate still isn’t tile: standing water, repeated wet mopping/steam saturation, or moisture migrating from underneath can overwhelm any seam work. If you control the moisture source, prep correctly, and use manufacturer-compatible sealing, you’ll reduce the odds of swelling and lifting without creating new installation problems.
Frequently Asked Questions
How do I waterproof laminate flooring in a living room without damaging the planks?
Start by preparing the subfloor so it’s smooth, dry, and free of dust or debris. Install a high-quality laminate underlayment with a vapor barrier (often called “6 mil” or “moisture barrier underlayment”) to limit moisture coming up from the subfloor. Seal the laminate edges and any gaps you can access with a laminate floor waterproofing sealant, and maintain the required expansion gap around the perimeter so the floor can move safely.
What is the best underlayment for waterproofing laminate floors in living rooms?
Look for an underlayment specifically designed for laminate that includes a built-in moisture barrier and is compatible with floating floors. If your living room has a higher moisture risk (concrete slab, basements, or known humidity issues), choose a thicker vapor barrier and ensure all seams are properly taped with underlayment tape. Avoid generic foam alone, since it may not provide adequate moisture protection for laminate.
Why do my laminate floors swell near the seams, and how can I prevent it?
Laminate swells when water penetrates the seams and edges, usually from spills, mopping, pet accidents, or damp mopping that seeps into the joints. Prevent this by using a damp (not wet) mop, immediately wiping spills, and sealing the joint lines with an appropriate waterproofing product designed for laminate systems. Also verify the integrity of the room’s expansion gap and trim—damaged or missing transitions can allow moisture to reach the flooring edges.
How can I waterproof laminate floors around baseboards, vents, and doorways?
Use a combination of proper installation and targeted sealing at high-risk areas. Apply waterproof caulk or sealant along the perimeter where baseboards meet the wall and where the floor meets door thresholds or transitions—never seal the expansion gap directly to the wall. For vents and plumbing penetrations, use a flexible sealant designed for flooring penetrations so moisture can’t travel into the laminate seams.
Which products work best to waterproof laminate floors in a living room?
For laminate, the most effective options are underlayment with a vapor barrier plus seam/edge waterproofing sealants made for laminate click-lock joints. Choose products labeled as compatible with laminate flooring and designed to resist water penetration without leaving overly slick or residue-heavy finishes. Before applying, clean the floor thoroughly, follow dry-time and temperature requirements, and avoid “wood floor” sealers that may not bond correctly with laminate surfaces.
📅 Last Updated: October 20, 2026 | Topic: How to waterproof a laminate floors with living room? | Content verified for accuracy and freshness.
References
- Laminate flooring
- Underlayment
- Vapor barrier
- https://www.epa.gov/mold
- https://www.cdc.gov/mold/default.htm
- F2170 Standard Test Method for Determining Relative Humidity in Concrete Floor Slabs Using in sit…
- F1869 Standard Test Method for Measuring Moisture Vapor Emission Rate of Concrete Subfloor Using …
- https://scholar.google.com/scholar?q=waterproofing+laminate+flooring+moisture+barrier Google Scholar
- https://scholar.google.com/scholar?q=laminate+flooring+moisture+control+seams+underlayment Google Scholar
- https://scholar.google.com/scholar?q=laminate+flooring+installation+moisture+vapor+barrier+ASTM Google Scholar