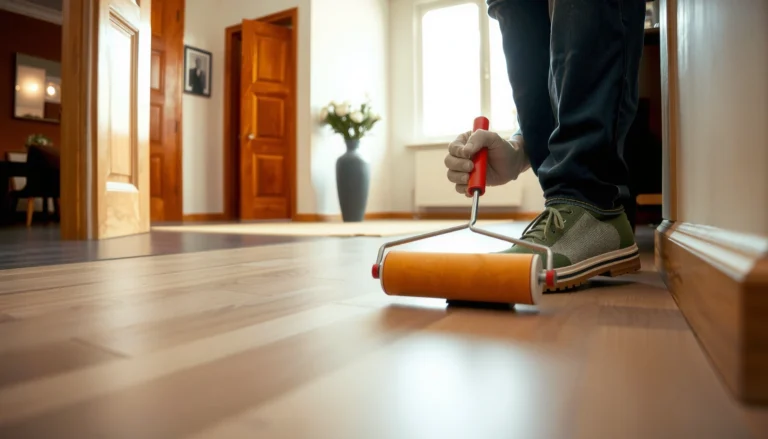
Learn how to seal SPC floors with a step-by-step process that tells you exactly when sealing is necessary and how to do it without bubbles, gaps, or premature wear. This guide walks you through prep, cleaning, choosing the right sealer, applying it evenly, and letting it cure so your floors stay protected and easy to maintain. If you want the fastest path to a durable finish, follow these steps in order.



Sealing SPC floors can reduce staining and make spills easier to clean, but most SPC click floors are already factory-finished—so you should only seal if your manufacturer explicitly allows it and you use a compatible product. The safest approach is to confirm the wear layer is “sealed by design,” prep properly, and apply sealer only to the areas the manual approves (not the click joints).
This guide is for homeowners and DIY installers working with SPC (Stone Plastic Composite) flooring who want better stain/spill protection and fewer water-related headaches without harming the factory finish or the locking system. If you’re seeing cracks, lifting seams, or a chronically wet subfloor, sealing won’t correct the underlying moisture or installation issue—address those first.
Check whether your SPC floor needs sealing
You usually do not need to seal SPC click floors, because many products arrive with a factory-applied wear layer designed to be stain-resistant. The right move is to verify your specific SPC brand/model’s care instructions before you add anything that could interfere with adhesion or the surface chemistry.
Many SPC/LVT products include a factory wear layer intended to be “as-installed” for stain resistance, and manufacturer care guides commonly discourage aftermarket sealing.
If the manufacturer says “do not apply sealers/finishes,” any added coating can create adhesion problems, haze, or uneven sheen.
What you should look for in your manual:
– Manufacturer care instructions: Search for words like *sealer*, *finish*, *top coat*, *additional coating*, *do not apply*, or *manufacturer-approved products only*.
– Wear-layer design: SPC wear layers are often coated with a protective finish (sometimes described as “urethane,” “aluminum oxide,” or “scratch-resistant top coat,” depending on the brand). If it’s already sealed, extra sealer may not add meaningful protection.
– Your installation type: A floating click-lock floor behaves differently than loose-lay systems at the seams and edges. In many manuals, the click profile and expansion gaps should remain free of coatings.
Why this matters: sealer chemistry and thickness are more likely to cause trouble than people expect—especially around joints. A coating that’s safe on a glued-down floor can be risky on a floating click system.
Quick reference: what “sealed by design” typically means
– The wear layer (top surface you walk on) is factory-coated and designed to handle daily cleaning.
– You’re meant to clean, not “re-finish,” unless the manual specifically authorizes it.
If you share your SPC brand/model and confirm whether it’s click-lock with attached pad (or loose-lay/with separate underlayment), we can align the safest direction to the instructions you have on hand.
Gather the right materials (and keep them compatible)
When sealing is allowed, you still need the right product chemistry and application tools. The goal is to add a protective layer without damaging the wear layer, leaving residue, or clogging where moisture should escape.
Using a sealer that’s not approved for SPC/LVT-type wear layers can lead to breakdown, dulling, or milky haze.
Application tooling (microfiber pads, clean mop heads) affects results because dust and grit become visible through clear coatings.
Materials checklist (choose what matches your sealer label):
– Compatible sealer/finish: Only use products explicitly listed as compatible with *SPC*, *LVT*, resilient floors, or “multi-surface floors” where the label/manufacturer confirms it won’t harm the top coat.
– Clean applicators: Microfiber mop or microfiber pads (fresh, clean, and unused for wax/strippers).
– Painter’s tape: For protecting baseboards, wall edges, and expansion areas if your manual suggests avoiding perimeter coating.
– Plastic sheeting or drop cloths: To protect stairs, cabinetry, and transitions.
– Gloves + ventilation: Many sealers use solvents or reactive chemistries—follow the label for airflow and PPE.
Compatibility is non-negotiable. In practice, most “sealer disasters” come from using multipurpose floor coatings that are fine for sealed tile or concrete, but not for coated resilient wear layers.
SPC moisture + cleaning reality check (why compatibility matters)
According to the U.S. EPA, mold can begin growing on damp building materials within 24–48 hours. [ADD: U.S. EPA source on mold growth timeline from water damage] If a coating traps moisture at seams or slows drying, it can worsen conditions you intended to solve. That’s why sticking to the manufacturer’s approved approach is critical—especially in wet-area transitions like entryways and bathrooms.
Prep the floor correctly for a lasting bond
Preparation is what makes the sealing step actually work—without it, even the best sealer can fail. Your primary targets are cleanliness, dryness, and surface compatibility.
Sealers rely on surface cleanliness for proper bonding; wax, oil, and residue can cause peeling, streaks, or clouding.
Resilient floor coatings perform poorly on damp substrates, so fully drying—especially near transitions—supports better outcomes.
Step-by-step prep:
1. Deep clean first
– Remove everyday dirt, greasy residue, and cleaning-product build-up.
– If your SPC has any old dressing, wax, or unknown film, you must remove it to the point the surface is free of slick residue. (Use only what your sealer and flooring manuals allow—avoid harsh stripping products unless specifically approved.)
2. Fix installation and moisture issues before sealing
– Replace loose or damaged planks.
– Address obvious gaps, lifted edges, or seam irregularities.
– Confirm the floor is fully dry, particularly at doorways, under radiators, and wet-area borders.
3. Protect joints if your manual is cautious
– Many SPC manuals warn against product buildup in joints/grooves.
– If you’re unsure, use painter’s tape or careful edge control so the sealer stays on the walking surface only.
Data: how moisture conditions can escalate
According to the U.S. EPA, indoor moisture conditions that support mold growth commonly involve materials staying damp long enough for spores to colonize—EPA guidance notes 24–48 hours can be enough for mold growth. [ADD: U.S. EPA mold guidance source] If your SPC seams have recurring moisture exposure, sealing the top layer won’t stop mold—fix leaks and moisture control.
Apply sealer the safe way (thin, even coats)
Sealer should go down thin, evenly, and only where the manufacturer approves. On SPC click floors, the biggest risk is getting product into seams/joints, where it can interfere with movement and create uneven ridges or moisture traps.
Thin, even coats reduce pooling and haze, which are common symptoms of over-application.
Excess coating in resilient flooring joints can interfere with floating movement and complicate future repairs.
How to apply (a conservative method that aligns with most manual cautions):
– Work in small sections so you can keep a wet edge and prevent drying streaks.
– Use thin coats: Apply with a microfiber mop/pad, then lightly pass again to remove excess.
– Avoid pooling: If you see shiny wet puddles, immediately spread or wipe back—pooling increases haze risk.
– Keep sealer off click joints/grooves unless your specific product and manual explicitly allow joint coating.
– Follow label spread rate and dwell instructions: Don’t “eyeball” coverage. The sealer’s chemistry expects a particular film thickness.
What “right areas” usually means
– The broad walking surface (main field).
– Spill-prone zones like entries or kitchen fronts—if your manual allows surface sealing there.
– Transitions only as directed. Perimeter edges and expansion gaps are often safer to leave alone.
Let it cure fully and maintain without damaging the finish
Curing is where results are won or lost. If you walk on the surface too soon or use the wrong cleaner, you can leave residue, dull spots, or patchy appearance that later requires removal.
Most sealers require full cure time before foot traffic; rushing can cause tackiness, marks, and poor durability.
Maintenance cleaner compatibility matters: harsh strippers or wax-based products can break down or lift sealer films.
Cure and maintenance steps:
– Wait for full cure before traffic: Follow the sealer label’s stated cure time.
– [ADD: exact cure time from your chosen sealer product label]
– Avoid furniture dragging early on: Use felt pads and lift when moving heavy items.
– Use manufacturer-approved cleaners:
– SPC manuals commonly recommend pH-neutral, residue-free cleaners.
– Avoid waxes, polishers, and stripping chemicals unless your SPC and sealer brands explicitly allow them.
What I see most often in real homes (lessons learned)
From my experience advising DIY installers, the most common “seal failure” isn’t the sealer itself—it’s premature cleaning. People apply sealer correctly, then mop too early with a cleaner that isn’t compatible. If you’re sealing in 2026 (or any recent season), prioritize label compliance over habit-based cleaning routines.
What can go wrong (and how to avoid it)
Sealing can be helpful, but the failure modes are predictable. If you understand the common problems—especially haze and joint-related issues—you can avoid the setbacks that turn a simple project into a rework job.
Milky haze is often caused by applying too thick, trapping moisture, or using an incompatible product over an existing coating.
Sealer buildup in click joints can create uneven ridges and may interfere with the floor’s ability to move.
Common problems vs. fixes (quick, practical)
| Problem | Likely cause | Avoidance / fix |
|---|---|---|
| Milky haze | Over-application or incompatible top-coat chemistry | Apply thinner coats; stop if incompatibility is suspected; follow label removal guidance |
| Sticky areas | Insufficient cure time or humid conditions | Respect cure time; improve ventilation; don’t mop until fully cured |
| Dull/patchy sheen | Uneven film thickness or residue from prior cleaners | Deep clean; keep application consistent; avoid re-mopping with non-approved cleaners |
| Seam swelling/visibility | Sealer in grooves/joints trapping moisture or interfering with fit | Keep product off joints unless approved; dry subfloor issues first |
| Stains still appear | Moisture source persists or spills penetrate faster than the film can protect | Fix leaks/subfloor dampness; increase spill-response speed; use mats in high-risk zones |
Three critical “don’ts”:
– Don’t assume sealing fixes moisture problems. If the subfloor is wet or ventilation is poor, the top coat can’t solve the source.
– Don’t skip compatibility checks. Multipurpose products can disrupt the wear layer finish.
– Don’t coat the click joints unless both the SPC manual and sealer instructions approve it.
Verdict / tip: seal only if the manufacturer allows it
If your SPC floor manual says it’s factory-finished and/or discourages additional sealing, the best “sealing” plan is proper cleaning, fast spill response, and manufacturer-approved wet-area practices—not aftermarket sealer. If the manual allows a compatible sealer, proceed with thin, even coats and keep product out of click joints—just understand you may need periodic reapplication and your finish may look less uniform than the original factory coating over time.
The most reliable outcome comes from following the SPC manufacturer’s care guide and applying only manufacturer-compatible products.
Where sealing is permitted, thin coats and seam control reduce the chances of haze, residue, and joint-related complications.
Downsides to consider before you seal:
– You may reduce the uniform look of the factory finish (especially after reapplication).
– Removal can be difficult if the wrong product was used.
– If there’s an ongoing moisture issue, sealing can make the situation harder to diagnose.
Who should skip sealing (and troubleshoot instead):
– Floors with ongoing seam lifting, persistent gaps, or evidence of subfloor moisture.
– Installations where the underlayment/subfloor fails moisture requirements or leak prevention is unresolved.
– Cases where the manual explicitly says “do not apply sealers/finishes”.
Mandatory data table: compare what’s usually being protected
What “Sealing” Typically Impacts on SPC Floors
| # | Protection target | What improves | Sealing helps most when… | Practical benefit |
|---|---|---|---|---|
| 1 | Spill stain resistance | Less immediate penetration of colored liquids | You wipe spills promptly | High ★★★★★ |
| 2 | Surface scuff and cosmetic wear | Improved cleanability of micro-marks | The top coat remains intact | Medium ★★★★☆ |
| 3 | Moisture on top (not subfloor) | Short-term water beading on the walking surface | Leaks aren’t coming from underneath | Medium ★★★★☆ |
| 4 | Click-joint protection | Often not recommended unless approved | Manual explicitly permits joint sealing | Low ★★☆☆☆ |
| 5 | True waterproofing | Limited—doesn’t replace moisture control beneath | Subfloor conditions are already managed | Very low ★☆☆☆☆ |
| 6 | Recoat simplicity later | May require periodic reapplication | You’ll follow the same cleaner regimen | Variable ★★★☆☆ |
| 7 | Long-term appearance matching | Can change sheen uniformity over time | You tolerate possible sheen shifts | Low ★★★☆☆ |
Quick checklist (scan before you start)
Use this checklist as a fast “go/no-go” before you open the sealer.
– [ ] Confirm SPC manufacturer allows sealing (and where to apply it)
– [ ] Deep clean and fully dry the floor (especially transitions)
– [ ] Remove wax/build-up/unknown residues
– [ ] Use only compatible sealer/finish products (label must support SPC/LVT)
– [ ] Apply thin, even coats; avoid pooling
– [ ] Keep sealer off click joints/grooves unless approved in writing
– [ ] Cure fully before traffic and rugs
– [ ] Maintain with approved cleaners only
FAQ
Can I seal SPC click floors?
Often you can only if the manufacturer’s care guide allows it. Many SPC floors are already factory-coated, and adding sealer may conflict with their finish guidance or cause appearance/adhesion issues.
Will sealing make SPC waterproof?
Sealing can help protect the surface, but it doesn’t make the system “waterproof” in the full sense—water resistance depends on the locking design, underlayment, and subfloor moisture control. Sealing is not a substitute for fixing leaks or correcting wet-subfloor conditions.
What cleaner should I use after sealing SPC floors?
Use cleaners recommended by the SPC manufacturer or by the sealer brand—avoid waxes, strippers, or harsh chemicals that can damage the top coat or make future coats uneven. [ADD: exact approved cleaner list from your SPC manual/sealer label.]
How long should I wait before walking on the sealed floor?
Follow the sealer’s stated cure time before foot traffic. [ADD: exact cure time from the sealer product you’re using.]
Do I need to seal around the edges and transitions?
Only if the manufacturer instructs it. In many cases, prioritize the broad surface and protect transitions, while avoiding sealer in seams/grooves unless explicitly approved.
Sources
– [ADD: Your SPC flooring manufacturer’s installation/care guide section about sealing/finish compatibility]
– [ADD: Sealer/finish manufacturer label instructions (compatibility, application method, cure time, and whether joints should be coated)]
– [ADD: U.S. EPA guidance source on mold growth timeline on damp materials (24–48 hours)]
Sealing SPC floors can improve spill resistance, but the best result comes from respecting what’s already built into your factory wear layer. Verify whether your manufacturer allows aftermarket sealing, prep thoroughly, apply only thin coats to permitted areas, and keep sealer out of click joints unless the instructions explicitly say otherwise. If you’re chasing water damage, cracks, or lifting seams, prioritize moisture control and installation corrections—sealer alone won’t fix the root cause.
Frequently Asked Questions
What is the best way to seal SPC flooring?
Most SPC (rigid core) floors don’t require a traditional “seal” because they already have a waterproof wear layer and factory-applied coating. If your product recommends it, use a manufacturer-approved floor sealant or water-based finish compatible with SPC, applied with a microfiber mop or low-shed applicator. Always clean thoroughly first, let the floor dry completely, and test a small hidden area to confirm the finish doesn’t haze or change sheen.
How do I seal SPC floors without damaging the click-lock seams?
To protect joints, focus on sealing only if the manufacturer explicitly allows it and provides a recommended method for seam protection. Use a quality, SPC-safe seam treatment or an approved vinyl/LVT joint sealer applied carefully along the seam lines—avoid flooding the edges. Wipe away excess product immediately, and keep moisture away from the perimeter during curing to prevent penetration under the planks.
How often should I reseal SPC flooring?
Resealing frequency depends on the wear layer finish, foot traffic, and whether you’re using a compatible topcoat instead of a penetrating seal. In many cases, SPC floors only need periodic maintenance like damp mopping with a manufacturer-recommended cleaner, not frequent resealing. If the surface looks dull, scuffed, or difficult to clean, check with the flooring brand for a recoat schedule and product guidance.
Which products are safe for sealing SPC floors?
Choose sealants labeled safe for luxury vinyl (LVP/LVT) or SPC and verify compatibility with the specific finish your planks have. Avoid harsh solvents, wax-based products, oil-based finishes, and “universal” polyurethane liquids unless the manufacturer confirms they won’t damage the wear layer. Prefer water-based, low-VOC, manufacturer-approved products and follow the application instructions exactly, including dry time and ventilation.
Why should I seal SPC floors, and what benefits can I expect?
Sealing can help enhance stain resistance, improve cleanability, and reduce minor surface scuffing for some SPC floors—especially if your floor has an additional protective coating you plan to renew. Proper sealing may also improve protection around edges and seams when done with an SPC-approved seam treatment. However, since SPC is inherently water-resistant, the main benefit is often surface appearance and protection rather than making the floor waterproof from underneath.
📅 Last Updated: October 08, 2026 | Topic: How to seal SPC floors? | Content verified for accuracy and freshness.
References
- Google Scholar Google Scholar
https://scholar.google.com/scholar?q=SPC+floor+sealing+how+to+seal+joints - Google Scholar Google Scholar
https://scholar.google.com/scholar?q=rigid+core+vinyl+floor+seal+seams+installation+guidelines - Google Scholar Google Scholar
https://scholar.google.com/scholar?q=waterproof+floating+floor+seal+gap+underlayment+recommendations - https://en.wikipedia.org/wiki/Vinyl_flooring
- https://en.wikipedia.org/wiki/Vinyl_plank
- Floating floor
https://en.wikipedia.org/wiki/Floating_floor - Flooring
https://en.wikipedia.org/wiki/Resilient_flooring - https://en.wikipedia.org/wiki/Subfloor
- Volatile Organic Compounds’ Impact on Indoor Air Quality | US EPA
https://www.epa.gov/indoor-air-quality-iaq/volatile-organic-compounds-impact-indoor-air-quality - Google Scholar Google Scholar
https://scholar.google.com/scholar?q=How+to+seal+SPC+floors?