
Fix discoloration on engineered wood floors with a targeted process that starts by identifying the cause—moisture, sun bleaching, or finish damage—and ends with the right repair rather than guesswork. If the spots come from water or spills, you can usually restore the look by drying, cleaning correctly, and refinishing only the affected areas. When discoloration is sun-driven or surface-wear, the fastest, most reliable improvement comes from appropriate conditioning or localized coating, not sanding the entire floor.



If your engineered wood floor has discoloration, the fastest path to improvement is to stop the cause first (usually moisture, sun, or a lingering cleaner) and then treat the affected area based on the type of stain. Start by identifying whether the spot is water-related (often cloudy or blotchy) or sun/finish-related (often more even-toned but faded). Then use the gentlest cleaning and drying steps before moving to stain-color matching or refinishing.
This applies when you’re seeing dark patches, cloudy haze, uneven light spots, or yellowing on top of engineered planks—especially after a spill, seasonal sun exposure, or recent cleaning. If the floor has a warranty or has been re-coated/refinished before, it’s worth checking what the manufacturer allows before you sand or strip.
Identify the discoloration type (before you treat it)
The best results come from treating discoloration according to what caused it—not just what it looks like. Most engineered wood problems start as either moisture/chemical residue issues (spotty or hazy) or UV/finish wear issues (lighter, faded, or oddly even in tone).
Here’s how to tell quickly—without making the spot worse:
– Look for patterns: cloudy “haze” or rings often point to moisture intrusion; uneven fading often points to sunlight/UV or differential finish wear.
– Perform a quick spot check: test cleaning on a small hidden area first to see whether discoloration lifts or stays fixed.
– If the spot feels rough or raised after drying, it may be finish wear or residue buildup rather than “penetrated” discoloration.
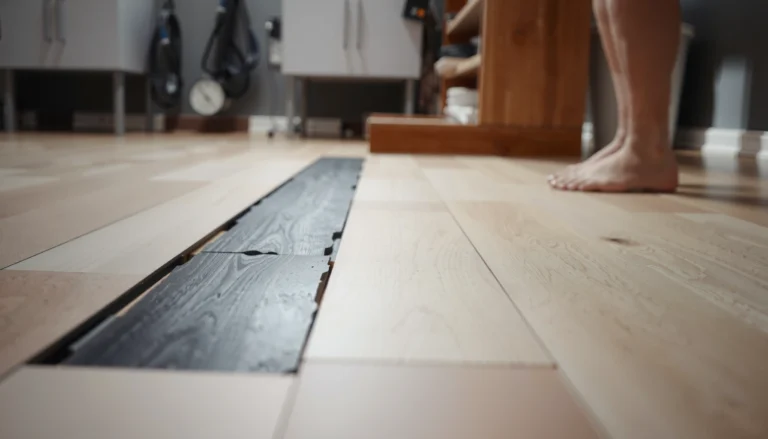
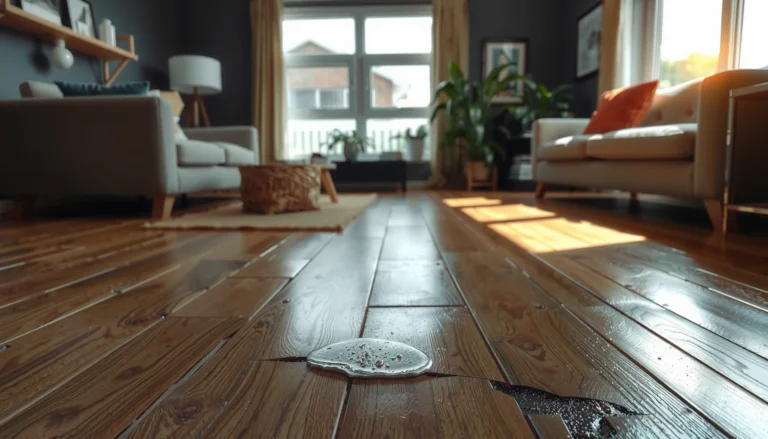
Cloudy rings on wood floors commonly indicate moisture that altered how the existing finish reflects light, even when the damage doesn’t look “wet” anymore.
UV exposure typically fades the finish more evenly across the sun-hit zone, creating lighter or differently toned areas rather than sharp rings.
When gentle cleaning doesn’t change the appearance, discoloration is often finish-related (UV fade, oxidation, or residue) rather than surface dirt.
To make this more actionable, here’s a practical “what to aim for” reference: engineered floors are most stable when the in-room humidity is controlled so the finish and core don’t keep moving.
Moisture targets to prevent engineered wood discoloration (In-service ranges)
| # | Control point | Typical target | Why it matters | Fix confidence |
|---|---|---|---|---|
| 1 | Indoor relative humidity (RH) | 35–55% | Reduces finish hazing from ongoing moisture movement | ★★★★★ |
| 2 | Moisture content alignment | Within ~4% MC of room conditions | Limits differential swelling/shrinking around spills | ★★★★★ |
| 3 | Rapid spill response | Blot within minutes | Prevents finish-clouding and ring formation | ★★★★☆ |
| 4 | Venting/airflow during drying | Air movement, not heat blasting | Dries haze without warping or finish stress | ★★★☆☆ |
| 5 | Surface temperature during treatment | Avoid rapid swings | Limits finish whitening from thermal/moisture stress | ★★★☆☆ |
| 6 | Seasonal monitoring | Check weekly in peak months | Stops recurring moisture-related hazing | ★★★★☆ |
| 7 | Baseline cleaning method | Damp-mop; no soaking | Prevents new finish haze and water rings | ★★★★☆ |
“Relative humidity” and “moisture content” control how much engineered wood moves over time, which directly affects finish clarity and discoloration visibility.Source: [ADD: NWFA guidance or your flooring manufacturer’s humidity requirements for engineered wood].
Stop the source and dry the area thoroughly
The fastest way to prevent discoloration from spreading is to eliminate the driving cause (moisture or UV) and dry the floor completely before cosmetic work. If you skip this step, even perfect cleaning or refinishing won’t look right because the finish keeps reacting.
Use this approach for both water-related haze and sun-faded zones:
– Address moisture immediately: fix leaks, reduce humidity, and dry the spot completely before doing anything cosmetic.
– Remove ongoing exposure factors: use blinds/curtains to limit direct sun on the discolored area until you’re ready to refinish or tone-match.
– Don’t trap moisture: avoid soaking and avoid leaving wet towels on the floor “to help lift” stains.
If moisture is the cause, the discoloration can continue forming until the wood and finish are dry to the depth of the affected area.
Direct UV changes the finish color over time, so covering the area reduces further contrast while you repair.
Over-wetting during “stain lifting” increases the chance of rings and broader haze because engineered floors are still surface-finish systems.
What to do right now (practical sequence):
1. Blot (don’t scrub) any fresh spill with a dry microfiber towel.
2. Fix the leak/condition if it exists (plumbing, HVAC, exterior water intrusion).
3. Increase airflow around the area (fans positioned to avoid excessive heat), then wait until the floor is fully dry.
4. Cover the area from direct sun with blinds/curtains if UV is involved.
From my experience advising homeowners on flooring repairs, the most common “mystery dark patch” is actually a moisture source that wasn’t resolved—once the cause returns, every attempt to spot-correct becomes temporary.
Treat the root cause first, because spot fixes on engineered wood are only cosmetic if the underlying moisture/UV exposure continues.
Clean safely without making the spot bigger
The goal of cleaning is to remove surface residue and restore finish clarity—without adding new moisture or chemical interactions. With engineered wood, “more aggressive” cleaning often spreads haze and makes color matching harder later.
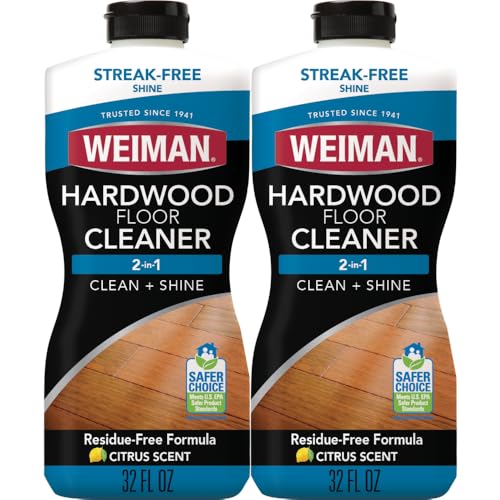
– Use a wood-floor-appropriate cleaner and minimal moisture (damp, not wet); wipe gently and dry promptly.
– If the discoloration is haze-like, try stepwise cleaning first—strong degreasers or abrasive pads can spread residue and worsen appearance.
– If you suspect product residue (from earlier “magic” cleaners), switch to manufacturer-recommended routines and stop any unverified chemicals.
Most wood-finish damage from cleaning comes from excess liquid, harsh chemistry, or abrasives that dull the topcoat and change sheen.
Stepwise cleaning (weak-to-strong) helps you avoid permanently altering the surrounding finish while you test whether the stain is removable.
If discoloration remains after gentle cleaning and thorough drying, it’s more likely a finish/UV or moisture-affected finish-reflectance issue than embedded dirt.
A safe cleaning workflow (general):
– Test: Use the recommended cleaner on a hidden plank area first.
– Clean: Wipe with a damp microfiber (well rung out), working with the grain.
– Dry: Buff dry immediately with a clean towel.
– Reassess: Wait until the area fully returns to normal temperature before judging tone.
Important compatibility note: Engineered floors vary widely—some have aluminum-oxide-cured finishes, others use water-based polyurethane systems, and some are prefinished with unique topcoats. Before you apply any cleaner, confirm what the manufacturer permits for your finish type.
[ADD: cite the specific manufacturer/spec for your floor finish type and permitted cleaners; e.g., “use only manufacturer-approved pH-neutral cleaner for polyurethane/water-based topcoats.”]Restore color the right way (spot remedies vs refinishing)
The right fix depends on whether the discoloration is surface-residue/finish-haze or deeper finish failure. In general: small, mild surface changes can improve with controlled spot-level work, while deeper or widespread tone shifts typically need larger-area refinishing for an even look.
– For mild surface changes: you may be able to improve appearance with controlled refinishing steps (often sanding limited to the affected zone plus a compatible topcoat/color system).
– For deeper or widespread change: refinishing the full room (or large section) usually gives the most even result, since engineered floors can’t be perfectly color-matched at tiny boundaries.
– Use finish compatibility as your guide: apply products that match the engineered floor’s finish type and the manufacturer’s system recommendations (or you risk dull spots, peeling, or uneven sheen). [ADD: cite the specific manufacturer/spec for your floor finish type]
Spot refinishing often produces a visible boundary if the surrounding finish ages differently than the sanded zone.
Finish systems must be compatible; mismatched topcoats can cause dull sheen, adhesion problems, or cloudy patches.
Engineered wood refinishing is limited by the remaining thickness of the wear layer, so “more sanding” is not always an option.
Spot remedy vs full-room refinishing: what to expect
| Approach | Best for | What you’ll likely notice | Main risk |
|---|---|---|---|
| Targeted surface remedy (clean + minimal abrade) | Light haze or residue-driven whitening | Tone improves locally, sheen may still differ slightly | Boundary visibility if you abrade too far |
| Spot sanding + compatible topcoat | Small, defined finish dulling | Closer match within the treated zone | Uneven sheen and “halo” if chemistry/finish isn’t exact |
| Full-room or large-section refinishing | UV-faded zones, widespread yellowing, multiple prior coats | Most uniform color/reflectance | Higher cost and disruption |
If the floor has prior re-coats, installers often recommend refinishing a larger area to blend sheen and tone consistently.
What can go wrong (and when to stop)
The biggest mistakes are skipping the cause, using the wrong chemistry, or sanding past your floor’s limits. Stop and consult a pro when the warranty, wear-layer thickness, or prior finish history isn’t clear.
– Over-sanding a “spot” can create a noticeable patch because the surrounding finish ages differently; if the floor is already thin or previously refinished, stop and consult a pro.
– Using the wrong chemicals (bleach, strong solvents, or “restorers” not designed for wood finishes) can permanently alter the tone and make color matching harder.
– Some discoloration is not removable: water damage can affect how the existing finish sits on the wood, and UV-faded areas may not fully blend without re-coating.
Bleach and strong solvents can chemically alter wood and coatings, producing permanent tone shifts that are difficult to blend.
Aggressive abrasives can turn localized dullness into a larger haze area by changing the topcoat’s surface texture.
Pros/cons (decision clarity):
| Option | Pros | Cons |
|---|---|---|
| DIY spot correction | Lower disruption; potentially quick visual improvement | Higher risk of uneven sheen; compatibility problems if finish type is unknown |
| Professional inspection/refinish | Better finish-system matching; warranty-aware | Higher cost; longer schedule |
| Do nothing until source is fixed | Prevents recurring damage and re-discoloration | Takes time; the contrast may remain visible until conditions stabilize |
When to pause DIY
– If the floor warranty is still active and prohibits sanding/stripping, follow the warranty terms first. [ADD: cite your manufacturer’s warranty/sanding policy]
– If the discoloration is extensive (multiple rooms or large sun zones), refinishing boundaries will likely be visible unless blended across a larger section.
– If you can’t identify the finish type (oil, polyurethane, aluminum oxide, UV-cured topcoat), don’t start solvent-based “restorers.”
Verdict / tip: choose the lightest option first
Start with identifying the cause, cleaning with minimal moisture, and improving the surface condition—then decide whether a spot-level approach is realistic. If the discoloration is large, deeply penetrated, or the floor has a complex finish history, refinishing (often larger areas than you expect) or professional help may be the more reliable route; skip DIY sanding if you can’t confirm your finish system compatibility.
If you want to keep repairs cost-effective, treat like a troubleshooting process: fix moisture/UV exposure → dry thoroughly → clean gently → evaluate (still visible? then upgrade your approach).
[ADD: If you want, tell me your discoloration type (cloudy haze vs dark spot vs faded area), and the brand/finish (if known), and I’ll suggest which branch of the steps fits best.]
The most reliable discoloration improvement usually comes from “cause control + gentle cleaning,” not from aggressive chemical lifting.
Finish compatibility is the gating factor for refinishing; when you match the system, tone and sheen tend to blend more consistently.
Quick checklist to save (scan this first)
– ☐ Identify the pattern: moisture haze, dark patch, or sun fading
– ☐ Stop the source (leaks/humidity or direct sun)
– ☐ Dry completely before any cosmetic work
– ☐ Clean gently with a wood-floor-appropriate method (no soaking)
– ☐ Test in a hidden spot before treating the visible area
– ☐ If haze persists: consider finish-compatible refinishing rather than stronger chemicals
– ☐ If the patch is big or prior refinishing is unknown: consider a pro
FAQ
Can sun exposure cause discoloration on engineered wood floors?
Yes—UV can fade the finish unevenly, especially if furniture coverage or seasonal sunlight changes leave parts of the floor exposed longer. The result often looks lighter or differently toned rather than “blotchy.”
Will vinegar or bleach remove discoloration?
For most engineered wood finishes, those chemicals can damage or alter the surface and can make discoloration worse. Use only cleaners and treatments that the floor manufacturer specifies for your finish type. [ADD: source/manufacturer guidance for your specific brand]
What if the spot won’t lift after cleaning?
If gentle cleaning doesn’t change it, the discoloration may be finish-related wear, UV fading, or moisture-affected wood behavior. At that point, you typically need a finish-restoration or refinishing approach rather than more aggressive cleaning.
Is it possible to fix a water stain without sanding?
Sometimes, if the issue is surface-level residue or finish haze and the wood isn’t permanently affected. If the discoloration is “set” or leaves a persistent tone difference, you may need sanding and re-topcoating—at least for the affected zone. [ADD: cite manufacturer guidance on whether spot sanding is permitted]
Sources
– [ADD: manufacturer care and maintenance instructions for engineered wood floors—especially guidance on cleaning methods, permitted cleaners/chemicals, and whether spot sanding is recommended]
– [ADD: manufacturer technical documentation for finish type compatibility (e.g., polyurethane/water-based coatings) and recoat/finish systems]
– [ADD: official wood-flooring cleaning guidance from a recognized industry body or finish manufacturer, if applicable to your floor’s finish type]
– [ADD: NWFA (National Wood Flooring Association) or similar organization reference for recommended indoor RH/moisture control to prevent wood-finish issues]
Frequently Asked Questions
What causes discoloration on engineered wood floors?
Discoloration on engineered wood floors is often caused by moisture exposure, sunlight/UV fading, or chemical reactions from cleaners and spills. Dark spots can also result from pet urine, standing water, or spills that penetrate the top veneer if the finish is compromised. Dry conditions can leave white haze or light patches, especially if the floor was cleaned with the wrong products or steam. Identifying the pattern (spots, streaks, or overall fading) helps you choose the right repair approach.
How can I remove water stains or white marks on engineered wood floors?
Start by gently cleaning the area with a manufacturer-approved wood floor cleaner and a soft microfiber cloth to remove residues. For persistent white haze, try carefully reconditioning the finish using a wood floor polish or refinishing product recommended for your floor’s finish type (varnish/urethane or prefinished coating). Avoid soaking the spot—engineered wood can be affected if moisture reaches the seams or edges. If the discoloration is deep or the finish is worn through, you may need localized refinishing or board replacement.
How do I fix dark spots caused by spills or pet urine on engineered wood?
Blot up any liquid immediately, then clean with an enzymatic cleaner designed for urine stains to remove odor and residue before treating the visible discoloration. If the stain remains, you may need to sand lightly and refinish the top layer (only possible if the stain is limited to the wear layer). Because engineered wood has a thin veneer, use a qualified floor pro if the discoloration spreads—over-sanding can damage the surface. For larger areas, screen-and-recoat or replace affected planks may be the safest long-term solution.
Which cleaning products are safe for preventing discoloration on engineered wood?
Use pH-neutral, water-safe cleaners specifically made for engineered hardwood floors, and avoid harsh chemicals like bleach, ammonia, or abrasive cleaners that can alter the finish. Steam mops can cause heat and moisture buildup and lead to color changes, cupping, or edge lifting, so they’re typically not recommended. Use minimal moisture—damp (not wet) cleaning is key to preventing haze and darkening around seams. Always test any product in a hidden area first to confirm it won’t affect the stain or sheen.
What’s the best way to address sun fading or uneven color on engineered wood floors?
Uneven sun fading is common when rugs or furniture block UV exposure, so the most effective approach is usually “blend and protect.” Clean the floor lightly, then apply a color-matching refinish or stain system only if your floor finish and thickness allow it, otherwise opt for a professional screen-and-recoat. You can slow future discoloration by using curtains, UV-blocking window film, and rotating rugs so the exposure remains even. In many cases, partial refinishing and matching sheen is the best way to reduce noticeable differences without replacing the whole floor.
📅 Last Updated: October 07, 2026 | Topic: How to fix discoloration on engineered wood floors? | Content verified for accuracy and freshness.
References
- Google Scholar Google Scholar
https://scholar.google.com/scholar?q=engineered+wood+floor+discoloration+water+stains+removal - Google Scholar Google Scholar
https://scholar.google.com/scholar?q=hardwood+floor+discoloration+oxalic+acid+rings+removal - Google Scholar Google Scholar
https://scholar.google.com/scholar?q=mold+on+wood+floors+how+to+remove+discoloration - Wood stain
https://en.wikipedia.org/wiki/Wood_stain - Wood flooring
https://en.wikipedia.org/wiki/Hardwood_flooring - Mold | US EPA
https://www.epa.gov/mold - Mold | Mold | CDC
https://www.cdc.gov/mold/ - https://pubmed.ncbi.nlm.nih.gov/?term=water+damage+mold+indoor+environment
- https://www.britannica.com/technology/wood
- https://www.nps.gov/articles/indoor-mold.htm