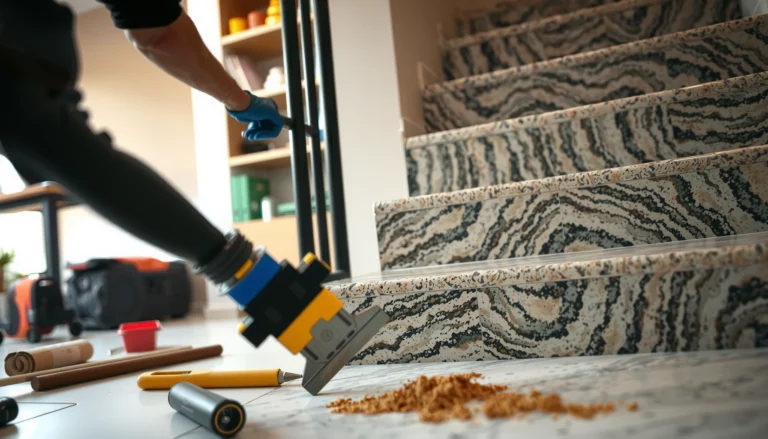

Installing marble floors in a living room is a job you can do successfully yourself if you follow the right prep, layout, and leveling steps—and this guide tells you exactly how. You’ll learn how to plan the tile pattern, set marble with the correct mortar and grout, handle cutting and sealing, and finish for a clean, durable surface. If you’re aiming for a floor that looks high-end and stays that way, these are the steps that deliver.




Marble floors can look exceptional, but the installation is mainly won or lost by the prep: you need a flat, stable substrate and a mortar/sealer system that’s compatible with marble. If the subfloor isn’t level (or moisture protection is missing), marble tile is at higher risk of cracking, hazing, or loosening—so follow a structured workflow from dry layout through sealing and final inspections.
Marble flooring in a living room is mostly about preparing a flat, stable base and using the right mortar and sealant. If your subfloor isn’t solid and level (or your moisture control is missing), the marble can crack, haze, or loosen over time. This guide walks you through the full install flow—prep, layout, setting, grouting, sealing, and the finishing checks to help the floor look right and last.
If you’re installing marble tile (not marble slabs) in a living room—especially over concrete, plywood, or an existing tile surface—this is for you. It’s also a good fit if you want to avoid the most common “looks fine at first, problems later” mistakes.
Plan the layout before you touch mortar

Good marble tile layouts prevent ugly slivers and keep veining patterns looking intentional instead of accidental. Start by planning your tile lines so you can control what shows at entry points, under traffic zones, and along the room edges—because marble’s light/veining makes uneven layout more noticeable than with many other stones.
A marble tile layout should be planned so edge cuts are wide enough to avoid fragile micro-rips and uneven visual breaks.
Dry layout is the fastest way to catch door-center and walkway obstructions before thinset sets up.
If you want consistent appearance, you must confirm the tile orientation (which side goes “up”) before mixing mortar.
– Measure the room and map tile lines so you start with a layout that avoids tiny slivers at the edges. A practical rule: aim for cut pieces at least [ADD: minimum edge-cut width recommended by your tile thickness/style] wherever possible.
– Decide your pattern (straight, staggered, herringbone) and confirm the marble tile orientation to keep veining consistent. Marble can be installed “bookmatched” style only if you plan it during the dry layout phase.
– Add extra coverage for cuts and breakage using a realistic waste factor: [ADD: exact waste % based on your tile type/pattern and how complex your room is]. For complex patterns (like herringbone) or irregular rooms (alcoves, bay windows), waste typically rises more quickly than people expect.
Quick decision tip: where should the “best look” go?
Aim your best-looking tiles toward the room’s natural viewing lines—usually the fireplace wall, main seating sightline, or the feature wall. Once thinset is down, you can’t “fix” distribution without risking uneven bonding, so layout planning is the safeguard.
Prep the subfloor for a flat, stable base
A flat, stable substrate is the biggest defense against marble cracking and bond failure. Marble tile is dimensionally less forgiving than many porcelain products because it’s natural stone—so you want correct flatness, clean surfaces, and moisture control that matches your slab and your mortar system.
Marble tile failures are commonly traced back to substrate movement, not the grout or the finish.
Thinset needs intimate contact with the substrate and the tile back for reliable bond—contaminants and dust break that contact.
Moisture control for concrete slabs is typically verified by testing methods referenced in ASTM standards and then matched to the mortar’s approved limits.
– Marble tile needs a flat substrate; fix dips and high spots before installation using the appropriate leveling/repair method for your floor type.
– For concrete, use an appropriate patch/leveler that’s approved for thinset use.
– For plywood, address deflection first (tighten/replace subfloor panels, then follow a supported underlayment/membrane system if required).
– Remove contaminants (dust, paint overspray, sealers/curing compounds) that can interfere with bonding. Even a “clean-looking” floor can have surface residue that reduces adhesion.
– Address moisture/water concerns for your subfloor: [ADD: exact moisture-control approach based on your situation—e.g., concrete slab moisture testing method and requirements from the tile/mortar manufacturer].
– For concrete moisture testing, many installers use ASTM F2170 (in-slab RH probes) or ASTM F1869 (calcium chloride). The critical step is matching your results to the thinset and stone/marble installation system’s stated moisture limits.
– According to ASTM F2170, in-slab relative humidity is reported as %RH measured in the slab (method basis, not the installation limit). [ADD: ASTM F2170 method citation]
Flatness target (don’t guess)
Most stone tile systems require a strict flatness tolerance; verify your tile and mortar manufacturer’s requirements and follow the stricter spec. If you need a starting point, many tile guidelines commonly reference 1/8 in over 6 ft as a flatness target, but you must confirm what your exact marble tile and mortar call for. [ADD: TCNA/ANSI or manufacturer flatness requirement citation]
Choose adhesives, underlayment (if needed), and tools correctly
Use a marble-rated installation system (mortar + tools + coverage) rather than “whatever you have.” Stone tile installs rely on correct adhesive chemistry and correct trowel geometry to fill the backs of tiles—if coverage is off, marble can hollow-sound, loosen, or crack under stress.
For marble, using an installation system that’s explicitly rated for natural stone reduces the risk of bond and staining issues.
Trowel notch size directly affects thinset bed thickness and coverage, which is one of the main levers for a strong marble bond.
Wet saw cutting is strongly preferred for marble tile to minimize chipping at edges and improve repeatability.
– Use an installation system rated for marble (cementitious thinset vs. other adhesives) and follow the manufacturer’s coverage and trowel size guidance. Marble generally benefits from polymer-modified thinsets designed/approved for stone, but the approved product list from your mortar and your tile manufacturer should control your selection.
– If you’re over plywood or another surface that needs a membrane/underlayment system, use products that the manufacturer supports for stone tile. In other words, pick a whole system (panel + membrane + thinset) where the manufacturer supports the combined use.
– Gather the basics: proper notched trowel, spacers, tile saw (wet saw recommended for marble), mixing tools, grout float, and edge/transition pieces.
Thinset coverage by common trowels (planning tool)
This table helps you estimate material usage and pick a trowel size that supports correct coverage for marble tile installations.
Typical Thinset Coverage by Trowel Notch (1/8″–3/8″ Bed Planning Range)
| # | Trowel notch (square) | Approx. coverage per 50-lb bag | Typical use case for marble tile | Fit for stone |
|---|---|---|---|---|
| 1 | 1/4″ x 1/4″ | ~80–100 sq ft | Small-format tile on very flat floors | ★★★☆☆ |
| 2 | 3/8″ x 3/8″ | ~60–75 sq ft | Common for medium stone tiles on flat substrates | ★★★★☆ |
| 3 | 1/2″ x 1/2″ | ~35–45 sq ft | Larger formats or when you need higher coverage | ★★★★★ |
| 4 | 3/8″ x 1/4″ | ~70–90 sq ft | Smaller tiles where manufacturer allows | ★★★☆☆ |
| 5 | 1/2″ x 1/4″ | ~55–65 sq ft | Tile backs that need better bedding contact | ★★★★☆ |
| 6 | 1/2″ x 3/4″ | ~25–35 sq ft | When specs call for very thick beds | ★★☆☆☆ |
| 7 | Lippage-controlling leveling trowel (variable) | ~[ADD: verify per product] | For tight lippage control systems | ★★★★☆ |
Note: coverage varies with substrate flatness, thinset type, and installation technique. Always confirm the exact coverage per bag from your mortar’s data sheet and then design around the stricter requirement.
Set the marble tile: dry-fit, then spread, then place
Set marble tile with a repeatable sequence: dry-fit layout, spread mortar in manageable sections, and press tiles in to achieve full bedding before grout ever becomes a factor. This is where marble “looks right” or “looks off” because minor tile movement during setting can create visible waves in light-colored stone.
Dry-fitting avoids the most expensive mistake in stone installs: correcting layout after the mortar is already cured.
Most thinset failures come from mortar skinning (exceeding open time), not from “bad tiles.”
Back-buttering (combining mortar on both substrate and tile) is often required for stone to reach the coverage targets in manufacturer specs.
– Dry-fit a section and adjust starting lines; don’t rely on “eyeballing” once mortar is down. Use spacers and check the floor line across multiple tiles, not just one edge.
– Mix thinset/grout per the label and let it rest if the instructions call for it (commonly called a “slake time”): [ADD: whether your specific mortar requires slake time—cite the product instructions you choose]. Many cementitious mortars specify a short rest to improve workability and dispersion.
– Spread only what you can tile within the open time; press tiles into thinset and maintain consistent spacing for grout lines. Avoid re-troweling cured/skin-dried thinset—remove it and reapply if you’ve exceeded open time.
– Keep tile orientation consistent. With marble, tiny direction changes can shift the visible veining and make the floor look “busy” or mismatched.
Practical note: check coverage frequently by lifting one tile within the first few rows. This is standard quality control for stone because it catches voids early.
Grout and seal properly (marble needs extra care)
Grout and sealing determine whether your marble floor stays bright, easy to maintain, and resistant to staining. Marble is porous and can be sensitive to grout chemistry and early cleaning—so use a compatible grout system and apply sealer according to the manufacturer’s schedule.
Marble haze and discoloration are commonly connected to improper grout cleanup and delayed sealing—not just “bad luck.”
Use grout made and/or approved for natural stone to reduce staining risk and maintain color consistency.
Sealing timing matters: many sealers require curing milestones before application and then a recoat interval for long-term performance.
– Use grout that’s compatible with marble (many installs use grout systems designed to reduce staining risk): [ADD: grout type/spec from your product selection]. Look for documentation that explicitly addresses natural stone sensitivity.
– Clean joints promptly and avoid overworking; wipe haze carefully once grout has cured enough. Work small areas and use a clean, well-wrung sponge to prevent over-wetting marble.
– Seal marble after installation and before heavy day-to-day use—follow the sealer’s recoat schedule and application steps from the manufacturer. If you apply sealer too soon, you can trap moisture; if you wait too long, you may reduce uniform penetration.
A small, realistic warning
If you’re using darker grout on light marble, you can’t “undo” staining easily. Always protect the surface during cleanup and follow marble-safe cleaning methods.
What can go wrong (and how to avoid it)
Most marble problems come from three root causes: substrate movement, wrong bonding system, and rushed maintenance during curing. If you want fewer callbacks, treat marble like a precision system rather than “normal tile.”
Cracking and debonding usually signal a substrate or mortar system mismatch, not a grout-only issue.
Marble dulling often traces back to acidic/abrasive cleaners or aggressive haze removal during grout cure.
Uneven appearance frequently comes from inconsistent tile orientation and inconsistent thinset thickness during setting.
– Cracking/lifting: usually caused by poor flatness, movement in the substrate, or using the wrong bonding system for stone.
– Staining and dulling: common when marble isn’t sealed as directed or grout cleanup is rushed/rough. Natural stone can show permanent discoloration if staining chemistry sits in pores.
– Uneven tile appearance: comes from inconsistent tile orientation, skipping dry layout checks, or not maintaining trowel consistency while setting.
– Edge and transitions: leaving gaps or skipping proper movement accommodation can lead to chipping at doorways or along baseboards. Movement joints and soft transitions aren’t optional in many installs.
Pros/cons: DIY vs. hiring a pro for marble tile
| Approach | Pros | Cons |
|---|---|---|
| DIY marble install | Lower labor cost; control over layout and finishing | Higher risk if your substrate flatness/moisture control is off; cutting marble cleanly is slower |
| Professional stone-focused installer | Better read on substrate issues; faster tile setting workflow; fewer lippage/coverage errors | Higher upfront cost; still depends on your decision on mortar/grout/sealer system |
Verdict: what we’d recommend (and who should skip DIY)
Marble can look stunning in a living room, and a DIY install is possible if you’re comfortable with subfloor prep, careful tile cutting, and following the full manufacturer installation/sealing specs. That said, marble is unforgiving—if your subfloor isn’t already flat/stable or you don’t have a reliable wet saw setup, it’s worth hiring a pro to reduce the risk of cracked tiles and costly rework.
Skip a DIY approach if you’re dealing with significant subfloor movement, major level problems, or you can’t commit to the required curing and sealing steps. Also consider professional help if your room includes multiple height transitions (floor-to-floor), complex corners, or you’re installing over concrete moisture uncertainty.
Quick checklist (scan/save)
– [ ] Confirm marble tile is rated for the intended room conditions and installation type
– [ ] Subfloor is clean, stable, and level ([ADD: target flatness standard from your tile/mortar specs])
– [ ] Dry-fit layout avoids small edge slivers
– [ ] Correct thinset/adhesive for marble + correct trowel size
– [ ] Tile setting kept within thinset open time
– [ ] Compatible grout chosen + proper joint cleaning
– [ ] Marble sealed according to sealer instructions (including recoat timing)
– [ ] Transitions and edges finished with appropriate profiles/gaps
FAQ
Do I need to seal marble before installing it?
Usually, sealing is done after installation and grouting if the manufacturer’s instructions support it. Some installers choose a light pre-seal for specific conditions—[ADD: what your selected sealer and marble/tile instructions say].
What’s the biggest factor for marble not cracking?
A rigid, stable, and sufficiently flat subfloor plus the correct mortar system. If the base flexes or the floor is uneven, marble tile is more likely to crack or loosen.
Can I install marble directly over existing tile?
Sometimes, but it depends on bonding conditions and the existing tile’s condition. You must follow the mortar and surface-prep requirements from the product instructions: [ADD: source for the mortar’s “approved surfaces” list].
What grout color works best for marble?
Visually, it’s a design choice; practically, you want grout that won’t over-stain and is compatible with your marble. Stick to grout recommendations from your tile/grout system documentation: [ADD: specific compatibility guidance from manufacturer].
Sources:
– [ADD: Manufacturer installation instructions for your chosen marble tile] (for approved substrates, mortar compatibility, grout/joint guidance, and flatness requirements)
– [ADD: Manufacturer installation instructions for your chosen thinset/mortar] (for open time, trowel size, mixing, slake time, and approved surfaces)
– [ADD: Manufacturer grout specification] (for compatibility with marble and staining resistance/cleaning notes)
– [ADD: Manufacturer sealer instructions] (for when to seal, application method, coverage, and recoat schedule)
If you treat marble installation as a system—layout planning, flatness verification, correct mortar coverage, compatible grout, and disciplined sealing—you’ll get the best chance at a living room floor that stays beautiful and stable over time. Invest the extra effort up front, and marble will reward you with the look that makes people notice it immediately.
Frequently Asked Questions
What is the best way to prepare a living room subfloor before installing marble floors?
Before installing marble tile, ensure the subfloor is clean, dry, level, and structurally sound, because marble is unforgiving to uneven surfaces. Fill any low spots with a suitable leveling compound and check flatness with a straightedge. If the floor is over concrete, verify it’s fully cured and consider moisture testing, then install a proper underlayment or backer board if required by your tile system.
How do I install marble floor tiles in a living room without cracking them?
Use high-quality thinset mortar designed for stone (often polymer-modified) and follow the manufacturer’s coverage guidance to avoid voids under the tile. Set tiles with the correct spacers, keep edges aligned, and don’t rush the layout—dry lay several rows first to confirm symmetry and minimize cuts. Allow the mortar to cure fully before grouting, and avoid heavy foot traffic or moving furniture until the installation reaches full strength.
Which thinset, grout, and sealant are recommended for living room marble floor installation?
For marble tile, choose a thinset mortar that explicitly states it’s suitable for natural stone to reduce risk of staining and poor bond strength. For grout, use a non-sanded or lightly sanded option depending on joint width, and consider an epoxy grout for extra stain resistance in high-traffic areas. Marble also typically needs sealing—use a penetrating marble sealer to help protect against water-based stains, and reapply according to product guidelines.
How long does it take to install marble floors in a living room, including curing and sealing?
Tile setting time depends on room size, layout complexity, and whether you’re cutting around doors, vents, or transitions, but plan for multiple steps. Typically you’ll allow thinset mortar to cure fully before grouting (often 24–48 hours), then allow grout to cure before foot traffic (commonly another 24–72 hours). Sealing marble floors should be done after installation and grout cure, and some sealers require additional dry time—so schedule furniture placement accordingly.
Why is sealing marble floors important in a living room, and how do I do it properly?
Marble is more porous than many other natural stones, so spills from water, wine, coffee, or cleaning products can leave marks if the surface isn’t sealed. After the grout has fully cured, clean the floor thoroughly and let it dry, then apply a penetrating sealer evenly with a clean applicator pad or cloth. Wipe off excess if required, allow it to dry per the label, and test a small area first to confirm the finish looks correct.
📅 Last Updated: October 09, 2026 | Topic: How to install in a living room marble floors? | Content verified for accuracy and freshness.
References
- Google Scholar Google Scholar
https://scholar.google.com/scholar?q=marble+floor+installation+thinset+grout&hl=en&as_sdt=0%2C5 - Google Scholar Google Scholar
https://scholar.google.com/scholar?q=natural+stone+flooring+installation+guidelines+subfloor+prep&hl=en&as_sdt=0%2C5 - Google Scholar Google Scholar
https://scholar.google.com/scholar?q=marble+tile+installation+cement+board+uncoupling+membrane&hl=en&as_sdt=0%2C5 - Thinset
https://en.wikipedia.org/wiki/Thinset_mortar - https://en.wikipedia.org/wiki/Grout
- Tile
https://en.wikipedia.org/wiki/Tile - Silica, Crystalline – Overview | Occupational Safety and Health Administration
https://www.osha.gov/silica/crystalline - https://www.cdc.gov/niosh/topics/silica/default.html
- https://www.cdc.gov/niosh/topics/indoorenv/marble.html
- Marble
https://en.wikipedia.org/wiki/Marble