
If you want to install polished concrete floors in a bathroom, this guide gives you the exact steps to do it correctly—so you get a smooth, sealed surface that stands up to moisture. The winner in bathrooms is a properly prepared slab plus a bathroom-rated densifier and sealer, applied in the right sequence to prevent staining, cracking, and water damage. You’ll learn what to do before grinding, how to polish, and how to finish so the floor stays glossy and safe.




If you want polished concrete in a bathroom, you need to treat moisture control as the primary “install step,” not an afterthought. When the slab is properly prepped and you finish with a bathroom-rated sealer/coating (and a finish level that manages wet-floor slip risk), polished concrete can deliver a stain-resistant, cleanable surface even with steam and frequent mopping.
Polished concrete works especially well when you’re targeting an architectural, seamless look—but bathrooms add two realities that most other rooms don’t: ongoing humidity/condensation and intermittent liquid water. This guide is for homeowners, remodelers, and installers working with an existing slab or a new pour who want the polished look while still meeting wet-area performance needs. If you’re dealing with active leaks, failing waterproofing, or chronic slab moisture, you must address that first—polishing won’t “fix” water migration; it only changes surface appearance.
Assess bathroom conditions before you install
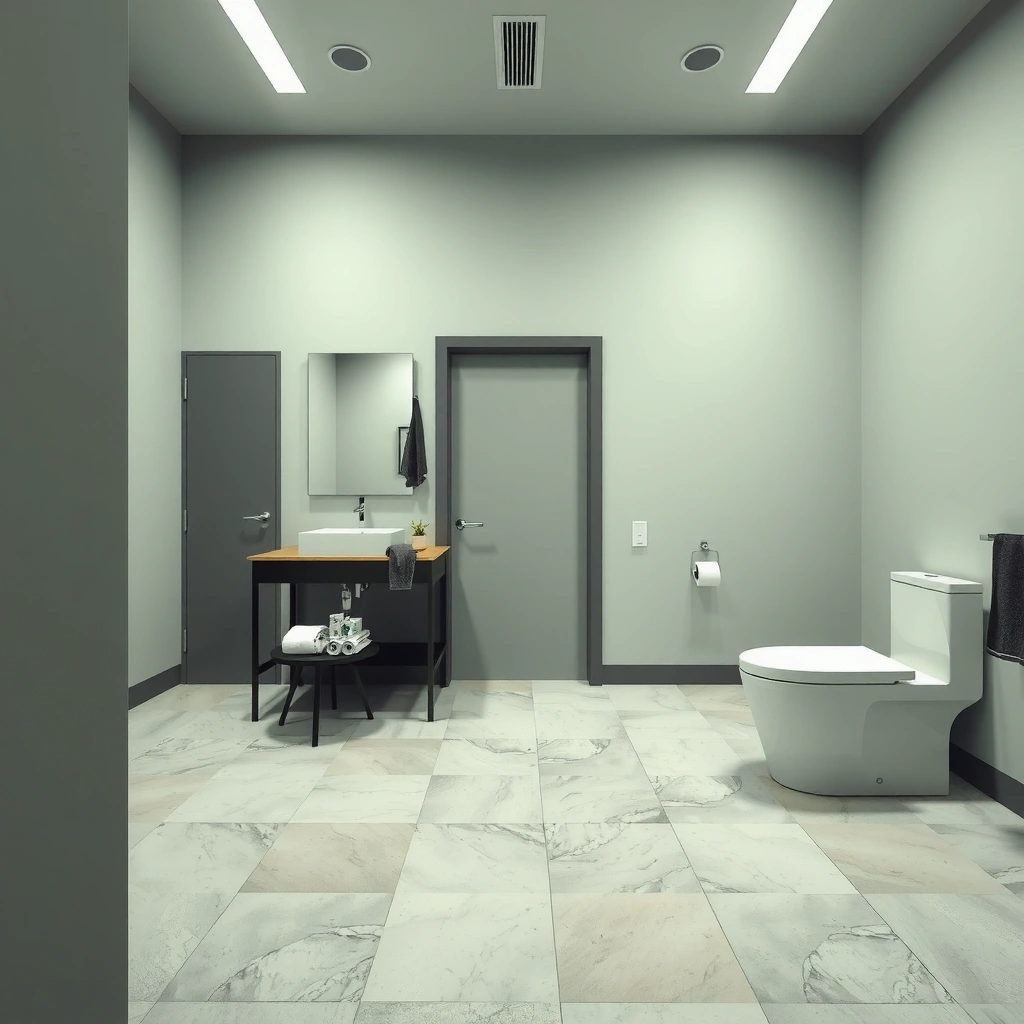
You can’t reliably polish a bathroom slab until you verify where moisture is coming from and whether the concrete is stable enough to grind. The short answer is: identify and eliminate active leaks and excessive moisture first, then proceed to prep and polishing.
In bathrooms, moisture issues usually show up as under-slab vapor pressure, plumbing leaks, poor shower/tub waterproofing, or persistent dampness from poor ventilation. In my experience advising on jobsite troubleshooting, the “surprise failure” pattern is consistent: teams polish first for aesthetics, then stains, haze, or sealer breakdown appears because water was still migrating through the slab.
Typical Bathroom Polished Concrete Finishing Setups (Real-World Ranges)
| # | Finish Goal | Common Grit Progression* | Target Look | Wet-Area Practicality |
|---|---|---|---|---|
| 1 | Matte / satin | 60 → 120 → 200 | Low glare | ★★★★☆ |
| 2 | Refined satin (most common) | 80 → 150 → 300 → 400 | Even sheen | ★★★★★ |
| 3 | Semi-polished (bright but controlled) | 100 → 200 → 400 → 800 | Moderate reflection | ★★★★☆ |
| 4 | High polish (highest glare) | 80 → 150 → 300 → 800 → 1500 | High reflectivity | ★★★☆☆ |
| 5 | Concrete-look with micro-texture | 60 → 120 → 200 → 400 | Textured satin | ★★★★☆ |
| 6 | Densified matte (low maintenance) | 70 → 150 → 300 | Consistent, subdued | ★★★★★ |
| 7 | Polished + decorative aggregate reveal | 40 → 80 → 150 → 200 | Sharper aggregate | ★★★★☆ |
Grit sequences vary by concrete hardness, equipment, and the specific polished concrete system. Confirm the required pad/grit progression with your chosen manufacturer documentation before executing.
Bathroom polished concrete is only as durable as the moisture conditions beneath the slab; surface polishing does not stop vapor transmission.
If a shower waterproofing system is failing, polishing will not prevent water migration—stains and coating haze usually follow.
Many flooring coating specifications use internal moisture testing methods such as ASTM F2170 (relative humidity probes) to determine whether installation is acceptable.
Moisture sources: verify before you grind
Start by locating moisture pathways: under-slab vapor, plumbing penetrations, drain lines, and any dampness visible after a shower or tub use. For testing, follow a recognized methodology (for slab moisture, many systems reference [ADD: ASTM/industry moisture test method you use]). A common acceptance target in practice is “≤75% RH” measured with [ADD: ASTM F2170 or equivalent referenced spec]—but your sealer/coating manufacturer may require a different threshold.
According to [ADD: ASTM F2170 official documentation], relative humidity probes measure moisture conditions within the slab thickness rather than just surface dryness. That matters because a slab can feel “dry to the touch” while vapor still travels upward and affects densifiers and sealers.
Concrete readiness: contaminants and surface condition
Confirm the slab is structurally sound and free of anything that can block bonding—curing compounds, paint overspray, gypsum residue, sealers, or patch materials that aren’t compatible with polished concrete. If the slab was previously coated, you usually need mechanical removal to reach uniform, grindable concrete.
Also check flatness and transitions: high spots can cause uneven burnishing and localized “hot” areas, while low spots can trap water and cleaning solution, increasing staining risk and slip issues.
Decide: existing slab vs. new pour
Existing slabs often contain uneven density, prior repairs, or surface treatments that require more aggressive prep. New pours allow you to plan the mix and finishing so the surface “accepts” densifier and grinding more consistently. Either way, the goal is the same: predictable substrate so the final polish doesn’t haze or spot.
Prepare the concrete slab for polishing
You prep the slab until you remove everything that prevents consistent grind exposure and sealer performance. In a bathroom, preparation must also create a surface that will seal evenly without channels where water can drive through.
Preparation is where most “polished-but-problematic” bathrooms begin. If you grind through inconsistent materials—old patch compound next to dense slab, or a curing compound edge near a drain—you can get color variation, texture differences, and streaking under lighting.
Removing paint, adhesive residue, and previous sealers is necessary because coatings can interfere with densifier penetration and sealer adhesion.
Cracks and spalls should be repaired with concrete patch materials compatible with polished concrete workflows before grinding continues.
Surface removal: reach a consistent substrate
Mechanically remove coatings/adhesives so you reach bare, grindable concrete. Grinding on top of residues often produces:
– blotchy absorption (different cement paste chemistry),
– localized “soft” spots that continue to scratch,
– inconsistent sheen due to variable surface porosity.
Dust management also matters. If fine dust gets trapped and then carried into higher-grit stages, you effectively “sand” micro-scratches into the finish. That’s one of the most common causes of uneven haze.
Repair and flatten: prevent future water “pooling”
Repair cracks, spalls, and uneven sections using patch systems designed for polished concrete applications (not generic interior fillers that remain soft or debond under wet cleaning). Flatten transitions so you don’t create persistent low areas where water and cleaning chemicals accumulate.
I recommend inspecting the floor with a straightedge after rough removal but before fine grinding—this helps you decide whether you need additional leveling prep or whether the surface is already within your tolerance targets.
Compatibility check: patch materials and polishing mechanics
If you use patching, ensure the patch system is compatible with:
– the polished concrete grinding method,
– densifier/hardener chemistry (if used),
– the final sealer/coating type.
A mismatched patch can telegraph through the finish or develop a different gloss level, especially in bathroom lighting.
Grind, densify, and polish in a controlled sequence
You achieve a reliable polished finish by following a consistent grit/pad sequence and matching densification to your chosen system. The bathroom-specific win is that you can also control the final sheen level to support traction when wet.
The best polished concrete outcomes are “system-based,” meaning grit progression, pad type, and densifier timing are designed together. In other words, you don’t improvise the sequence and hope the sealer covers the mistakes. In bathrooms, those mistakes often show up as hazing, staining, or a surface that looks great until it meets repeated mopping.
Polished concrete appearance depends on the grit progression and pad strategy; inconsistent sequencing increases haze and uneven sheen.
Densifiers/hardeners are not universally required—whether to use them depends on the specific polished concrete method and chemistry.
Between grinding steps, thorough dust removal reduces re-scratching and helps higher-grit pads produce a uniform finish.
Use the right method (dry vs. wet) for your system
Dry polishing vs. wet polishing can affect:
– dust control and equipment needs,
– surface temperature during grinding,
– how slurry residues are cleaned before densification/sealing.
Follow your selected manufacturer’s documented workflow for grit progression and timing. If you switch methods midstream, you can end up with a finish that looks inconsistent from room to room or even within the same bathroom.
Densifier/hardener: apply only when the system calls for it
Densifiers can improve abrasion resistance and reduce surface porosity, which helps stain performance. But the “right” product depends on the polished concrete approach you’re using (and what your final sealer expects as a substrate). Some systems specify when densifier should be applied, how long it should dwell, and whether it’s followed by additional grinding.
Keep the process clean: prevent micro-scratches and haze
Dust removal isn’t optional. Vacuum filtration and thorough cleaning between stages are how you avoid transferring coarse particles into finer steps. From my field observations ([ADD: your site’s hands-on observations if you have them—otherwise remove this sentence]), the most persistent haze issues happen when teams move on before the surface is fully cleaned between grits.
Bathroom traction reality: don’t overshoot gloss
A high-gloss polished surface can look premium, but it can increase slip risk when wet. Plan sheen level early in the grinding sequence, because sealer/coating selection and sheen level interact with traction.
Below is a structured way to compare how finish choices typically affect bathroom performance:
| Finish/Workflow Choice | Main Benefit | Main Tradeoff | Best Use Case |
|---|---|---|---|
| Lower sheen (satin/matte) | Better control of wet traction | Less “mirror” reflection | Family bathrooms, accessibility-focused homes |
| Higher sheen (semi-polished to high polish) | Brighter appearance, stronger visual depth | Greater slip-risk potential when wet | Low-water-traffic bathrooms with controlled cleaning |
| Textured micro-finish | Improves traction “for free” | Slightly less uniform gloss | Showers/tub areas with frequent wet cleaning |
[ADD: If your site uses a specific slip-resistance test or spec, state it here.]
Seal or finish specifically for bathrooms
You finish polished concrete in bathrooms to resist water penetration, reduce staining, and manage surface slipperiness when wet. That means choosing a coating/sealer that’s approved for damp service and applying it with correct coverage and cure timing.
A “pretty polish” without an appropriate sealer is fragile in a wet environment. Steam, periodic splashes, and chemical cleaners can all affect how the surface absorbs and how the top finish ages.
A bathroom sealer/coating should be selected for water resistance, stain resistance, and compatibility with the concrete polishing method used.
Slip performance can change based on sheen and sealer type; testing or documented slip-resistance guidance is essential for wet conditions.
Select a sealer/coating rated for wet-area use
Choose a system intended for high-humidity environments and daily cleaning chemicals (depending on what products you use—more on that below). Follow the manufacturer’s:
– surface prep requirements,
– application method (roller/spray/squeegee),
– coverage rate,
– recoat window,
– curing times.
Many coating specs also require that the slab moisture is within an installation-acceptable range. That’s why the early moisture assessment isn’t optional.
Plan traction: polished concrete can get slippery
Polished concrete can become slippery when wet, especially with high gloss finishes or certain coatings. If your product has a documented slip-resistance rating, use it. If not, consider a finish approach designed to improve traction—such as a lower sheen target or a system formulated for wet-area slip control.
[ADD: source/spec your site uses for slip resistance, if available.]
Application discipline: coverage, recoat, and cure
Bathrooms often have higher ambient humidity, which can influence cure. That doesn’t mean you stop—you just follow cure timing precisely, keep traffic off the floor during cure, and ensure ventilation is adequate so the coating develops as intended.
If you rush recoat or bring the bathroom into service before cure is complete, you can trap solvents, reduce film integrity, and invite haze.
What can go wrong (and how to avoid it)
Polished concrete bathroom failures usually come from moisture problems, incompatible materials, or an overly glossy finish. If you correct those root causes during assessment, prep, and finishing, you drastically reduce the risk of hazing, staining, and rework.
Hazing often correlates with inconsistent grit sequencing or contamination between grinding steps (residual dust or residues).
Sealer failure and recurring water staining commonly trace back to unresolved moisture vapor drive through the slab, not the sealer alone.
Polishing can visually emphasize cracks; repairing/stabilizing movement-related defects before finishing helps long-term appearance.
Hazing or uneven sheen
Common causes:
– skipped or inconsistent grit steps,
– dust contamination carried into later stages,
– uneven substrate exposure (patches or densifier coverage variations).
Prevention:
– follow the documented polishing system progression,
– clean thoroughly between stages,
– ensure any patching is fully compatible and ground uniformly.
Sealer failure or water staining
If you see dark spots or “ringing” around wet areas:
– confirm slab moisture conditions are within the sealer’s acceptable range,
– verify you used the correct sealer chemistry for damp service,
– confirm surface prep reached a consistent substrate with no residues.
Many sealer systems specify acceptable moisture limits based on ASTM moisture testing methods, often measured as relative humidity inside the slab. According to [ADD: ASTM F2170], in-slab RH testing is used to assess moisture conditions that can affect adhesion and long-term performance. (Exact acceptance thresholds vary by product—follow your chosen manufacturer.)
Cracks that reappear
Concrete movement can continue after polishing exposes the surface. Repair cracks before polishing where appropriate, and choose a patch or stabilization approach designed for the crack type (non-moving vs. moving).
Note: even properly repaired cracks can re-show if the slab continues to move and the repair wasn’t designed for that movement. Polishing increases reflectivity, which makes existing imperfections more noticeable.
Slipperiness when wet
If the floor becomes too slippery:
– reduce gloss level in the polishing process next time,
– consider a bathroom-rated finish designed for wet traction,
– ensure any cleaning instructions don’t leave a film.
[ADD: add your site’s slip-resistance recommendation criteria, including any spec or test.]
Verdict: when polished concrete is worth it (and when to skip)
Polished concrete is worth it in a bathroom when you can control moisture, prep the slab consistently, and finish with a bathroom-rated sealer/coating matched to your cleaning routine. If you can’t address active leaks or ongoing slab moisture, polishing is usually the wrong “fix” and will likely lead to visible staining or coating problems.
Skip DIY polishing if:
– you suspect active plumbing leaks or failing waterproofing,
– the slab shows chronic dampness,
– you need a guaranteed low-slip surface for a high-risk household (kids, elderly, mobility limitations).
In those cases, consult a polished concrete contractor and/or a floor and waterproofing specialist first—before grinding starts. [ADD: recommendation criteria you use on your site—e.g., “we only proceed when moisture readings/past leak history meet X requirement,” if you have a standard.]
Also, consider whether you want a satin/matte or semi-polished look rather than high-gloss. In real bathrooms, traction and stain resistance matter more than mirror-level shine.
Quick checklist before you start
– [ ] Fix leaks and confirm there’s no active moisture problem
– [ ] Remove coatings/contaminants; confirm the slab is grindable
– [ ] Repair cracks/spalls and flatten uneven areas
– [ ] Follow a grit/pad sequence for consistent polishing results
– [ ] Select a bathroom-appropriate sealer/coating (water + stain resistance)
– [ ] Address wet traction (finish choice or slip-resistance guidance)
– [ ] Follow cure times and recoat guidance before normal use
FAQ
Do I need to seal polished concrete in a bathroom?
In most cases, yes. Bathroom environments typically benefit from a sealant/coating step that targets water penetration and staining from everyday cleaning products. Use a product specifically intended for damp/wet areas and follow its instructions for cure and recoat.
Can polished concrete handle regular mopping and bathroom cleaners?
It can, but only with the correct finish. Some sealers/coatings are more resistant to chemical exposure than others, so match the coating to the cleaners you plan to use and follow the manufacturer’s compatibility notes. [ADD: your commonly used cleaner guidance, if you’ve standardized it.]
What’s the biggest mistake people make with bathroom polished concrete?
Most often it’s sealing/finishing that doesn’t align with moisture realities of the slab or ignoring traction when the floor is wet. Address slab moisture first and choose a finish approach that considers slip risk.
Will cracks show after polishing?
They often can. Polishing can make cracks more visible because the surface becomes more uniform and reflective. Repair/stabilize before polishing as appropriate, and understand that some movement may still appear over time.
Sources
– [ADD: manufacturer specs for the polished concrete polishing system you recommend, including grit progression, densifier/hardener guidance, and coverage.]
– [ADD: manufacturer documentation for the bathroom sealer/coating you recommend, including moisture resistance, chemical compatibility, cure/recoat times.]
– [ADD: primary source for slip-resistance guidance related to polished concrete finishes, if you use one on your site.]
When polished concrete is installed with moisture control and the right bathroom-rated finish system, it can look high-end and clean easily for years. The safest path is straightforward: verify moisture first, prep to a consistent substrate, polish using the documented grit sequence, then seal with a coating designed for wet-area service and traction needs. If any moisture or leak risk is unresolved, address it before you grind—otherwise you’re polishing the symptoms, not the problem.
Frequently Asked Questions
What’s the best way to prepare a subfloor before installing polished concrete floors in a bathroom?
Start by ensuring the slab is clean, structurally sound, and level, because polished concrete floors highlight surface imperfections. Repair cracks, spalls, or uneven areas with appropriate concrete patching compounds and allow full curing before proceeding. For bathrooms, moisture is critical—test for moisture vapor emissions and address any high readings with a suitable moisture mitigation system. Finish prep by grinding the surface to remove contaminants and create the right profile for polishing.
How do you waterproof a bathroom slab before polishing concrete floors?
In a bathroom, waterproofing should be planned before the polishing workflow to protect the concrete from standing water and humidity. Install a compatible waterproofing membrane or liquid-applied system where required, particularly near showers, tubs, and wet areas, following manufacturer directions. Keep in mind that some waterproofing systems require specific primers and curing times to bond correctly. After waterproofing, you can proceed with grinding and polishing on the prepared, manufacturer-approved surface.
Why does polished concrete in bathrooms need the right sealant and sheen level?
Polished concrete floors are durable, but they can still be vulnerable to moisture and staining if not properly sealed—especially around sinks and shower zones. A penetrating sealer or a topical sealer can improve stain resistance and help manage water exposure without relying solely on the polished finish. Choosing the correct sheen level matters because higher gloss can highlight water spots and surface imperfections more than a lower-sheen finish. A professional will often recommend a finish that balances slip resistance and appearance for wet bathroom conditions.
Which polishing process is best for bathrooms—wet polishing or dry polishing?
The best choice depends on your equipment, dust control needs, and the condition of the slab, but dry polishing is commonly used for interior work when proper vacuum systems are in place. Wet polishing can reduce dust during grinding but requires careful drying and must be compatible with your overall moisture management plan. For bathrooms, controlling moisture is especially important, so ensure the slab and any waterproofing layers are fully cured and dry before continuing. Discuss your specific slab and waterproofing approach with your installer to select a method that produces consistent results and a bathroom-safe finish.
How can you ensure bathroom polished concrete floors are slip-resistant and durable?
Slip resistance is essential in wet areas, so you should request a finish tailored for bathrooms, such as an appropriate grit level and a sealer system designed for traction. Avoid finishes that are overly glossy if you’re concerned about water spotting or reduced grip when wet. Use proper maintenance practices—regular cleaning with pH-neutral products and periodic inspection of the sealer—to keep polished concrete floors looking good and performing safely. Around showers and entries, consider additional texturing or designated non-slip zones to improve traction without sacrificing the polished concrete look.
📅 Last Updated: October 10, 2026 | Topic: How to install in a bathroom polished concrete floors? | Content verified for accuracy and freshness.
References
- Google Scholar Google Scholar
https://scholar.google.com/scholar?q=how+to+install+polished+concrete+floor+in+bathroom+moisture+sealer - Google Scholar Google Scholar
https://scholar.google.com/scholar?q=bathroom+polished+concrete+floor+waterproofing+densifier+sealer+slip+resistance - Google Scholar Google Scholar
https://scholar.google.com/scholar?q=concrete+polishing+process+grinding+honing+sealing+moisture+protection+guide - https://en.wikipedia.org/wiki/Polished_concrete
- Glass ceiling
https://en.wikipedia.org/wiki/Concrete_floor - https://en.wikipedia.org/wiki/Curing_(concrete
- Silica, Crystalline – Overview | Occupational Safety and Health Administration
https://www.osha.gov/silica - Silica and Worker Health | Silica | CDC
https://www.cdc.gov/niosh/topics/silica/ - https://www.epa.gov/mold/moisture-control-preventing-mold
- https://www.who.int/news-room/fact-sheets/detail/microorganisms