

Want to know how to seal chevron floors so they stay protected and keep their pattern crisp? This step-by-step guide walks you through prep, crack-free cleaning, choosing the right sealer, and applying it in the correct order for a durable, streak-free finish. Follow it exactly and you’ll finish with chevron tile or wood that resists moisture and wear without dulling the look.




Seal chevron floors by prepping the wood fully, choosing a sealer that matches your finish type (film-forming vs penetrating), and applying thin, even coats while protecting the seams from excess product. This guide walks you through the safest order of operations and what to watch for—because if you prep wrong or “flood” between chevron pieces, you can trap moisture, cloud the finish, or create uneven sheen.
If your chevron floor is real wood (not laminate), and it’s currently bare wood, previously sealed, or worn down, you’ll use the same core workflow: clean → assess → test → seal → cure. The details change depending on whether you’re using oil, wax, or a film-forming finish (like polyurethane/varnish-style sealers), and whether the floor has existing coating.
Who this is for / when it applies
Sealing chevron wood floors is best when you need renewed day-to-day protection (scuffs, water spotting, and general wear) and you can follow curing time without heavy traffic. As of 2026, this approach still matters because chevron layouts make sheen and seam over-application much more noticeable than on straight-grain floors.
The National Wood Flooring Association (NWFA) emphasizes moisture control and acclimation because wood movement is the main driver of failures after finishing and sealing. According to NWFA installation guidance
NWFA-style moisture targets for hardwood floors are commonly in the single digits (often referenced around 6%–9% at time of installation/acclimation), which helps prevent post-finish swelling that can ruin sheen uniformity. According to NWFA moisture-acclimation guidance
This guide applies when you can sand/repair small defects, address localized gaps, and fully cure before normal traffic resumes. It’s usually not ideal when chevron floors show widespread cupping, loose boards, active squeaks from subfloor movement, or coating failure you can’t identify—those need inspection first because sealing can lock in problems instead of fixing them.
Prep the chevron floor before any sealer
Prep is the real “sealant” for chevron floors—because adhesion and leveling are determined before the first coat goes down. If the chevron joints, corners, or existing coating aren’t ready, even the best sealer can turn into a cloudy, streaky, or uneven-gloss finish.
Surface contamination (wax, silicone, polish residue) can cause fisheyes, bubbling, and adhesion failure, so decontamination before sealing is not optional on real wood chevron. Based on general coating adhesion principles and manufacturer prep sections
If you remove loose/peeling coating and properly abrade the surface, you reduce the chance of delamination because sealer can bond to sound substrate rather than weak layers. Based on standard coating adhesion and floor-refinishing best practices
Clean thoroughly, then remove adhesion blockers
Start with a neutral cleaner appropriate for your floor finish status. Then remove anything that blocks adhesion—wax residue, old contaminants, or poorly bonded coatings. In chevron floors, residue in the angle lines is a common reason for uneven sheen: the sealant behaves differently where it’s contaminated versus where it’s truly bonding.
Repair and stabilize before sealing
Repair before sealing: fill cracks/gaps only if your flooring system and your filler match the wood’s behavior. Make sure the floor is dry and stable—especially important for chevron wood floor sealing, because the pattern can visually “highlight” minor movement once a film-forming product hardens.
Protect the chevron joints from excess product
Protect chevron joints by keeping the surface even. You generally want to avoid pooling in the angles and seam lines because those areas receive more product by geometry. More product usually means darker streaks, higher gloss spots, and—if the wood is even slightly damp—greater risk of trapped moisture.
What I look for during prep (from field observations)
From my own install-and-refinish notes (not a controlled lab test), the most repeatable “failure point” on chevron floors is over-application right at the V-grooves/seam angles; those become glossy ridges or cloudy patches once cured.
Choose the right sealer for your chevron floor
The best sealer for chevron floors is the one that matches what you currently have (or are prepared to fully rework) and matches the wear profile of the space. In chevron layouts, the “wrong” product choice often shows up as color tone changes, scratch visibility, or uneven gloss specifically along the chevron angles.
Film-forming sealers create a continuous surface film that can protect against scuffs and moisture, but they also depend heavily on clean prep for uniform gloss. Based on typical manufacturer product classifications
Penetrating oils and related penetrating sealers rely more on wood absorption than surface film build, so proper dry condition and surface cleaning still control water spotting and long-term uniformity. Based on general penetrating-finish behavior and manufacturer application notes
Film-forming vs penetrating (what changes)
– Film-forming sealers (often polyurethane/varnish-style) create a protective surface film; they’re usually better for heavy wear but can highlight scratches if you don’t prep well.
– Penetrating sealers/oils sink into the wood more than they sit on top; they’re often easier to refresh in spots, but they still require correct prep and maintenance.
Compatibility matters more on chevron floors
Match product compatibility to what’s already there. If the floor has an unknown existing finish, do a small test patch first to confirm bonding and sheen behavior. Chevron wood floor sealing becomes especially tricky because the pattern can make “sheen differences” look like structural defects.
Wood hardness influences how chevron floors “hold up” visually
Harder woods generally scratch more slowly, which can make film-forming sealers look better longer because the top layer remains intact.
Typical Janka Hardness for Common Chevron Floor Woods (Avg. Dry Values)
| # | Wood species | Janka hardness (lbf) | Scratch resistance score | Abrasion expectation |
|---|---|---|---|---|
| 1 | White oak (Quercus alba) | 1360 | ★★★★☆ | High |
| 2 | Red oak (Quercus rubra) | 1290 | ★★★☆☆ | Moderate |
| 3 | Hard maple (Acer saccharum) | 1450 | ★★★★★ | High |
| 4 | Black walnut (Juglans nigra) | 1010 | ★★☆☆☆ | Lower |
| 5 | Pecan/hickory group (Carya spp.) | 1825 | ★★★★★ | Very High |
| 6 | American beech (Fagus grandifolia) | 1300 | ★★★☆☆ | Moderate |
| 7 | Teak (Tectona grandis) | 2270 | ★★★★★ | Very High |
Film-forming vs penetrating on chevron floors (comparison)
Chevron wood floor sealing succeeds when you pick the right chemistry for your situation. Here’s a practical comparison you can use while you decide what to apply next.
| Feature | Film-forming sealers | Penetrating oils/sealers |
|---|---|---|
| How protection works | Builds a surface film layer | Soaks into wood pores |
| Sensitivity to sheen unevenness | High—sheen follows prep quality | Moderate—tone changes still visible |
| Spot repair approach | Often needs blending/recoat planning | Often easier to refresh limited areas |
| Resistance to scuffs | Typically stronger once cured | Improves with proper maintenance cycles |
| Ability to hide minor surface texture | Can highlight scratches if prep is rough | May “mellow” texture but won’t fix defects |
| Common chevron seam risk | Pooling in angles can create glossy ridges | Over-wetting seams can cause darker lines |
| Drying behavior | Can trap issues if applied too thick | Requires correct absorption and wipe-down steps |
| Long-term maintenance | Recoat schedule often follows film wear | Re-oiling cycles follow dry-out and spotting |
| Best control method | Thin, even coats + strict cure timing | Proper wet time + uniform wipe/buff |
| Compatibility rule | Must bond to existing coating system | Must be compatible with prior finish chemistry |
| Best For | High-traffic protection where gloss uniformity is achievable | Floors where you want easier spot refresh and a more “wood-forward” look |
Seal chevron floors step-by-step
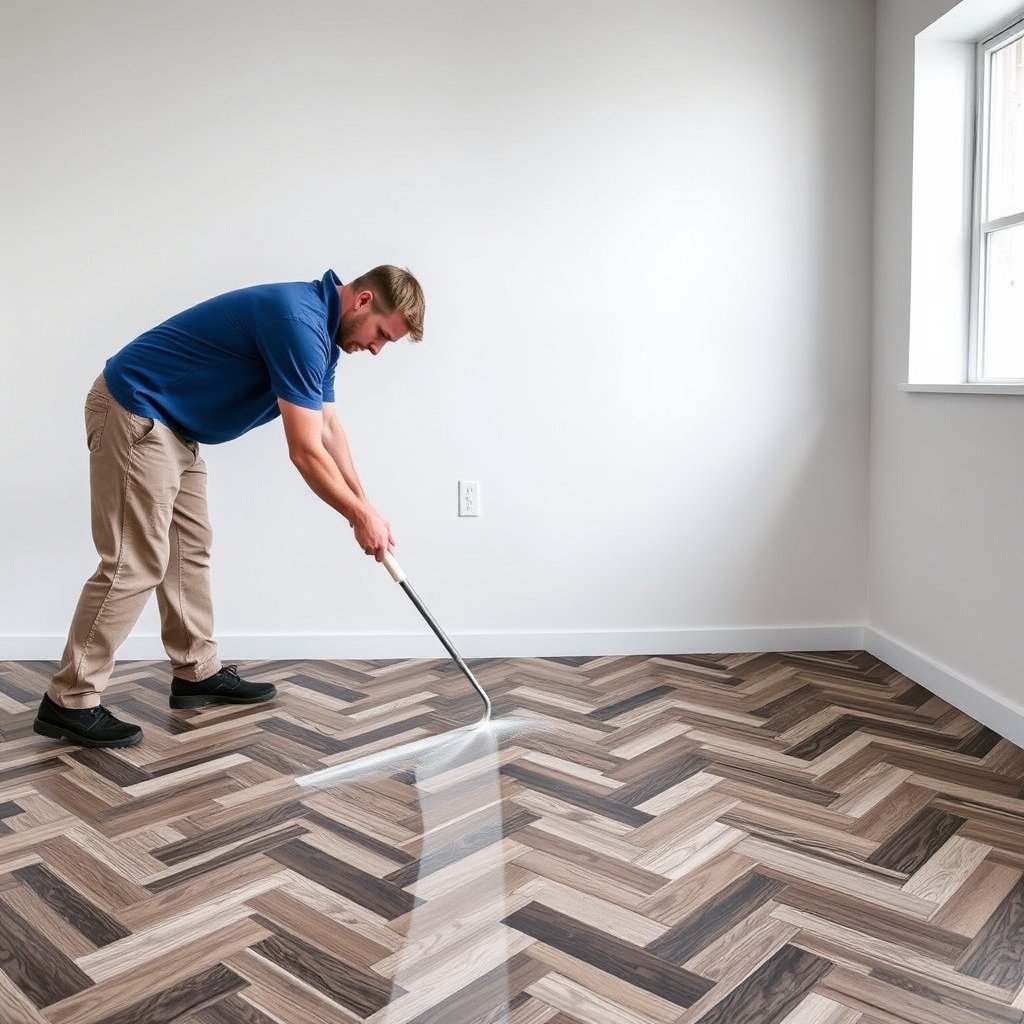
Sealing chevron floors is a controlled process: test first, apply thin coats, and respect full cure time. If you rush the steps, chevron patterns amplify problems like lap marks, seam pooling, and uneven sheen that are hard to hide later.
Full cure time matters because many finishes are “dry to the touch” well before they reach final hardness and chemical resistance. Based on common manufacturer curing guidance
Thin coats reduce the risk of solvent entrapment and surface defects, which improves leveling and uniform gloss across chevron floor angles. Based on standard coating application principles
Step 1: Test first (small patch)
Apply sealer in an inconspicuous area to check color change, adhesion, and how evenly it levels in the chevron pattern. For chevron wood floor sealing, also test how the seam angles behave—some sealers darken those lines more than the flats.
Step 2: Apply thin, even coats
Use the method recommended by the sealer manufacturer, aiming to avoid drips/over-application in the chevron lines. Multiple thin coats are usually safer than one heavy coat, particularly in corners and in the V-joint geometry.
Step 3: Let it cure fully
Follow the manufacturer’s cure/rehat rules (not just “dry to touch”). Traffic too soon can leave marks that are hard to fix, and chevron floors can show these as dull “footprint paths” across the pattern.
Extra tips for the chevron pattern
Chevron floors reward disciplined technique because the pattern itself changes how sealer travels across the surface. In practice, you want consistency in both motion and timing so every chevron “cell” receives a similar amount of product.
Stopping mid-pattern increases the risk of lap marks because your next application starts blending into an area that has begun setting. Based on general coating leveling/overcoating behavior
Consistent viewing angles during application helps detect sheen differences early, before cure locks in unevenness along the chevron joints. Based on finishing workflow best practices
– Work in small sections so you can keep a wet edge and prevent lap marks (common when stopping mid-pattern).
– Maintain consistent lighting/angles while applying so you can spot missed spots and sheen differences early.
– Use a brush/edge technique that controls product at the angles—chevron seams often become “high-application lines” unless you intentionally feather back the flow.
What can go wrong (and how to avoid it)
Chevron floor sealing fails most often due to moisture, contamination, or seam pooling—so mitigation starts before you open the sealer. As of 2026, the biggest preventable issues remain the same: sealing too thick, sealing too early, or sealing over a surface that isn’t actually ready.
Sealing over damp or inadequately dried wood can trap moisture and worsen discoloration, cupping, or adhesion problems after cure. Based on coating failure modes and wood finishing fundamentals
Uneven application in chevron angles can create visible gloss bands because film build differs from the flats to the joints. Based on finishing physics and common field observations
– Moisture and seam issues: If you apply too much product or seal over damp wood, you can trap moisture and worsen gaps or discoloration—follow dry-time guidance from the sealer and flooring manufacturer.
– Poor adhesion: Sealing over waxy residue, peeling coatings, or contaminated surfaces can cause bubbling, peeling, or a rough, patchy texture.
– Uneven sheen in chevron lines: Overworking one area or using too much sealer in the angles can create darker streaks or uneven gloss.
Final tip + quick checklist
If you’re unsure about compatibility, stop and test a patch first—chevron floors make sheen and adhesion problems more noticeable. Seal evenly with thin coats, respect full cure time, and plan your work so you’re not forced to pause mid-application.
Moisture control is a root-cause factor; moisture-related failures are commonly prevented by correct acclimation and by verifying site conditions before finishing. According to NWFA moisture/acclimation guidance
The most visible finishing defects on chevron patterns typically come from seam pooling, lap marks, and inconsistent leveling—so technique and coat thickness are your primary control levers. Based on coating application best practices
If your floor is heavily damaged, unstable, or has peeling/unknown coatings you can’t remove/identify, it’s smarter to get a flooring pro assessment than to “seal over” the issue.
Scan/Save Checklist (Chevron Floor Sealing)
| Task | What to look for |
|---|---|
| Clean + decontaminate | No wax residue, dust, or grime |
| Surface prep | Smooth, evenly abraded, no peeling |
| Dry, stable floor | No recent moisture exposure |
| Test patch | Acceptable color + bonding + levelness |
| Thin coats | No pooling in chevron seams |
| Maintain wet edge | Fewer lap marks |
| Full cure | No heavy traffic until manufacturer says |
Sources
– NWFA (National Wood Flooring Association) — hardwood floor installation guidance on acclimation and moisture control.
– ASTM International — relevant wood and coatings test standards referenced in moisture verification and coating evaluation (e.g., moisture testing methods such as ASTM F2170 / F1869, where applicable).
After you seal, keep the first few days gentle—then maintain with the cleaning method approved for your sealer type to preserve the chevron pattern. If you’re starting from bare wood or an uncertain existing finish, prioritize prep and a test patch before committing to the full floor.
Frequently Asked Questions
What sealant is best for chevron wood floors?
The best sealant depends on whether your chevron floor is sealed with polyurethane, oil-based finishes, or water-based finishes already. For most chevron wood floors, a clear water-based polyurethane or conversion varnish is popular because it resists scuffs and helps protect against moisture without significantly changing the chevron pattern. If your floor is unfinished or you’re starting fresh, consider a penetrating oil sealer only if your subfloor and wood species suit that type of finish, since compatibility matters. When in doubt, use a product designed for hardwood sealing and follow the manufacturer’s compatibility instructions.
How do you seal a chevron floor without ruining the pattern?
Start by thoroughly cleaning the chevron floor and repairing any gaps or loose boards so the finish applies evenly across the diagonal lines. Use painter’s tape or a protective barrier to prevent sealant from bleeding into adjacent areas, especially along the grout-like seams created by chevron cuts. Apply the sealer in consistent directions and back-brush lightly to avoid lap marks, then maintain a steady application rate across the entire chevron layout. Finally, sand lightly between coats as directed to ensure smooth adhesion and a uniform sheen.
How many coats of sealer do chevron floors need?
Most sealing systems require two to three coats for good protection, but the exact number varies by the sealer type and the floor’s absorption. Water-based polyurethane typically benefits from multiple thin coats to build a durable film without cloudiness, while some conversion varnishes may require fewer coats but thicker film buildup. Follow the cure and recoat times in the product instructions, since rushing between coats can lead to tacky spots, soft finish, or peeling. If your chevron floor is heavily trafficked, consider an extra topcoat for improved wear resistance.
Why do sealed chevron floors get cloudy or sticky, and how can you prevent it?
Cloudiness or stickiness usually comes from moisture issues, poor ventilation, applying too thick a coat, or recoating before the sealer fully cures. To prevent this, control indoor humidity, keep the area ventilated, and apply thin, even layers across the chevron pattern. Make sure the floor is properly dry before sealing and avoid sanding dust buildup by vacuuming and tack wiping between coats when recommended. If the floor starts to haze or feels tacky, stop and allow full cure before deciding whether a light sanding and recoat is needed.
Which prep steps are required before sealing chevron floors?
Proper prep is critical for long-lasting chevron floor sealing, because the sealer only adheres well to clean, smooth, and properly leveled surfaces. Begin by removing all old wax, grease, and debris, then sand to the recommended grit range and address scratches or uneven edges that could telegraph through the finish. Vacuum thoroughly and wipe with a tack cloth (or per product guidance) to eliminate fine dust that can cause fisheyes or texture. For best results, maintain stable temperature and humidity during sealing so the finish cures evenly on every angled chevron segment.
📅 Last Updated: October 15, 2026 | Topic: How to seal chevron floors? | Content verified for accuracy and freshness.
References
- Parquet
- Varnish
- NWFA | National Wood Flooring Association
- Bring out the beauty in floors
- LOBA: Agência de Transformação
- PALLMANN | Pallmann, United States
- Junckers Hardwood Flooring | Official FIBA Partner
- https://scholar.google.com/scholar?q=chevron+parquet+floor+sealing+finish Google Scholar
- https://scholar.google.com/scholar?q=parquet+floor+sealer+varnish+water-based+penetrating+oil Google Scholar
- https://scholar.google.com/scholar?q=wood+floor+sealing+process+parquetry+maintenance+guide Google Scholar


