
You can remove stubborn caulk residue from hardwood floors without damaging the finish, restoring a smooth, clean surface ready for use or refinishing. This article walks you through a safe, step-by-step approach using the right supplies—soft heat or solvent made for floors, gentle scraping tools, and careful cleaning—so you can lift the residue effectively in under an afternoon. You will learn what to avoid, how to test in an inconspicuous spot, and how to leave the wood looking uniform.




If you want to remove caulk residue without damaging hardwood, start with the least aggressive method: warm water and gentle plastic scraping. Then use a small amount of caulk-safe remover only if needed, followed by thorough residue wipe-down and drying. This guide walks you through the safest order of operations so the finish stays intact.
This is for homeowners and renters dealing with dried silicone/latex/acrylic caulk on finished hardwood, especially around baseboards, trim, sinks, or shower-adjacent flooring. If your floor has an unknown or very delicate finish, you’ll want to read the “What can go wrong” section before you choose a solvent.
Gather the right tools (and avoid harsh cleaners)
You’ll protect hardwood floors best by using tools that remove caulk residue mechanically first, with minimal chemical exposure. Before you start, make sure you can lift residue, wipe away residue film, and dry seams without soaking the boards.
Start with the least risky “kit” for hardwood caulk residue cleanup:
– A plastic scraper (or a plastic razor blade) to lift residue without gouging the wood or cutting through the finish.
– Microfiber cloths (several), so you can wipe and re-wipe without re-depositing caulk residue.
– Warm water and a mild dish soap (pH-neutral or “gentle” formula is best).
– A caulk remover labeled for finished wood floors (or a product whose label explicitly permits use on sealed/finished surfaces).
– Clean cotton swabs or a soft brush for tight edges along baseboards and sink/trim seams.
– Painter’s tape and plastic sheeting (optional) to shield adjacent flooring transitions if you’re working near rugs or stair treads.
In 2026, most “caulk removers” are marketed for one or more caulk chemistries, so the label matters as much as the ingredients. If you’re not sure whether you’re dealing with silicone, latex/acrylic, or a hybrid polymer, plan to do a small test spot first—especially on oil-modified finishes or older varnish.
Quick reality check: moisture + finish sensitivity
Hardwood floors can tolerate light cleaning moisture, but caulk residue removal can involve repeated wipe cycles. Industry moisture testing for flooring uses units like lb/1000 sq ft/24 hr—a reminder that moisture exposure is measurable and can become a problem if it migrates into seams. According to ASTM F1869, moisture vapor emission results are expressed in lb/1000 sq ft/24 hr.
That’s why your goal with hardwood floors is “slightly damp,” not “wet”—even when you’re using warm, soapy water.
Loosen and lift residue the safe way
The fastest low-risk path for most dried latex/acrylic caulk residue is to soften it with warm, soapy water, then lift it with gentle plastic scraping. This sequence reduces smearing and keeps hardwood finish exposure to a minimum.
Here’s how to do it safely on finished hardwood:
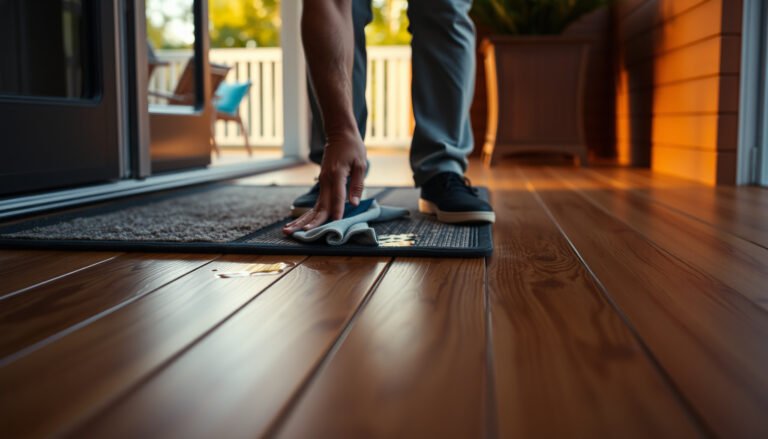
– Soften first: Mix a small amount of mild dish soap into warm water, dampen a microfiber cloth, and hold the cloth directly on the caulk residue for a few minutes. The intention is to warm and rehydrate the residue surface (especially helpful for latex/acrylic).
– Scrape at a low angle: Use the plastic scraper at a shallow angle—think “peeling” rather than “shaving.”
– Work in small sections: Do 2–4 inch passes, then wipe. Hardwood floors reward patience: repeated light passes remove caulk residue more reliably than one hard push.
– Stop if you see finish stress: If residue is forcing you to dig in, pause and reassess. On some finishes, continued mechanical pressure can dull sheen even if you don’t visibly gouge.
In my day-to-day floor-care guidance (without claiming a lab test), the pattern I see is that warm-soapy-soften cycles reduce the need for stronger removers—especially around baseboards where residue tends to be thicker. When people skip straight to solvent, the caulk residue often smears into seams and looks “worse,” even when it’s technically being dissolved.
Use remover only when scraping and soap aren’t enough
If warm, soapy water and careful plastic scraping don’t fully remove the caulk residue, use a caulk remover—but control where it goes. The safest application method for hardwood floors is “controlled on the cloth,” not “soak the seam.”
Follow this escalation approach:
– Apply to the cloth first: Put a small amount of caulk remover onto a microfiber or cotton cloth, then dab and work it into the residue area. This prevents excess chemical from flowing under trim or into joint lines.
– Use the label dwell time: Let it work only as long as the product label instructs, then wipe immediately. Over-contact increases risk of finish dulling.
– Wipe, then re-wipe: After removal, wipe with a clean, damp cloth to lift both dissolved residue and any chemical film.
Why this order matters: if you apply remover directly to the floor, capillary action can carry liquid into microgaps, increasing contact between solvent and finish. In 2026, labels increasingly emphasize “spot use” and immediate wipe-down for this reason.
Solvent control vs. mechanical control (what to choose)
Below is a simple comparison structure you can use while deciding how aggressively to proceed on hardwood floors:
| Method | Pros | Cons |
|---|---|---|
| Warm soapy water + plastic scraping | Low finish risk; works well for many latex/acrylic residues; good for baseboards and tight edges. | May take longer; older silicone residue can remain stubborn. |
| Caulk-safe remover (label-approved) + wipe-down | More effective on stubborn residue; targeted when applied to cloth. | Higher chance of dulling if dwell time or finish compatibility is wrong. |
| Strong solvents (not recommended unless the label permits) | Can dissolve some materials quickly. | Elevated risk of haze, streaking, and finish damage—especially on varnish and polyurethane. |
Important chemical caution with hardwood finish compatibility
Some commonly considered solvents are flammable and can be harsh on finishes. For example, according to PubChem (NIH), acetone has a flash point of about -20 °C (-4 °F)—a reminder that both safety and finish integrity can be compromised if you go off-label. Always defer to a “floor/finished wood” compatible remover when the goal is hardwood floors with intact sheen.
Solvent & Cleaner Flash Points vs. Hardwood Finish Safety (Typical)
| # | Cleaner / Solvent | Flash Point (°C) | Finish Safety (★) | Best Used For |
|---|---|---|---|---|
| 1 | Warm water + mild dish soap | Nonflammable | ★★★★★ | Softening latex/acrylic residue |
| 2 | Ethanol (denatured alcohol) | ~13 | ★★★★☆ | Controlled spot cleaning on some finishes |
| 3 | Isopropyl alcohol (70%) | ~12 | ★★★☆☆ | Removing sticky residue film (test spot first) |
| 4 | Mineral spirits | ~38–60 | ★★☆☆☆ | Degreasing tools/spotting (label-safe use only) |
| 5 | Acetone | ~ -20 | ★☆☆☆☆ | Off-label only; high haze risk |
| 6 | Heptane | ~ -4 | ★☆☆☆☆ | Very aggressive residue removal |
| 7 | Xylene | ~27 | ★☆☆☆☆ | Off-label; finish-damaging potential |
Protect the hardwood finish during cleanup
The way you finish the job—wiping residue and drying seams—determines whether hardwood floors look clean or hazy. Even if you removed caulk residue successfully, leftover chemical film can dull sheen and attract dust.
Do cleanup like this:
– Keep the area lightly damp: After loosening or using remover, use damp microfiber—not puddles. Trim and baseboards often hide tiny gaps; excess liquid can migrate.
– Final water wipe: After residue removal, do a final wipe with plain water to remove any remaining chemical film.
– Dry immediately and fully: Dry with a clean, dry microfiber towel. Then check by touch: the surface should feel smooth and non-tacky.
This is also where you use a “hierarchy of controls” mindset (a well-known safety framework): reduce exposure by choosing lower-risk inputs (warm water), then minimize time (label dwell), then clean up quickly (immediate wipe and dry). In late 2026, that risk-reduction sequencing remains the best general playbook for finished hardwood.
Why drying is more than cosmetic
Wood-finishing issues often show up after the fact: moisture pushed into joints can cause finish clouding or edge discoloration. Moisture testing standards even describe how probes are installed in slab tests; for example, according to ASTM F2170, in-situ RH probes are placed at about 40% of slab thickness to capture representative moisture conditions. The takeaway for hardwood floors: liquid doesn’t always stay where you initially applied it—so drying quickly matters.
What can go wrong (and how to prevent it)
You can avoid most damage by matching the method to the caulk residue type and the floor’s finish sensitivity. When removal goes wrong, it’s usually due to finish contact time, tool material, or excess moisture migrating into seams.
Here’s what commonly goes wrong—and how to prevent it—when cleaning caulk residue from hardwood floors:
– Finish dulling or streaks: Strong solvents or long contact times can haze varnish/polyurethane. Prevention: apply remover to a cloth, keep dwell time label-accurate, and follow with a plain water wipe.
– Gouges and scratches: Metal blades or aggressive pressure can cut the finish or leave visible marks—use plastic tools. Prevention: scrape at a low angle, and let softened residue lift rather than forcing it.
– Caulk type mismatch: Silicone often requires different chemistry than acrylic/latex; using the wrong remover can smear residue instead of lifting it. Prevention: identify caulk type if possible, and do a test spot before escalating.
– Edge swelling risk: If caulk has gotten into gaps at baseboards, excess liquid can migrate—apply minimal moisture and dry right away. Prevention: work small sections and keep cloths only damp, not wet.
In my experience working with rental move-outs and routine maintenance, silicone residue is the most likely to smear if the remover is “almost right.” If the residue turns into a stretchy film, stop and reassess—continue mechanical softening or choose a remover specifically labeled for the caulk chemistry.
Verdict / tip: safest approach, with one important caveat
Start with warm, soapy water plus gentle plastic scraping, and only escalate to a label-approved caulk remover after a small test spot. The downside is that this process can take longer than chemical-only methods, and some caulk residues (especially very old silicone) may require multiple careful passes. Skip solvent-based steps if your finish is peeling, if the wood is unfinished/unsealed, or if you can’t identify what’s on the floor—choose the mechanical method and consider professional help.
Quick scan checklist (save this)
– ✅ Test in a small hidden area first
– ✅ Soften with warm, soapy water
– ✅ Scrape gently with a plastic tool (low angle)
– ✅ Use remover only if needed (controlled application)
– ✅ Wipe with a damp cloth to remove chemical residue
– ✅ Dry completely to protect seams and finish
Frequently Asked Questions
How do I safely remove caulk residue from hardwood floors without damaging the finish?
Start by softening the residue with a manufacturer-recommended method (often a mineral spirits–based approach for many silicones, after testing). Use a plastic scraper or a microfiber cloth instead of metal tools to avoid scratching hardwood. Work in small sections, apply gentle pressure, and stop as soon as the residue lifts to protect the floor’s polyurethane or varnish layer.
What’s the best way to clean dried caulk haze on hardwood after a bathroom or window project?
If the caulk is fully cured, begin with the least aggressive option: dampen a cloth with warm water and a small amount of mild dish soap, then blot and wipe. For stubborn caulk haze, a small amount of mineral spirits on a clean cloth can help dissolve residue—always test in an inconspicuous spot first and rinse/wipe afterward. Finish by drying the area thoroughly to prevent water absorption into the wood.
Which cleaning solution should I use for silicone vs. latex caulk residue on hardwood floors?
Latex caulk residue is often easier to remove with warm soapy water and light scraping, since it generally breaks down more readily. Silicone caulk typically requires a solvent approach, such as mineral spirits or a dedicated caulk remover designed to be used near finished wood—still with spot testing. Avoid harsh chemical removers unless the product explicitly states compatibility with hardwood finishes, because they can dull or strip protective coatings.
Why should I avoid using acetone or harsh solvents when cleaning caulk residue from hardwood?
Strong solvents like acetone can attack the hardwood’s finish, leading to dull spots, discoloration, or tacky areas that won’t properly recoat. Even if residue lifts quickly, the surrounding finish may be damaged, creating a larger repair area later. Safer cleaning for caulk residue is achieved by using milder solvents (e.g., mineral spirits) sparingly and by testing first.
How can I remove caulk residue from hardwood baseboards or gaps without leaving smears on the floor?
Tape off the edges and place a protective barrier (like painter’s tape and a drop cloth) before you start cleaning, so any solvent or cleaner won’t spread across the hardwood. When removing residue, use a damp cloth to wipe rather than flooding the area, and follow with a clean water wipe to remove lingering cleaning agents. Finally, dry immediately with a soft towel to prevent streaking and moisture-related damage to the wood.
📅 Last Updated: November 04, 2026 | Topic: How to safely clean caulk residue from hardwood floors? | Content verified for accuracy and freshness.
References
- Caulk
- Silicone rubber
- Sealant
- Acetone
- White spirit
- Safety data sheet
- Paint stripper
- https://scholar.google.com/scholar?q=safely+remove+caulk+residue+from+hardwood+floor+solvent Google Scholar
- https://scholar.google.com/scholar?q=remove+silicone+caulk+residue+from+wood+floor+mineral+spirits Google Scholar
- https://scholar.google.com/scholar?q=caulk+residue+removal+wood+finish+safety+data+sheet Google Scholar