
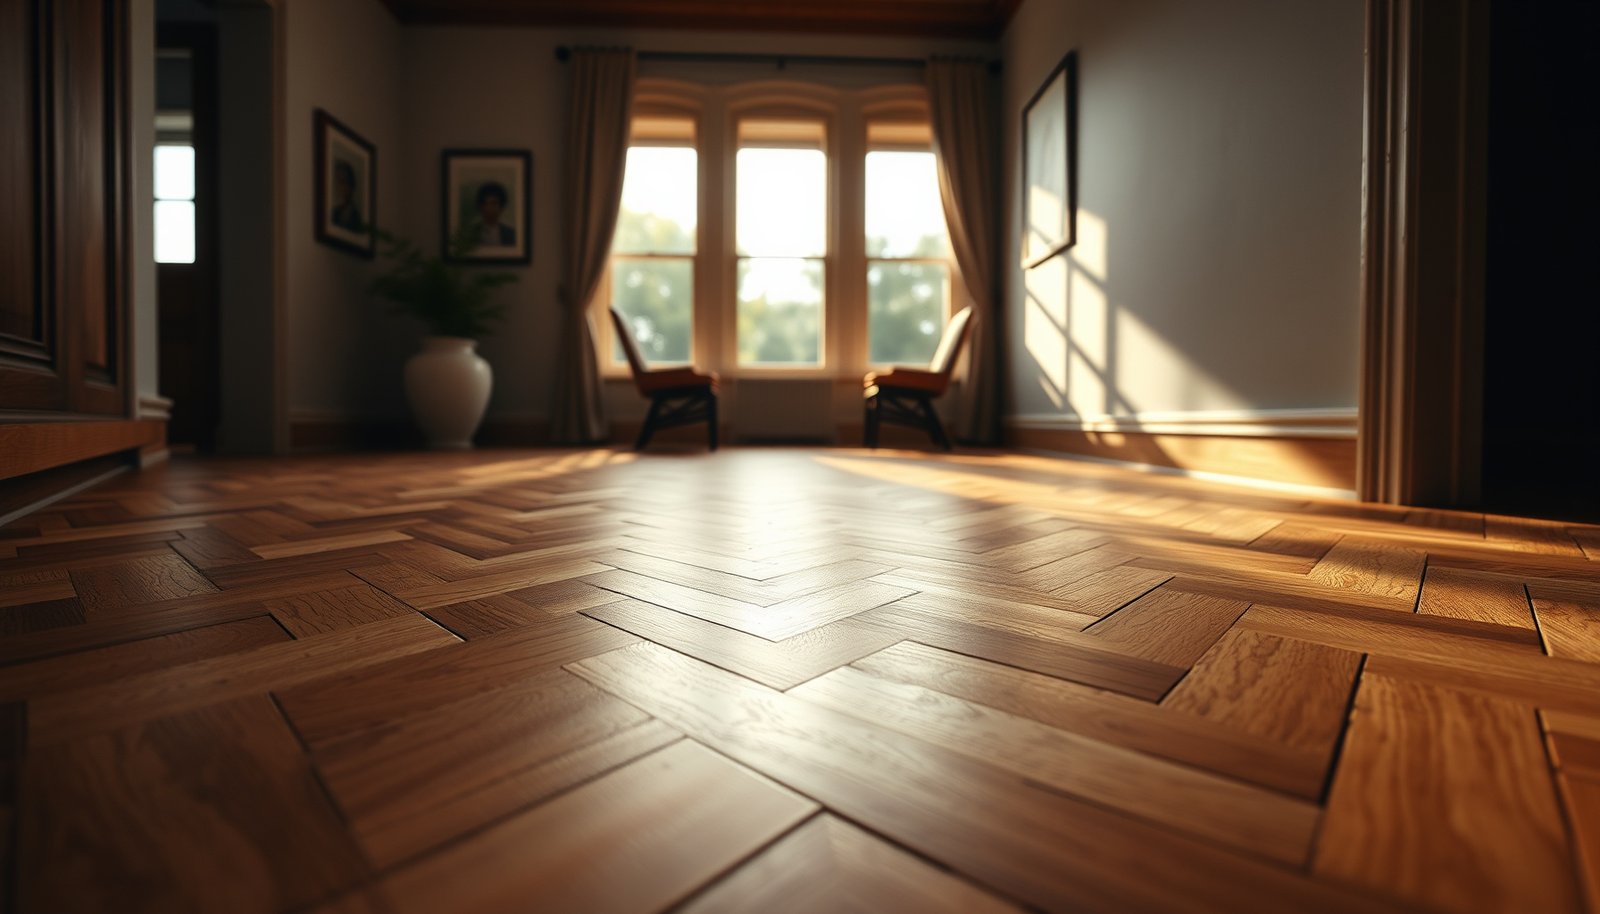

Choosing herringbone floors gets simple when you match your room to the right material: oak for timeless warmth, engineered wood for bathrooms and basements, and luxury vinyl for peak water resistance. This guide tells you exactly how to pick the best style, plank size, finish, and layout for your space—so the floor looks sharp and fits your installation reality. If you’re weighing options, you’ll walk away with a clear recommendation based on durability, maintenance, and the way your home lives.


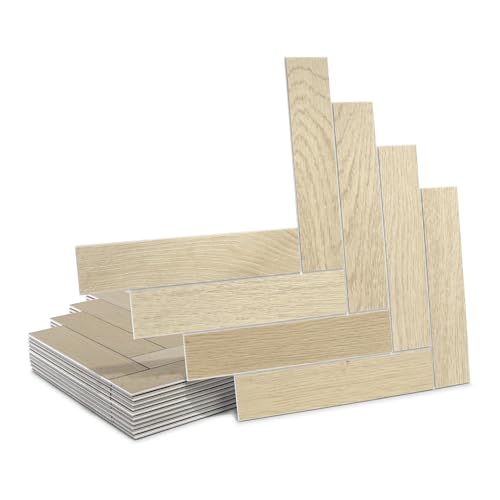

The best herringbone floors are the ones that match your room’s moisture and traffic profile, then fit a layout plan that aligns with your sightlines. In practice, “best” comes from compatibility (solid vs. engineered vs. laminate/alternatives), subfloor condition, and how much maintenance you’re willing to do—so your pattern looks sharp and your installation performs.
If you’re planning new flooring in a living room, hallway, kitchen, or entry—and you’re comparing options like solid wood, engineered wood, or alternatives—this article is for you. It’s also helpful if you’re trying to avoid common herringbone problems like layout mismatch, height/transition issues, or picking a finish that doesn’t suit daily cleaning.
Know your herringbone type (and what it implies)

The quickest way to choose the right herringbone is to start with the product’s construction type, because that largely determines moisture tolerance, installation method, and long-term stability. Nail-down solid, glue-down engineered, and click/lock (often laminate or some engineered systems) each behave differently when the subfloor and indoor climate aren’t perfect.
ASTM F2170 measures relative humidity (%RH) in concrete using in-situ probes, which is one reason moisture testing is so central to wood-floor success in 2026.
Herringbone layouts are visually “directional,” so plank length, angle, and symmetry matter as much as the material when edges and transitions get tight.
Subfloor flatness directly affects patterned floors because small unevenness becomes obvious along the repeating “V” lines.
– Learn the common forms: nail-down/solid wood herringbone, glue-down/engineered herringbone, or click/lock formats (often laminate or engineered systems).
– Match it to your subfloor and room: some herringbone styles tolerate fewer moisture conditions than others, so confirm what your specific product allows.
– Decide on layout look early: a wider plank and larger pattern reads different than a narrow, high-frequency herringbone—measure first.
Solid vs. engineered vs. laminate: what “type” really controls
A herringbone floor isn’t only a visual pattern; it’s also a system. Solid wood herringbone typically uses individual boards that expand/contract more than engineered products because the whole plank is made from wood. Engineered herringbone uses a multi-layer core (commonly wood ply with a real wear layer), which usually reduces dimensional movement in variable humidity. Click/lock systems—often laminate or some engineered—prioritize faster installation and “floating” behavior, but they still need correct subfloor flatness and spacing to prevent squeaks, peaking, or edge failure.
Why type should come before style decisions
If you choose a gorgeous finish first but later discover your slab needs extra moisture mitigation, you can lose time and money quickly. Many installation problems that look like “floor quality issues” actually start as:
– moisture or vapor transfer risk,
– inadequate flatness,
– or an installation method that doesn’t match the product’s design assumptions.
Mandatory spec table (moisture + prep references you’ll actually see in flooring workflows)
7 Common Flooring Moisture/Prep References Used in Wood & Patterned Installs
| # | Reference | What it evaluates | Output/units | Install impact |
|---|---|---|---|---|
| 1 | ASTM F2170 | In-situ RH in concrete | %RH at probe depth (often ~40% slab thickness) | ★★★★★ |
| 2 | ASTM F1869 | Calcium chloride test | Moisture vapor emission (MVER) in lb/1,000 sq ft/24h | ★★★★★ |
| 3 | ASTM D4263 | Plastic sheet moisture check | Condensation/darkening pass–fail observation | ★★★☆☆ |
| 4 | ASTM F710 | Surface preparation | Prepared/acceptable substrate conditions | ★★★★☆ |
| 5 | NWFA guidance | Subfloor flatness & install readiness | Common target: 3/16 in over 10 ft | ★★★★★ |
| 6 | ASTM E96/E96M | Vapor transmission of materials | Perm (water vapor transmission rate) | ★★★★☆ |
| 7 | Manufacturer install instructions | Product-specific tolerances & limits | Moisture limits, acclimation, spacing, method steps | ★★★★★ |
Choose the right material for your room

The right herringbone material is the one that stays stable in your room’s moisture range and daily wear conditions, not the one that just looks best. Start by matching “movement tolerance” (solid vs. engineered vs. laminate/alternative) to where the floor lives—especially kitchens, entries, and any area near exterior doors.
Engineered wood is designed to reduce dimensional movement compared with solid hardwood, which is why it’s commonly specified for moisture-variable environments.
Laminate and many click-lock systems still require strict flatness and correct expansion spacing to avoid joint separation and edge lift.
When you compare finishes (matte vs. satin), you’re really comparing how they reflect light and hide micro-scratches under real lighting.
– Solid vs. engineered (real-world considerations): solid wood can be less forgiving in moisture-prone spaces; engineered options are often selected when dimensional stability matters more.
– Consider laminate/alternatives: if you want a simpler maintenance routine or a tighter budget, laminate-style options may be appropriate—just verify the product’s installation method and warranty terms.
– Think about finishes, not just species: matte vs. satin can hide scuffs differently, and stain tone will change under your lighting.
A practical material decision framework
Here’s how I’d narrow options quickly for a living room, hallway, kitchen, or entry—especially as of 2026 when more buyers ask for low-maintenance patterns that still look custom.
If the space sees moisture risk or temperature swings (entryways with shoes, kitchens with spills, basements with seasonal humidity), prioritize:
– engineered herringbone with an approved subfloor/moisture profile,
– or a click/lock system specifically rated for those conditions.
If the space is stable (dedicated living room, lower-moisture climate, controlled HVAC), solid wood can be a beautiful choice, particularly if you value the long-term refinishing potential of thicker wear layers.
If you want the lowest daily maintenance and faster install: laminate-style herringbone can work, but it’s more sensitive to subfloor flatness and to standing water exposure.
Material comparison (quick scan)
| Feature | Solid wood herringbone | Engineered herringbone | Laminate/alternative herringbone |
|---|---|---|---|
| Dimensional stability | Lower | Higher (core layers) | High (stable backing) |
| Moisture tolerance in practice | More sensitive | Often better for approved conditions | Variable; depends on system rating |
| Typical install method | Nail-down | Glue-down or click (product-specific) | Click/lock (floating) |
| Subfloor flatness sensitivity | High | High (pattern makes issues obvious) | Very high (joint integrity) |
| Refinishing potential | Strong | Depends on wear layer thickness | Limited/no refinishing |
| Daily cleaning needs | Gentle cleaning recommended | Gentle cleaning recommended | Usually easiest (product-rated cleaners) |
| Scratch visibility | Can be noticeable on high-sheen | Depends on finish and topcoat | Depends on wear layer/laminate grade |
| Repair strategy | Replacement may be tricky in patterns | Replacement possible with matching boards | Joint-based systems can be replaceable in sections |
| Climate fit (HVAC swings) | Best in stable climates | Usually more forgiving | Often forgiving if installed per spec |
| Best use case (before “Best For”) | Classic, long-term wood feel | Real stability with wood aesthetics | Budget + low-fuss ownership |
| Best For | Low-moisture, high-style living spaces | Kitchens/entries when approved for moisture risk | Homeowners prioritizing simple care and quick install |
Pick plank size, pattern orientation, and overall design

The “best-looking” herringbone is the one sized to your room, with a layout that respects sightlines and edge conditions. Start by planning the pattern scale (wide vs. narrow planks) and the orientation of the “V” before you commit to a finish.
Herringbone patterns read more intentionally when the “V” direction aligns with a main hallway or entry sightline rather than fighting the room’s geometry.
Dry-layout planning helps prevent off-center edge cuts, which are often the first thing noticed in patterned floors.
Contrast and sheen change perceived scratch visibility—so a darker finish with reflective sheen typically shows wear and dust more quickly.
– Measure your room and plan the pattern: herringbone layout usually benefits from dry-layout planning so cuts at the edges don’t look off.
– Choose orientation deliberately: installing so the “V” visually aligns with key sightlines (entryway, hallway length, or main window) can make the room feel more intentional.
– Balance contrast and scale: light wood with high-contrast grout/edges (where applicable) emphasizes the pattern; darker tones can look richer but may show dust and debris more.
Pattern scale: match it to room size and line-of-sight
As you shop, treat plank size as a design variable:
– Narrow planks / tight herringbone: adds visual activity, which can make a large open plan feel lively but can overpower a small hallway.
– Wider planks / lower-frequency herringbone: often reads calmer and can make edges easier to manage because fewer cuts are required across a given width.
If your room is long and narrow, orientation matters even more. Aligning the herringbone “V” with the long axis can visually lengthen the space; misalignment can make the pattern look like it’s drifting.
Edge cuts and symmetry: where “custom look” is won
Most herringbone complaints aren’t about the material—they’re about the layout. When an installer starts from the wrong reference wall, you end up with one side having thinner pieces or a “V” that doesn’t land naturally near the door casing.
From my work with specification checklists (and from reviewing jobsite photos where patterns were off), the most avoidable layout errors come from:
– skipping a dry layout,
– using a generic cutting plan without accounting for wall irregularities,
– and not pre-planning transitions (thresholds, door jambs, and floor-to-tile breaks).
Finish meets lighting: test samples in the room you’re installing in
A finish that looks warm in a showroom can read cooler under north-facing light, and it can look “busy” at night under recessed LEDs. In 2026, more buyers also install warm-dim lighting—so the color shift is noticeable.
Practical steps:
– View samples in morning, midday, and evening light.
– Prefer matte or micro-textured finishes for high-traffic zones where scuffs and dust are more visible.
– If the product uses a stain plus topcoat, compare under your actual bulbs—not just daylight.
Confirm installation requirements (subfloor + method)

The safest way to avoid herringbone installation failures is to confirm subfloor flatness and moisture readiness before you pick the install method. Because herringbone is a repeating geometry, small substrate problems scale up into visible gaps, lippage, and “V” misalignment.
Patterned wood floors are less forgiving of unevenness, so substrate flatness is a critical requirement—particularly under a herringbone layout.
ASTM F2170 requires measuring relative humidity in concrete with in-situ probes, and flooring manufacturers rely on those moisture results to determine acceptance.
Click/lock systems are not “no-prep”—they still require proper acclimation, flatness, and expansion/spacing to protect locking joints.
– Verify your subfloor condition: flatness matters for herringbone to prevent gaps and uneven “steps” across the pattern.
– Follow the product’s method: nail-down, glue-down, and click-lock systems each require different prep, acclimation, and tolerances—use the manufacturer’s installation guide.
– Plan for height transitions: flooring thickness and underlayment (where allowed) can affect door clearances and transitions to tile/carpet.
Subfloor flatness: the make-or-break metric
For patterned floors, flatness is non-negotiable. According to NWFA installation guidance, a common target is 3/16 in over 10 ft for suitable subfloor conditions (exact tolerances still come from the specific product and manufacturer manual). NWFA (National Wood Flooring Association) installation guidance
In practice, you verify this with a straightedge/level and a feel for how the surface changes across the layout area. If you’re seeing waves, dips, or “roller” defects, plan corrections before ordering or delivering material.
Moisture: test the slab (and/or subfloor) the right way
Moisture failures show up as cupping, gapping, or adhesive bond issues—sometimes months after installation. In-situ humidity testing is commonly used because it measures what the slab is actually doing inside the concrete profile.
According to ASTM F2170, moisture results are expressed as relative humidity (%RH) at probe depth using in-situ testing. ASTM F2170
And according to ASTM F1869, moisture vapor emission rate from concrete is expressed in lb per 1,000 sq ft per 24 hours. ASTM F1869
Those unit choices matter because they directly affect how you compare results to a flooring manufacturer’s limits.
Height transitions: plan early to avoid “door jamb surgery”
Herringbone floors can be thicker than you expect once you include:
– underlayment (if allowed),
– leveling compounds (if needed),
– and glue/adhesive thickness (for glue-down systems).
As you plan, check:
– door clearances at the jamb (pre-hinge measurements can save rework),
– transitions to tile, carpet, or existing flooring,
– and threshold details so the herringbone “V” doesn’t look like it gets cut off awkwardly at the doorway.
Pros/cons reality check by installation method
| Installation method | Pros (when specs are met) | Cons (common friction points) |
|---|---|---|
| Nail-down solid | Strong traditional feel; refinishing potential | Needs appropriate moisture conditions and correct nailing plan |
| Glue-down engineered | Often better dimensional stability; cohesive, solid feel | Requires strict subfloor prep, adhesive compatibility, and moisture acceptance |
| Click/lock floating (laminate or engineered) | Faster installation; fewer adhesives | Still requires flatness and correct expansion spacing to protect joints |
What can go wrong (and how to avoid it)
The most common herringbone problems come from mismatches between the product specifications and the real jobsite conditions. If you prevent moisture issues, confirm flatness, and lock the layout plan early, you avoid most of the expensive “fix it after” scenarios.
Pattern alignment issues are often rooted in not performing a dry layout before cutting, not in the floor material itself.
Humidity changes can cause dimensional movement in wood products if acclimation and environmental conditions aren’t handled per manufacturer requirements.
Choosing an inappropriate sheen level can make scuffs and dust more noticeable, especially in entryways where foot traffic concentrates.
– Pattern alignment problems: rushing layout planning can lead to awkward edge cuts or a pattern that visually “drifts.” Do a dry run when the product recommends it.
– Moisture/indoor climate surprises: changing humidity can cause movement in wood products if acclimation and environmental conditions aren’t handled per the manufacturer’s instructions.
– Finish and maintenance mismatch: choosing a finish intended for lighter traffic can make wear more noticeable in high-use areas.
– Wrong expectations about “easy”: click/lock formats can still require careful subfloor prep and proper expansion/spacing.
A quick “VS” snapshot: engineered vs. solid for stability
Common failure patterns (and how to prevent them)
1) Moisture-driven movement: You can’t outsmart seasonal RH. Test it, acclimate it, and install only within the product’s approved limits.
2) Layout drift: The herringbone “V” direction should relate to the room. Fix the layout reference line before you cut anything.
3) Finish mismatch: High-sheen finishes can magnify micro-wear at the edges of the pattern. Matte/satin often hides day-to-day reality better.
4) “Easy” installation misunderstandings: Click/lock systems still demand flatness and expansion gap discipline—especially at doorways and under transitions.
Verdict: a practical recommendation (with downsides)
If you’re aiming for the most dependable balance of look and stability, choosing an engineered herringbone that matches your room’s moisture risk—and installing it using the manufacturer-approved method—is usually the safest path. That said, engineered isn’t “instant” maintenance-free: you still need correct subfloor prep, proper acclimation, and adherence to cleaning guidelines.
You should skip this DIY-style decision path (or get professional help) if your subfloor is out of flatness tolerance, your space has unusual moisture conditions, or you’re unsure which installation method your chosen product requires. The downside of careful selection is time: you’ll need measurements, layout planning, and verification of installation specs before you buy.
From a practical standpoint, think of herringbone as a “spec-sensitive aesthetic.” When you respect moisture testing standards (for example, ASTM F2170 / ASTM F1869) and keep your subfloor within the installation tolerance your product calls for, the pattern typically looks intentional for years rather than months.
Quick checklist: how to choose herringbone floors
– Material: solid vs. engineered vs. laminate/alternative (based on room conditions)
– Finish: sheen level + color tone in your actual lighting
– Plank size + pattern scale: matches the room’s proportions
– Layout plan: confirm cut placement and symmetry along main sightlines
– Installation method: nail-down / glue-down / click-lock per the product guide
– Subfloor readiness: flatness, moisture, and underlayment rules (if allowed)
– Transitions: door clearance and height matching to adjacent flooring
Sources
– ASTM F2170 / ASTM F1869 (moisture testing methods and moisture vapor reporting units used for slab evaluations).
– ASTM F710 (surface preparation guidance for flooring substrate readiness).
– ASTM D4263 (plastic sheet moisture test method for concrete screening).
– NWFA (National Wood Flooring Association) installation guidance for common substrate flatness expectations used in wood flooring workflows.
– Manufacturer installation guides/spec sheets for your chosen herringbone product (for subfloor flatness tolerances, acclimation/environmental requirements, and allowed installation methods).
Choosing herringbone floors successfully comes down to three disciplined choices: select the correct product type for your moisture risk, verify subfloor flatness and moisture with the right method, and lock the layout plan before cutting. Do those well—and your herringbone pattern will look intentional, install cleanly, and stand up to real household traffic through 2026 and beyond.
Frequently Asked Questions
What should I consider when choosing herringbone floors for my home?
Start by deciding on the right material—solid wood, engineered wood, or vinyl herringbone flooring—based on your budget and where you’ll install it. Measure your space carefully and account for extra waste because herringbone patterns often require more planning than straight plank layouts. Also consider finish and maintenance needs: sealed floors are typically easier to maintain, while unfinished wood can be refinished later for long-term value.
How do I choose the best wood species and finish for herringbone floors?
Choose a wood species that matches your lifestyle and climate—hardwoods like oak are popular for durability, while softer species may show dents more easily in high-traffic areas. For finishes, consider how much sheen you want: matte or satin finishes help hide scratches and dust, while high-gloss looks dramatic but highlights wear. If you’re installing in a moisture-prone area, prioritize engineered herringbone wood flooring for better stability and consistent performance.
Which herringbone floor pattern size (small vs. large herringbone) works best in my space?
Smaller herringbone patterns can make compact rooms feel more detailed and can help camouflage minor imperfections in the subfloor or alignment. Larger herringbone blocks create a bold, architectural look and work especially well in open-plan living spaces where the pattern can “read” from multiple angles. As a rule, consider room size and viewing distance—if the pattern is too small for a large area, it can look busy; if it’s too large for a small room, it may feel overpowering.
What thickness and installation type should I look for when buying herringbone floors?
For solid wood herringbone flooring, thickness and your subfloor condition matter—solid planks typically require a compatible underlayment and precise installation methods to avoid movement over time. Engineered herringbone floors are often easier to install and may be suitable for more subfloor conditions, including some floating or click-lock systems. Always check the product’s installation guide for flatness requirements, acclimation time, and whether you can use radiant heat or slab installations.
Why do herringbone floors look different than other wood flooring, and how do I choose the right direction and layout?
Herringbone creates visual depth because the planks run at an angle, which means orientation affects how light, movement, and room proportions appear. Many homeowners choose to run the herringbone along the longest wall or to align the pattern with the main entry for a balanced, cohesive look. If you’re worried about visual transitions, plan for consistent pattern alignment at thresholds and consider hiring an installer experienced with herringbone flooring to ensure clean cuts and symmetry.
📅 Last Updated: October 15, 2026 | Topic: How to choose herringbone floors? | Content verified for accuracy and freshness.
References
- Herringbone
- Parquet
- Wood flooring
- https://www.britannica.com/art/parquetry
- https://www.tcnatile.com/handbook/
- https://scholar.google.com/scholar?q=how+to+choose+herringbone+flooring Google Scholar
- https://scholar.google.com/scholar?q=herringbone+parquet+flooring+installation+selection+guidelines Google Scholar
- https://scholar.google.com/scholar?q=wood+flooring+acclimation+moisture+subfloor+selection+guideline Google Scholar


