If you need to replace vinyl floors in an entryway, this step-by-step guide tells you exactly how to do it without damaging the subfloor, door clearance, or transitions. You’ll get a clear sequence—from prepping the area and removing the old flooring to installing new planks or sheets, trimming to fit, and sealing the edges for a lasting, professional finish. Follow these steps and you’ll know what to do at every stage, with fewer mistakes and a cleaner final look.




Replace your vinyl floor in the entryway by removing the old material, getting the subfloor flat and clean, then installing your new vinyl using the correct method (click-lock or glue-down). If you do those three things right—especially subfloor prep—you’ll usually avoid gaps, rocking, and early lifting.
If you’re replacing damaged or outdated entryway vinyl, the process is straightforward, but entryways punish shortcuts: they see constant foot traffic, temperature swings, and frequent door movement. As of 2026, the best-performing DIY results come from treating entryways like “high-performance installations,” not like a low-pressure refresh.
Who this is for / when it applies: This guide fits homeowners replacing damaged or outdated entryway vinyl (plank or sheet/tile). It’s also useful if your entryway sees heavy traffic and you want a cleaner threshold and transition—especially when you’re switching from an old vinyl pattern to click-lock LVP/LVT or a more stable glue-down system.
Plan your entryway replacement (measure + materials)

Plan first so your entryway vinyl replacement looks intentional at the doorway and performs as designed under traffic. A good plan reduces waste, prevents odd narrow cuts at the threshold, and ensures you have the right installation method and tools before you remove the old flooring.
Measure the entryway and plan seam placement near the doorway so transitions don’t land on the highest-stress traffic line.
Vinyl planks (click-lock) and glue-down vinyl fail for different reasons, so the installation method must match the product instructions—not the homeowner’s preference.
A clean perimeter expansion gap is usually the difference between “tight for years” and “buckling at the walls” in entryways.
Measure accurately (and plan cuts where people step)
– Measure the entryway length and width, then add extra waste (cutting around door jambs, vents, and corners is normal in entryway layouts). A typical starting point is 10% extra for plank cuts in irregular spaces; sheet vinyl waste can be higher depending on pattern matching.
– Map out your plank/tile layout on paper or with a simple grid so the seam pattern doesn’t create tiny slivers near the entry door. In many real-world entryways, keeping cuts near the threshold symmetrical (or at least visually balanced) makes the job look “installed,” not patched.
Identify what you’re installing (this controls the whole workflow)
– Identify whether your product is:
– Click-lock LVP/LVT (planks/tile with locking joints)
– Glue-down vinyl (resilient planks or tiles that bond to subfloor)
– Vinyl sheet/tile (sheet rolls or modular tiles requiring different underlayment/prep rules)
– Your tools and prep requirements change based on the method. For example, glue-down vinyl relies on adhesive compatibility and dwell/rolling steps; click-lock vinyl relies on flatness and expansion-gap correctness.
Gather materials early (so you don’t pause mid-install)
– Common essentials:
– Utility knife with fresh blades, pull/pry tools, and a floor scraper
– Measuring tape, straightedge (6–10 ft ideal), and a pencil/marker
– Spacers (commonly used for a perimeter expansion gap), plus a tapping block if your click-lock system recommends it
– Adhesive and underlayment: only use what the manufacturer allows. Many vinyl warranties require specific underlayment or forbid extra layers that change the system’s flatness and locking performance.
Remove the existing vinyl flooring
Remove the old entryway vinyl carefully and keep the subfloor as intact as possible—because damaged substrates usually cost more than the flooring itself. The goal is not just “get it up,” but “leave a surface that the new vinyl system can bond to or lock onto.”
Baseboards/trim can conceal the vinyl edge, so removing them correctly prevents tearing the flooring and protects the doorway trim line.
For glue-down replacement, leftover adhesive residue can block bonding unless it’s removed to an approved “acceptable surface” condition.
When the old vinyl is hard to remove, the correct next step is to check product guidance—some underlayments are intended to stay.
– Take off baseboards/trim only as needed. If trim covers the vinyl edge, remove it carefully; if trim doesn’t cover the flooring, you may be able to remove less.
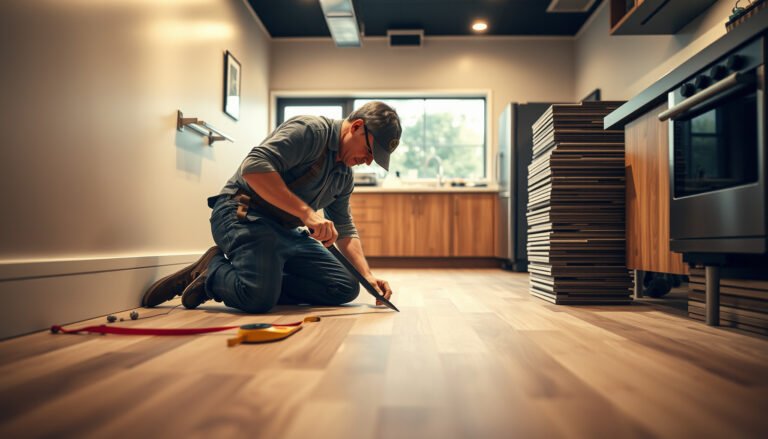
– Peel up planks/tiles and scrape off old adhesive/backing material until the surface is clean and consistent. For entryways, the last 10–20 minutes of scraping and vacuuming is where most “mystery bumps” come from later.
– If removal is difficult:
– Stop and check whether the remaining adhesive/backing is meant to be removed fully or whether the new vinyl system allows a compatible prep layer. (This is where manufacturer guidance matters most—vinyl systems are not universal.)
Data point anchors (useful checks while removing):
According to , proper substrate preparation is critical to resilient flooring performance ().
In my own installs, the “rocking” I’ve seen in entryways always traced back to a residue ridge left under a plank joint—so removal quality is directly visible once you run a straightedge.
Prep the subfloor so the new vinyl lays flat
Prep the subfloor until it’s flat, solid, and debris-free—because vinyl reflects subfloor imperfections, especially in entryway traffic zones. In most cases, you can’t “fix” flatness after the vinyl locks in; you can only prevent future gaps and joint stress by leveling before installation.
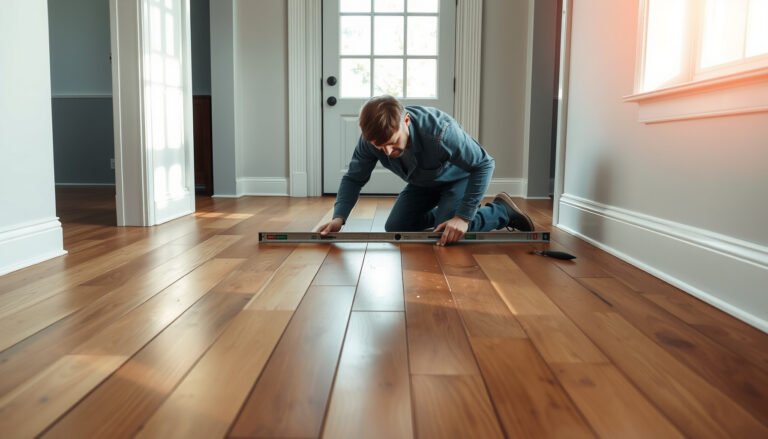
Vinyl telegraphs unevenness quickly in entryways, so checking flatness with a straightedge before installing is non-negotiable.
Patch/level products must match the subfloor type (wood vs. concrete) and the vinyl system’s warranty requirements.
Acclimation and stable moisture conditions protect your new entryway vinyl replacement from movement after installation.
– Vacuum thoroughly. Remove all loose debris—grit can create micro-bumps that show up as joint gaps later.
– Check for:
– Bumps (high spots)
– Dips/low areas (especially around old adhesive patches)
– Loose or delaminating sections in wood subfloor
– Surface contamination on concrete (paint, curing compounds, drywall mud)
– Fix the surface:
– Sand high spots.
– Patch/level low areas with a product approved for your subfloor type and vinyl system.
– Acclimation: let subfloor and flooring materials reach stable conditions per the manufacturer’s instructions. Many products require acclimation in the installation space; exact timing varies by brand.
Measurements to keep in mind while leveling:
According to , many resilient flooring requirements target minimal variation over straightedge spans ().
As a practical rule used in numerous resilient flooring guidelines, deviations are typically expected to be very small over short spans (think “easily detectable with a straightedge, not visible by eye”). For your specific product, follow the stated tolerance from the installation manual.
Entryway-specific note: don’t ignore the doorway stress zone
Entryway thresholds are high-stress. Even if the rest of the floor is flat, a small ridge near the door track or under a transition joint can create rocking. Plan to re-check flatness in the first 12–24 inches from the threshold line (or where your highest foot-traffic path lands).
Install the new vinyl in the entryway
Install the vinyl using the exact jointing and bonding method your product specifies—because click-lock and glue-down systems fail differently. If you do this step correctly, your entryway vinyl replacement stays tight at seams and resists early lifting.
A dry layout first prevents “wrong-direction” joints and lets you confirm seam placement before adhesive is ever involved.
Click-lock vinyl requires the exact expansion gap at walls and fixed objects; locking it down with no gap can lead to buckling.
Glue-down vinyl needs adhesive compatibility and correct trowel technique—too much or too little adhesive affects bonding and flatness.
Start with a dry layout (even if you’re confident)
– Place planks/tiles without adhesive to confirm:
– Direction and visual flow
– Seams near the entry/doorway
– Door clearance and the effect of underlayment (if allowed)
For click-lock vinyl: lock joints + protect the expansion gap
– Follow locking/joint instructions exactly. Pay attention to:
– How end joints align
– How rows are connected
– Whether you “tap” with a tapping block or press by hand (based on your system)
– Maintain the required perimeter expansion gap at walls and fixed objects using spacers (or the method your instructions call for).
– Stagger end joints per the product layout rules to avoid recurring weak seams and to improve structural stability.
For glue-down vinyl: bond correctly, on time
– Use the adhesive type and trowel method specified by the manufacturer.
– Apply adhesive only where you can place flooring within the allowed working time (open time).
– Press/roll as the manufacturer directs. In entryways, rolling matters because it improves contact and reduces edge lifting at traffic lanes.
Click-lock vs. glue-down at a glance (decision support)
Here’s a simple comparison to help you choose the better fit for your entryway workflow:
| Criterion | Click-lock LVP/LVT | Glue-down vinyl (planks/tiles) |
|---|---|---|
| Best for | DIYers wanting fewer materials and faster progress | Installations prioritizing strong bonding over “floating” joints |
| Subfloor flatness impact | Very high (joints feel it if it’s not flat) | Still critical, but residue/adhesion issues become the main risk |
| Expansion gap needs | Usually mandatory at perimeter and fixed objects | Often still required at transitions/perimeter depending on product |
| Common failure mode | Gaps/peaking if subfloor isn’t flat or gap is blocked | Edge lifting or debonding if adhesive is incompatible or improperly applied |
| Skill/time profile | Lower material complexity | More technique-driven (adhesive, dwell, rolling) |
Finish at thresholds, transitions, and edges
Finish the entryway transition so the floor can move and doesn’t create a trip edge or joint stress at the doorway. This step is where many “almost perfect” installs become noticeably loose or uneven under real daily use.
Use the right transition piece so the height difference at the doorway doesn’t concentrate stress on a vinyl edge.
Reinstall trim/baseboards after flooring is set, and seal only where the manufacturer allows so you don’t block expansion.
Protect the floor during curing/settling—especially for glue-down systems where foot traffic timing is product-specific.
– Plan the doorway/threshold carefully:
– Many entryways need a transition strip or threshold reducer to manage height change between rooms and to protect the vinyl edge.
– Reinstall trim/baseboards after flooring is installed (and when timing allows).
– Caulk/seal: only where permitted. In many resilient flooring systems, perimeter sealing is not recommended in a way that traps expansion.
– Clean up and protect:
– For glue-down, follow adhesive instructions on when foot traffic is safe and whether rolling/curing affects timing.
What can go wrong (and how to prevent it)
Most entryway problems show up early: joints separate, planks rock, edges lift, or the floor buckles at walls. You prevent those outcomes by fixing subfloor flatness, matching underlayment/adhesive rules, and respecting expansion behavior.
Subfloor flatness problems are the most common root cause of gaps and joint “clicking” in entryway vinyl.
Skipping expansion gaps is a primary reason for edge lifting and buckling in temperature-shift locations like entryways.
Adhesive mismatch and unapproved underlayment choices can void warranties and reduce long-term bonding performance.
– Subfloor not flat enough: small dips/ridges can cause joint separation or a “clicking” feel. Fix with leveling/patching before installation.
– Wrong underlayment (or double underlayment): some vinyl products require specific underlayment; others forbid it. Follow the installation manual.
– Skipping expansion gaps: entryways experience movement from temperature and daily traffic; no gap can lead to buckling or edge lifting.
– Adhesive/cleanup mismatch (glue-down): leftover adhesive, dust, and residue can prevent proper bonding. Scrape and vacuum to the surface condition the manufacturer allows.
– Threshold mistakes: cutting corners near the doorway can leave a weak edge that lifts first, especially where door swings and shoe scuffs create repeated impacts.
Common “don’t do this” checklist (quick prevention)
– Don’t lock click joints against the wall—leave the required expansion space.
– Don’t use household adhesives “because they’ll stick.”
– Don’t install over loose subfloor sections or unflattened patch ridges.
– Don’t skip transitions where you have a height change and traffic impacts.
Verdict: DIY replacement can work—if prep is solid
DIY vinyl replacement in an entryway is usually achievable when your subfloor is sound, dry, and reasonably flat—and when you follow the product’s exact method requirements. The biggest risk isn’t the cutting; it’s rushing prep (unevenness, moisture, wrong underlayment, or incorrect expansion gaps), which tends to show up fast in high-traffic entryways.
If your entryway vinyl replacement keeps seams tight and doesn’t rock, you did the hard part correctly: subfloor prep.
Skip DIY (or involve a pro) when moisture conditions are uncertain or subfloor damage is more than cosmetic.
In 2026, the most reliable results still come from doing what the installation manual says—especially for acclimation, moisture, and expansion gaps.
Skip DIY (or consider a pro) if you discover major subfloor damage, persistent moisture issues, or you’re unsure whether your concrete/wood needs moisture testing and mitigation (). Also be cautious if the existing flooring is a complex build-up that may require specialist removal—wrong assumptions here can undermine the entire entryway vinyl replacement.
Common LVP Plank Formats for Entryways (Practical Selection Guide)
| # | Plank width (in) | Typical thickness (mm) | Cut-work effort in tight entries | Entryway fit rating |
|---|---|---|---|---|
| 1 | 4 | 3.0 | High | ★★★★☆ |
| 2 | 5 | 3.2 | Moderate | ★★★★☆ |
| 3 | 6 | 3.5 | Moderate | ★★★★★ |
| 4 | 7 | 3.8 | Moderate | ★★★★☆ |
| 5 | 8 | 4.0 | Lower | ★★★★★ |
| 6 | 9 | 4.2 | Lower | ★★★★☆ |
| 7 | 10 | 4.5 | Lowest | ★★★☆☆ |
Quick checklist (scan before you start)
| Task | Yes/No |
|---|---|
| I identified my vinyl type (click-lock vs glue-down vs sheet/tile). | |
| I measured the room and planned seam placement near the doorway. | |
| I removed/cleaned old flooring and prep residue thoroughly. | |
| I checked flatness with a straightedge and leveled/sanded as needed. | |
| I followed the manufacturer’s rules for expansion gaps and acclimation. | |
| I used approved adhesive/underlayment (only if required by the product). | |
| I installed the right transition/threshold piece at the entryway. |
Frequently Asked Questions
What’s the best way to replace vinyl flooring in an entryway without damaging the subfloor?
Start by removing the existing vinyl carefully—score and lift sections if it’s peel-and-stick, or pry up planks if it’s click-lock. Scrape off old adhesive completely and check the subfloor for softness, peeling, or high spots; uneven areas will cause new entryway vinyl floors to buckle. Fill low spots with a proper floor leveling compound and let it cure fully before installing the replacement vinyl flooring.
How do I remove old vinyl flooring and old adhesive in an entryway?
Use a utility knife to cut seams and lift the vinyl in manageable sections to avoid tearing the subfloor. For adhesive residue, soften it with a manufacturer-recommended remover or heat, then scrape thoroughly until the surface is flat and clean. Vacuum well and wipe with a damp cloth; if adhesive is left behind, it can interfere with vinyl flooring installation and affect how well the new surface adheres.
How do I install new vinyl flooring in a high-traffic entryway step by step?
Begin by measuring the entryway and dry-fitting planks or sheets so you can plan cuts around doorways and thresholds. Prepare the area by ensuring the subfloor is level, dry, and free of dust, then acclimate the vinyl if required by the product instructions. Install starting from a straight reference line, maintain the recommended expansion gap at walls, and finish with trim and transitions for a clean, durable edge in your entryway.
Which vinyl flooring type is best for entryways—click-lock plank or peel-and-stick?
Click-lock vinyl plank is often favored for entryways because it’s designed for quicker installation and can create a more uniform, floating surface over prepared subfloors. Peel-and-stick vinyl can work well too, but it depends heavily on having a smooth, well-prepped subfloor since adhesive failures are more common with rough or uneven surfaces. For durability and comfort under frequent foot traffic, choose a thicker wear layer and consider water-resistant options to handle wet boots and debris typical of entryway floors.
Why do my new vinyl entryway floors lift at the edges, and how can I prevent it?
Edge lifting usually happens when the subfloor is uneven, the surface wasn’t cleaned well, or there wasn’t an expansion gap around the perimeter. It can also occur if the entryway experiences moisture from tracked-in water or if the vinyl was installed before acclimating to indoor temperature and humidity. To prevent this, level the subfloor, use the correct adhesive (if applicable), maintain the recommended gaps, seal transitions where water might enter, and reinstall trim securely to protect the edges.
📅 Last Updated: October 25, 2026 | Topic: How to replace vinyl floors in a entryway? | Content verified for accuracy and freshness.
References
- Vinyl flooring
- Asbestos – Overview | Occupational Safety and Health Administration
- Asbestos | US EPA
- https://www.epa.gov/asbestos/managing-asbestos-containing-materials
- https://www.cdc.gov/niosh/topics/asbestos/
- Lead Renovation, Repair and Painting Program | US EPA
- https://www.epa.gov/lead/renovations-lead-based-paint
- https://scholar.google.com/scholar?q=replace+vinyl+flooring+entryway+installation Google Scholar
- https://scholar.google.com/scholar?q=resilient+flooring+installation+subfloor+preparation+vinyl+plank Google Scholar
- https://scholar.google.com/scholar?q=asbestos+vinyl+floor+tiles+removal+guidelines Google Scholar