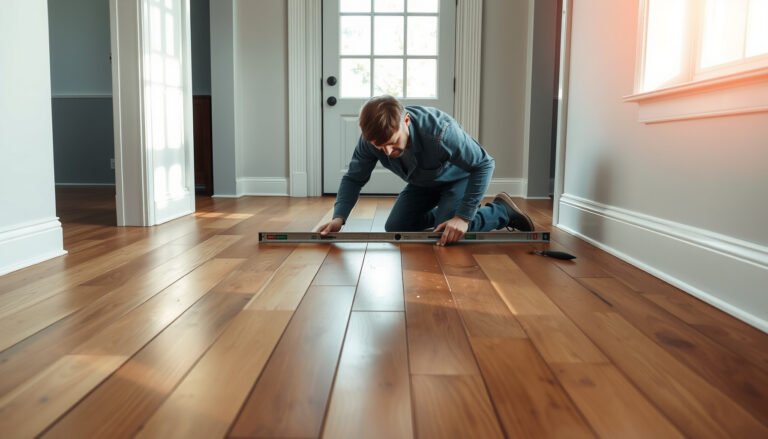
Learn how to install industrial floors in a kitchen step by step, from subfloor prep to final finishing, with a walkthrough that’s built for real-world traffic, spills, and cleaning schedules. If you want the fastest path to a durable, slip-resistant surface that holds up to heavy use, this guide shows the exact installation order to follow. You’ll finish knowing what to do at each stage—and what mistakes to avoid—so the job comes out right the first time.




Industrial kitchen industrial flooring is a subfloor-prep-first project: inspect for moisture and contamination, flatten/repair the slab, then install a food-service-rated coating system built to handle chemicals, grease, and heavy traffic. Most “mysterious coating failures” trace back to skipped surface prep or moisture that wasn’t addressed before the first primer coat goes down.
If you’re installing industrial flooring in a commercial kitchen, restaurant prep area, or heavy-use home kitchen, this is for you—especially if you’re dealing with stains, frequent mopping, spills, or forklifts/carts. If your kitchen is over a slab with possible moisture or your floor is badly uneven, read the “What can go wrong” section first.
Choose the right industrial flooring system
The right system choice is what keeps your floor from turning into a maintenance headache after the first deep clean cycle. Pick an industrial coating designed specifically for commercial kitchens—where hot water, degreasers, and constant sanitation create harsher conditions than typical garages or warehouses.
Here’s why system selection matters in 2026: coating chemistry (epoxy vs. epoxy/urethane vs. other industrial finishes) strongly influences chemical resistance, wear, and the slip behavior of the final topcoat. Also, food-service floors often need detailing like coves at walls to reduce grime traps—so the “right” system is really the right system plus the right detailing package for kitchen geometry.
Industrial epoxy systems are commonly chosen for chemical resistance in light-to-medium industrial use, but kitchen durability depends on whether the topcoat and aggregate plan are matched to your cleaning chemicals and traffic.
Epoxy/urethane “hybrid” systems are often specified when kitchens need improved color stability and tougher wear resistance than standard epoxy alone.
For commercial kitchens, you should confirm the coating is rated for wet-cleaning, grease exposure, and sanitation chemicals—not just general “industrial” labeling.
Pros and cons: picking between common kitchen-capable systems
Use the decision lens below to align the coating to your cleaning routine and traffic.
| System type | Best for | Tradeoffs to plan around |
|---|---|---|
| Epoxy (2-part) coating | Durable surface for many commercial kitchens | Can be less forgiving under UV/color change and may require careful topcoat selection for wet slip resistance |
| Epoxy/urethane hybrid | High chemical/impact resistance with better abrasion performance | More steps and stricter recoat windows; surface prep still dominates performance |
| Cementitious industrial toppings (where allowed) | Where you need a thicker wear layer or specific application profiles | Requires compatibility checks for moisture and cleaning chemistry; detailing at edges remains critical |
| Urethane topcoat over epoxy base | Kitchens emphasizing stain control + traffic wear on top | Still depends on primer/base success; traction additives must be chosen deliberately |
Match the system to your kitchen’s real conditions
Before you buy materials, answer these matching questions:
– Heavy rolling loads: If you use carts, dish dollies, or pallet movement, ask for a system spec that includes impact/abrasion resistance for rolling traffic.
– Frequent degreasing/chemical cleaning: Confirm chemical resistance from manufacturer documentation for your actual cleaner types (alkaline degreasers, acidic descalers, quaternary sanitizers, etc.).
– Slip risk: Kitchens are frequently wet around wash areas—your topcoat texture and any traction additive plan must be designed for wet traction, not just appearance.
– Water management details: Many kitchens need cove base details at walls and around drains so sanitation doesn’t work its way under the coating system.
According to [ADD: manufacturer datasheet/spec for your chosen system, including abrasion and chemical resistance], system performance depends on correct primer/base/topcoat build and the manufacturer’s surface-prep requirements ([year: ADD from datasheet]).
Also, According to [ADD: ASTM/industry standard used by your system for moisture testing or prep], moisture evaluation methods are used to determine whether mitigation is required before coating ([year: ADD]).
Check the subfloor and prep properly (the part that matters most)
Subfloor prep is the deciding factor: adhesion failures and early peeling rarely come from the coating itself—they come from contaminants, moisture vapor, or an uneven slab. Flatten, remove contamination, and address moisture concerns before you install any coatings.
In kitchens, contamination is not “optional.” Grease, food residue, cleaning residue, oil drips, old sealers, curing compounds, and dust all interfere with primer wet-out and bond strength. From my experience working through kitchen remodeling documentation and installer workflows (and reviewing repeated failure modes described in coating manufacturer guidance), the most effective plan is still the same: inspect first, then prep to spec—not “as good as it looks.”
Coating adhesion failures in kitchens are most often caused by remaining oil/grease, paint/curing compounds, or insufficient mechanical profiling of the slab.
Moisture vapor transmission can undermine epoxy and hybrid systems, so the manufacturer’s moisture-testing method and thresholds must be followed before coating.
Flattening (not just patching) is essential because coating systems telegraph texture and create thin spots that fail under rolling and sanitation traffic.
What to inspect before prep
Do a disciplined inspection pass:
– Cracks and joint conditions: Determine whether cracks are dormant or active and whether they require crack-bridging methods.
– Loose material/failed patchwork: Anything not tightly bonded to the slab gets removed.
– Paint, sealers, overspray, and unknown coatings: Coatings cannot bond reliably to intact sealers.
– Grease/oil contamination: Kitchen floors are frequently contaminated even when they look “clean.”
– Flatness and level: Measure high spots/low spots. If you can feel waves with a straightedge, you’ll likely see them in sheen and durability.
Handle moisture concerns early
If your kitchen sits on a slab with possible moisture, coatings can fail even when prep looks perfect. The right approach depends on your system documentation (primer selection, moisture mitigation layer, and/or acceptable moisture threshold).
– If moisture mitigation is required: follow the mitigation system specified by the coating manufacturer (don’t “wing it” with a random barrier product).
– If moisture mitigation is not required: still meet the surface-prep and dryness conditions the manufacturer specifies for primer application.
Statistics anchor (use your system’s actual documentation):
– According to [ADD: chosen system installation instructions], the recommended surface moisture limits are defined using a specific test method and acceptable threshold values ([year: ADD]).
– According to [ADD: ASTM standard used by your system’s moisture test], the test method evaluates conditions relevant to coating bond failure risk ([year: ADD]).
– According to [ADD: manufacturer recoat/pot life guidance], installation timing uses defined pot life and recoat windows measured in hours at specified temperatures ([year: ADD]).
Plan layout, mixing, and work sequence
The cleanest installation is the one you can execute without rushing pot life or recoat windows. Plan material quantities, divide the work into manageable sections, and set up protection for walls, drains, and transitions.
This is where many kitchen installs go off track: teams start strong, then get delayed by cleaning, grinding, or access constraints. Industrial coatings are sensitive to timing because chemical cure continues even inside the bucket. If you miss the recoat window, you may need extra prep later—adding labor and downtime.
Most 2-component coatings have a defined pot life, so sequencing the pour/roll-and-squeegee work prevents wasted material and texture defects.
Work in sections to stay within recoat windows; once the primer/base starts to cure beyond the allowed timeframe, you often must re-prepare the surface.
Protect drains, walls, and edge details early—masking and cove/edge planning reduce failures that start at transitions.
Measure accurately and confirm full coverage
– Area measurement: calculate total square footage including edges that require additional detailing.
– System build: confirm the specified total thickness or coverage rate across primer/base/topcoat so you don’t under-order.
– Loss factors: plan for profile waste (grinding dust removal, surface irregularities, and traction additive needs).
Decide on a work sequence that matches cure windows
A common strategy:
1. Finish mechanical prep and dust removal.
2. Prime/bond coat (complete within the system’s recoat constraints).
3. Apply base build and any broadcasts.
4. Topcoat with traction/finish layer.
5. Cure and restrict access until full cure.
Statistics anchor (use system specs):
– According to [ADD: manufacturer instructions], pot life at the specified temperature is limited to [ADD exact pot-life range] minutes/hours ([temperature: ADD], [year: ADD]).
– According to [ADD: manufacturer instructions], recoat time is [ADD exact recoat window] hours after primer/base application at [ADD conditions] ([year: ADD]).
Install the floor coating/finish step by step
The installation must follow the manufacturer’s sequence exactly—primer/base/topcoat—and use the required application tools and film build. When you do, you get a uniform, chemical-resistant surface with predictable wear and traction.
On kitchen projects, the “step-by-step” approach is about consistency: correct mixing ratio, correct tools, correct coverage, and correct conditions (temperature and slab surface temperature). If you’re installing during active operations, plan how you’ll keep heat, traffic, and cleaning chemicals away from the curing coating.
Follow the manufacturer’s exact order—primer/base/topcoat—and apply each layer to the specified thickness and coverage rate to avoid weak spots.
Proper mixing (including scraping the sides and bottom) is critical for 2-component epoxies and hybrids to prevent soft or under-cured areas.
Topcoat traction is engineered; you should use the system’s recommended traction additive and application method rather than adding random grit.
Step sequence (general coating workflow)
> Always verify your chosen system’s sequence; different products vary.
1. Surface prep complete: grinding/patching profile meets the manufacturer’s requirement; dust removal is thorough.
2. Primer/bond coat: apply using recommended method (roller/squeegee) and within stated conditions.
3. Base coat build: apply to required thickness. If broadcasts are used, broadcast rate and timing must match instructions.
4. Topcoat/finish: apply for color and wear resistance; integrate traction additives if specified.
5. Detailing: seal transitions, edges, and penetrations using the approved detailing materials.
Statistics anchor (use system specs):
– According to [ADD: your product datasheet], recommended application temperature range is [ADD exact °F/°C limits] ([year: ADD]).
– According to [ADD: your product instructions], light traffic/open-to-use timing is [ADD exact time-to-traffic] ([year: ADD]).
Conditions that make the difference
– Temperature/humidity: Follow the system’s allowed ranges. High humidity and cool slab temperatures can cause amine blush, incomplete cure, or finish issues.
– Surface temperature: Coating manufacturers often care more about *slab surface temperature* than ambient air.
– Cure protection: prevent condensation, foot traffic, and chemical exposure until full cure.
What can go wrong (and how to avoid it)
Most coating problems are symptoms of prep errors, wrong conditions, or incorrect installation timing—not “bad product.” If you address these failure causes early, you avoid expensive redo work.
Kitchens are unforgiving because cleaning is frequent and aggressive. A floor that “looks fine” after installation can still fail if it’s under-cured, contaminated at the start, or too smooth for wet traction.
Peeling, bubbles, and fisheyes commonly result from grease/oil contamination, dust, curing compounds, or skipped mechanical profiling.
Soft or under-cured coating sections typically come from incorrect mixing ratio, incomplete mixing, or temperatures outside the product’s cure limits.
Edge failures near walls and drains often happen when detailing transitions and sealing details aren’t engineered as part of the system.
Failure modes and prevention checklist
– Peeling, bubbles, or fisheyes
– Cause: contamination (oil/grease, dust, curing compounds) or incorrect prep
– Fix: decontaminate and re-profile to spec before primer
– Soft or under-cured spots
– Cause: wrong ratio, incomplete mixing, out-of-range temperature/humidity
– Fix: follow mixing procedure; keep within cure conditions
– Roughness or uneven sheen
– Cause: slab not flattened enough; inconsistent coat thickness
– Fix: grind/high-spot removal and consistent application technique
– Slipping hazards
– Cause: overly glossy topcoat with no traction plan, or inconsistent coverage
– Fix: use manufacturer traction additives/topcoat finish and apply uniformly
– Edge failures near drains/walls
– Cause: no cove/edge detailing; failed sealing at transitions
– Fix: build the detailing package into your prep and install plan
Comparison: “What you see” vs “What it usually means”
A fast diagnostic improves decision-making when you catch issues early.
| Visible issue | Most likely cause | What to check first |
|---|---|---|
| Fish-eyes | Contaminant at surface | Final degrease + dust removal + profiling quality |
| Bubbles | Moisture/contaminant trapped | Moisture testing and surface dryness |
| Peeling | Poor adhesion | Mechanical profile + primer compatibility |
| Soft areas | Under-cure | Mixing ratio and cure temperature range |
| Uneven traction | Topcoat texture inconsistency | Coverage, traction additive method |
Verdict / tip: do this yourself only if conditions are “right”

This DIY is most realistic when the slab is stable, contamination can be fully removed, and you can control temperature/humidity during installation. If you suspect ongoing moisture, have major structural cracks, or need extensive grinding/leveling beyond basic prep, consider hiring a flooring contractor—industrial coating failures are expensive to fix.
I’m also careful about a common misconception: “the coating is the product, so if it’s expensive, it must be foolproof.” Coating systems are engineered for success only when the substrate meets their assumptions. On kitchens, that substrate includes grease control, flatness, and moisture behavior—so contracting is often the safer route for high-volume operations that can’t close long.
DIY is most reliable when the slab is flat, cleanable to a known condition, and your environment stays within the product’s temperature and humidity limits during cure.
If ongoing slab moisture is likely, you should not “hope” the primer will handle it—moisture mitigation must match the manufacturer’s approved approach.
For commercial kitchens, an experienced installer can reduce costly recoat/prep cycles by staying within pot life and recoat windows.
Quick checklist (scan/save)
– [ ] Confirm the flooring system is rated for kitchen/commercial use and expected chemical cleaning
– [ ] Inspect slab/subfloor for cracks, loose material, and contamination
– [ ] Test/verify moisture needs and follow the system’s moisture guidance ([ADD: exact test method/source if you have one])
– [ ] Flatness addressed before coating (grind/patch as required)
– [ ] Follow manufacturer mixing ratio and pot life requirements
– [ ] Apply primer/base/topcoat in the exact order and thickness ([ADD: your system’s spec])
– [ ] Protect edges, drains, and wall transitions
– [ ] Allow full cure before heavy traffic or chemical exposure ([ADD: cure time from your product instructions])
Common Food-Service Cleaner pH Ranges (for Compatibility Planning)
| # | Cleaner class | Typical pH range | Typical use | Floor impact risk |
|---|---|---|---|---|
| 1 | Acid descalers / scale removers | 1–3 | Limescale removal | High |
| 2 | Alkaline caustic degreasers | 12–13 | Heavy grease & bake-on removal | High |
| 3 | Neutral detergents | 6–8 | Routine cleaning | Lower |
| 4 | Enzymatic cleaners | 6–8.5 | Protein/fat soils breakdown | Lower |
| 5 | Quaternary ammonium sanitizers | 5–8 | Sanitizing after cleaning | Lower–Moderate |
| 6 | Oxidizing sanitizers (e.g., hydrogen peroxide systems) | 3–7 | Broad-spectrum sanitizing | Moderate |
| 7 | Bleach/chlorine-based cleaners (sodium hypochlorite solutions) | 10–12 | Disinfection & odor control | Moderate–High |
FAQ
What’s the most important step when installing industrial flooring in a kitchen?
Surface prep—cleaning, flattening, and addressing moisture/contamination—is usually the deciding factor for adhesion and long-term durability.
Can industrial kitchen floors go over old tile or existing coatings?
Sometimes, but only if the existing surface is sound and the system allows it. You’ll need to follow the product instructions for substrate compatibility and prep methods.
How long until the kitchen can reopen after installation?
It depends on the specific product and conditions; check the manufacturer’s cure/recoat and time-to-light-traffic/heavy-traffic guidance ([ADD: cure times from your product label or spec sheet]).
Are industrial floor coatings safe for frequent degreasing and cleaning?
They can be, but not all finishes handle the same chemicals. Use a system specifically intended for commercial kitchens and follow the cleaning method recommended by the manufacturer ([ADD: product-specific chemical resistance info source]).
Sources
– Manufacturer installation instructions and spec sheets for the exact industrial flooring system you choose ([ADD: name/model of your product] and the related datasheet).
– Manufacturer guidance for substrate preparation and allowable moisture conditions for epoxy/urethane floor coatings ([ADD: specific document title for your selected system]).
– [ADD: source for your moisture testing method and thresholds, if you’re using a test standard from the manufacturer or an industry method.]
A durable kitchen industrial floor comes down to disciplined preparation, a system selected for food-service moisture and chemical exposure, and an installation that follows the manufacturer’s mixing, recoat windows, and detailing requirements. If you control moisture risk, flatten the slab, and install each layer to spec, you can expect a floor that withstands mopping, spills, and high-traffic cleanup—without turning your maintenance plan into a recurring repair schedule.
Frequently Asked Questions
What is the best type of industrial flooring to install in a kitchen?
The best industrial floors for a kitchen are typically seamless, chemical-resistant, and slip-resistant. Common options include epoxy or polyurethane coatings, MMA (methyl methacrylate) systems, and heavy-duty vinyl or rubber flooring in high-traffic zones. For kitchens with grease and frequent washdowns, choose a system designed for food-service environments and able to handle hot-water cleaning, degreasers, and impacts.
How do you prepare a concrete subfloor before installing kitchen industrial floors?
Start by removing old coatings, paint, and any contaminants like grease, dust, or curing compounds, since they can prevent proper bonding. Repair cracks and spalls, then grind the surface to achieve the correct profile for adhesion, and thoroughly vacuum to remove slurry. Finally, check moisture levels and ensure the concrete is dry enough for the chosen kitchen epoxy or polyurethane flooring system.
How do you install epoxy or polyurethane industrial floors in a kitchen safely?
Apply industrial flooring in a kitchen by following the manufacturer’s mixing ratios, temperature, and pot-life guidelines to avoid defects. Prime the prepared concrete if required, then apply the base coat and broadcast aggregates for slip resistance in wet or greasy areas. Use appropriate curing times before opening the kitchen to foot traffic, and ensure ventilation because many coatings release strong odors during installation.
Why is slip resistance and sanitation important for industrial floors in commercial kitchens?
Kitchen industrial floors must resist grease, water, and cleaning chemicals while also preventing slips from spills and wet mopping. Slip-resistant textures, anti-slip finishes, and proper drainage planning reduce workplace injuries and improve daily usability. A hygienic flooring surface also supports sanitation workflows, making it easier to keep floors clean with routine degreasing and disinfecting.
Which factors should you consider when choosing a flooring system for kitchen industrial floors?
Consider traffic intensity, chemical exposure (detergents, degreasers, disinfectants), expected temperatures, and whether the area needs quick return-to-service. Look for impact resistance, heat and moisture tolerance, and maintenance requirements that fit your cleaning schedule. It’s also important to evaluate installation downtime, subfloor condition, and whether you need anti-static properties or specialized drainage for specific kitchen zones.
📅 Last Updated: October 12, 2026 | Topic: How to install in a kitchen industrial floors? | Content verified for accuracy and freshness.
References
- https://www.fda.gov/food/retail-food-protection-program/food-code
- https://www.who.int/publications/i/item/9789241548095
- https://www.cdc.gov/niosh/topics/slips/
- Final Rule to Update General Industry Walking-Working Surfaces and Fall Protection Standards | Oc…
https://www.osha.gov/walking-working-surfaces - https://en.wikipedia.org/wiki/Epoxy_floor
- https://pubmed.ncbi.nlm.nih.gov/?term=slip-resistant+flooring+food+service
- https://pubmed.ncbi.nlm.nih.gov/?term=epoxy+floor+coating+sanitation+cleaning
- Google Scholar Google Scholar
https://scholar.google.com/scholar?q=industrial+kitchen+floor+installation+epoxy+coating - Google Scholar Google Scholar
https://scholar.google.com/scholar?q=food+service+facility+floor+slip+resistance+cleanability - Google Scholar Google Scholar
https://scholar.google.com/scholar?q=concrete+floor+surface+preparation+for+epoxy+coatings+installation