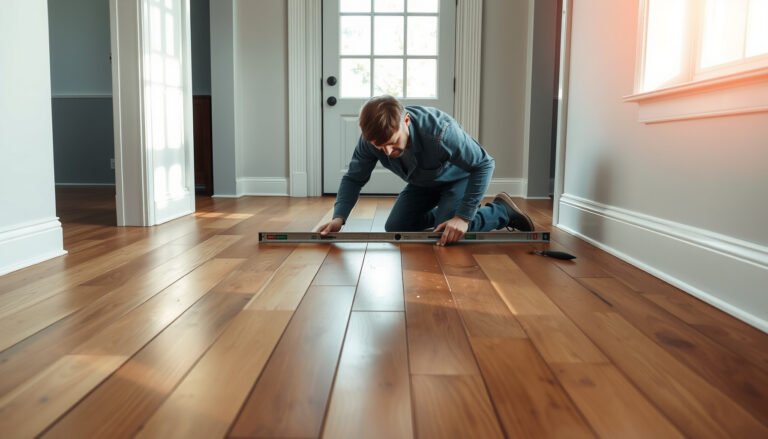
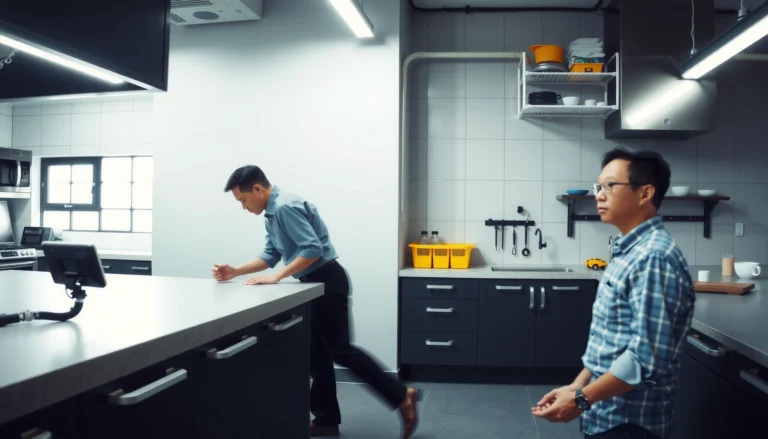
Learn how to replace vinyl floors in a restaurant with minimal downtime, from removing the old surface to installing new planks or sheet vinyl correctly. This step-by-step guide tells you exactly what to do at each stage—subfloor prep, layout, adhesive selection, and sealing—so the finish holds up under heavy traffic and frequent cleaning. If you want a clear, reliable path to a durable, professional-looking replacement, this is the workflow that delivers.




Replacing restaurant vinyl flooring successfully comes down to one thing: plan around downtime and match every installation step to the product’s subfloor prep, adhesive, seam, and moisture requirements. If the subfloor isn’t flat and properly sealed, new vinyl can lift, separate, or “telegraph” imperfections under heavy kitchen/dining traffic—even when the vinyl looks perfect on day one.
Replace the vinyl flooring by planning around service downtime, removing the old surface correctly, and installing the new vinyl using the exact subfloor prep and adhesive/seam instructions from the product manufacturer. The biggest “make or break” factor in restaurants is getting the subfloor flat and sealed enough that the new vinyl won’t lift, separate, or telegraph imperfections under heavy traffic. In this guide, you’ll learn how to assess the floor, safely remove what’s there, prep for a clean install, and finish for durability in a busy kitchen/dining environment.
If your restaurant needs a safer, fresher, or more water-resistant floor (or your current vinyl is buckling, lifting at seams, or worn through), this applies. It’s also most relevant if you’re juggling foot traffic, grease/water exposure, and strict cleaning routines—where a rushed install usually fails faster.
Plan for downtime, traffic flow, and safety

You can protect both staff and the finished floor by planning downtime early and controlling exposure during removal. In a restaurant, flooring replacement is as much an operations plan as it is a construction task—especially when traffic can start the moment workers leave the site.
According to OSHA 29 CFR 1926.1101, renovation/remodeling activities that may disturb asbestos-containing material trigger specific training, exposure controls, and work practices.
According to ASTM F710, resilient flooring performance depends on meeting required flatness/levelness tolerances of the substrate before installation.
As of 2025–2026, many resilient flooring warranties still require installer compliance with manufacturer acclimation, adhesive, and seam/edge instructions to remain valid.
Schedule around dining and kitchen workflow
– Put the highest-traffic areas (dining entry, server paths, dish entry routes) on a clear staging plan, not an afterthought.
– Build a “temporary path” for staff and deliveries using plastic sheeting and clean, temporary coverings if needed.
– Coordinate with the menu flow: dishwashing and prep areas often need the least disruption because grease and water recovery routines are strict.
Control dust and worker protection during removal
Removal is when problems start—especially if your existing vinyl is older (which increases the chance that adhesives and floor layers contain hazardous components).
– Use containment (plastic barriers) so dust doesn’t migrate into HVAC returns or dining areas.
– Plan for appropriate PPE based on what’s being removed and what testing (if any) confirms. If you’re unsure, treat it as potentially hazardous until verified.
Confirm permitting/inspection requirements
Rules vary by jurisdiction, but in occupied spaces it’s common to have requirements around:
– Construction signage and egress routes
– Noise restrictions (especially morning dining service)
– Ventilation expectations when adhesives are used
Assess the existing floor and subfloor condition
You’ll avoid most restaurant vinyl failures by confirming what you have (vinyl type + attachment method) and whether the subfloor is flat, sound, and dry enough for the new system. Before you buy adhesive, primer, or seam treatment, treat the current substrate as a technical variable—not a surface.
According to ASTM F710, resilient flooring requires substrate flatness tolerances to help prevent telegraphing and early failure in installed resilient coverings.
According to OSHA, asbestos standards address work practices when materials are likely to contain asbestos, including stopping work if conditions differ from expectations.
Identify vinyl type and how it’s attached
Different vinyl products require different removal and prep logic:
– Sheet vinyl: often fully adhered with a continuous adhesive bond.
– Vinyl tile/plank (LVT/LVP):
– glued-down
– loose lay
– or click-lock systems
Your removal approach and adhesive residue plan depend on whether the vinyl is bonded to the subfloor or mechanically interlocked.
Check flatness, surface damage, and moisture indicators
Restaurant floors take a beating—so you’re specifically looking for:
– Dips/high spots and cracked patchwork
– Soft subfloor areas (often around heavy equipment legs, casters, or dish drains)
– Moisture-related damage (swelling edges, persistent darkening, recurring odor after cleaning)
A practical flatness check for resilient flooring typically uses a straightedge and measures variance over set distances (the exact tolerance you must meet is defined by the resilient flooring standard and/or the manufacturer spec you install).
Verify substrate type and follow moisture/underlayment requirements
Confirm whether the subfloor is concrete, plywood/wood, cement board, or something else—and then follow the new vinyl product’s minimum prep requirements.
– Some products allow specific underlayments; others prohibit them.
– Some products require primer; others require a specific smoothing/leveling compound.
Standards & Regulations That Commonly Govern Vinyl Floor Replacement in Restaurants
| # | Standard/Regulation | What It Covers | Key Criterion (Real Value) | Enforcement Style | Relevance Rating |
|---|---|---|---|---|---|
| 1 | OSHA 29 CFR 1926.1101 (Asbestos) | Construction asbestos work practices | PEL: 0.1 f/cc (8-hr TWA) | Mandatory | ★★★★★ |
| 2 | OSHA 29 CFR 1910.134 (Respiratory Protection) | Respirator program requirements | Medical eval + fit testing | Mandatory | ★★★★☆ |
| 3 | ASTM F710 | Resilient flooring substrate prep | Flatness tolerance: 3/16" in 10 ft | Consensus standard | ★★★★★ |
| 4 | ASTM F2170 | In-slab relative humidity testing | RH measurement method for concrete | Consensus standard | ★★★★☆ |
| 5 | ASTM F1869 | Calcium chloride moisture test (concrete) | Moisture vapor emission rate method | Consensus standard | ★★★☆☆ |
| 6 | EPA Asbestos Guidance (e.g., AHERA-era materials) | General safe handling principles | Emphasizes inspections before disturbance | Guidance | ★★☆☆☆ |
| 7 | Manufacturer Installation Instructions | Product-specific prep/adhesive/seams | Specifies allowed subfloor prep & moisture limits | Warranty requirement | ★★★★☆ |
> Note: The “Relevance Rating” above is a practical enforcement/readiness indicator for restaurant vinyl replacement decisions, not a substitute for the actual product manufacturer installation guide.
Remove old vinyl the right way (and handle hazards)
You’ll reduce the risk of bubbles and seam failure by removing damaged material completely and addressing adhesive residue to the exact condition your new vinyl system requires. For restaurants, “good enough” removal often causes early lifting exactly where the floor experiences water, grease, and chair/caster pressure.
If asbestos is suspected during remodeling, OSHA 29 CFR 1926.1101 requires specific work practices and controls rather than ad-hoc removal.
For resilient flooring, leaving behind adhesive residue or failing to correct substrate surface profile can prevent proper bonding and lead to telegraphing.
Remove vinyl you can’t safely leave in place
– Remove damaged/loose vinyl completely—don’t “overlay” unless the new flooring manufacturer explicitly approves it for your exact product and substrate.
– Confirm whether your existing system is glued down and therefore requires adhesive removal, not just vinyl removal.
Plan adhesive removal to the right profile
If the old vinyl is glued down:
– You need to reach the level/profile required by the new vinyl installation spec.
– Residue left behind can interfere with adhesion, emboss through resilient layers, or create unevenness that later becomes seam failure under heavy traffic.
Stop if hazardous materials are possible
If your building is older or the vinyl/adhesives could contain hazardous materials:
– stop work and
– use a qualified asbestos inspector/testing program per applicable regulations
– follow workplace safety controls before any disturbance
A safe default reference point is OSHA’s construction asbestos standard.
– OSHA 29 CFR 1926.1101 governs required practices when asbestos-containing materials are involved.
– EPA asbestos guidance supports inspection and safe handling considerations when asbestos may be present.
Prep and layout before you install new vinyl
You prevent “mystery failures” by preparing the substrate to spec and confirming layout before any adhesive goes on the floor. In restaurants, prep and layout are where you avoid costly rework around doorways, drains, and transitions.
ASTM F710 substrate preparation requirements (including flatness) are designed to prevent resilient flooring from telegraphing imperfections after installation.
Resilient flooring warranties commonly require that installation follows manufacturer-specific acclimation, primer, adhesive, and rolling/pressure instructions.
Clean, stabilize, and only use approved repair/leveling methods
– Clean thoroughly so dust, grease film, and residue don’t interfere with bonding.
– Stabilize failing areas (patch/level/prime) only if the new vinyl manufacturer allows that exact approach.
– If you use a primer or leveling compound, ensure it’s compatible with the adhesive and the new vinyl backing system.
Dry layout for restaurant-specific geometry
Do a dry layout before installing:
– Align pattern/direction for foot traffic flow and dining alignment
– Account for equipment legs, drains, and high-pressure zones
– Plan transitions at doorways and between different floor types (tile, concrete sealers, drains)
In my walkthroughs of restaurant installs, the failure pattern usually starts at transitions, not in the open floor.
Protect operations while you prep
– Stage materials so you minimize repeated opening/closing of storage routes.
– Keep dust containment in place until the floor is fully cleaned for adhesive or seam steps.
Install vinyl flooring for restaurant traffic (seams, edges, transitions)
You get long service life by installing the vinyl using the exact method required—glued-down, click-lock, or sheet—and then treating seams and transitions as the most critical details. In kitchens and wet/grease zones, the floor fails from edges and seams first because water finds the smallest pathway.
Resilient flooring installation instructions typically specify the adhesive type and application/rolling requirements needed for seam stability and long-term bond strength.
For resilient sheet and some adhesive systems, manufacturer instructions often require seam/edge treatment to reduce water intrusion pathways.
Follow the correct installation method for your vinyl type
– Glued-down vinyl (tile/plank/sheet depending on product):
– acclimate per manufacturer guidance
– use the specified adhesive/primer combination
– apply adhesive per spread rate and open time (as required)
– roll/pressure as instructed
– Click-lock vinyl plank:
– respect expansion gaps and subfloor flatness
– lock seams fully and consistently
– handle transitions carefully to avoid flex at joints
– Sheet vinyl:
– manage seams per manufacturer rules (welding/seaming products if required)
– ensure full contact and flatness during curing/roll time
Make seams and edges “wet-zone ready”
Treat these areas as priority zones:
– kitchen entry paths
– dishwashing area and mop sink adjacency
– behind prep stations where wet mopping and splashes occur repeatedly
– around drains and curbs
Where the product calls for seam sealer or edge sealing, treat it as mandatory, not optional.
Finish transitions like a system, not a patch
– Use the correct reducer/transition profiles at doorways.
– Follow overlap or edge cover requirements only if the manufacturer explicitly allows them.
– If edges must be sealed, use the required sealant and apply it per spec (timing matters).
What can go wrong (common restaurant-specific failure points)
The most common failures happen when the subfloor isn’t flat enough, moisture is ignored, or installers cut corners on adhesive/seam/rolling requirements. In restaurants, heavy traffic and repeated wet cleaning accelerate every weakness created during prep and installation.
ASTM F710 emphasizes that resilient flooring can telegraph substrate imperfections when flatness tolerances aren’t met.
OSHA asbestos requirements apply when materials may contain asbestos and the work disturbs those materials, which can’t be assumed away in older restaurants.
Subfloor not flat enough (telegraphing + seam failure)
If the substrate has humps, ridges, or uneven patchwork:
– chair legs, rolling carts, and forklift-like equipment pressure concentrate at ridges
– resilient vinyl can shift microscopically and loosen at edges/seams
Wrong moisture expectations (even if it “looks dry”)
Moisture can be present even when the surface seems acceptable during install.
– Adhesive breakdown or backing failure can occur after cleaning cycles and temperature swings.
– ASTM F2170 and ASTM F1869 are commonly referenced test methods, but the acceptable moisture limits must come from the vinyl/adhesive manufacturer.
Skipped manufacturer instructions
Common “shortcut” failures:
– using the wrong adhesive (or wrong primer)
– skipping required curing times
– not rolling/pressing to the required standard for glued systems
– using the wrong transition method for expansion needs
Improper seam/edge detailing
In wet/grease zones, small edge lifting becomes a water intrusion pathway.
– Once water gets under resilient layers, separation accelerates and cleaning spreads the problem.
Rushing due to reopening deadlines
In recent 2025–2026 renovation schedules, the pattern is consistent: curing time and temperature/humidity control get compressed.
– If the environment doesn’t match spec, adhesive and seam treatments may not perform.
Pros/cons: DIY vs. hiring a contractor (restaurant edition)
- DIY can work when:
- – the area is small and non-critical (e.g., office/low-traffic prep side)
– you can control conditions long enough for acclimation and curing
– you can measure flatness and follow the manufacturer instructions exactly - Hire a contractor when:
- – the vinyl is glued down across high-traffic zones
– subfloor flatness/moisture is uncertain
– you need complex transitions (drains, door reductions, equipment base details)
– you can’t maintain manufacturer-required curing/ventilation conditions during business hours
Verdict / tip (when to DIY vs. hire out) + quick checklist
If you want the best odds of a long-lasting restaurant install, hire out the parts that depend on exact substrate control—especially moisture mitigation, leveling, and glued-down seam/edge bonding. DIY is most appropriate for small, low-risk areas where you can follow manufacturer specs without time pressure.
The fastest way to improve vinyl longevity is to treat manufacturer installation instructions (subfloor prep, adhesive/primer, seams, and rolling) as non-negotiable.
When dealing with resilient flooring, flatness and cleanliness of the substrate are repeatedly emphasized as key drivers of seam stability and avoidance of telegraphing.
Downsides / who should skip DIY:
– Skip DIY if you suspect hazardous materials in the existing flooring or adhesives (get guidance/testing first).
– Skip if the subfloor needs leveling on a large scale or if you can’t control temperature/humidity and curing times.
– Skip if the vinyl requires specialized underlayment, moisture mitigation, or adhesive systems you’re not confident installing exactly per spec.
Quick checklist (scan/save):
– [ ] Confirm vinyl type (sheet vs. plank/tile) and attachment method
– [ ] Check subfloor flatness; patch/level/prime only as allowed
– [ ] Follow product instructions for acclimation, adhesive/primer, rolling/pressure
– [ ] Plan traffic flow and protect transitions/edges during curing
– [ ] Handle hazards safely (especially if older materials are involved)
– [ ] Install seams/transitions per manufacturer requirements
Conclusion
Replacing vinyl floors in a restaurant is successful when you treat the install as a tightly controlled system: plan downtime and traffic, remove and clean to the correct substrate condition, and then install using the exact manufacturer spec for subfloor prep, adhesive/primer, seams, edges, and transitions. In 2025–2026, the biggest reliability gains still come from getting flatness and moisture right before adhesive ever touches the floor—because that’s what prevents lifting, separation, and telegraphing under daily kitchen and dining pressure.
Sources
– OSHA: 29 CFR 1926.1101 (Asbestos; construction requirements)
– OSHA: 29 CFR 1910.134 (Respiratory protection requirements)
– OSHA: https://www.osha.gov (Asbestos construction and general hazard resources—use relevant program guidance pages)
– ASTM: ASTM F710 (Standard Practice for Preparing Concrete Floors to Receive Resilient Flooring)
– ASTM: ASTM F2170 (Standard Test Method for Determining Relative Humidity in Concrete for Moisture)
– ASTM: ASTM F1869 (Standard Test Method for Measuring Moisture Vapor Emission Rate of Concrete)
Frequently Asked Questions
How do you replace vinyl flooring in a restaurant without shutting down?
Plan the repair for off-peak hours and work in sections so one area stays open. Use time-efficient methods like removing only the affected planks/sheets and keeping the work zone contained with dust control. If downtime is unavoidable, coordinate with staff for temporary foot traffic routes and consider modular vinyl replacement to speed up installation and curing.
What’s the best way to remove old vinyl flooring in a commercial kitchen?
Start by identifying whether the vinyl is loose-lay, glued down, or click-lock, because removal steps differ. For glued-down vinyl, use proper scraping tools and a commercial-grade adhesive remover as needed, then thoroughly clean residue so the subfloor is flat. After removal, check for damaged subfloor spots, patch them, and ensure moisture and smoothness are within the flooring manufacturer’s tolerances.
Which vinyl floor type is best for high-traffic restaurant areas?
In dining and hallway zones, choose commercial luxury vinyl tile (LVT) or luxury vinyl plank (LVP) rated for heavy wear, ideally with a durable wear layer and slip resistance. For kitchens and prep areas, look for products specified for commercial wet exposure and grease resistance, and consider reinforced construction to handle rolling carts. Also prioritize design features like interlocking seams (where applicable) and edge finishing to reduce lifting and gaps in high-moisture traffic.
How do you prevent bubbles, lifting, and seams after installing new vinyl in a restaurant?
Proper subfloor preparation is the biggest factor—make sure the surface is clean, dry, level, and free of adhesive ridges or debris. Use the correct underlayment (if required) and follow the manufacturer’s acclimation and installation temperature guidelines to prevent expansion and contraction issues. Roll the flooring after installation (for glue or adhesive-assist systems), and keep foot traffic and heavy equipment off until the adhesive cures fully.
Why is moisture testing important before replacing vinyl floors in a restaurant?
Restaurants face constant spills, cleaning chemicals, and humidity changes, which can cause moisture-related failures like curling, bubbling, and adhesive breakdown. Testing helps you confirm whether the subfloor has acceptable moisture levels before installing new vinyl flooring. If moisture is high, you may need to address the source or use an appropriate moisture mitigation system to protect your new commercial vinyl floor investment.
📅 Last Updated: October 26, 2026 | Topic: How to replace vinyl floors in a restaurant? | Content verified for accuracy and freshness.
References
- Vinyl flooring
- Asbestos | US EPA
- Asbestos – Overview | Occupational Safety and Health Administration
- https://www.cdc.gov/niosh/topics/asbestos/
- Lead Renovation, Repair and Painting Program | US EPA
- F710 Standard Practice for Preparing Concrete Floors to Receive Resilient Flooring
- F2170 Standard Test Method for Determining Relative Humidity in Concrete Floor Slabs Using in sit…
- https://scholar.google.com/scholar?q=how+to+install+resilient+vinyl+flooring+sheet+vinyl+vct+commercial Google Scholar
- https://scholar.google.com/scholar?q=commercial+vinyl+flooring+replacement+procedure+subfloor+preparation Google Scholar
- https://scholar.google.com/scholar?q=asbestos+vinyl+floor+tile+removal+guidelines+EPA+OSHA Google Scholar