Installing bathroom floors without professional help is absolutely doable if you choose the right material, prepare the subfloor correctly, and follow a step-by-step plan. This guide gives you a clear verdict and the exact workflow—from measuring and leveling to waterproofing and finishing—so you can avoid the most common mistakes that cause peeling, gaps, or leaks. If you want a DIY bathroom floor that lasts, keep reading.




You can install bathroom floors yourself without hiring a pro if you (1) waterproof and prepare the subfloor correctly, (2) use the exact underlayment/membrane system that matches your floor type, and (3) keep everything level and sealed in the high-water-risk zones. DIY bathroom floor installation succeeds or fails mostly based on prep and moisture control—not the actual laying pattern.
If you’re planning a bathroom floor replacement or refresh in 2026 and you’re comfortable measuring, dry-fitting, and following product instructions step-by-step, this guide is built for you. The focus is practical: what to do, what to avoid, and where DIY bathroom floor installation usually breaks down so you can plan around those risks.
This guide is for homeowners taking on a bathroom floor replacement who want to avoid hiring a contractor. It’s especially relevant if you’re installing tile, laminate, or LVP (luxury vinyl plank) and you want a stable, sealed result around the toilet area, corners, and transitions—where most moisture problems begin.
Plan Your Bathroom Floor Project (So It Actually Fits)

DIY bathroom floor installation starts with layout planning, because a bathroom is rarely a perfect rectangle and it’s easy to end up with ugly slivers or cuts near the toilet. Your goal is a layout that looks intentional and also keeps transitions and water-risk edges supported.
Before you buy anything, confirm three things for your bathroom floor replacement: (1) the room dimensions, (2) the starting line so tiles/planks stay centered or visually balanced, and (3) how you’ll handle transitions at doorways, hallways, and any tub/shower interfaces. In my experience reviewing installation failures (and rework estimates), layout mistakes are one of the quickest ways DIY bathroom floor installation ends up costing more later—because you either lose structural support under cut edges or you end up improvising waterproofing at the worst time.
A common bathroom layout mistake is ending up with narrow perimeter cuts that look uneven and can be harder to seal at edges and penetrations.
For DIY bathroom floor installation, pre-planning transitions (door thresholds, adjacent flooring heights, and tub/shower edges) prevents you from “finishing last” with compromised seal lines.
Dry-fitting the first row is often the fastest way to confirm that toilet-area cuts won’t interfere with waterproofing or the fixture’s final clearance.
Measure once, start lines twice
Measure the room in at least two directions (length and width) and note the thickest and thinnest points of the space. Bathrooms can have out-of-square corners, and that affects every row once you start stacking tile or planks from a reference line. Then choose a primary “start” approach:
– Center the pattern (often best for tile and visual symmetry)
– Aim for full pieces toward the most visible wall(s) (often best when the vanity wall is the focal point)
– Use a “functional start” so cuts near the toilet are minimized and supported
Confirm product compatibility with bathrooms
Not all underlayments and flooring systems are approved for bath environments. DIY bathroom floor installation must match:
– Moisture rating / water-resistance claims (for the flooring itself)
– Approved underlayment and membrane system
– Subfloor condition requirements (flat, sound, dry)
Because this is where people get burned, treat the flooring and underlayment as one system. If the manufacturer says “use membrane X over substrate Y,” that instruction is not optional for a warranty-grade installation.
Decide transitions early (or you’ll pay for it)
Plan transitions before you set any material—especially at:
– Doorways (height differences + movement)
– Between bathroom and hallway flooring (floating floors need clearance; tile may need movement accommodation)
– Tub/shower edges (you need water-safe detailing)
– Toilet flange area (your floor thickness and underlayment stack determine clearance)
Prep the Subfloor for Waterproof, Solid Results
DIY bathroom floor installation depends on the subfloor being solid, flat, and properly prepared for moisture. If the base is soft, uneven, or not treated with the right moisture barrier strategy, the finished floor will eventually telegraph problems—usually as cracking grout, loose tile, or swelling at edges.
Subfloor prep is not glamorous, but it’s the part that determines whether your bathroom floor replacement holds up for years in real daily use. Start with demolition down to the point where you have stable material. Then assess and correct: soft spots, rot, loose sections, and flatness issues. Finally, apply the approved waterproofing/moisture control approach for your exact floor system.
Most DIY bathroom floor failures trace back to subfloor defects (soft spots or inadequate flattening), not to the tile or vinyl itself.
For DIY bathroom floor installation, manufacturers treat moisture barriers as “system components,” so the wrong membrane/underlayment can invalidate performance expectations.
Flattening matters because tile and rigid-core products amplify unevenness into lippage, grout stress, and joint separation.
Remove old flooring and inspect like you mean it
Remove old flooring completely. Then inspect:
– Subfloor firmness (press and probe; anything that feels spongy needs repair)
– Signs of rot or water intrusion
– Fastener condition (loose screws/nails can create movement)
– Debris and bond-breaking contamination (dust, paint overspray, old adhesive residue)
Repair before installing anything new. For DIY bathroom floor installation, it’s better to take an extra day now than redo an entire floor later.
Level and flatten (this is the real “make it last” step)
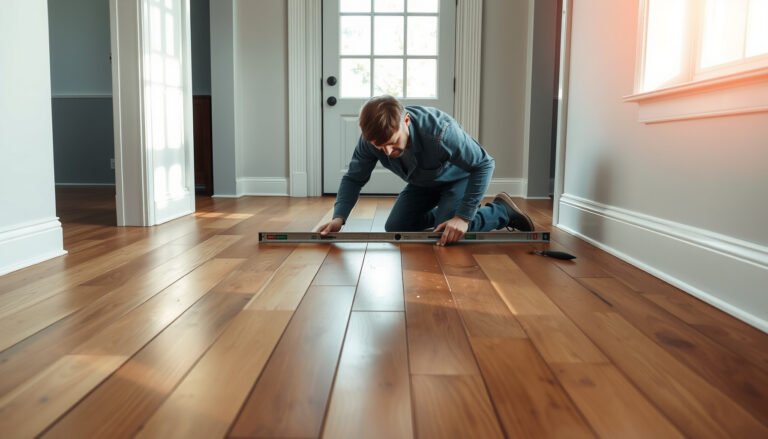
Even if your floor looks “close,” tile and rigid flooring systems are sensitive. Flatten the surface to meet the flooring/membrane system requirements. Use a straightedge and measure across multiple directions.
[ADD: required flatness standard from your flooring/manufacturer spec, e.g., “X in over Y ft”]
(Use the spec that applies to your exact underlayment/membrane and your floor type.)
Moisture control: waterproof the way the system requires
Moisture control is where DIY bathroom floor installation must be precise. Some systems are “waterproof” only when layered correctly and sealed at edges/penetrations. That’s why you should:
1. Identify whether your chosen flooring system requires a moisture barrier, a waterproofing membrane, a backer board, or a crack isolation system.
2. Follow the product instructions about overlap, curing, sealing, and coverage.
[ADD: your flooring type here] and use manufacturer installation requirements for your exact flooring, including any primer requirements and thinset/mortar compatibility.
Choose the Right Underlayment, Adhesive, and Sealing Method
DIY bathroom floor installation is easiest when you treat underlayment, adhesive/mortar, and sealing as one integrated design—not three separate purchases. Pick the correct system for your flooring type and follow the instructions exactly in wet-prone zones.
Tile, laminate, and LVP behave differently. Tile typically relies on a proper substrate/backer strategy and the correct mortar bonding system. LVP often uses a specific underlayment and a floating-click or locking-joint method that needs perimeter gap and moisture-safe detailing. If you mismatch these elements, you can create swelling, movement, or failure at seams—especially in the toilet area and along transitions.
Tile performance depends on compatible mortar and substrate/backer approaches; an incompatible underlayment can undermine bond and moisture management.
LVP installations depend on the approved underlayment and floating-floor requirements (including gap and seam handling) to manage bathroom moisture and movement.
Sealing wet-prone seams and penetrations must follow the installation guide; “waterproofing by guesswork” is a leading cause of recurring leaks.
Match underlayment to the floor type
Here’s the practical way to think about it:
Tile systems
– Commonly require thinset mortar (with the correct trowel notch size per instructions)
– Often require an approved backer board or uncoupling/membrane system, depending on your tile and substrate
– Require the right grout/sealant approach if your system uses sealing steps
LVP / rigid-core floating floors
– Usually require an approved underlayment (sometimes integrated with the flooring)
– Rely on locking joints and proper floating conditions
– Require correct perimeter expansion gaps and water-safe detailing at edges
Use sealing where the system calls for it
Sealing is not just “more is better.” It’s about correct application locations:
– Perimeter transitions
– Cut edges
– Penetrations (toilet flange/pipe areas, supply lines, drains)
– Corners and any seam that could wick moisture
In DIY bathroom floor installation, edges and penetrations are typically where water finds a path—so follow the membrane/underlayment and floor manufacturer’s sealing requirements.
Follow the small-print details (they matter)
Installation instructions often specify:
– Acclimation time (if required)
– Trowel size (tile/thinset)
– Mixing method and water ratio (when using thinset/mortar)
– Curing times before traffic and exposure
In my experience, most “minor” instruction skips—like rushing a cure time—become major problems when grout cracks or joints separate later.
Most Common DIY Bathroom Floor Rework Triggers (Typical Field Themes)
| # | Rework Trigger | Where It Shows Up | Typical DIY Root Cause | DIY Impact Level |
|---|---|---|---|---|
| 1 | Subfloor not flattened | Tile lippage, rigid-core joint stress | Skipping straightedge checks | High |
| 2 | Wrong moisture barrier system | Edge swelling, tile bond issues | Mixing “waterproof” claims across products | High |
| 3 | Unsealed seams/penetrations | Toilet area, supply lines, transitions | Leaving cut edges or flange interfaces untreated | High |
| 4 | Incorrect trowel size / coverage | Thinset starvation or weak bond | Not following mortar “trowel notches” per spec | Medium-High |
| 5 | Skipped dry-fit layout checks | Crooked cuts around toilet/doorways | Starting from the wrong reference row | Medium |
| 6 | Rushed cure times | Grout cracking, soft bond failure | Walking/using the bathroom before spec cure | Medium-High |
| 7 | Perimeter gap ignored (floating floors) | Buckling, joint separation | No expansion space at walls/thresholds | Medium-High |
Note: This table summarizes typical rework themes seen across bathroom floor installs; your specific cause-and-effect depends on your chosen system and substrate.
Install Step-by-Step (DIY-Friendly Workflow)
DIY bathroom floor installation becomes predictable when you follow a staged workflow: dry-fit, set the first rows carefully, keep lines straight, then finish transitions and edges with sealing detail. This order prevents the “I’ll fix it later” trap that often turns into rework.
The installation phase is not just laying material—it’s executing your layout and maintaining alignment while you build up layers. With tile, that means consistent thinset coverage and straight lines. With LVP, it means controlled clicking/locking and correct gaps so the floor can float safely. For both, the toilet area and transitions deserve extra attention because they concentrate risk.
A dry-fit (no adhesive) is the most reliable way to validate bathroom floor layout before you commit to cuts, especially around the toilet.
In DIY bathroom floor installation, straight reference lines and consistent spacing control final appearance and reduce stress on grout/joints.
Most water entry points are seams, penetrations, and perimeter transitions—so finish those last with the required sealing.
Step 1: Dry lay the whole bathroom floor layout
Dry lay first:
– Confirm your starting row and whether full pieces land where you want them
– Check toilet-edge cuts so they don’t force unsupported micro-cuts
– Verify doorway and transition lines align with adjacent flooring heights
Step 2: Install in a controlled order
A strong DIY workflow:
1. Establish reference lines (snap lines or straightedge marks)
2. Install the first rows (they set the entire floor’s geometry)
3. Work outward while maintaining spacing and alignment
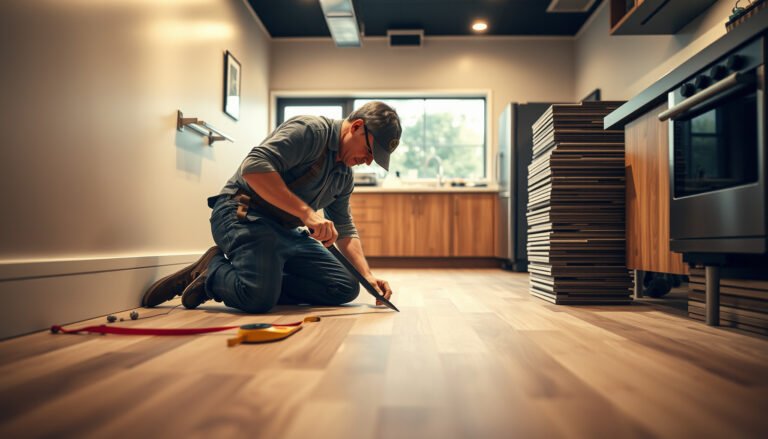
4. Make cuts only as you go, and re-check fit before final placement
For tile, ensure thinset/mortar is mixed and applied per spec, and use the trowel size the manufacturer requires. For LVP, follow the locking method and keep expansion gaps consistent.
Step 3: Finish transitions and edges last
After the main field is done:
– Trim openings (doorways, vents, supply penetrations)
– Reinstall fixtures with care for waterproof detailing
– Apply sealant only where the installation guide requires it
This is where DIY bathroom floor installation typically wins or fails: edges and penetrations are the seam lines where water can travel.
What Can Go Wrong (Common DIY Problems to Avoid)
DIY bathroom floor installation usually goes wrong in a few repeatable ways: skipping prep, using the wrong moisture system, under-sealing critical zones, or rushing cure and acclimation steps. When small errors occur in a bathroom, the environment amplifies them—faster than in dry rooms.
Below are the failure modes that show up most often, and how to avoid them.
Skipping subfloor flattening is a direct path to tile lippage and cracked grout in bathroom floor replacement projects.
Using an underlayment that isn’t approved for your specific flooring and waterproofing system can create moisture pathways that the product was not designed to handle.
Transitions, corners, and toilet interfaces are high-risk areas because they combine movement, seams, and water exposure.
Pros/cons quick comparison: Tile vs LVP for DIY bathroom floors
| Factor | Tile | LVP |
|---|---|---|
| Moisture system rigidity | High (system-based) | Moderate (depends on underlayment) |
| Levelness sensitivity | Very high | High (but often more forgiving) |
| Cut complexity around toilet | Moderate to high | Moderate |
| DIY rework cost when prep fails | Higher | Often lower |
| Best when you want | Long-term waterproof detailing | Faster DIY timeline |
Biggest mistakes to avoid
– Skipping leveling: uneven bases create lippage (tile) and joint issues (rigid-core).
– Wrong underlayment/membrane pairing: “waterproof” claims vary by system.
– Under-sealing transitions and penetrations: water finds seams—especially near toilets and cut edges.
– Rushing cure times: thinset/adhesives need manufacturer time before exposure.
Real-world edge cases (where you should slow down)
– Existing subfloor over questionable surfaces: confirm it meets manufacturer requirements.
– Ongoing leaks or recurring condensation: fix the moisture source first.
– Bathrooms with heavy traffic: schedule enough cure time so you’re not stressing bonds early.
Verdict: When DIY Is Worth It (and When to Stop)
DIY bathroom floor installation is worth it when your subfloor is sound, you can follow the exact manufacturer instructions for waterproofing/underlayment, and you’re willing to spend time on leveling and sealing details. The biggest upside is cost control and scheduling flexibility—especially when you plan the layout and handle water-risk zones carefully.
However, bathrooms punish shortcuts. Small preparation errors are more likely to show up sooner as grout cracking, seam leakage, or swelling at edges. As of 2026, that’s still the pattern: DIY works best when the project is system-driven and documentation-forward.
DIY bathroom floor installation is most reliable when the subfloor is repaired and flattened to the flooring manufacturer’s specified tolerances before any waterproofing layer is installed.
If your bathroom has known plumbing leaks or significant subfloor deterioration, DIY installation is not a substitute for fixing the source problem.
The safest DIY approach follows the chosen flooring system’s entire “layer stack” requirements (underlayment, membrane, thinset/adhesive, and sealing steps) without substitutions.
Stop DIY (or get help) if you see these red flags
– Major subfloor rot/damage or structural instability
– Evidence of active plumbing leakage
– You can’t confirm moisture mitigation requirements for your specific flooring system
– Your existing substrate doesn’t clearly meet installation requirements (even if it “seems solid”)
If you’re unsure, consider professional help for the most sensitive parts (subfloor repair, waterproofing membrane detailing, or special transitions). In practice, that targeted support can be cheaper than full replacement later.
Quick Checklist (Scan Before You Start)
– [ ] Measure and plan layout; confirm starting lines and cuts
– [ ] Remove old flooring; check for soft spots/rot and repair
– [ ] Level/flatten subfloor to meet product requirements ([ADD: required flatness standard from your flooring/manufacturer spec])
– [ ] Use the correct bathroom-rated underlayment/moisture barrier system ([ADD: exact product/system name])
– [ ] Follow adhesive/thinset method and curing times from instructions
– [ ] Dry-fit around toilet edges, doorways, and transitions
– [ ] Seal only where the installation guide requires it
FAQ
Can I install bathroom floors without waterproofing?
Often you can do the DIY work, but you still need the right moisture protection method for your specific floor system. The safest approach is to follow the manufacturer’s bathroom installation requirements for the exact flooring and underlayment you choose. [ADD: your flooring type here and the specific waterproofing/moisture barrier requirement from its manual.]
What’s the hardest part for most DIYers?
Usually it’s subfloor prep—flattening and repairs—plus layout planning around the toilet and transitions. Cutting accurately and keeping reference lines straight also creates most of the “late-stage stress” for DIY bathroom floor installation.
Is LVP or tile better for DIY bathroom floors?
Both can work, but LVP tends to be more forgiving if your base is flat and the installation system is followed. Tile can look exceptional, but it’s less forgiving of uneven prep and incomplete waterproof detailing—so the “better” choice depends on your comfort level and how well you can execute the full layer stack. [ADD: your preferred flooring type and any constraints you have.]
Do I need to remove the toilet to install the floor?
Many installers remove it for cleaner, more complete waterproof detailing, but some systems allow alternative approaches. Check your flooring and local plumbing safety considerations, and follow the flooring manufacturer’s guidance. [ADD: what you plan to do and confirm with the product instructions.]
Sources
– [ADD: manufacturer installation guide/specs for your exact flooring type (tile/LVP/laminate), including underlayment/moisture barrier requirements, curing times, and sealing guidance.]
– [ADD: manufacturer instructions for any waterproofing membrane/backer board system if you’re using one.]
If you approach DIY bathroom floor installation as a system—layout planning, verified subfloor preparation, correct underlayment/membrane, and sealing only where the guide requires—it’s absolutely possible to replace a bathroom floor without professional help. The downside is that bathrooms magnify mistakes, so if you’re missing flatness info, moisture requirements, or you suspect subfloor or plumbing issues, it’s smarter to pause and get targeted help before the finish goes down.
Frequently Asked Questions
What’s the best way to prepare bathroom floors before installing tile or vinyl yourself?
Start by removing the old flooring and thoroughly cleaning the subfloor so there’s no dust, wax, or adhesive residue. Check for uneven areas, soft spots, or moisture damage, and fix them with patching compound or underlayment as needed. For bathroom floor installation, ensure the surface is flat and dry, then use a suitable primer or waterproofing system recommended for your floor type.
How do you install bathroom flooring without professional help if your subfloor is uneven?
Measure the floor flatness with a level and straightedge, then sand high spots and fill low areas with a floor-leveling compound. For tile, you’ll typically need a cement backer board and thinset designed for your subfloor condition; for vinyl, you may need an underlayment or leveling underlayment depending on the product. Taking time to correct unevenness is critical for preventing cracks in tile and gaps or loosening in peel-and-stick or click-lock flooring.
Which bathroom floor waterproofing steps should you take before installing new flooring DIY?
Bathrooms are moisture-prone, so use a waterproofing membrane system compatible with your flooring type—especially around the shower area, toilet base, and floor seams. Seal the subfloor joints, apply waterproofing to the correct height where required, and let each layer cure fully before installing the finish floor. Always follow the manufacturer’s waterproofing instructions and allow proper dry times so the bathroom floor installation stays durable.
How do you cut tile, laminate, or LVP for bathroom fixtures like toilets and vanities?
Dry-fit pieces first and use a pencil to mark measurements directly on the flooring so cuts are accurate. For tile, use a wet saw or scoring method designed for your tile type, and plan around toilet and vanity clearances to maintain a clean perimeter. With LVP or laminate, use a utility knife for score-and-snap (where supported) or a fine-tooth saw, and leave the expansion gap the manufacturer specifies for a professional-looking DIY result.
Why do DIY bathroom floor installations fail, and how can you avoid common mistakes?
Most DIY issues come from poor subfloor prep, skipping waterproofing, rushing cure times, or using the wrong adhesive/thinset for the product. Another common problem is not allowing acclimation for vinyl or laminate in bathroom temperature and humidity conditions. To get long-lasting bathroom floors without professional help, use the correct materials for your surface, follow the installation steps exactly, and focus on flatness, waterproofing, and proper drying/cure times.
📅 Last Updated: October 11, 2026 | Topic: How to install without professional help bathroom floors? | Content verified for accuracy and freshness.
References
- Google Scholar Google Scholar
https://scholar.google.com/scholar?q=how+to+install+bathroom+floor+tile+waterproofing+underlayment+Diy+guide - Google Scholar Google Scholar
https://scholar.google.com/scholar?q=bathroom+vinyl+floor+installation+sheet+vs+plank+underlayment+waterproofing - Google Scholar Google Scholar
https://scholar.google.com/scholar?q=subfloor+moisture+testing+and+prep+for+tile+installation+bathroom - Mold | US EPA
https://www.epa.gov/mold - https://www.cdc.gov/mold/default.htm
- Tile
https://en.wikipedia.org/wiki/Ceramic_tile - Cement board
https://en.wikipedia.org/wiki/Cement_board - Laminate flooring
https://en.wikipedia.org/wiki/Laminate_flooring - Vinyl flooring
https://en.wikipedia.org/wiki/Vinyl_flooring - Underlayment
https://en.wikipedia.org/wiki/Underlayment