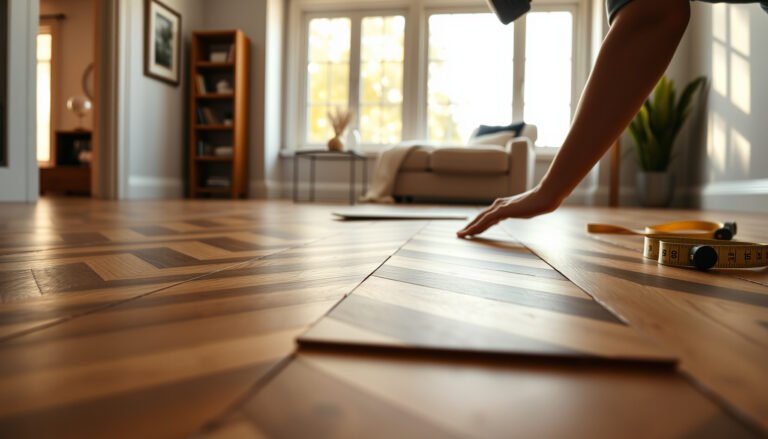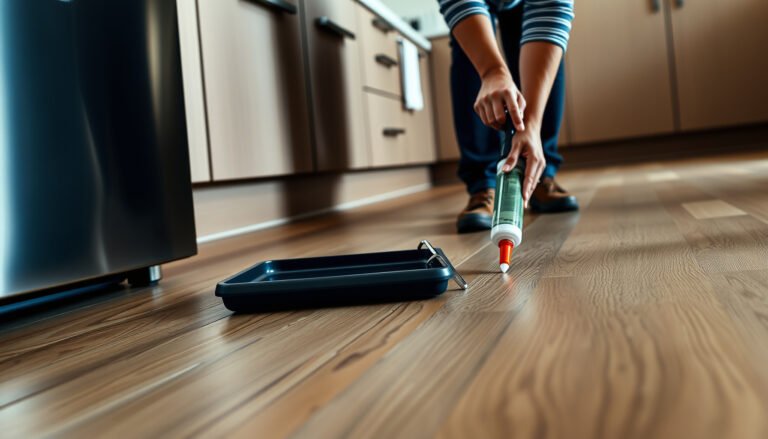

Replacing engineered wood floors in a home office is a straightforward job—if you choose the right removal method and matching replacement plank system. This guide tells you when to float over existing subfloor versus when to pull boards up, how to handle office humidity and rolling-chair wear, and what to buy to get a tight, level finish. By the end, you’ll know the fastest path to a floor that stays quiet, stable, and professional-looking.
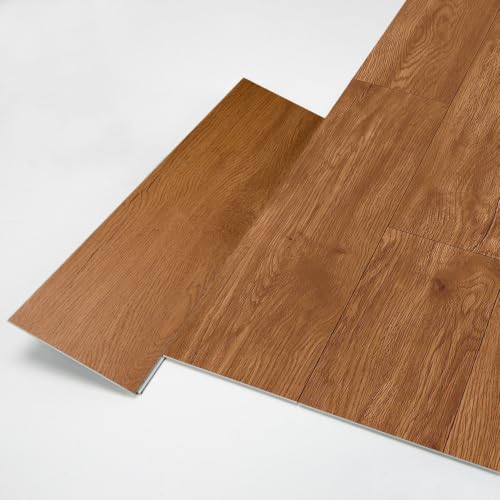


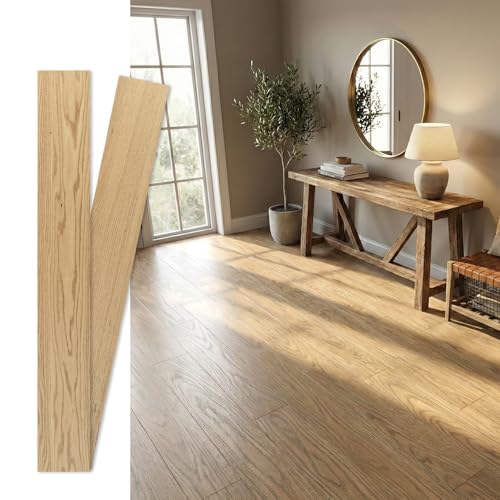
Replacing engineered wood floors in a home office is mostly about three things: identifying how your current floor is installed, preparing the subfloor to a flat/clean standard, and keeping the right expansion gaps during installation. If you do those steps in order, you can avoid most problems like squeaks, gaps, or cupping—especially in office spaces that get temperature swings from HVAC and sun.
This is for homeowners (or handy DIYers) who want to swap out existing engineered wood—whether it’s floating (click-lock), nail-down, or glue-down—and need a clear process for removal, prep, installation, and finishing.
Plan first: identify your floor type and measure accurately

Start by determining the installation method (floating, nail-down, or glue-down), because it dictates the safest removal approach and the level of subfloor cleanup you’ll need. Then measure your office layout so you can plan transitions and cut patterns that keep seams stable and supported under rolling-chair traffic.
– Check whether the existing engineered wood is floating/click-lock, nail-down, or glue-down (the removal method and risk level change a lot).
– Measure the office area and add extra flooring for cuts around doorways, built-ins, and obstacles; confirm you have the right thickness and wear layer for what you’re replacing.
Engineered wood planks that are installed as a floating (click-lock) floor typically have no permanent mechanical fastening to the subfloor, so removal is generally less destructive than glue-down installations.
For engineered wood over concrete, moisture testing and moisture-control products are typically selected using the method and criteria required by the flooring manufacturer.
ASTM F1869 measures moisture vapor emission rate using anhydrous calcium chloride, and the result is expressed as lb/1,000 ft²/24 h. (ASTM F1869)
Before you buy anything, treat measurement as a risk-management step, not a math exercise. In home offices, the “real world” variables include chair tracks (rolling loads), direct sunlight, and HVAC cycling that can shift interior humidity quickly in 2026. If you plan seams and transitions poorly, you’ll often feel it immediately under a chair before you ever see visible damage.
Also note the engineering reality: engineered wood moves less than solid hardwood, but it still expands and contracts with moisture and temperature. That movement is why expansion gaps are not optional—even when your home looks dry. Your measurement plan should explicitly account for those gaps at walls, posts, and doorways.
Finally, confirm compatibility between what you’re removing and what you’re installing. If the existing engineered wood uses an underlayment or moisture barrier system, the new product may require a different assembly. “Same brand” doesn’t automatically mean “same system,” and mismatches can show up as early joint gapping or “cupping” later.
Remove the existing engineered wood safely
Start removal by matching the demolition method to the installed system; this prevents subfloor damage that would later create squeaks or uneven plank behavior. Then protect nearby trim and details so you’re not rebuilding a bigger perimeter than necessary.
– Start by protecting what you can: baseboards/trim if you’ll reuse them, nearby walls, and any floor vents or electrical runs.
– Remove flooring boards row-by-row (best-case for floating floors) or break up sections carefully (often required for glue-down); plan for more subfloor cleanup if adhesive is involved.
Click-lock floating engineered wood is usually designed to be disassembled without destroying plank tongues and grooves, which is why careful row-by-row removal can reduce waste.
Glue-down engineered wood removal commonly requires mechanical scraping and surface leveling because residual adhesive can interfere with flatness and adhesion of the next system.
When you reuse baseboards, protect them early—damage at nail lines often forces repainting and re-trimming later.
If your home office has sensitive cabinetry or built-ins, map the floor-breaking points before you pry anything. Even in DIY-friendly floating installs, the goal is to avoid gouging the subfloor where the new engineered wood must sit flat.
Removal approach by install type (what to expect)
– Floating/click-lock: Expect the best results when you unlock starting rows and work methodically. If the floor was installed over an old underlayment, plan for underlayment removal or replacement where required by the new manufacturer.
– Nail-down: Expect fastener removal and extra subfloor inspection. Old nail holes aren’t automatically a problem, but they’re a flatness variable—and flatness is non-negotiable for engineered wood joint integrity.
– Glue-down: Expect the mess. Adhesive residue often needs extensive scraping plus patching/leveling. If the subfloor is concrete, you may also discover moisture issues that were previously masked by the old flooring system.
From my own remodel planning for engineered wood replacements, the biggest time sink is usually not pulling planks—it’s getting the subfloor back to a truly clean, smooth surface so the new installation can sit without stress.
Inspect and prep the subfloor (this is where failures start)
Start subfloor prep with flatness and cleanliness because engineered wood floors translate subfloor irregularities into squeaks, joint failure, or early wear. Then address moisture with the exact method your engineered wood manufacturer requires—office environments can be especially punishing in 2026.
– Verify the subfloor is flat and structurally sound (fix high spots, fill low spots, and remove debris/old adhesive residue).
– If the office slab/subfloor has moisture concerns, use the moisture test method required by your engineered wood manufacturer (and document results if the warranty depends on it).
For engineered wood installations, subfloor “flatness” is about avoiding point loading and maintaining consistent plank support—small dips and ridges often show up as gaps over time.
ASTM F2170 uses in situ probes to determine relative humidity within concrete, producing RH% values at slab depth. (ASTM F2170)
ASTM F710 provides general principles for preparing concrete floors prior to resilient flooring, emphasizing that the surface must be clean and properly prepared so the floor system can perform. (ASTM F710)
Flatness: how you prevent squeaks and “springy” joints
Engineered wood is less forgiving than people think when the subfloor isn’t flat. In offices, you’re often rolling a chair back and forth over the same seams. If the subfloor has a hump, the plank can flex more than intended; if there’s a dip, the plank edge can separate.
Your inspection should include:
– High spots: Grind or sand (concrete) and scrape (wood subfloor) until you remove the ridge source.
– Low spots: Patch with a compatible leveling/repair product and feather edges.
– Debris control: Vacuum thoroughly; adhesive “dust” is still abrasive and can prevent bonding or leveling compound adhesion.
If you’re on wood subfloor (not slab), also check for loose subfloor panels and fasteners. A well-leveled surface that squeaks when stepped on will still squeak after you install engineered wood—because the engineered wood cannot fix structural movement.
Moisture: choose the approved method and keep documentation
Moisture is a recurring office issue because HVAC setbacks, solar gain, and occupant schedules create cycles—warm/dry then cool/humid. For engineered wood, that cycle can contribute to cupping and seasonal joint behavior if your moisture system is wrong.
Use the moisture test method your engineered wood manufacturer requires, and save the documentation. Many warranties rely on test results and the specific test method used, not just “we felt it was dry.”
Common ASTM moisture methods relevant to engineered wood over concrete (measurement + reporting)
| # | ASTM method | What it measures | Reported metric | Office risk-readiness |
|---|---|---|---|---|
| 1 | ASTM F2170 | In situ concrete RH (equilibrium) | Relative Humidity (%RH) | ★★★★★ |
| 2 | ASTM F1869 | Concrete moisture vapor emission rate (MVER) | lb/1,000 ft²/24 h | ★★★★☆ |
| 3 | ASTM F710 | Concrete floor preparation principles | Surface condition (clean/sound/level) | ★★★★☆ |
| 4 | In-situ RH probes (per F2170) | RH at slab depth where boards sit | %RH at probe location | ★★★★★ |
| 5 | MVER calcium chloride test (per F1869) | Vapor drive through slab | MVER numeric in lb/1,000 ft²/24 h | ★★★★☆ |
| 6 | Moisture barrier selection (manufacturer-led) | Approved system for the tested condition | Perm ratings + installation specs | ★★★☆☆ |
| 7 | Documentation for warranty claims | Test method + results retained | Date/location/procedure records | ★★★★★ |
> Note: “Office risk-readiness” above is a planning aid, not a warranty guarantee; engineered wood manufacturers ultimately define the accepted moisture system and test limits for their products.
Install the new engineered wood correctly
Start installation by following your specific plank’s instructions exactly—especially underlayment, moisture barrier, and joint-spacing requirements—because engineered wood tolerates fewer “workarounds” than people expect. Then install with controlled expansion gaps so seasonal movement doesn’t turn into buckling or edge separation.
– Use the installation instructions for your specific plank style—especially for underlayment choice and whether you need an approved moisture barrier.
– Maintain proper expansion gaps around walls, posts, and vents, and follow the required nailing method (if nail-down) or adhesive specification (if glue-down).
Floating (click-lock) engineered wood still needs a perimeter expansion gap to allow board movement; the locking joint is not a substitute for spacing.
Nail-down engineered wood must use the fastener type and nailing method specified by the manufacturer to avoid tongue damage and squeaks.
Glue-down engineered wood performance depends on approved adhesive and subfloor condition; residual contaminants and poor surface prep reduce bond strength and can contribute to gapping.
Underlayment and moisture barrier: treat them as a system
As of 2026, many engineered wood products require a specific underlayment thickness and sometimes an integrated moisture barrier. If the new engineered wood calls for a vapor barrier, don’t assume that “old underlayment” will do the same job.
Key installation system checks:
– Underlayment compatibility: thickness and type, and whether it’s approved over your subfloor type (plywood vs concrete).
– Moisture barrier requirement: whether the barrier is required, and how seams are taped or overlapped.
– Adhesive compatibility (glue-down): the adhesive specification often includes moisture tolerances and allowed substrates.
Expansion gaps and office constraints
Expansion gaps aren’t just perimeter math—they’re stability under movement. Office layouts often include:
– Door openings that compress airflow and change surface temperature quickly.
– Built-ins where planks stop and restart.
– HVAC registers that create localized drying/warming.
Maintain the required gap at every fixed boundary. Don’t “tighten it up” to reduce visual seams; the seasonal movement is real, and pinching the perimeter can lead to buckling.
Also plan your pattern. Stagger joints per instructions so you avoid small “H” shapes that can align with rolling-chair tracks. In an office, seams are walked on daily, so seam placement matters for longevity.
Finish details: transitions, trim, and office-friendly protection
Start by treating transitions and trim as structural support, not cosmetic upgrades—un-supported edges are a common reason engineered wood joints fail prematurely in offices. Then protect the surface for rolling chair traffic so your seams stay smooth and snag-free.
– Reinstall/replace baseboards and add the correct transitions at door openings or between rooms so edges stay supported.
– For a home office (rolling chair traffic is common), consider adding chair-safe protection and making sure seams are smooth enough to prevent snagging.
Transitions at doorways reduce stress on plank edges by providing supported profiles where flooring height changes or runs stop.
Rolling-chair use increases localized wear at seams; keeping seam edges flush reduces the likelihood of chair wheels catching.
When reinstalling trim over an engineered wood floor, avoid covering the full expansion gap with caulk or rigid material where movement is required.
Trim and transitions that prevent early joint issues
– Baseboards/quarter round: These should conceal gaps while still allowing movement beneath them as required.
– Doorway thresholds: Use the transition profile required by the floor system, especially where the floor run ends or changes direction.
– Edge sealing: Follow manufacturer guidance. Over-sealing can restrict movement.
Office protection for rolling chair traffic
Many engineered wood floors do well in home offices when you combine:
– a quality chair mat designed for hard floors (if compatible with your flooring finish),
– routine debris removal (grit acts like sandpaper), and
– smooth transitions where wheel movement crosses seams.
If your engineered wood has a factory finish, avoid using cleaners that aren’t approved for that finish type. If you’re refinishing (some engineered floors are re-sandable), ensure the finish system supports that process and that your office environment can accommodate curing/drying time.
What can go wrong (and how to prevent it)
Start by understanding that most engineered wood replacement failures trace back to subfloor flatness, moisture system mismatches, or expansion-gap mistakes—especially in office environments with HVAC cycling. Then reduce those risks by following the manufacturer’s installation framework and verifying conditions before you install.
– Skipping subfloor flatness/cleaning: leads to squeaks, board separation, or early wear—especially when floors are walked on daily.
– Wrong moisture/underlayment setup: can cause cupping or gaps over time; always follow the manufacturer’s required system.
– Not honoring expansion gaps: can trap movement and result in buckling after seasonal humidity changes.
– Removing in older homes: if your home is older, adhesives/dust may contain hazardous materials—before starting, check whether you need professional assessment or specific precautions.
Engineered wood floors fail most often when the subfloor is not flat enough for the planks to sit without point loads; this can manifest as squeaks and joint separation.
Moisture problems (cupping/gapping) are frequently linked to using the wrong moisture test or moisture control system—not just to “having moisture.” (ASTM F1869; ASTM F2170)
ASTM F710 is a preparation-oriented standard that reinforces the same principle: the concrete surface must be clean and properly prepared before installing a resilient or floor-covering system. (ASTM F710)
Pros/cons by removal/installation path (what you’re trading off)
| Feature | Floating / click-lock | Nail-down | Glue-down |
|---|---|---|---|
| Typical removal destructiveness | Low (often) | Medium | High |
| Subfloor cleaning requirement | Moderate | Moderate–High | High (adhesive residue) |
| Flatness sensitivity | High | High | Very high |
| Squeak risk driver | Loose underlayment/subfloor | Fastener/subfloor movement | Poor bond + uneven surfaces |
| Moisture control dependence | Moderate–High | Moderate–High | High (adhesive + slab conditions) |
| Time and mess factor | Lower | Medium | Higher |
| Repairability later | Better (often) | Moderate | More difficult |
| Best for DIYers | Usually | Sometimes | Rarely |
| Office chair traffic performance | Depends on flatness + underlayment | Depends on fastening accuracy | Depends on adhesive bond + prep |
| Main downside | Movement if perimeter is trapped | Squeaks if subfloor is loose | Hard, dusty demo and residue prep |
| Best For | Rooms where removal needs to be controlled | Wood subfloors that can be fastened securely | When you have a flat, clean, properly tested concrete slab and you can meet adhesive requirements |
If your home is older, pause before grinding or scraping old adhesives. Safety guidance can change based on region and building age, and it’s better to confirm before demolition starts.
Quick checklist + honest verdict (DIY vs hire)
Start with the flooring type and subfloor condition: those two factors predict whether DIY will be smooth or painful. In most 2026 office remodels, DIY is happiest when you keep the installation path simple (floating over a flat subfloor) and avoid adhesive-heavy removal.
– If your current engineered wood is floating and your subfloor is already flat, this is a fairly straightforward DIY.
– If it’s glue-down or nail-down, expect more demo time and more subfloor remediation work—hiring help can be worth it.
Scan-and-save checklist
| Step | What to check | Done? |
|---|---|---|
| Identify installation type | Floating / nail-down / glue-down | ☐ |
| Measure room + plan layout | Account for doorways/obstacles | ☐ |
| Remove flooring carefully | Avoid damaging subfloor | ☐ |
| Remove adhesive/residue | Subfloor is clean and ready | ☐ |
| Flatness + repairs | Fix high/low spots | ☐ |
| Moisture testing | Use manufacturer-required method | ☐ |
| Underlayment/moisture barrier | Approved system only | ☐ |
| Expansion gaps | Maintain required perimeter gaps | ☐ |
| Install in pattern | Stagger joints per instructions | ☐ |
| Trim & transitions | Fully support edges | ☐ |
| Post-install protection | Chair/traffic protection | ☐ |
Sources
– (rules for expansion gaps, underlayment, moisture barriers, and permitted subfloor flatness).
– ASTM F710, Standard Practice for Preparing Concrete Floors to Receive Resilient Flooring (general principles for concrete floor prep).
– ASTM F2170, Standard Test Method for Determining Relative Humidity in Concrete Using In Situ Probes (commonly used moisture testing approach for slabs).
– ASTM F1869, Standard Test Method for Measuring Moisture Vapor Emission Rate of Concrete Subfloor Using Anhydrous Calcium Chloride (alternative moisture test approach).
Replacing engineered wood in a home office comes down to doing the boring parts well: correctly identify how the existing floor is installed, remove it without damaging the subfloor, and install the new planks with the right moisture system, underlayment (if required), and expansion gaps. If you have floating flooring and a reasonably flat subfloor, DIY is often manageable—otherwise, consider professional help for glue-down/nail-down removals and subfloor remediation. If you share your current floor type (floating vs glue-down/nail-down) and whether your office is on slab or wood subfloor, we can map the safest, most realistic route for your setup.
Frequently Asked Questions
What tools and materials do I need to replace engineered wood floors in a home office?
For a clean engineered wood floor replacement, gather a circular saw or jigsaw (for trim and custom cuts), a tapping block, pull bar, utility knife, spacers, measuring tape, and a pry bar. You’ll also need underlayment or the manufacturer-approved vapor barrier (if required), new engineered wood planks, transition strips, and flooring adhesive or recommended installation supplies for your system. If you’re replacing over an existing surface, plan for subfloor repair materials like leveling compound, screws for loose boards, and a vacuum for dust control.
How do I remove existing engineered wood flooring without damaging the subfloor?
Start by removing baseboards and trim carefully using a pry bar and a putty knife to protect the drywall. For click-lock engineered wood, lift boards section by section and pull them straight up when possible to avoid gouging; for glued-down floors, use a floor scraper and take your time to remove adhesive residue. After removal, inspect the subfloor for high spots, loose areas, and moisture issues, then sand, level, and patch as needed before installing new engineered wood flooring.
Why is subfloor preparation critical when replacing engineered wood floors in a home office?
A home office often has heavy, rolling chair traffic and concentrated loads, so any unevenness can cause squeaks, joint separation, and gaps between engineered wood planks. Properly leveling the subfloor prevents the floor from flexing and helps engineered wood flooring lock or glue securely. Check for flatness, moisture, and stability—especially in basements, over concrete slabs, or areas with seasonal humidity swings—so your replacement stays durable for years.
Which installation method is best for replacing engineered wood floors in a home office—floating, nail-down, or glue-down?
The best method depends on your engineered wood type, subfloor material, and moisture conditions. Floating click-lock engineered wood is often fastest and ideal for many subfloors, but it requires the right underlayment and proper expansion gaps around the room. Nail-down works well when the subfloor is wood and provides a very solid feel, while glue-down installation can be best over concrete or when you want maximum stability—provided you use the adhesive system recommended for the engineered wood. If your home office experiences humidity changes, choose a method and underlayment that match the product’s specifications.
What are the steps to install new engineered wood flooring and ensure a professional finish in a home office?
Begin by acclimating the engineered wood planks in the room for the time recommended by the manufacturer, then lay out a centered pattern and maintain expansion gaps along walls and fixed columns. Install underlayment/vapor barrier as required, fit the first row carefully, and stagger plank joints for a balanced look while keeping edges aligned. After installation, reinstall baseboards, add transitions (especially at doorways), and use caulk or matching trim only where appropriate—not in the expansion gap areas. Finally, allow proper curing time for any adhesives, clean thoroughly, and use felt pads under office chairs to protect the new surface.
📅 Last Updated: October 19, 2026 | Topic: How to replace engineered wood floors in a home office? | Content verified for accuracy and freshness.
References
- Engineered wood
- Wood flooring
- Floor
- https://www.cdc.gov/niosh/topics/wooddust/
- https://www.epa.gov/lead/renovation-repair-and-painting-program
- https://www.epa.gov/asbestos/asbestos-homeowner-information
- https://scholar.google.com/scholar?q=engineered+wood+floor+replacement+installation+guide Google Scholar
- https://scholar.google.com/scholar?q=engineered+wood+floor+subfloor+preparation+moisture+humidity Google Scholar
- https://scholar.google.com/scholar?q=wood+floor+removal+dust+control+ventilation Google Scholar