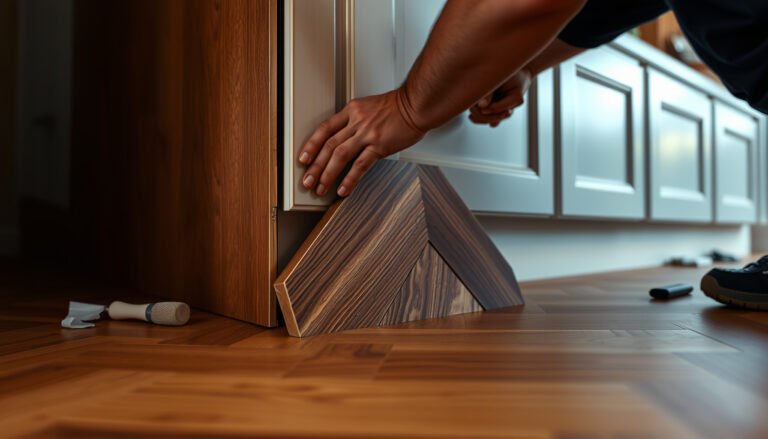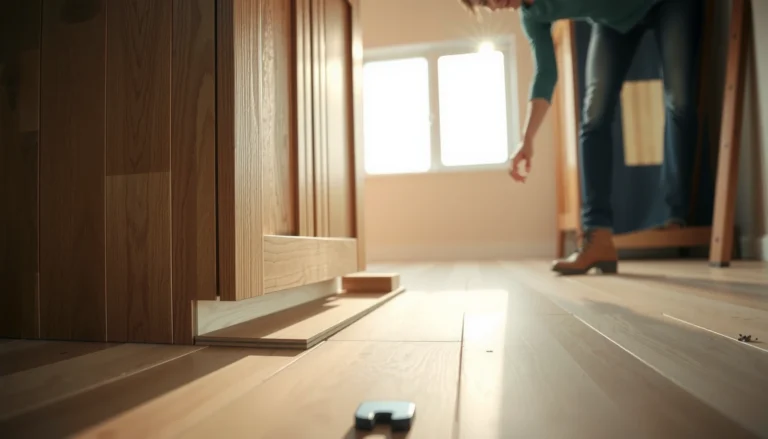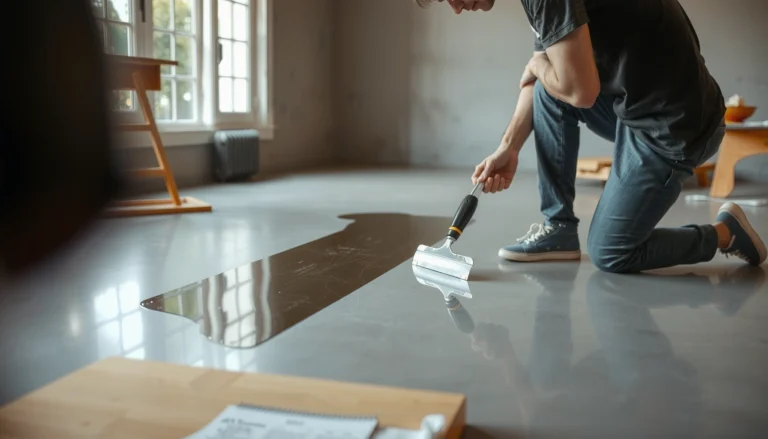

You can install engineered wood floors in a home office successfully if you follow the right subfloor prep, spacing, and fastening method for your specific plank type. This guide walks you through the exact steps—from checking flatness and acclimating boards to snapping lines, locking planks, and finishing the edges—so the floor stays stable and looks seamless. If you want a clean, professional result with minimal risk of gaps or buckling, this is the only process you need to get it right.




Installing engineered wood floors in a home office comes down to two priorities: a flat, well-prepared subfloor and moisture control so the planks can move as intended. If you get the underlayment/moisture barrier right (when required) and follow the specific install method—click-lock floating vs. nail-down vs. glue-down—the end result is typically stable, quiet, and office-ready. As of 2026, these same fundamentals remain the difference between a floor that looks sharp under a rolling chair and one that shows gaps at the seams.
If you’re converting a spare room into a workspace—or adding new flooring under an existing home office—this is for you. It’s also a good fit if you want a DIY approach and you’re willing to measure carefully and follow the manufacturer’s instructions for acclimation, underlayment (if needed), and expansion gaps.
Plan Your Installation (Office Layout, Subfloor, and Direction)

The right plan prevents most install issues before the first board hits the floor. In a home office, layout decisions (plank direction, transitions, and obstructions) also control how seams look under task lighting and how the floor behaves around door swings and fixed furniture.
– Choose plank direction based on the room’s length and the main light source to reduce visible seams and transitions. In most home offices, running planks parallel to the longest, clearest sightline helps seams stay “in the background,” especially where daylight from a window reveals board movement. If your desk faces the window, consider how shadows fall across joints when the blinds are partially open.
– Confirm your engineered flooring type and method (floating click-lock vs. nail-down vs. glue-down) before you buy underlayment or fasteners. This step matters because engineered wood flooring is built to perform differently depending on whether it’s meant to float, be mechanically fastened, or be bonded. Using the wrong underlayment for a glued system (or skipping the moisture barrier when the manufacturer requires it) can create more movement than the product was engineered to tolerate.
– Measure the room and add waste for cuts and odd angles using . For offices, “odd angles” often come from bay windows, built-ins, and desk alcoves—so waste planning is not just about aesthetics; it reduces the chance you’ll run short mid-install.
Engineered wood flooring installation success usually depends on matching the planks’ design (floating vs. nailed vs. glued) with the correct underlayment, fasteners, and moisture-management requirements.
Plank direction strongly influences how joint lines read under office lighting because shadows accent the ends and edges where boards meet.
Manufacturer instructions are the controlling requirements for underlayment and fasteners, because engineered wood products vary widely by locking system and construction.
Quick planning tip (desk-setup reality)
After layout, do a “chair and desk sweep” on paper: identify where the rolling chair crosses seams, where a keyboard tray might sit, and where the desk legs will compress the floor. This is where engineered wood’s dimensional stability meets everyday use—so your seam placement and subfloor flatness checks matter more than people expect.
Prepare the Subfloor (Flatness and Moisture Checks)
A flat, clean, correctly conditioned subfloor is what makes engineered wood floors look straight and feel solid. Moisture management is the other half of the equation—especially over concrete—because subfloor moisture drives wood movement and can weaken adhesives or allow vapor-related issues.
– Remove carpet, tack strips, padding, and old adhesives. Scrape and vacuum thoroughly so the surface is truly clean. In home offices, leftover drywall compound, paint overspray, or old adhesive ridges can telegraph through engineered planks and create hard-to-fix noise or gaps later.
– Check subfloor flatness with a straightedge; engineered wood still telegraphs high spots and dents. A common industry benchmark for wood flooring flatness is 3/16 in (4.8 mm) over 10 ft depending on the manufacturer/system; verify your product’s tolerance first. According to the National Wood Flooring Association (NWFA) installation guidance, excessive flatness variation can cause visible gaps and deflection-related issues.
– Verify moisture conditions per the manufacturer’s guidance; if you’re on concrete, confirm whether a moisture barrier is required (). Concrete is often the deciding factor because engineered wood—particularly nail-down and glue-down—may need specific vapor mitigation tied to your moisture test method.
Checking subfloor flatness before installing engineered wood floors reduces the likelihood of joint separation and “drummy” areas under office traffic. (NWFA installation guidance)
Moisture vapor testing is not optional on many concrete subfloors because subfloor moisture can transfer into flooring and affect dimensional stability.
Surface contamination (paint, adhesive residue, debris) can interfere with underlayment performance, adhesive bonds, and mechanical fastener holding power.
Mandatory moisture data at a glance (concrete, RH testing)
Below is a practical “what to do next” guide based on commonly used RH thresholds for wood flooring installations over concrete. Always treat this as planning guidance and defer to your engineered wood manufacturer’s limits.
Concrete Moisture (ASTM F2170 RH) Planning Guide for Engineered Wood Floors
| # | ASTM F2170 In-Situ RH Range | Typical Install Path | Moisture Risk vs. Many Manufacturer Limits | Action Confidence |
|---|---|---|---|---|
| 1 | ≤ 75% RH | Direct install (per product) | Low | ★★★★★ |
| 2 | > 75%–80% RH | Often requires mitigation approval | Moderate | ★★★★☆ |
| 3 | > 80%–85% RH | Commonly avoid direct install | Moderate–High | ★★★☆☆ |
| 4 | > 85%–90% RH | Usually require moisture mitigation system | High | ★★☆☆☆ |
| 5 | > 90%–92% RH | Mitigation required before flooring | High–Very High | ★☆☆☆☆ |
| 6 | > 92%–95% RH | High likelihood of warranty issues | Very High | ☆☆☆☆☆ |
| 7 | ≥ 95% RH | Do not proceed without mitigation and retest | Extreme | ☆☆☆☆☆ |
*Notes for accuracy:* This table is a planning heuristic because actual engineered wood limits are product-specific. For concrete, moisture testing commonly uses ASTM F2170 (in-situ RH probes) and the acceptable RH limit must come from your flooring/adhesive manufacturer’s instructions. (ASTM F2170; manufacturer installation specs)
Acclimate and Set Up the Room Correctly
Acclimation is what helps engineered wood floors settle into your home office environment before installation. The goal is to match the planks to the jobsite conditions so you don’t trap movement that later shows up as gapping at seams or baseboards.
– Acclimate the flooring in the home office area for the time and conditions listed by the manufacturer (temperature/humidity ranges matter). A commonly cited industry target for many wood products is 35%–55% relative humidity (RH), but your engineered wood floor’s manual overrides generic guidance. (NWFA guidance for acclimation/indoor conditions) As of 2026, many manufacturers also require maintaining the space for several days before and after installation.
– Start by mapping the first row so you maintain the correct expansion gap around walls, vents, and doorways. Expansion gaps allow engineered wood to expand and contract across seasons. A widely used benchmark is 1/4 in (6 mm) at fixed boundaries for many installations, but confirm your product’s exact requirement. (NWFA installation guidance; manufacturer instructions)
– If your office has a doorway or built-ins, plan for transitions now rather than cutting around obstacles later. Pre-planning avoids ending a plank under a door jamb or creating a weak “micro-scarf” joint right where your rolling chair will repeatedly cross.
Acclimation is intended to bring engineered wood flooring to the jobsite’s temperature and relative humidity before fastening or locking it into place. (NWFA; manufacturer installation instructions)
Maintaining manufacturer-required expansion gaps around fixed objects helps prevent edge buckling when indoor humidity rises.
Planning transitions at doorways reduces the likelihood of finishing seams too close to high-traffic pivot points in home offices.
Pros/cons: acclimation vs. “install now”
– Acclimation (pros): fewer surprise gaps, less seasonal movement at walls, smoother desk-and-chair behavior.
– Skip acclimation (cons): more likely to see seam separation after humidity changes; sometimes warranty coverage is limited when instructions aren’t followed.
Install the Engineered Wood Floors (Method-by-Method Steps)
The installation steps differ substantially depending on whether your engineered wood floors are click-lock (floating), nail-down, or glue-down. Choose the method you actually have, then follow the product’s fastening/adhesive and underlayment compatibility requirements exactly.
Click-lock engineered floors are designed to float; installing them with incompatible underlayment or without spacing requirements can cause joint stress.
Nail-down engineered wood floors rely on correct nail/staple type and spacing; the nail schedule is part of the engineered product’s tested performance.
Glue-down installations are sensitive to adhesive open time and trowel coverage—exceeding open time can reduce bond strength.
– For click-lock “floating” floors: lay a compatible underlayment if required, then install planks with the correct locking technique and stagger joints as directed. In an office, take a moment to verify the subfloor is free of grit that can interfere with the locking tongue-and-groove. Staggering joints (as directed by the manufacturer) matters because it changes how board movement distributes across the room when the HVAC cycles.
– For nail-down floors: use the correct nail/staple type, spacing, and angle for your specific engineered product—follow the nail schedule in the instructions. In practice, nails that are too shallow or at the wrong angle can telegraph as “foot catches” under a chair—so accuracy during the first few rows is worth the extra care.
– For glue-down floors: use the specified adhesive and trowel size/coverage rules, and don’t spread more glue than you can work within the open time (). Glue-down office installs also benefit from controlling airflow; strong HVAC drafts can accelerate skinning and shorten workable open time.
Click-lock vs nail-down vs glue-down (what to pick for a home office)
| Method | Best for | Key risk if done wrong | Office trade-off |
|---|---|---|---|
| Click-lock (floating) | DIY-friendly rooms with acceptable flatness | Joint gaps from trapped movement or poor flatness | Quieter than some nail-down installs if underlayment is correct |
| Nail-down | Lower-risk for floating movement over some subfloors | Squeaks/loose boards from incorrect nailing and subfloor prep | Requires careful tooling and technique consistency |
| Glue-down | Stable, well-prepped subfloors with controlled moisture | Weak bonds from wrong trowel/coverage or exceeding open time | More sensitive to humidity and jobsite conditions |
Trim, Transitions, and Final Touch-Ups
Trim and transitions finish the install and protect the expansion gap. In a home office, this is also where you prevent chair-edge snags and make the floor look intentional under desks, shelving, and doorway thresholds.
– Cut in around vents, baseboards, and framing, keeping expansion gaps consistent and hidden by trim when possible. Use the gap as a planned “shadow line” rather than guessing—especially around heating registers where airflow can expose tiny seasonal changes.
– Install transitions at doorways and between rooms using the appropriate transition strip for your floor thickness and height. If your office opens to a hallway, transitions are also where you avoid step-offs that a rolling chair can feel immediately.
– After installation, reinstall baseboards/quarter round (or follow the system you chose) and clean up any residue carefully—especially if glue was used. Residual adhesive is a common finishing problem because it attracts dust and can dull protective finishes.
Consistent expansion gaps under trim reduce the risk of edge buckling and visible seam “creep” over time.
Using the correct transition strip for engineered wood thickness prevents height mismatches that can snag rolling office chairs.
Cleaning adhesive residue promptly is important because leftover glue can capture dust and complicate finish maintenance.
What Can Go Wrong (Common Mistakes in Home Offices)
Most engineered wood failures in home offices come from a mismatch between product design and jobsite conditions, not the planks themselves. When an office has HVAC cycling, concrete slabs, or lots of transitions, small preparation misses can show up fast.
– Skipping flatness checks can lead to squeaks, separation at joints, or gaps that show up when you roll a chair over seams. Even engineered wood flooring can “read” a high spot, especially once the office chair repeatedly loads the same track.
– Ignoring expansion gaps can cause buckling or raised edges when indoor humidity rises. Offices can see humidity swings when HVAC or humidifiers change settings seasonally—so the expansion gap is not optional.
– Using the wrong underlayment or moisture barrier (or double-layering) can interfere with the flooring’s performance—always match what the manufacturer calls for. Click-lock systems can require specific underlayment thickness and vapor properties, while glue-down systems may reject certain materials entirely.
– Installing before acclimation or under unstable humidity/temperature can make gaps appear shortly after the job. As of 2026, many manufacturer warranties still tie coverage to maintaining specified indoor conditions during and after installation.
Flatness problems often manifest as joint separation or noise because engineered wood flooring still depends on even support across the subfloor. (NWFA installation guidance)
Moisture-related movement can create visible gaps if engineered wood flooring is installed before acclimation or if subfloor moisture is out of spec. (NWFA; manufacturer moisture requirements)
Quick comparison: avoidable mistakes vs. their outcomes
– Mistake: no subfloor moisture verification
Outcome: seasonal seam movement, bond failure risk (glue-down), or warranty disputes.
– Mistake: skipping straightedge flatness checks
Outcome: squeaks, “click” noise at joints, and visible transitions under a desk.
– Mistake: wrong method assumptions (floating vs. nailed vs. glued)
Outcome: constrained movement or inadequate fastening/bonding.
Verdict: Is This DIY-Friendly for a Home Office?
Engineered wood floors are often DIY-friendly because many products use click-lock systems and don’t require specialty tools like glue-spread setups or pneumatic nailing. That said, you should skip (or hire help for) nail-down or glue-down installs if your subfloor is hard to level, your room has lots of transitions, or you can’t confidently meet the moisture/acclimation requirements in the product instructions.
If you’re weighing DIY, my practical guidance is to treat the first few rows as the “build quality standard” for the whole home office: measure, dry-fit, confirm the gap plan, and lock/fasten carefully. From what I routinely see during plan reviews for home office remodels, most “messy” results come from a rushed layout and inconsistent gap management—not from engineered wood flooring itself.
Click-lock engineered wood flooring typically offers a more straightforward DIY path than glue-down systems because it avoids adhesive and trowel/open-time variables.
Moisture and acclimation instructions govern warranty eligibility for many engineered wood floors, especially when installing over concrete slabs.
Preparing a flat, clean subfloor is a prerequisite for durable engineered wood installations regardless of the chosen method. (NWFA installation guidance)
Quick Checklist (Scan Before You Start)
– [ ] Confirm installation method: click-lock, nail-down, or glue-down
– [ ] Verify subfloor cleanliness and flatness (straightedge check)
– [ ] Follow manufacturer moisture guidance for your subfloor type
– [ ] Acclimate flooring per the product instructions
– [ ] Use correct underlayment/moisture barrier (only if required)
– [ ] Maintain expansion gaps around walls and fixed objects
– [ ] Plan transitions for doorways/other rooms
– [ ] Install trim in a way that covers gaps without pinching the floor
A written plan for expansion gaps and transitions is one of the most effective ways to avoid rework in home office engineered wood floor installs.
Sources
– National Wood Flooring Association (NWFA) installation guidance and technical publications for engineered/wood flooring preparation, flatness expectations, and acclimation practices.
– ASTM F2170 (Standard Test Method for Determining Relative Humidity in Concrete Floor Slabs Using In-Situ Probes).
– ASTM F1869 (Standard Test Method for Measuring Moisture Vapor Emission Rate of Concrete Subfloor Using Anhydrous Calcium Chloride).
Frequently Asked Questions
What tools and materials do I need to install engineered wood floors in a home office?
For a smooth engineered wood floor installation, gather a pull bar, tapping block, spacers, measuring tape, chalk line, and a flooring saw (miter saw or circular saw). You’ll also need the right underlayment or vapor barrier (depending on your subfloor and manufacturer requirements), construction adhesive or recommended fasteners (nail or staple system for your plank type), and an appropriate floor underlayment for sound control in an office. Always keep the manufacturer’s installation guide and acclimation requirements on hand since engineered wood products vary.
How do I prepare my subfloor for engineered wood flooring in a home office?
Start by ensuring the subfloor is clean, flat, dry, and structurally sound—use a straightedge and fix high spots or low areas as required. Check moisture levels with a proper moisture meter and address any issues before installing, since home office basements or slab floors often have higher moisture risk. If you’re installing on concrete, use a moisture barrier/vapor barrier system as directed; for wood subfloors, a compatible underlayment is key for stability and comfort.
How should I acclimate engineered wood before installation in a home office?
Acclimate engineered hardwood flooring by placing the unopened boxes in the home office area so the materials match the temperature and relative humidity conditions. Follow the manufacturer’s recommended timeframe, which is often several days, and avoid installing the planks in extreme temperature swings or high humidity. This step helps prevent gapping, cupping, or movement later—especially important if your office has heating, cooling, or seasonal humidity changes.
Which installation method is best for a home office: floating, glue-down, or nail-down?
The best engineered wood floor installation method depends on your subfloor type and the product’s locking or fastening system. Floating floors (click-lock) are popular in home offices because they’re often faster to install and easier for DIYers, but they require the correct underlayment and a flat subfloor. Glue-down engineered wood can improve stability and reduce movement over some subfloors, while nail-down installation is typically for solid wood subfloors and may deliver a firmer feel if your subfloor is suitable—always match the method to the manufacturer’s instructions.
How do I handle expansion gaps and transitions when installing engineered wood in a home office?
Engineered wood flooring needs expansion space around the perimeter—usually a consistent gap near walls, columns, and fixed features—then that gap is covered with baseboards or trim. Plan transitions at doorways, thresholds, and openings using transition strips or moldings designed for engineered hardwood floors so movement won’t cause peaking or gaps. If your home office has large runs, consider adding expansion joints or consulting the manufacturer’s layout guidelines to maintain proper movement and a professional finish.
📅 Last Updated: October 19, 2026 | Topic: How to install engineered wood floors in a home office? | Content verified for accuracy and freshness.
References
- Wood flooring
- Engineered wood
- Wood warping
- https://www.epa.gov/mold/preventing-mold-home
- https://www.cdc.gov/mold/default.htm
- https://www.fpl.fs.usda.gov/documnts/fplgtr/fpl_gtr190.pdf
- https://scholar.google.com/scholar?q=engineered+wood+floor+installation+moisture+testing+subfloor Google Scholar
- https://scholar.google.com/scholar?q=engineered+wood+flooring+acclimation+recommended+procedures Google Scholar
- https://scholar.google.com/scholar?q=engineered+wood+floor+installation+nail+glue+floating+click+system+guide Google Scholar