
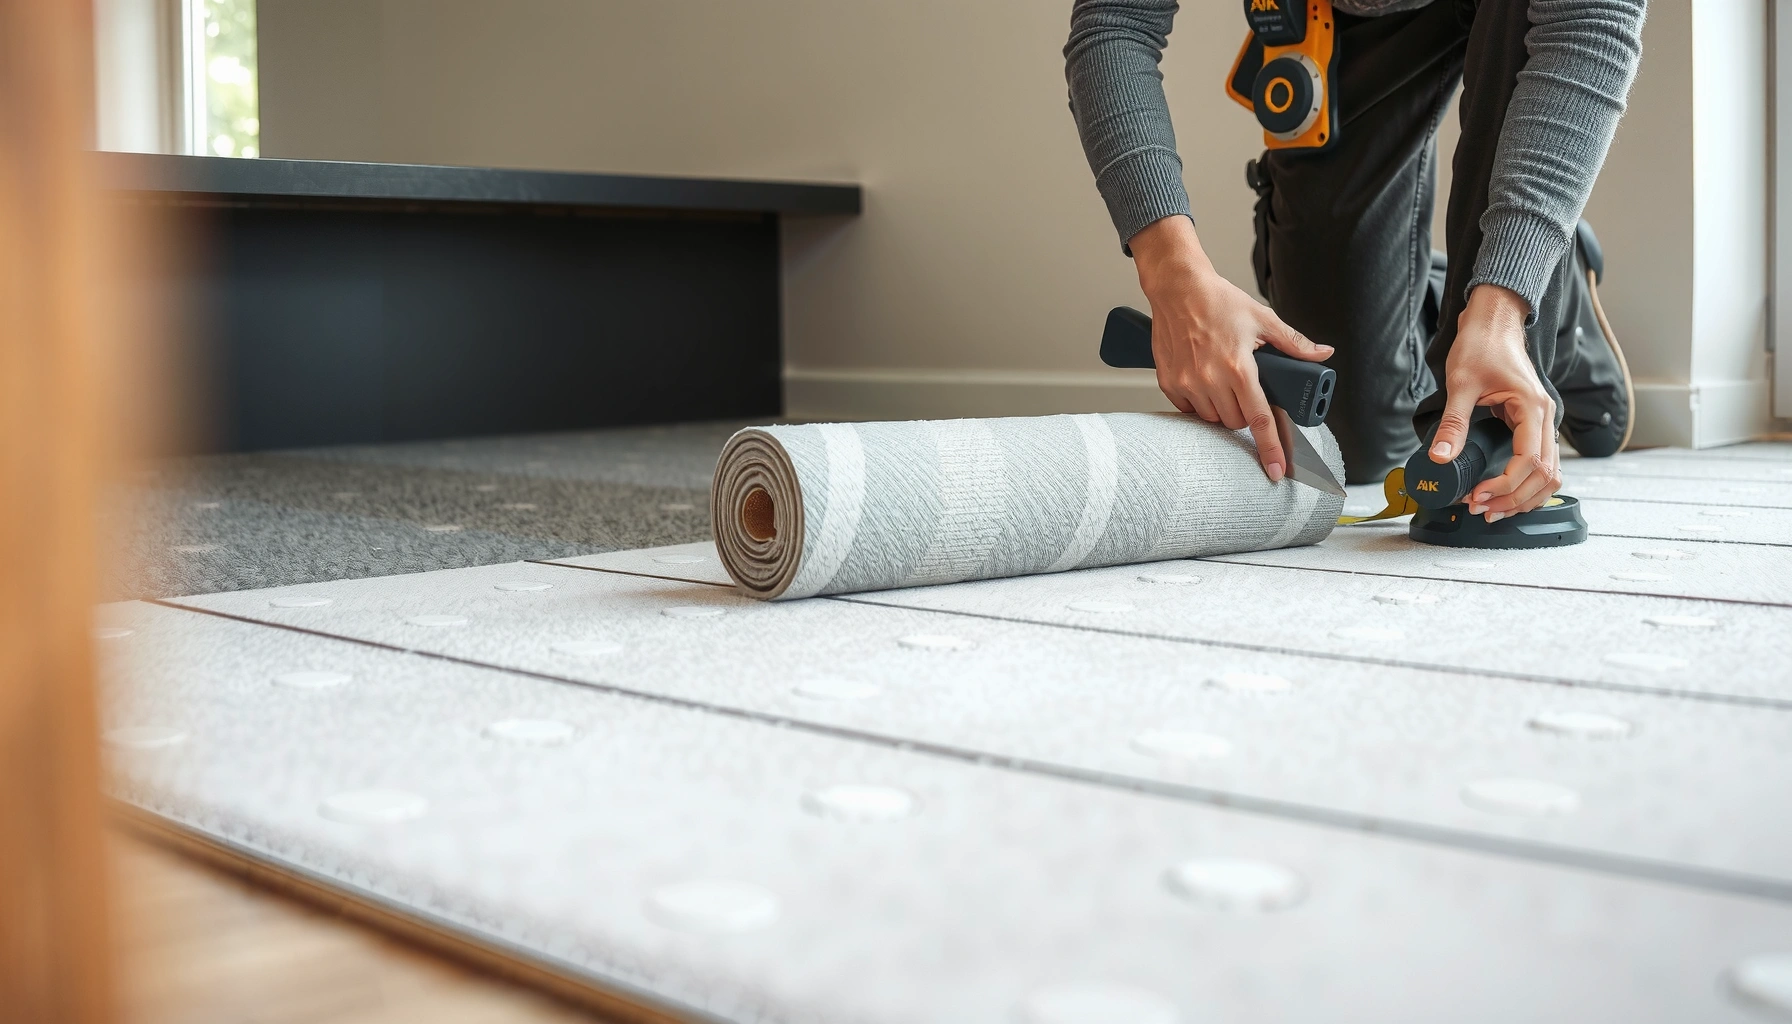

You can install underlayment under carpet tiles correctly the first time by following a tight, step-by-step process that prevents slipping, uneven feel, and early wear. This guide tells you exactly what to prepare, how to lay the underlayment to the subfloor, and how to seam and fit it so the tile installation locks down cleanly. If your subfloor is solid and dry, the right underlayment choice and proper placement are the difference between a flat, quiet floor and one that fails fast.


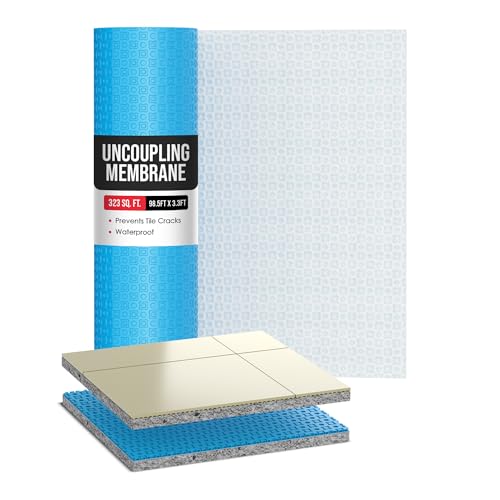
Carpet tiles usually install best with the right underlayment because it improves cushioning, reduces noise, and helps create a more even surface. For most jobs, you’ll clean and prep the subfloor first, then roll or place the underlayment (and tape/seal the seams if the system calls for it) before setting the tiles.
This guide is for homeowners and DIY installers who want to lay carpet tiles over common subfloors (like concrete, plywood, or existing flooring) and want a practical, mistake-resistant process. If you’re unsure whether your specific carpet tile system requires underlayment, check the manufacturer’s installation instructions first.
Typical Underlayment Roles for Carpet Tiles (Practical Selection Guide)
| # | Room / Subfloor Condition | Primary Underlayment Function | Best-Fit Material Type | Installation “Risk Level” |
|---|---|---|---|---|
| 1 | Dry interior over plywood | Cushion + acoustic control | Foam or felt | Low |
| 2 | Concrete slab on main floor | Moisture management | Moisture barrier backing | Medium |
| 3 | Basement level with damp season | Vapor barrier + stability | Seam-sealed vapor barrier | High |
| 4 | Existing resilient flooring (approved only) | Leveling + isolation | Approved isolator layer | Medium |
| 5 | Room with frequent rolling traffic | Stability under load | High-density cushioning | Low |
| 6 | Subfloor with minor surface irregularities | Micro-smoothing | Underlayment with spec compliance | Medium |
| 7 | Areas near exterior-grade exposure | Moisture isolation + longevity | Barrier + correct seams | High |
Step 1: Check your carpet tile instructions first

You should not “choose underlayment later”—you should select and install it based on the exact carpet tile system’s requirements. The fastest way to avoid bubbles, seam ridges, or warranty issues is to confirm whether your tiles need cushion, moisture protection, or both.
“Underlayment requirements for carpet tiles are system-specific and are stated in the manufacturer’s installation instructions.”
“When an underlayment is required, using an incompatible type can void coverage even if the floor looks flat at install time.”
“Seam tape or seam sealing is not universal—follow the underlayment manufacturer’s seam instructions exactly.”
Start by finding the “floor preparation” and “installation over underlayment” sections for your carpet tile model. Many commercial carpet tile systems are designed as a complete assembly (tile + backing + approved underlayment). If your tile is adhesive-free or uses a locking edge, you still may need an underlayment layer for dimensional stability and acoustics.
Also map the underlayment type to real room conditions. Concrete slabs and below-grade spaces are where moisture vapor drive is most likely. In many specifications, installers use flatness checks such as 1/8 inch over 6 feet (≈3 mm over 2 m) as a common tolerance reference—however, your tile and underlayment documents may define a different target. [ADD: source for your tile/underlayment flatness tolerance]
Finally, verify what the system expects at transitions (doorways, HVAC registers, floor-to-wall edges). If you install an underlayment that’s thicker or less stable than specified, the tiles may shift slightly under foot traffic, creating misaligned rows.
Step 2: Prepare the subfloor for a flat, clean base
You’ll get the best result when the subfloor is clean, stable, and within the tile system’s flatness tolerance. Underlayment helps with cushioning and small imperfections, but it does not correct structural defects or ongoing moisture problems.
“Carpet tile performance depends on subfloor cleanliness and stability as described in flooring installation guidelines.”
“Underlayment cannot compensate for major depressions, loose surfaces, or active moisture.”
“Dust and debris can prevent underlayment from lying flat, creating ridges that telegraph through carpet tiles.”
Begin with removal: sweep and vacuum to remove grit, drywall dust, and sanding residue. Scrape off paint overspray, ridges from old patch material, and any loose coating. If you’re working over concrete, check for curing compounds, sealers, and contaminants—many underlayments require a porous or approved substrate condition.
Next, fix flatness. Fill low spots with a product approved for your substrate type, then let it cure fully. If you notice high spots (common around old slab seams or trowel marks), sand or grind them down to avoid creating “rocking” tiles.
At this stage, you’re also checking moisture and damage before you install underlayment. If there’s visible dampness, recurring condensation, or prior water intrusion, stop and address that first—then return to underlayment. For moisture testing, many flooring systems reference ASTM test methods (for example, ASTM F2170 for in-slab relative humidity). [ADD: your tile manufacturer’s approved moisture testing method]
From a practical standpoint, we recommend staging materials so you can install underlayment promptly after the subfloor is prepared. Waiting can reintroduce dust and debris, which increases the chance of wrinkles or voids under the underlayment layer.
Step 3: Choose the right underlayment placement and seams
You should treat underlayment installation like a precision system: placement and seams must match the carpet tile spec. The goal is full contact (no bubbles), proper edge finishing, and seam treatment that aligns with the underlayment’s instructions.
“Moisture barrier systems often require seam taping or sealing to maintain their vapor-control performance.”
“Underlayment seams are commonly staggered or positioned to avoid overlapping joints directly under carpet tile seams.”
“Some underlayments must remain un-taped to avoid creating ridges or trapping movement.”
Start by classifying what you’re installing:
– Cushion / comfort layer: Improves feel and acoustics.
– Moisture barrier: Reduces vapor transmission from slabs or below-grade conditions.
– Combined system: Some underlayments integrate both functions and may have specific seam requirements.
Then plan placement. Most systems call for full coverage under the tile field so the subfloor is consistently supported. If your underlayment is separate from the moisture barrier, the barrier may need a different overlap/seal method than a standard cushion layer.
Here’s a quick contrast to decide whether you’re dealing with a “seal-critical” situation:
| Underlayment Type | Seam Treatment Usually Required? | Why It Matters |
|---|---|---|
| Cushion-only | Often optional (only if specified) | Incorrect tape can create ridges or edge curl |
| Moisture barrier | Usually yes (tape/seal per system) | Unsealed joints can reduce barrier effectiveness |
| Combined cushion + barrier | Often system-mandated | Both comfort and vapor control rely on correct seams |
In my experience advising DIY installers, the biggest seam-related failure isn’t the underlayment—it’s the installer “improvising” seam tape when the manufacturer says tape is only for moisture-barrier seams. If in doubt, lay out a test seam section first and confirm in the documentation.
Step 4: Install the underlayment correctly (avoid wrinkles and gaps)
You install underlayment flat and tension-free so it stays in full contact once the carpet tiles go down. Wrinkles, curled edges, and gaps are the most common causes of tile movement, telegraphing, and premature wear patterns.
“Underlayment that does not lie flat can create ridges that become visible or felt after carpet tile installation.”
“Cuts around vents and posts should be precise to prevent bulges at tile edges.”
“Replacing underlayment pieces that won’t relax flat now is cheaper than correcting tile misalignment later.”
Roll or place material in the order that lets it relax. If your underlayment comes rolled, allow it to acclimate per the manufacturer’s guidance before installation. Then cut carefully around obstacles:
– HVAC vents: cut a clean opening so tiles sit fully without rocking.
– Pipes/posts: make relief cuts so the underlayment doesn’t push up tile corners.
– Door thresholds: plan transitions so seams don’t land in high-flex areas unless the system allows it.
Use a firm technique to remove trapped air. Many installers press with a smoothing tool, working from center outward. Avoid stretching the layer—stretching can create “memory” that pulls the seams later.
Also watch for edge curl. If an edge curls, re-check the substrate for debris or unevenness, then re-seat the underlayment. Once the tiles are installed, it’s harder to correct without disturbing your layout and adhesive (if used).
Important limitation: underlayment can soften minor imperfections, but it should not be treated as a substitute for structural leveling. If your subfloor has a ridge or dip outside the approved flatness tolerance (commonly referenced as about 1/8 inch over 6 feet in many flooring contexts), address it before underlayment. [ADD: source for flatness tolerance relevant to your tile/underlayment]
Step 5: Install carpet tiles on top and keep layout consistent
You’ll protect your investment by matching the tile layout to the underlayment seams and confirming alignment early. After underlayment is in place, dry-lay rows to verify starting lines, then install tiles methodically so seams stay consistent across the room.
“Carpet tile installation quality is highly dependent on layout accuracy and consistent seam alignment across rows.”
“Dry-laying a section before committing to full installation helps prevent awkward perimeter cuts and crooked rows.”
“Different installation methods (loose lay, snap/lock, adhesive-backed) still require the same subfloor readiness and underlayment stability.”
Dry-lay first—especially near walls, thresholds, and doorways. Carpet tiles often use modular dimensions; if your tile field doesn’t fit cleanly, you may need a different starting point to avoid narrow slivers. Keep a measuring tape and snap line handy, but also trust your dry-lay inspection: the “look” of a layout is easier to correct before tiles are fully set.
Then install according to your system:
– Snap/lock tiles: ensure each tile engages fully without shifting the adjacent row.
– Loose lay: keep pressure/contact consistent so the backing settles evenly.
– Adhesive-backed: apply adhesive exactly per instructions, and avoid smearing into seams that should remain free.
As you work, do frequent alignment checks. The best time to correct is within the first few rows—later corrections can lead to jagged edges because adjacent tiles are already constrained by their neighbors.
If your carpet tile system includes a “rolling” step after installation, follow it. If it does not, don’t roll “because it seems right”—excess pressure can telegraph underlayment seams or move tiles out of alignment.
What can go wrong (and how to prevent it)
The most common underlayment failures come from moisture issues, poor flatness, or incorrect seam treatment. If you address those three categories up front, you dramatically reduce the chances of bubbling, ridges, odor, or pattern misalignment.
“Skipping a required moisture barrier over concrete can lead to odor or adhesive problems even if the installation appears fine initially.”
“Underlayment seams that are not treated as specified can allow movement and create visible ridging under carpet tiles.”
“Carpet tiles require a stable base; loose, crumbling, or deteriorating subfloors can undermine the entire system.”
Moisture surprises
Concrete slabs and basements can transmit vapor even when the room “feels dry.” If your system calls for a moisture barrier, don’t substitute a different membrane or skip seam sealing. [ADD: specify moisture-barrier requirement from your tile/underlayment manufacturer.]
For context, many flooring moisture programs rely on ASTM methods such as ASTM F2170 (in-slab relative humidity) or surface vapor tests (method depends on the product). [ADD: your manufacturer’s moisture testing method]
Uneven subfloor
Underlayment may smooth micro-texture, but it won’t fix major dips. If tiles rock when stepped on, stop and correct the subfloor before continuing. In many installations, a “feelable” instability often leads to:
– edge fraying in high-traffic rows
– seam separation
– premature wear along tile borders
Wrong seam treatment
A seam tape that’s correct for one underlayment can be wrong for another. Follow the spec on:
– tape type (width and adhesive backing)
– overlap requirements
– whether seams must remain unsealed for cushion systems
[ADD: include the exact seam/tape rule from your underlayment instructions.]
Verdict / tip
If your carpet tile system specifies underlayment, installing it is usually worth the effort for improved comfort and a smoother, quieter floor—but only if you follow the exact seam, tape, and moisture requirements from the manufacturer. Skip DIY on this step (or get help) if your subfloor has moisture issues, significant flatness problems, or if your instructions are unclear about whether underlayment is required.
We recommend reading the tile and underlayment manuals side-by-side before buying any materials. When the documents agree, follow both; when they don’t, treat the stricter requirement as the rule and confirm with the manufacturers.
Quick checklist (scan/save)
– [ ] Verify underlayment requirement and type in the carpet tile instructions
– [ ] Clean subfloor; remove high spots; fill low areas
– [ ] Place underlayment flat; cut around obstacles cleanly
– [ ] Install seams exactly as directed; tape/seal only if required
– [ ] Confirm tile layout before committing full install
– [ ] Set tiles methodically; recheck alignment as you go
FAQ
Do carpet tiles always need underlayment?
Not always—some carpet tile systems include backing or require only a specific subfloor condition. Check the manufacturer’s installation instructions for your exact tile model.
Can I install underlayment over painted concrete or old flooring?
Often you can only if the surface is properly prepped and approved by the tile/underlayment instructions. Loose or peeling coatings, contaminants, or unstable flooring typically need removal or repair first.
Should underlayment seams be taped?
Sometimes, but it depends on the underlayment system. Follow the underlayment instructions for seam treatment (tape type and whether sealing is required).
What if the subfloor isn’t perfectly flat?
Underlayment can help with minor irregularities, but large dips or ridges can cause tile rocking and seam separation. Address flatness before installing the underlayment.
Sources
– [ADD: manufacturer installation instructions for your specific carpet tile model—include the section covering underlayment/moisture barrier requirements.]
– [ADD: underlayment manufacturer’s installation guide—include seam/taping and subfloor prep requirements.]
– [ADD: any applicable moisture barrier or subfloor flatness guidance referenced by the tile/underlayment manufacturers.]
If you tell me the carpet tile brand/model and your subfloor type (concrete slab, plywood, existing flooring, basement level, etc.), we can tailor the seam and moisture steps to the exact requirements for your setup.
Frequently Asked Questions
What underlayment should I use under carpet tiles?
Choose underlayment based on your subfloor type and comfort goals. For most installations, a carpet tile underlayment like a thin, breathable cushioning pad works well to reduce impact noise and add slight comfort without affecting lock-and-fit alignment. If you’re installing over concrete, look for an underlayment with moisture protection (a built-in vapor barrier or appropriate moisture-rated layer) to prevent mold and odor.
How do I install underlayment under carpet tiles on concrete?
Start by cleaning the slab thoroughly and repairing any cracks, then ensure the concrete is dry and level. Roll or lay the carpet tile underlayment so seams are tight, and tape or overlap joints according to the manufacturer’s instructions. After the underlayment is secure and flat, you can place the carpet tiles, keeping edges aligned and avoiding stretching or bunching the underlayment underneath.
How thick should underlayment be for carpet tile floors?
Typically, thinner underlayment is best for carpet tiles because it helps maintain proper fit and performance. Many carpet tile systems recommend lightweight, low-compress underlayment (often around 1/8 inch or less), but always follow the specific guidance from your tile and underlayment manufacturer. If the underlayment is too thick, carpet tiles may shift, seam lines can become uneven, and doors may not clear properly.
Why does my underlayment keep wrinkling or lifting under carpet tiles?
Wrinkling usually happens when the underlayment isn’t laid flat, is installed over a rough subfloor, or isn’t allowed to acclimate before installation. Make sure the surface is smooth, clean, and dry, then cut the underlayment to fit without forcing it into corners. Also confirm the correct installation method—some underlayments must be taped at seams, while others should be rolled and weighted briefly so they settle flat.
Which installation method is best—tape seams, overlap edges, or use full-spread adhesive?
The best method depends on the underlayment type and carpet tile backing system. Most carpet tile underlayment installations require seam tape to prevent movement and to maintain a flat base, while overlap rules vary by product (some use butt joints rather than overlaps). Avoid using heavy adhesive unless the underlayment is specifically designed for it, because incorrect bonding can make future repairs or tile replacement difficult and can lead to uneven spots.
📅 Last Updated: October 11, 2026 | Topic: How to install underlayment under carpet tiles? | Content verified for accuracy and freshness.
References
- Google Scholar Google Scholar
https://scholar.google.com/scholar?q=install+underlayment+under+carpet+tiles - Google Scholar Google Scholar
https://scholar.google.com/scholar?q=carpet+tile+installation+underlayment+subfloor+preparation - Google Scholar Google Scholar
https://scholar.google.com/scholar?q=carpet+tile+underlayment+requirements+moisture+barrier - Carpet
https://en.wikipedia.org/wiki/Carpet - https://en.wikipedia.org/wiki/Carpet_tile
- https://en.wikipedia.org/wiki/Underlayment
- https://en.wikipedia.org/wiki/Subfloor
- https://en.wikipedia.org/wiki/Flooring
- Flooring
https://en.wikipedia.org/wiki/Resilient_flooring - https://en.wikipedia.org/wiki/Floor_tile


