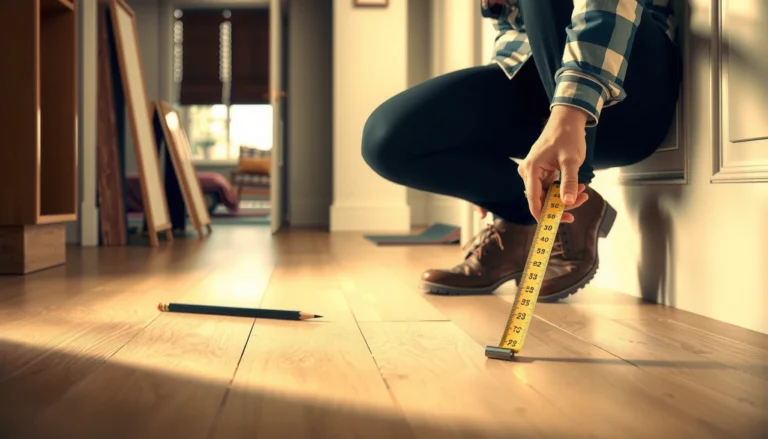
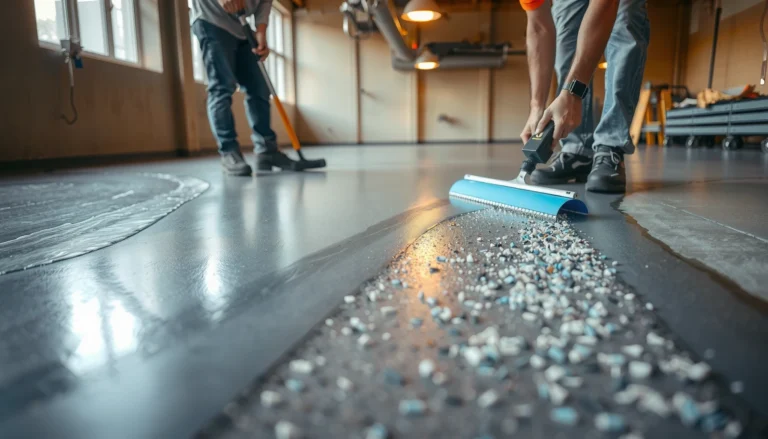
If you’re trying to remove hardwood floors from a basement, this step-by-step guide tells you exactly how to do it safely, start to finish. You’ll learn how to identify the floor type, pull up boards or tiles, handle nails and subflooring, and clean up without damaging the structure below. Finish with the right prep for refinishing or installing new flooring.




Removing hardwood floors from a basement comes down to one critical decision: identify whether the planks are nail-down, glue-down, or floating, then remove boards in the correct order to protect the subfloor. Once you know the installation method, the “right order” is usually trim/baseboard first, then boards, and finally adhesive residue and remaining fasteners—with strict dust control throughout. If your goal is a remodel, replacement flooring, or moisture-related repairs, this approach helps you avoid the two most expensive problems: damaging the subfloor and reintroducing trapped moisture after demo.
This guide is for homeowners and DIYers tackling a basement floor demo for a remodel, replacement, or moisture-related repairs. It’s especially useful when you don’t yet know whether your hardwood is nailed, glued, or “floating.”
Check how your hardwood is installed (nail-down vs glue-down vs floating)

You can remove basement hardwood safely by first confirming how the boards are attached—because nail-down, glue-down, and floating floors each require a different release technique. The fastest way to do this is to inspect seams, edges, and transitions for movement, glue lines, and fasteners before you pry or cut anything.
Here’s what to check on your specific basement floor (and why it matters):
– Look along edges, transitions, and seams to identify whether boards are fastened (nails/screws), bonded (continuous glue line), or click-locked/loose (gaps or movement).
– Determine what’s under the hardwood: concrete slab, plywood subfloor, or sleepers—because removal techniques differ.
– Inspect for underlayment type (foam/tar paper) since it changes what you’ll need to scrape off afterward.
In my experience advising homeowners during walkthroughs, the biggest “oops” comes from prying a glue-down floor like it’s nail-down—suddenly you’re not just removing planks, you’re also tearing up subfloor material.
If you see planks that lift with minimal resistance at a seam and the joints show a “click” pattern, the floor is likely a floating/click-lock system rather than a nail-down installation.
A continuous glue bond along seams and edges is a strong indicator of glue-down hardwood, which typically requires cutting seams to avoid lifting or tearing the subfloor.
Basement subfloors vary: hardwood installed over plywood behaves differently during demolition than hardwood installed directly over a concrete slab.
Nail-down vs glue-down vs floating: what you’ll actually see
– Nail-down hardwood: You’ll often find nail lines near the board edges, and boards may resist lifting until a fastener zone is exposed. Baseboards also tend to be crucial for hiding the perimeter detail.
– Glue-down hardwood: You usually see tighter seams with a bonded feel; when a piece starts to lift, it may pull adhesive threads, chunks, or leave a thick residue layer.
– Floating/click systems: You’ll often notice board movement when pressed or at a corner, and the floor typically disengages from a perimeter direction without removing individual fasteners.
Underlayment and subfloor materials change your “cleanup” job
Even when the top layer removal is straightforward, basements frequently turn the project into a cleanup-and-prep task. If there’s foam underlayment, you may be ripping pads; if there’s tar paper, you’ll likely scrape and vacuum; if there’s residue from glue-down plank adhesive, you’ll need a method designed to prevent gouges.
Also, consider moisture context as part of installation identification: moisture can loosen adhesives over time or swell plywood edges, making “diagnosis by feel” harder. That’s why you should inspect multiple locations (front corner, middle seam, and transitions near doorways).
Prep the basement to avoid damage and control dust
You should prep first because dust control and hazard awareness determine whether your demo stays manageable—or becomes a remodeling bottleneck. Proper containment, PPE (personal protective equipment), and compliance checks reduce risks from debris, volatile odors, and possible hazardous materials in older homes.
– Remove valuables and seal off vents/duct returns; cover nearby surfaces with plastic to limit debris spread.
– Wear protection appropriate for demo work (eye protection, gloves, hearing protection), and use a respirator if you’ll be cutting or generating fine dust.
– If the home is older or you suspect hazardous materials in finishes/adhesives, pause and get testing guidance before disturbing materials ().
Dust isn’t just unpleasant—it’s a quality issue. A dusty basement can contaminate surfaces you’ll need later for moisture mitigation, patching, and flatness correction.
The U.S. EPA Renovation, Repair and Painting (RRP) Rule is designed to address lead dust during renovation and demolition activities in covered target housing and child-occupied facilities.
OSHA’s respiratory protection standard (29 CFR 1910.134) requires a respiratory protection program that includes medical evaluation and fit testing before respirator use.
Proper containment (plastic barriers and sealed airflow paths) helps prevent construction dust from migrating to other basement areas and occupied parts of the home.
Regulatory triggers that can change how you demo (lead paint and dust)
If your basement is in a home built before 1978, your “hardwood removal plan” may need additional lead-dust precautions. According to U.S. EPA (40 CFR Part 745), the RRP Rule applies to certain renovation activities in target housing and child-occupied facilities built before 1978 (2010). According to the same rule, the trigger can be based on surface area disturbed: more than 6 square feet indoors or 20 square feet outdoors (40 CFR Part 745).
And because basement floors often involve scraping and cutting, respiratory protection matters. According to U.S. OSHA (29 CFR 1910.134), fit testing is required and respirator use must be covered by medical evaluation and program elements (2017-present compliance framework).
Practical containment setup (what to do before the first pry bar)
– Seal airflow: Close doors; cover return vents and isolate the work area. Dust follows air paths.
– Cover what matters: Plastic sheeting over storage shelves, water heaters, and adjacent finished surfaces; tape seams so debris can’t sneak through.
– PPE as a system: Eye protection for chips, gloves for splinters, hearing protection for demolition tools, and a respirator when you’re cutting, sanding, or scraping adhesive.
– Pause if you suspect regulated hazards: If coatings or adhesives are unknown in a pre-1978 home, testing guidance is worth the delay.
Remove the hardwood boards the right way
You’ll avoid needless subfloor damage by removing boards using the release method that matches the installation type. Nail-down planks typically come up by lifting while pulling nails/staples as you uncover them; glue-down floors usually require seam cutting first; floating boards disengage from the perimeter in the correct direction.
– Nail-down hardwood: remove baseboards/trim first, start at an edge or seam, lift boards with a pry bar/floor puller, then pull nails/staples as you uncover them.
– Glue-down hardwood: cut along seams or use an oscillating tool to free sections before prying; expect adhesive residue that needs extra cleanup.
– Floating/click systems: remove trim and disengage boards starting from the appropriate wall direction; avoid forcing boards to prevent broken tongues/locks.
For nail-down hardwood, removing baseboards/trim first reduces the chance of tearing the perimeter joint and helps you expose fasteners without prying against finished edges.
For glue-down hardwood, cutting seams before prying helps prevent the board from tearing upward with adhesive and damaging the subfloor.
For floating/click systems, disengaging boards from the correct perimeter direction prevents broken tongues and avoids locking-system damage.
Nail-down: slow lift, expose fasteners, then remove
When you start at a seam or outer edge, you’re trying to do two things: (1) keep boards intact as long as possible and (2) expose nails/staples so you can remove them instead of ripping them out.
A practical sequence:
1. Remove baseboards/quarter round carefully (use a trim pry tool if you have one).
2. Start at an edge or seam where the board is least “locked.”
3. Use a floor puller or a pry bar with a protective block to lift.
4. As soon as you can see nails/staples, pull them while you continue the row-by-row lift.
Glue-down: cut seams to avoid subfloor tears
Glue-down removal is where many projects go sideways. Prying can rip plywood fibers, gouge concrete, and create high spots that telegraph through your replacement flooring.
A workable approach:
1. Use an oscillating multi-tool or seam-cutting method to free boards along seams.
2. Pry small sections after you’ve released the adhesive bond locally.
3. Expect residue—plan to scrape and vacuum, not just “lift and toss.”
Floating/click: disengage, don’t force
Floating systems rely on lock geometry. If you force boards, you can break tongues/locks and create gaps that are difficult to replicate or reuse.
A workable sequence:
– Remove trim and undercut it enough to clear the perimeter expansion gap.
– Start disengaging from the perimeter direction that “unlocks” the joints.
– Remove board by board without twisting hard enough to snap the lock.
Quick pros/cons comparison (choose the method you can execute cleanly)
| Installation type | Best when | Main drawback |
|---|---|---|
| Nail-down | Subfloor is sound and you can remove trim cleanly. | Risk of subfloor gouging if pry points are too aggressive. |
| Glue-down | You’re willing to cut seams and do thorough residue cleanup. | Adhesive residue can damage flatness and complicate new installs. |
| Floating/click | You can access the perimeter and follow lock direction. | Forcing joints can break tongues/locks and create debris you must clean. |
Deal with underlayment, adhesive, and fasteners
You finish the demo correctly when the subfloor is clean, flat, and free of leftover fasteners and thick adhesive. This is where the “real work” happens—because new flooring fails most often due to unevenness, embedded debris, or moisture being trapped under later layers.
– Scrape down remaining adhesive carefully (floor scraper, proper adhesive-removal approach) to prevent bumps that can ruin a new installation.
– Pull or remove leftover nails/staples and check the subfloor flatness; fix high spots before moving forward.
– Inspect for basement moisture problems (signs of dampness, staining, musty odor) because trapped moisture can cause new flooring to fail even if the demo is perfect.
Leaving adhesive ridges or fastener debris on the subfloor can translate into bumps under new flooring, leading to visible telegraphing or premature wear.
A subfloor flatness check after removal is essential because most replacement flooring systems require a relatively even plane to install correctly.
Basements can hide moisture behind flooring; staining, persistent dampness, or musty odors are practical indicators that you should address moisture before installing new material.
Underlayment removal: don’t assume it’s “just padding”
Foam underlayment often tears into fragments. Tar paper can leave textured residue that affects smoothness. Plan to scrape and vacuum thoroughly, then do a final sweep before any patching or coating.
Fasteners: remove them even if they “look harmless”
Even small nail heads and staples can prevent replacement flooring from seating correctly. Pull what you find, then run your hand over the surface to detect remaining points. If you’re working over plywood, be careful not to tear fibers while removing metal—patching damaged plywood is easier than grinding it down later.
Moisture inspection: treat it as part of the removal process
Before you install anything new, inspect around:
– perimeter walls and corners
– changes in color (dark patches, tide-like staining)
– condensation on concrete (especially if the basement is unconditioned)
– odors that linger after cleanup
If you see active moisture issues, address them first. Moisture mitigation typically involves controlling water entry and improving ventilation or humidity management; installing new flooring on top of a wet substrate is a recipe for long-term failure.
Regulatory triggers that can affect basement floor demo (U.S. EPA/OSHA)
| # | Rule / requirement | Key trigger or timing | Reference year | DIY clarity |
|---|---|---|---|---|
| 1 | EPA RRP “target housing” coverage | Applies to certain renovation activities in housing built before 1978 | 1978 | ★★★★★ |
| 2 | EPA RRP indoor painted-surface trigger | More than 6 sq ft disturbed per room/space | 2010 | ★★★★★ |
| 3 | EPA RRP exterior painted-surface trigger | More than 20 sq ft disturbed | 2010 | ★★★★★ |
| 4 | OSHA Respiratory Protection (program elements) | Includes medical eval + fit testing before use | 2017-present | ★★★★☆ |
| 5 | OSHA Respirator fit testing interval | At least every 12 months (and as needed) | 2017-present | ★★★★★ |
| 6 | OSHA PPE basics (Subpart I) | Eye/face, hand, and protective equipment as hazards require | Current OSHA | ★★★☆☆ |
| 7 | OSHA training/documented compliance | Training required before respirator use and when program changes | 2017-present | ★★★☆☆ |
What can go wrong during basement hardwood removal
You’ll reduce risk by anticipating the three most common failure points: subfloor damage, broken boards, and hazardous surprises. If you’re aware of what typically goes wrong, you can slow down where it matters and make safer decisions when conditions are uncertain.
– Subfloor damage: aggressive prying can gouge plywood, loosen concrete patches, or create dips that later transfer through new flooring.
– Broken boards: rushing the first row or starting in the wrong spot can split planks and make it harder to remove the rest cleanly.
– Hazard surprises: old sealers/adhesives may contain regulated substances (e.g., lead or asbestos-containing materials), which changes the safe-removal process.
In real projects, broken boards usually happen at the first “wrong pry.” Once the perimeter is damaged, the rest of the job becomes harder because boards stop behaving predictably at seams.
Subfloor gouges can create high/low spots that may transfer through replacement flooring, especially in rigid or thin systems.
Starting removal from the incorrect perimeter can damage click-lock tongues and locks, increasing debris and making cleanup more difficult.
If you discover potentially hazardous lead or asbestos-containing materials, the removal method and required precautions may change substantially from standard demo practices.
Subfloor damage: how to recognize it early
Watch for:
– visible plywood fiber tear-ups
– crumbling concrete patches
– new dips created by repeated pry pressure
– fasteners that rip out leaving larger holes than you started with
If you see these early, stop and change tactics—reduce pry leverage, increase seam cutting, and switch to smaller controlled sections.
Broken boards: prevent it at the start
The first row determines the feel of the whole process. If you’re unsure, start at the easiest edge, confirm attachment type at that location, and proceed slowly. Glue-down mistakes can also cause board splitting because adhesive holds unevenly.
Hazard surprises: when you should stop
If your basement is older and the adhesive, underlayment, or coatings look unusual, pause. EPA’s RRP framework is one example of how lead-based paint rules can affect demolition dust control and process requirements (U.S. EPA, 40 CFR Part 745). For asbestos-containing materials, you’ll need appropriate testing guidance before disturbance ().
Verdict / practical recommendation
DIY hardwood removal is usually reasonable when you can confirm nail-down attachment and your subfloor is in decent condition—especially if you plan to remove trim carefully and lift boards in controlled sections. If your floor is glue-down over concrete, covers a large area, or you’re unsure about hazardous materials in adhesives/finishes, consider hiring a flooring demo professional because cleanup risk and subfloor damage risk increase.
Here’s the practical decision logic I’d use:
– Go DIY: Nail-down hardwood, plywood subfloor, clear trim removal access, and manageable adhesive conditions.
– Consider pro help: Large glue-down areas, unknown adhesives/coatings in a pre-1978 setting, concrete slab with patchy condition, or moisture damage that’s already suspected.
Also skip DIY (or stop early) if you find evidence that requires specialized handling/testing, or if dust control and PPE are difficult in your basement layout.
EPA’s RRP Rule can apply to renovation activities that disturb lead-based paint in pre-1978 housing, which means dust-control and compliance steps may be required during floor demo.
OSHA’s respirator standard requires medical evaluation and fit testing as part of respiratory protection program requirements.
When demolition damages subfloor flatness, replacement flooring installation can fail even if the original hardwood removal was “complete.”
Quick checklist (scan before you start)
| Situation | Best removal approach | Biggest risk |
|---|---|---|
| Nail-down hardwood | Remove trim, lift boards, pull nails as you go | Subfloor gouging if you pry too aggressively |
| Glue-down hardwood | Cut seams/free sections, then pry | Leaving adhesive residue; damaging concrete/plywood |
| Floating/click | Disengage boards starting from the correct wall direction | Breaking locks if forced |
| Unknown installation method | Test an edge in a small area | Wrong technique causing unnecessary damage |
– [ ] Identify installation type (nail, glue, floating)
– [ ] Remove baseboards/trim before lifting boards
– [ ] Control dust (cover areas; use appropriate respiratory protection)
– [ ] Remove residue and fasteners thoroughly
– [ ] Inspect moisture and subfloor condition before installing anything new
Sources
– U.S. EPA — Renovation, Repair and Painting (RRP) Rule for lead-based paint (40 CFR Part 745)
– U.S. OSHA — Respiratory Protection (29 CFR 1910.134)
– U.S. OSHA — Personal Protective Equipment (PPE) requirements (29 CFR 1910 Subpart I)
If you take away one workflow, make it this: identify the installation type, prep the basement for dust and safety, remove in the correct order, then validate the subfloor and moisture conditions before installing anything new. When you do that—even if the demo takes longer than expected—you’re far more likely to end up with a basement floor system that looks good and lasts.
Frequently Asked Questions
What is the best way to remove hardwood floors from a basement without damaging the subfloor?
Start by removing baseboards and any transitions so you can lift the hardwood flooring with minimal stress. Use a pry bar and a flooring knife to separate planks from nails or adhesive, working from an edge or doorway area to control tear-out. If you’re trying to protect a concrete subfloor or underlayment, remove fasteners carefully and scrape residue with a floor scraper and adhesive remover rated for your flooring type. Expect that nail-down boards can be cleaned up more easily than glue-down hardwood, which often leaves adhesive behind.
How do you remove nail-down hardwood basement flooring safely?
Begin by finding nail lines or fasteners, then loosen boards with a pry bar and small scrap block to prevent gouging. Pull nails with pliers or a nail puller as you go, and avoid striking aggressively that could crack concrete or damage the underlayment. Wear PPE—gloves, eye protection, and a dust mask—because sanding or chipping can release fine debris. Keep boards organized by room and direction so reinstallation or resale is easier later.
Which tools and supplies do you need to remove hardwood floors in a basement?
For most basement hardwood removal jobs, use a pry bar, flat bar, utility knife/flooring knife, hammer, drill/oscillating multi-tool (for stubborn sections), and a heavy-duty floor scraper. If the hardwood is glue-down, include an adhesive remover, solvent-safe scraper blades, and disposable rags. Protect the space with plastic sheeting, a shop vacuum with a HEPA filter, and painter’s tape to contain dust while you remove hardwood flooring. Don’t forget PPE: safety glasses, gloves, and a respirator if you’ll be cutting or scraping adhesives.
Why is it important to manage dust and moisture when removing hardwood floors in a basement?
Basements can be more humid than other parts of the home, and removing hardwood can expose concrete moisture, mold risk, or trapped dirt that becomes airborne during demolition. Use plastic barriers and a HEPA shop vac to limit dust, especially if you plan to dispose of or transport hardwood planks. If you see musty odors or discoloration, pause and address potential moisture problems before continuing, since wet conditions can affect later flooring installation. Proper cleanup also helps prevent odors and improves safety for anyone working in the basement.
How do you remove glue-down hardwood flooring from a basement?
Glue-down hardwood requires more careful separation because adhesive often bonds strongly to the subfloor. Score seams with a utility knife, heat selectively with a heat gun (if recommended for your adhesive type), then lift small sections using a floor scraper or oscillating tool rather than pulling whole boards. After boards are removed, use an adhesive remover compatible with concrete and scrape until the surface is smooth, then clean thoroughly for the next step. Always test a small area first to avoid damaging the concrete or leaving stubborn residue that can interfere with new flooring.
📅 Last Updated: October 16, 2026 | Topic: How to remove hardwood floors from a basement? | Content verified for accuracy and freshness.