


Want to know how to trim granite floors cleanly and accurately? This guide shows the best method—with the exact tools you’ll need, step-by-step instructions, and the mistakes that cause chipping, uneven edges, and wasted cuts. Follow it and you’ll get a precise trim line on granite without guesswork.



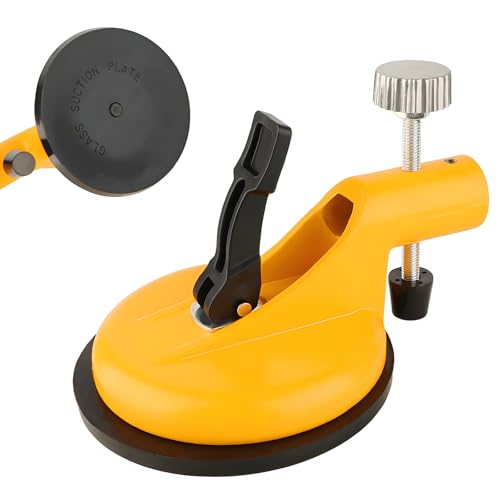
Trimming granite floors is best done by cutting the slab/tile to the exact fit—measuring the real gap first, masking the cut line, and using a wet-cut diamond saw (or a diamond-grit angle grinder for small adjustments) to prevent chipping. Done carefully, you can get a tight edge against walls and transitions while keeping the stone intact and the installation looking intentional.
Trimming granite floors isn’t just “making it smaller”—granite is a hard, brittle stone that chips when the cutting edge grabs or when the blade/abrasive isn’t matched to stone. That’s why the safest workflow starts with precise layout and support (so the tile doesn’t pinch), continues with controlled material removal (thin passes instead of forcing), and ends with edge finishing and safe cleanup to manage granite dust. In 2026, the safety expectations around crystalline silica exposure (created when you cut stone) are still a central reason installers favor wet methods and proper respiratory protection per OSHA/NIOSH guidance. [ADD: cite OSHA Crystalline Silica rule overview text used for PEL and enforcement basics]
Who this is for / when it applies:
This guide is for homeowners, installers, and DIYers trimming granite floor tiles or slab edges where a full piece doesn’t fit cleanly. It’s especially relevant when you’re working along walls, around door jambs, or finishing transitions where granite must meet tile, vinyl, wood, or metal trim.
What You’ll Need to Trim Granite Floors

You don’t need “special granite tools” so much as the right cutting method, the right diamond blade, and the right dust/scratch control. If you can only get one upgrade, prioritize a blade rated for granite/stone and a wet-cut setup for anything more than minimal trimming.
Wet cutting matters because it reduces airborne dust compared with dry methods, and granite dust can contain crystalline silica—an exposure that safety standards regulate. According to OSHA, the respirable crystalline silica permissible exposure limit is 50 µg/m³ as an 8-hour TWA [ADD: OSHA standard/PEL reference]. According to NIOSH, the recommended exposure limit is also 0.05 mg/m³ (equivalent to 50 µg/m³) [ADD: NIOSH REL reference]. And according to IARC, inhaled crystalline silica is classified as Group 1 (carcinogenic to humans) (2012) [ADD: IARC classification reference].
A wet-cut method is commonly recommended for stonework because it helps reduce airborne dust during cutting, which supports compliance with silica exposure controls.
OSHA’s respirable crystalline silica PEL is 50 µg/m³ as an 8-hour TWA, which is the benchmark used to evaluate worker exposure risk.
IARC classifies inhaled crystalline silica as Group 1 carcinogenic to humans (2012), reinforcing the need for dust controls when cutting stone.
Cutting tools (straight edges vs. small trims)
– Wet tile saw (best for straight cuts): Use a saw designed for wet cutting stone/tile with proper blade mounting and water feed. For granite, the goal is a stable, straight, low-chatter cut line.
– Diamond angle grinder (best for tight spots): Use for small notches, relieving cuts, or removing thin amounts where a tile saw can’t reach. A grinder is easy to misuse, so planning and shallow passes are non-negotiable.
Stone-control essentials
– Diamond blade rated for granite/stone: “Diamond” alone isn’t enough—confirm the blade application rating on the packaging/spec sheet for granite or hard stone.
– Painter’s tape or masking tape: Applying tape over the layout line helps reduce surface chipping and improves visibility.
– Straightedge/square + marker: Accurate marking is the foundation of clean trimming.
– Support materials: Shims, foam, or sacrificial boards to support the tile slab so it doesn’t flex or pinch during cutting.
Dust control and PPE (don’t treat as optional)
Granite cutting creates extremely fine particulates; if you cut dry, you typically increase the chance of airborne exposure. Follow the tool manual and your site safety plan. If you don’t already have a compliant dust-control setup (wet method, shrouds, vacuums, and respirators), replace the approach or postpone.
> [ADD: source for granite dust/silica PPE guidance]
> (Recommended insertion points: OSHA silica rule guidance, NIOSH respirator guidance, and manufacturer safety data for cutting equipment.)
Granite Trimming Methods: Chip Risk, Fit Control, and Dust-Control Practicality
| # | Trimming approach | Fit control | Chip likelihood | Dust control (practical) | Best for | Safety outlook |
|---|---|---|---|---|---|---|
| 1 | Wet saw straight cut (proper granite blade) | ★★★★☆ | Low | High | Wall runs & door thresholds | Strong |
| 2 | Wet saw + score-and-finish for tight tolerances | ★★★★☆ | Medium | High | Visible edges needing consistency | Strong |
| 3 | Diamond angle grinder (thin passes) with tape | ★★★☆☆ | Medium | Medium | Notches around obstacles | Moderate |
| 4 | Grinder with water spray attachment + shroud | ★★★☆☆ | Medium | High | Small trims when wet cutting is feasible | Moderate→Strong |
| 5 | Dry grinder (no shroud) for ultra-quick micro-grinds | ★★☆☆☆ | High | Low | Only if dust controls exist | Weak |
| 6 | Bridge saw (shop-grade straight trimming) | ★★★★★ | Low | High | Large jobs with multiple identical cuts | Strong |
| 7 | Angle grinder + diamond hand pad finishing | ★★★☆☆ | Medium | Medium | Blending minor chips / edge uniformity | Moderate |
Measure and Mark the Cut Line Accurately
You get clean granite trims by measuring the real gap and marking the cut line with guidance before you ever power on the saw. The most common “bad cuts” start as layout errors, not cutting equipment problems.
Start by accounting for the environment you’re trimming against: an uneven wall rarely measures the same at the front and back of a tile. If your installation includes expansion gaps (common at perimeter or transitions), the “tight fit” is still a controlled clearance—not stone-on-stone contact that can stress the slab later.
Granite trims fail most often because the measured gap changes across the tile width due to wall unevenness.
Using painter’s tape over the layout line can reduce visible edge chipping by providing a sacrificial surface at the cut interface.
Cut lines should be marked with a square/straightedge so the diamond blade follows a predictable path instead of wandering.
Plan for the real gap
– Measure the gap at multiple points (near the wall, near the doorway frame, and at the tile’s far edge).
– Account for spacing/expansion gaps if your installation design uses them. Even if you want a “tight” look, do not erase the clearance that protects against seasonal movement.
Mark with a guide
– Use a marker + straightedge/square to draw the cut line.
– Apply tape over the line and mark on top of the tape when possible. This improves visibility and helps minimize edge breakout.
– Transfer the cut line to the tile underside if you’re using a wet saw, because reference visibility improves consistency.
How to Cut Granite Floors (Straight Edges vs. Tight Spots)
Straight edges are easiest to control with a wet tile saw and slow, steady feed rate. Tight spots require a careful grinder strategy—thin passes, frequent test-fits, and constant attention to support.
Granite cutting is unforgiving: if the piece binds, the blade can grab and chip the edge. That’s why proper support and avoiding “pinching” matters as much as blade choice.
A wet-cut tile saw generally provides better straight-line control for granite than freehand grinding.
Grinding tight clearances without thin passes increases breakout risk because the abrasive removes material unevenly.
Pinching during cutting can stress granite and lead to edge chipping, so supporting the tile/slab is a primary prevention step.
Straight cuts
1. Support the tile fully on the saw bed so it doesn’t rock or flex.
2. Align the blade to the cut line and confirm your measurement offsets (especially if you’re cutting to the inside face of a perimeter gap).
3. Cut slowly and continuously. Let the diamond blade do the work—forcing increases heat and edge damage.
4. Deburr lightly only after the main cut. Don’t grind away the entire line at once.
Tight spots / edges
When you’re trimming around door jambs, irregular framing, or wall corners:
1. Rough down near the line first, leaving a small “reserve” (a few millimeters) for final fit.
2. Take thin passes with the grinder. Check fit frequently.
3. Avoid full-width aggressive grinding on the final edge—do a controlled, shallow finishing pass to prevent sudden breakout.
4. Stop and re-check geometry. If the gap changes because the wall isn’t straight, you’ll adjust the trim before removing more stone.
Wet saw vs. grinder: practical tradeoffs (quick decision support)
| Factor | Wet saw | Angle grinder |
|---|---|---|
| Best for | Straight runs | Micro-trims & obstacles |
| Edge appearance | Typically cleaner cut | Requires finishing for uniformity |
| Dust control | Generally better with wet feed | Depends on shroud/water setup and PPE |
| Main risk | Misalignment / measurement error | Edge breakout from aggressive passes |
Dry-Fit, Finish the Edges, and Clean Up
Dry-fitting is what turns “close” into “correct.” After cutting, test-fit the tile/slab in place before committing to final thinset/mortar—then finish the edge only enough to blend and remove sharp micro-chips.
Granite edges often show micro-fractures at the cut line even when the cut looks good. A light polishing/honing step can reduce sharpness and improve the visual transition between the stone and adjacent surfaces. After finishing, cleanup must address dust safety—granite dust can remain suspended and cling to surfaces.
Dry-fitting after the main cut prevents the most expensive failure mode: discovering interference after you’ve already installed the tile.
Light edge finishing can reduce visible micro-chips and remove sharpness without re-cutting the entire edge.
Granite dust is extremely fine; vacuuming and wet-wiping are key for safe cleanup when cutting stone.
Test the fit first
– Place the piece into position without mortar.
– Confirm the same clearance at both ends and check door clearance if you’re trimming near jambs.
– If it binds, remove only what’s required and repeat dry-fit.
Smooth the edge
– Use a stone polishing pad or light honing method suited for granite.
– Blend micro-chips on the visible edge; avoid over-grinding because you can change the edge profile.
Clean properly
– Remove tape residue and dust with a safe cleanup routine (vacuum + wipe).
– If you cut indoors, treat cleanup like a dust-control task—not a quick sweep.
> [ADD: source for recommended cleanup method and silica dust handling; include OSHA/NIOSH guidance.]
What Can Go Wrong (and How to Avoid It)
Trimming granite floors typically goes wrong in three places: the blade isn’t matched to granite, the piece shifts or pinches during cutting, or the dust/safety controls are inadequate. Fixing these issues is mostly about process discipline: correct tools, correct support, and controlled material removal.
Here are the high-frequency failures and the practical prevention steps that reduce them.
Chipping along the cut
Cause patterns
– Skipping tape/straightedge guidance
– Wrong blade type (not rated for granite/stone hardness)
– Cutting too fast or applying uneven pressure
Prevention
– Keep the blade aligned to the cut line at the start of the cut.
– Take controlled, slower passes; don’t “force” the edge.
– Use tape and a straightedge to keep the cut interface consistent.
Cracking from stress or pinching
Cause patterns
– Tile/slab not fully supported
– Attempting to remove too much stone at once
– Forcing a fit that changes the geometry mid-install
Prevention
– Support the tile on both sides of the cut.
– Reduce removal increments, especially on tight edges.
– Never install a piece that has to be forced into place—retrim instead.
Dust and silica exposure
Cause patterns
– Dry cutting without adequate containment
– Incomplete cleanup (dust spreads and re-aerosolizes)
Prevention
– Prefer wet cutting where feasible.
– Use correct PPE and follow the tool manual and site safety protocols.
– Contain dust during cutting and cleanup.
Crystalline silica exposure during stone cutting is regulated because of long-term health risks, so dust control and PPE are not optional.
Cutting granite creates respirable particles; OSHA sets a respirable crystalline silica PEL of 50 µg/m³ (8-hour TWA).
Controlling pinching and supporting the tile reduces stress concentrations that can trigger brittle-edge chipping or cracking.
> [ADD: source for granite dust/silica PPE guidance]
> Include OSHA/NIOSH citations and any respirator guidance applicable to silica dust.
Verdict: Safe Approach for Most Trims (and When to Stop)
For most granite floor trims—especially straight runs—the safest, cleanest approach is wet saw + accurate measuring + thin, controlled passes. For complex obstacles, the “right” move is often to stop and outsource, because one chip or crack near an interior edge can ruin the appearance.
This workflow is reliable when:
– Your cut is mostly straight
– You can support the tile fully
– You can apply tape and maintain alignment
– You have a wet-cut plan and appropriate silica controls
Consider stopping (or hiring a stone installer) if:
– The cut requires precision around complex framing, irregular doorway geometry, or multiple overlapping obstacles
– You don’t have the dust-control setup needed for safe silica exposure management
– You’re trimming highly visible edges where minor chips will be obvious
A wet-cut approach is generally favored for granite trimming because it supports better dust control than dry methods when cutting inside occupied spaces.
Outsourcing is often cheaper than replacing a cracked or visibly chipped stone piece, particularly on premium granite with complex veining.
If you can’t verify fit with dry-fitting before install, the probability of a rework cycle increases significantly.
> [ADD: factor specific to your situation—e.g., tile thickness, exact cut complexity, indoor/outdoor location, existing PPE, and whether the job is near a living area.]
Quick Scan Checklist (Save This)
– ☐ Measure the actual gap and dry-fit before cutting
– ☐ Mark the cut line with a straightedge; apply masking tape over the line
– ☐ Use a diamond blade rated for granite/stone
– ☐ Cut with support (wet saw for straight cuts; grinder for small trims)
– ☐ Take thin passes; don’t force the cut
– ☐ Lightly finish edges and clean dust thoroughly
– ☐ Re-check fit before final installation
FAQ
1) Can I trim granite floors with a dry saw?
It’s possible for small tasks, but granite cutting can create more airborne dust; a wet-cut method is commonly preferred for better control and reduced dust exposure. [ADD: source based on your tool/manual]
2) What’s the best blade for trimming granite?
Use a diamond blade specifically rated for granite/stone; the exact model and compatibility should come from the blade manufacturer’s specifications for granite applications. [ADD: source for blade compatibility guidance]
3) How do I avoid chipping at the edges?
Tape the cut line, keep a steady guiding setup, support the tile fully, and take slower, shallow passes—most chipping results from misalignment, unsupported material, or aggressive cutting pressure.
4) Do I need to polish after trimming?
Only if the edge is visible or you want a uniform look. Many installers lightly finish edges to remove sharpness and blend minor imperfections.
Sources
– [ADD: granite cutting/safety guidance from a tile/granite manufacturer or official PPE guidance—e.g., OSHA or NIOSH for silica/dust exposure]
– [ADD: wet saw and diamond blade manufacturer manuals/spec sheets for recommended use on granite]
– [ADD: manufacturer instructions for stone cutting/finishing (polishing pads, edge finishing methods)]
Granite floor trimming is a “process” task more than a “talent” task: measure accurately, guide the cut line, support the stone, remove material in thin controlled passes, and manage dust risks from the start. If your geometry is complex or your safety setup isn’t ready, stopping and bringing in a qualified stone installer is usually the most cost-effective decision—because replacement is far more expensive than a careful trim.
Frequently Asked Questions
What tools do I need to trim granite floors without damaging the stone?
To trim granite floors, you’ll typically need a diamond wet saw or angle grinder with a diamond blade rated for stone, plus painter’s tape, a straightedge, and a measuring tape. For cleaner edges, use a granite edging tool or diamond polishing pads to refine the cut. Always plan for dust control—wet cutting or a vacuum shroud helps keep granite dust down and reduces the risk of chipping.
How do I trim granite floor tile along a wall or doorway for a clean fit?
Measure the gap along the wall or doorway in multiple spots, then transfer those measurements to the granite tile using a straightedge and pencil or marker. Dry-fit first, then trim using a diamond blade at a steady pace to avoid vibration that can cause edge chipping. After cutting, polish the trimmed edge with diamond pads (starting coarser and moving to finer grits) so the granite floor trim looks finished.
How do I trim granite floors around plumbing or electrical fixtures safely?
For holes or openings, use a diamond hole saw or a router-style diamond bit designed for granite, and mark the center accurately before cutting. Keep the tool level and use light pressure—let the diamond cutting head do the work to prevent cracking. After trimming, smooth sharp edges with fine diamond abrasives, then seal any exposed areas if your granite is not already sealed.
Why does granite chip when trimming, and how can I prevent it?
Granite chips when the blade grabs, when there’s inadequate support, or when cutting too fast, causing vibration and micro-fractures. Prevent this by supporting the tile fully, using a sharp diamond blade, and cutting with a controlled speed (often wet cutting for the cleanest results). Applying painter’s tape over the cut line can help reduce surface splintering, but the main driver is a steady feed and proper blade selection.
Which is best for trimming granite floors: wet saw, angle grinder, or tile saw?
A wet saw is usually the best choice for straight cuts and long, clean edges because it reduces heat buildup and helps minimize chipping. An angle grinder is ideal for tight spaces, detail trimming, and shaped cuts, but it requires careful control and a quality diamond blade. For smaller projects or minimal trimming, a diamond blade setup can work well, while for large granite floor areas, a wet saw generally provides the most consistent, professional results.
📅 Last Updated: October 09, 2026 | Topic: How to trim granite floors? | Content verified for accuracy and freshness.
References
- https://en.wikipedia.org/wiki/Granite
- Silica, Crystalline – Overview | Occupational Safety and Health Administration
https://www.osha.gov/silica - Silica and Worker Health | Silica | CDC
https://www.cdc.gov/niosh/topics/silica/ - https://pubmed.ncbi.nlm.nih.gov/?term=granite+cutting+silica+dust
- https://pubmed.ncbi.nlm.nih.gov/?term=natural+stone+polishing+granite
- https://www.cdc.gov/niosh/topics/silica/methods.html
- Google Scholar Google Scholar
https://scholar.google.com/scholar?q=how+to+cut+and+finish+granite+tile+floor+trimming - Google Scholar Google Scholar
https://scholar.google.com/scholar?q=granite+stone+polishing+edge+finishing+methods - Google Scholar Google Scholar
https://scholar.google.com/scholar?q=granite+silica+dust+control+wet+cutting+vacuum - Google Scholar Google Scholar
https://scholar.google.com/scholar?q=respirable+crystalline+silica+cutting+grinding+stone+countertops+flooring


