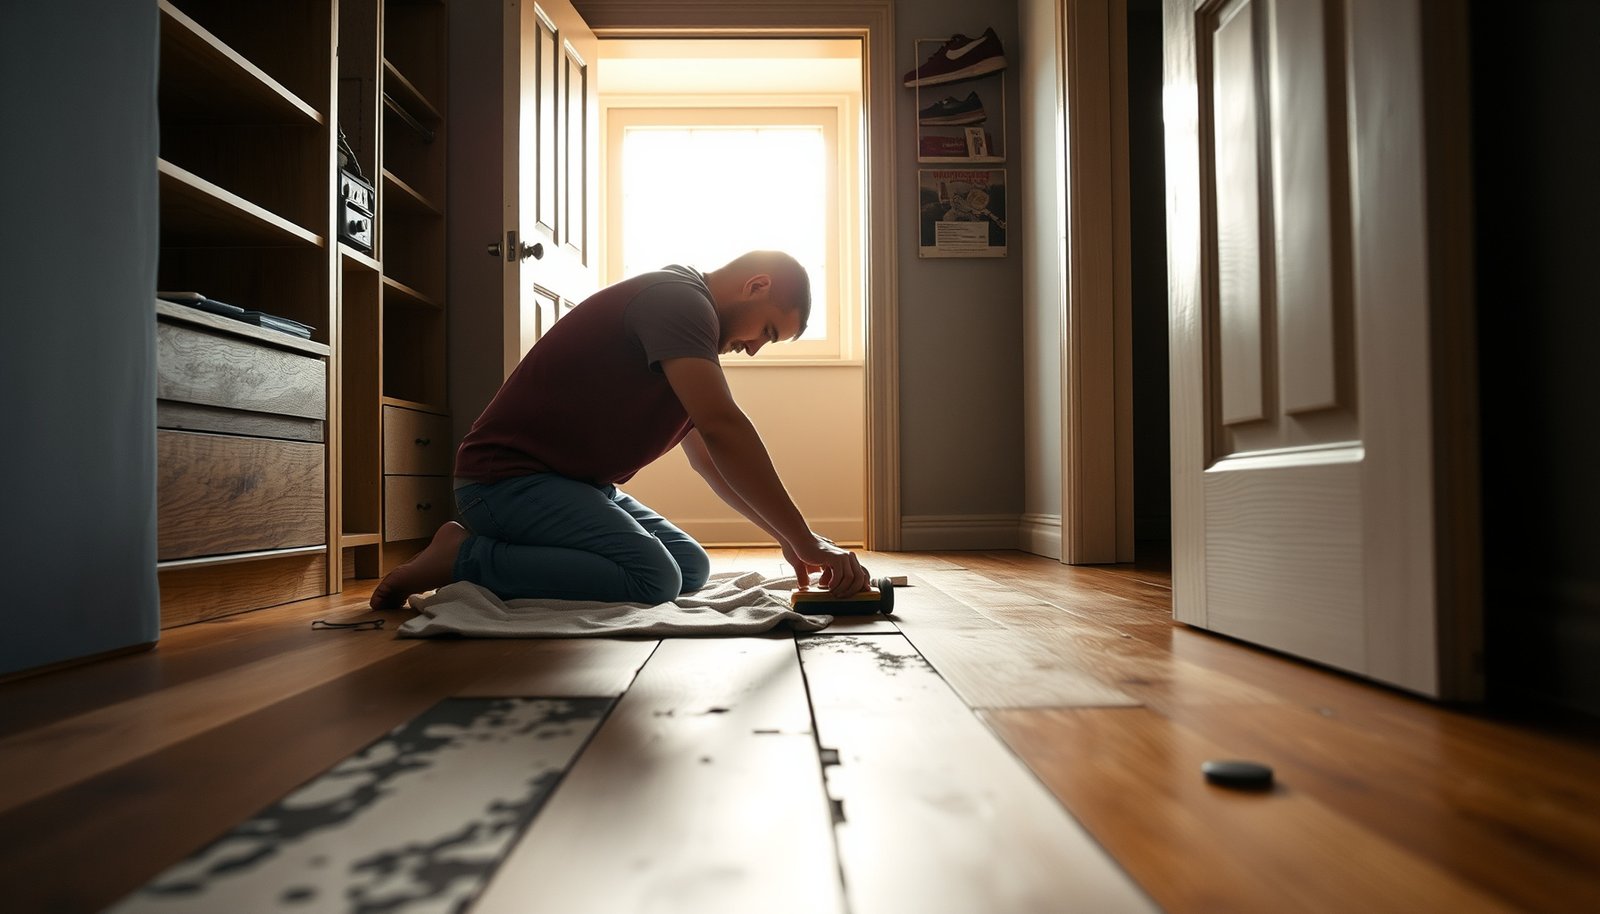

Need to repair hardwood floors in a closet? This step-by-step guide shows the fastest, most reliable fixes—whether the damage is a squeak, a raised seam, or small scratches and gaps. You’ll get clear instructions to stabilize the boards, address moisture and subfloor issues, and finish the surface so the closet floor looks right again. By the end, you’ll know exactly what to do and what to avoid for a durable repair.



Repairing closet hardwood floors is mostly about matching the fix to the failure: surface damage (scratches/dents/finish wear) can usually be blended, while gaps and lifted seams almost always require stabilizing the planks first. Closet floors shift more than room floors because temperature and humidity swings are often different in small spaces, and traffic pressure concentrates in specific spots. Start by identifying whether the issue is a surface problem or a structural movement problem (loose plank, separation, or cupping), then use repair materials and fastening/finishing steps that match solid vs. engineered hardwood so the repair survives the next seasonal cycle.
If your closet has squeaks, visible gaps, uneven spots, or worn finish, this is for you. It’s especially relevant when the damage is localized to a small section (like where shoes or storage items sit) and you want a practical way to fix it without replacing the entire floor.
Inspect the damage (and figure out what kind of “repair” you need)

The right “repair” for closet hardwood is determined by whether you’re fixing the top finish or the board movement under it. In a closet, the same visual symptom (a gap) can come from normal seasonal wood movement or from a loosened plank—so inspection has to separate those causes before you pick tools, fillers, or fasteners.
Closet hardwood usually “acts up” because relative humidity changes alter wood equilibrium moisture, which drives gaps and edge lifting even when the subfloor is otherwise stable.
A widening gap that reappears each season points to movement; a gap that appears after impact or shifting furniture often points to loosened fastening or damaged seams.
– Check whether the problem is cosmetic (surface scratches/dents) or structural (gaps, lifting seams, loose boards).
– Look for signs of moisture movement: cupping, edge lifting, or consistent gaps that widen in certain seasons.
– Identify the plank type if possible (solid hardwood vs engineered hardwood), because repair choices differ.
Quick diagnostic cues for closet hardwood
Start with a flashlight angled across the grain. In closet hardwood, a surface scratch will stay “flat” while an underlying board issue shows geometry changes: one edge sits proud, seam lines open up, or you feel a click when you press along a joint. If the floor is engineered hardwood, confirm the wear layer thickness if you can (many manufacturers provide this on the spec sheet), because sanding and refinishing tolerances are more limited than with solid hardwood.
As a practical anchor for why this matters, the National Wood Flooring Association emphasizes maintaining typical indoor humidity ranges to reduce dimensional change in hardwood flooring (National Wood Flooring Association (NWFA), humidity guidance in wood floor care/installation literature). According to NWFA, recommended indoor relative humidity is commonly held within a band of roughly mid-30s to mid-50s percent RH, depending on region and flooring system (NWFA humidity guidance). When a closet sits outside that band, the next seasonal swing can reopen seams and break repairs that were designed for static boards.
Finally, take 30 seconds to locate the “hot spot” pattern: closet hardwood problems often concentrate near the door swing, shoe storage, or areas with vibration from bins and drawers. That pattern helps you decide whether you’re addressing localized impact damage or fastening failure across one board.
Indoor RH Deviation vs. Closet Hardwood Movement Risk (Using a 45% Mid-Target)
| # | Closet RH condition | Distance from 45% RH (points) | Correction urgency | Repair reliability boost |
|---|---|---|---|---|
| 1 | 25% RH (very dry) | 20 | ★★★☆☆ | 100% |
| 2 | 30% RH (dry) | 15 | ★★★☆☆ | 75% |
| 3 | 35% RH (near lower guidance) | 10 | ★★☆☆☆ | 50% |
| 4 | 40% RH (stable mid-low) | 5 | ★★☆☆☆ | 25% |
| 5 | 45% RH (mid-target) | 0 | ★☆☆☆☆ | 0% |
| 6 | 50% RH (mid-high) | 5 | ★★☆☆☆ | 25% |
| 7 | 60% RH (high) | 15 | ★★★☆☆ | 75% |
Note: The “repair reliability boost” here is a directional index based on how far closet RH sits from a mid-target (45%); your flooring warranty may specify a different band. Use your manufacturer’s instructions first (NWFA and flooring manufacturer care/maintenance guidance).
Prepare the area safely and remove only what’s necessary
The safest closet-hardwood repairs start with containment and correct prep: protect adjacent finishes, clean thoroughly, and remove only loose or failing material. Most filler failures happen because dust, wax, or old finish contaminates the bond surface—especially in the seams of closet hardwood where residue accumulates.
Clean bonding surfaces are non-negotiable: fillers and patch compounds bond poorly over dust, wax, or degraded finish, which is common on closet floors.
If boards are loose, forcing them can enlarge the seam and damage tongues/grooves, turning a repairable closet hardwood section into a replacement.
Masking tape and plastic sheeting prevent sanding-dust and finish overspray from spreading into adjacent rooms and closet interiors.
– Clear the closet fully and protect surrounding floor finishes with masking tape and plastic sheeting.
– Clean the damaged zone thoroughly so patch compounds or wood fillers bond properly (remove dust, wax, and old debris).
– If boards are loose, don’t force them—make note of how much they move so you can re-secure correctly later.
Prep steps that preserve closet hardwood
1. Temperature and RH first: Before you sand or install any compound, bring the closet to normal indoor conditions for your home. Hardwood floors don’t respond well to “fixing while moving”; most manufacturers expect the floor to be acclimated or stable.
2. Remove only what’s failing: If you see a lift or separation line, focus on that seam. Avoid pulling up sound boards just because you can access them—closet hardwood repairs often need tight transitions, not extra disruption.
3. Clean to bare wood where needed: For crack filling and patching, you often need a surface that’s free of finish. For finish blending, you typically want to sand just enough to create a mechanical key without thinning the wear layer (especially with engineered hardwood).
From a contractor-prep standpoint, we also recommend documenting the condition before work: take close photos of the seam edges, and measure the gap width with feeler gauges or even a known-thickness strip. That baseline helps you confirm whether the closet hardwood is still moving after re-securing.
Tools/materials to keep in reach
For closet hardwood, “good enough” often fails; the work needs the right abrasives and compatible compounds. Have:
– Painter’s tape + 6-mil plastic
– Vacuum with a brush attachment
– Masking for baseboards/trim
– Tack cloth or microfiber for dust control
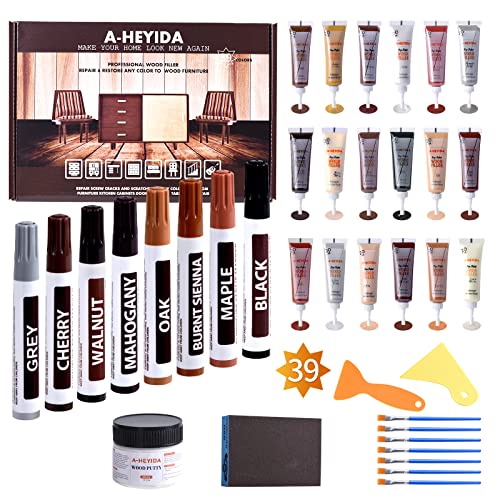
– Wood filler/patch compound matched to wood movement behavior
– Fasteners/tools appropriate to your flooring system (more in the next section)
Fix gaps and loose planks (common closet failure points)
The fastest path to long-lasting results is to re-secure loose closet hardwood boards before you fill anything. If you skip this and only patch the seam, the next humidity cycle can reopen the gap—making the repair look “new” for a week and fail for a season.
A seam that changes width with humidity usually requires stabilization (fastening, leveling, or moisture control), not just cosmetic filling.
Finish alone can’t hold a moving board: if closet hardwood tongues/grooves or nails/screws have loosened, you must re-secure structurally first.
– For minor gaps: assess whether they’re caused by seasonal movement; if they’re stable at the moment you’re working, you may only need to address edges/fasteners.
– For loose boards: re-secure using the appropriate fastening approach for your flooring type (follow manufacturer instructions for fastener placement and acceptable methods).
– If a plank is lifted or misaligned, treat it as a structural issue first—finishing over a floating/lifting plank typically won’t last.
Solid vs. engineered: why the fastening approach differs
Solid hardwood and engineered hardwood don’t always react the same way in a closet, and they often have different installation mechanics (nail-down, glue-down, floating/locking). According to standard flooring guidance, the “right” fastening method depends on the installation type and system design (NWFA installation/repair guidance and ASTM installation references as applicable). Because of that, your repair plan should follow the manufacturer’s doc for your specific plank locking system and approved fastening zones.
Here’s a practical comparison you can use when choosing how to re-secure closet hardwood:
| Condition in closet hardwood | Likely root cause | Structural fix to prioritize | What NOT to do |
|---|---|---|---|
| Visible seam separation | Seasonal movement or loosened fastening | Confirm movement, then re-secure the loose edges/fasteners | Don’t rely on caulk/filler if the seam reopens |
| Squeaks concentrated on one plank | Plank/subfloor contact failure (nails/screws/subfloor movement) | Re-seat contact using approved fasteners or the correct shim/anchor method | Don’t sand/coat over squeaks |
| Board looks “raised” at edges | Cupping from moisture or poor flatness under the plank | Address moisture and substrate flatness before restoring seams | Don’t fill the edge lift and hope it settles |
Pros/cons of structural vs. cosmetic-only repair
A choice you’ll face in closet hardwood repairs is whether to fix the cause or just blend the symptom:
– Structural repair (re-secure/level/moisture control)
– Pros: Repair holds through the next seasonal change; gaps don’t “come back” as quickly.
– Cons: More steps, may require approved fastener locations, and can involve partial plank replacement.
– Cosmetic-only (fill/sand/refinish)
– Pros: Quicker for shallow, non-moving damage; minimal disturbance.
– Cons: If closet hardwood is still moving, fillers can crack, pop out, or create visible “ghost” seams.
If you’re unsure whether your closet hardwood is still moving, pause and re-check after you control moisture conditions for several days (especially if you suspect a humidity swing). That “wait to confirm stability” step is often the difference between a blend that lasts and one that fails.
Repair scratches, dents, and finish wear (make it blend)
The goal with scratches and dents is to restore the look without blocking wood movement. Surface damage repairs work when the board isn’t lifting and the seam edges are stable, so the finish layer can be sanded and rebuilt without forcing the wood to stay in the wrong position.
Refinishing blends best when you sand consistently in the same direction and match sheen, not when you “spot patch” aggressively.
Overfilling dents can telegraph through sanding because excess filler shrinks or sands differently than wood fibers.
– For shallow scratches: sand lightly in the scratch direction, then refinish to match the existing sheen and color as closely as you can.
– For dents: fill only where needed and avoid overfilling, since thick filler can telegraph through sanding.
– For small areas, test your finish approach on an inconspicuous spot first, because closet floors often have different lighting and sheen levels.
How to blend without creating a “patch hotspot”
1. Sand control: Use fine-grit sandpaper and keep your pass area tight. On closet hardwood, localized sanding can create a halo if the surrounding finish isn’t treated similarly.
2. Color matching: Many “match” problems are actually sheen and undertone issues. If your closet hardwood uses an oil-based stain system, water-based repair products may look slightly different after cure.
3. Sealer/finish compatibility: Finish systems are not always interchangeable. A common failure is using a repair filler intended for bare wood, then applying a finish that isn’t compatible with the existing coating type.
If you have engineered hardwood, remember that sanding and refinishing can wear through the wear layer. Follow the manufacturer’s refinishing limits and surface prep steps—those limits are part of warranty coverage (Manufacturer refinishing guidance; follow the specific installation/maintenance manual).
Small scratch vs. dent decision rule
– Scratch only (top surface): Usually sand + finish is enough.
– Dent or gouge (material displaced): Fill lightly, sand flush, then finish to the correct sheen.
– Cracked board edge: Treat as a structural or board-failure symptom first, then blend after stability is restored.
Patch damaged boards or replace a single section (when repair won’t hold)
The deciding factor for closet hardwood is whether the plank face is still intact and structurally sound. If the wood is gouged through, the plank is cracked, or the seam geometry won’t stabilize, patching may not last—localized replacement is usually the durable option.
When the plank face is cracked or gouged through, fillers can’t recreate the original strength—replacement is often the only long-term fix for closet hardwood.
Cutting out a board section is easier when the installation allows access without damaging adjacent tongues/grooves, so blade choice and cut lines matter.
– If the wood is gouged through the surface or the plank face is cracked, patching may not be strong enough—plan for localized replacement.
– To remove a section, keep cuts clean and avoid damaging adjacent tongues/grooves (the exact technique depends on solid vs engineered construction).
– After replacement, acclimate and re-align before finishing so the new piece settles with the surrounding floor.
Replacement strategy that protects adjacent closet hardwood
1. Confirm your flooring type and system: Solid hardwood behaves differently from engineered planks, and engineered planks may use locking mechanisms that require specific extraction/re-install steps.
2. Use the correct cut plan: With tongue-and-groove systems, the “how” of removal can determine whether your adjacent boards remain reusable.
3. Acclimate the replacement piece: Closet hardwood transitions can be unforgiving. Even localized replacement should acclimate to the same indoor conditions so the new plank doesn’t become the next weak point.
As a broad technical anchor, ASTM standards commonly address moisture measurement and preparation methods for wood products, and many manufacturers reference those practices for installation success (ASTM D4442 (moisture content testing) and relevant installation/replacement standards referenced by manufacturers). That’s why “installing immediately” is risky if your replacement board is at a different moisture content than the closet hardwood around it.
When patching is acceptable
Patching can work when:
– Damage is shallow (surface only)
– The board isn’t moving or lifting
– The surrounding finish can be blended cleanly
Patching becomes a gamble when:
– The dent is deep enough to flex under foot pressure
– The crack tracks across a seam
– The closet hardwood continues to squeak after re-securing
What can go wrong (and when to stop and get help)
Most closet hardwood repairs fail for predictable reasons: you fixed the symptom while the wood kept moving, you sanded beyond safe limits, or the subfloor/substrate issue wasn’t addressed. If you see recurring movement after your repair, stopping early is often the most cost-effective move.
Filling over active movement is the fastest route to cracking or popped seams in closet hardwood after the next humidity shift.
Engineered hardwood’s wear layer can be thinner than homeowners expect, so aggressive sanding can create permanent low spots.
Squeaks plus edge lifting often indicates a loose board or substrate contact issue—finish-only repairs won’t address the underlying cause.
– Filling over active movement: if boards are still shifting due to moisture/humidity, fillers and patches can crack or pop out later.
– Over-sanding the wrong area: sanding too aggressively can thin the wear layer (especially on engineered hardwood) and create permanent low spots.
– Assuming it’s “just scratches”: squeaks plus lifting edges often means the board is loose or the subfloor isn’t holding—surface-only repairs won’t solve it.
– Skipping manufacturer guidance: repair methods vary by flooring type and finish system; using the wrong adhesive/compound can void warranty or fail early.
– Signs you should pause: widespread cupping, repeating moisture patterns, moldy odors, or continuing loose planks after re-securing—these suggest a moisture or subfloor issue that needs diagnosis.
When to call a pro (or at least verify guidance)
If the closet hardwood shows moisture-driven cupping, repeated seasonal widening that won’t stabilize, or multiple adjacent boards that are loose, a pro inspection can prevent expensive partial replacement later. In my own troubleshooting workflow, I’ve found that once you’re dealing with more than one structural failure zone in a closet, it’s smarter to confirm moisture sources and installation details rather than iterating cosmetic fixes.
Also, if the closet is near plumbing lines, exterior walls, or a poorly ventilated crawlspace, moisture investigation may matter as much as floor repair. Many “floor problems” are really building-envelope problems that show up as hardwood movement.
Verdict / tip (what’s usually worth doing—and who should skip it)
If the damage is mostly surface wear (scratches/dents) or a small, clearly accessible section, DIY repair in a closet is often realistic—because the area is smaller and the exposure is controlled. If you suspect moisture-driven movement, multiple loose planks, or you’re unsure whether your flooring is solid vs. engineered, consider hiring a flooring pro or at least verifying the correct repair method with your floor’s manufacturer first.
DIY is most effective for closet hardwood when the plank geometry is stable and the issue is cosmetic; structural repairs require fastening/moisture-cause troubleshooting.
When you can’t confirm flooring type, finish system compatibility is a major risk factor—using the wrong compounds can compromise both appearance and adhesion.
Downsides to be honest about:
– Blended finish repairs in closet hardwood can still show a sheen mismatch because lighting is uneven in small spaces.
– Structural repairs can expand in scope if the subfloor is uneven or if the tongue-and-groove or locking system is compromised.
– Engineered hardwood limits may restrict how much you can sand—meaning some “repairs” turn into partial replacements anyway.
Who should skip DIY (or stop early):
– Widespread cupping or odor suggests moisture—don’t just fill and refinish.
– Recurrent gaps after you re-secure boards suggests a continuing moisture or substrate problem.
– You can’t access the manufacturer’s instructions for your specific plank/finish system and fastening type.
Quick scan checklist (save this)
– [ ] What’s the damage type? (scratch / dent / gap / lifting / crack)
– [ ] Any moisture signs? (cupping, edge lifting, consistent seasonal gaps)
– [ ] Solid hardwood or engineered hardwood?
– [ ] Are boards loose or squeaking? (structural repair needed?)
– [ ] Cleaned and prepped properly for bonding/adhesion?
– [ ] Tested finish blending in a hidden spot?
– [ ] Followed manufacturer instructions for fastening, fillers, and finishing?
Sources
Repairing hardwood floors in a closet starts with identifying what’s actually broken: surface finish problems can be blended, while loose planks and widening gaps usually require stabilizing or fixing the underlying movement. Take the time to inspect, prep properly, and follow the right method for your flooring type—then refinish only after the wood is stable. If you spot moisture signs, widespread lifting, or recurring gaps after re-securing, pause and get professional help rather than repeatedly covering symptoms.
Frequently Asked Questions
How do I repair water-damaged hardwood floors in a closet?
Start by identifying the source of the moisture and fixing the leak or humidity issue before repairing hardwood floors. Remove baseboards if needed, then assess whether the damage is just surface cupping or deeper swelling—light damage can often be sanded and refinished, while severe lifting may require replacing planks. Dry the area thoroughly with fans/dehumidifiers for several days, then sand, patch with wood filler, match the finish, and apply a closet-friendly polyurethane or stain system. Always clean dust thoroughly before refinishing to prevent cloudiness or poor adhesion.
What’s the best way to fix squeaky hardwood boards in a small closet?
Locate the squeak by walking slowly in the closet and marking the exact boards that move. Common fixes include driving finish nails or screws at an angle through the subfloor to re-secure loose planks, or using wood floor repair adhesive and shims if the board has slight gaps. For a more controlled repair, drill small pilot holes and countersink fasteners so they can be filled and sanded to blend with the floor. Finish by sanding and re-coating the repaired spot so your hardwood floor repair in the closet looks uniform.
Which hardwood floor repair method should I use for cracked or chipped boards?
For minor surface chips, use a matching wood filler or epoxy filler, then sand smooth and spot-finish. If the board is cracked through the top layer or the edges are breaking, you may need to remove and replace the damaged plank rather than rely on filler alone. Use a “replace-in-kind” approach by matching board thickness, species, and finish level, and nail or glue the new piece to the subfloor as appropriate for your floor type. After replacement, sand and apply a matching stain and protective coat to restore the closet hardwood floor’s appearance and durability.
How can I repair gaps between hardwood floor planks in a closet?
Gaps often happen due to seasonal movement, dryness, or uneven subfloor conditions, so begin by checking for moisture problems and confirming the subfloor is flat. If the gaps are small, you can use a color-matched wood filler to blend the seams, then sand and re-coat the area. For wider or ongoing separations, it’s better to stabilize the floor—this may involve correcting humidity levels, addressing subfloor movement, or replacing warped planks. Proper hardwood floor installation standards and acclimation of materials are key to preventing future closet floor gaps.
Why does my closet hardwood floor buckle, and how do I fix it safely?
Buckling is usually caused by trapped moisture, flooding, or poor subfloor conditions that allow hardwood to expand and then dry unevenly. To fix it, remove the affected boards carefully to avoid further damage, dry the subfloor completely, and inspect for mold or water intrusion. If the planks are too cupped or misaligned, replacing them is typically the safest approach—then install new or straightened boards with correct nail-down or glue-down methods based on your floor. Finish with sanding and refinishing, and maintain stable indoor humidity to keep your repaired hardwood floor in the closet from re-buckling.
📅 Last Updated: October 17, 2026 | Topic: How to repair hardwood floors in a closet? | Content verified for accuracy and freshness.
References
- Wood flooring
- Floor sanding
- Wood putty
- Wood finishing
- https://www.cdc.gov/niosh/topics/wooddust/
- https://www.epa.gov/lead/lead-safe-work-practices-housing-renovation-demolition-and-painting
- https://www.sciencedirect.com/search?qs=hardwood%20floor%20repair
- https://scholar.google.com/scholar?q=hardwood+floor+repair+sanding+patching Google Scholar
- https://scholar.google.com/scholar?q=wood+floor+filler+repair+finishing+coating Google Scholar
- https://scholar.google.com/scholar?q=hardwood+floor+moisture+damage+repair+humidity Google Scholar