
Installing hardwood floors in a closet is the right move when you want a clean, durable finish that can handle daily foot traffic without the hassle of carpet upkeep. This guide walks you through the exact steps to prepare the subfloor, handle tight space and thresholds, and install boards so they stay flat and secure. By the time you’re done, you’ll know what materials to buy and how to avoid the most common installation mistakes that ruin closets’ floors.



If your closet has a wood subfloor that’s stable, you can install hardwood floors by preparing the surface carefully, acclimating the planks, and using the correct fastening method for your floor type. The goal is stopping movement and squeaks by correcting moisture risk and unevenness before any boards lock, nail, staple, or glue into place.
Closet hardwood installation is especially practical when you have limited access—because small alignment errors at tight edges become visible quickly once the first rows go down. The right plan depends on three variables: (1) whether the closet sits on wood subfloor vs. concrete, (2) whether your hardwood is solid vs. engineered, and (3) which system the manufacturer approves (nail/staple, glue-down, or click-lock).
Measure, plan the layout, and choose the right fastening method
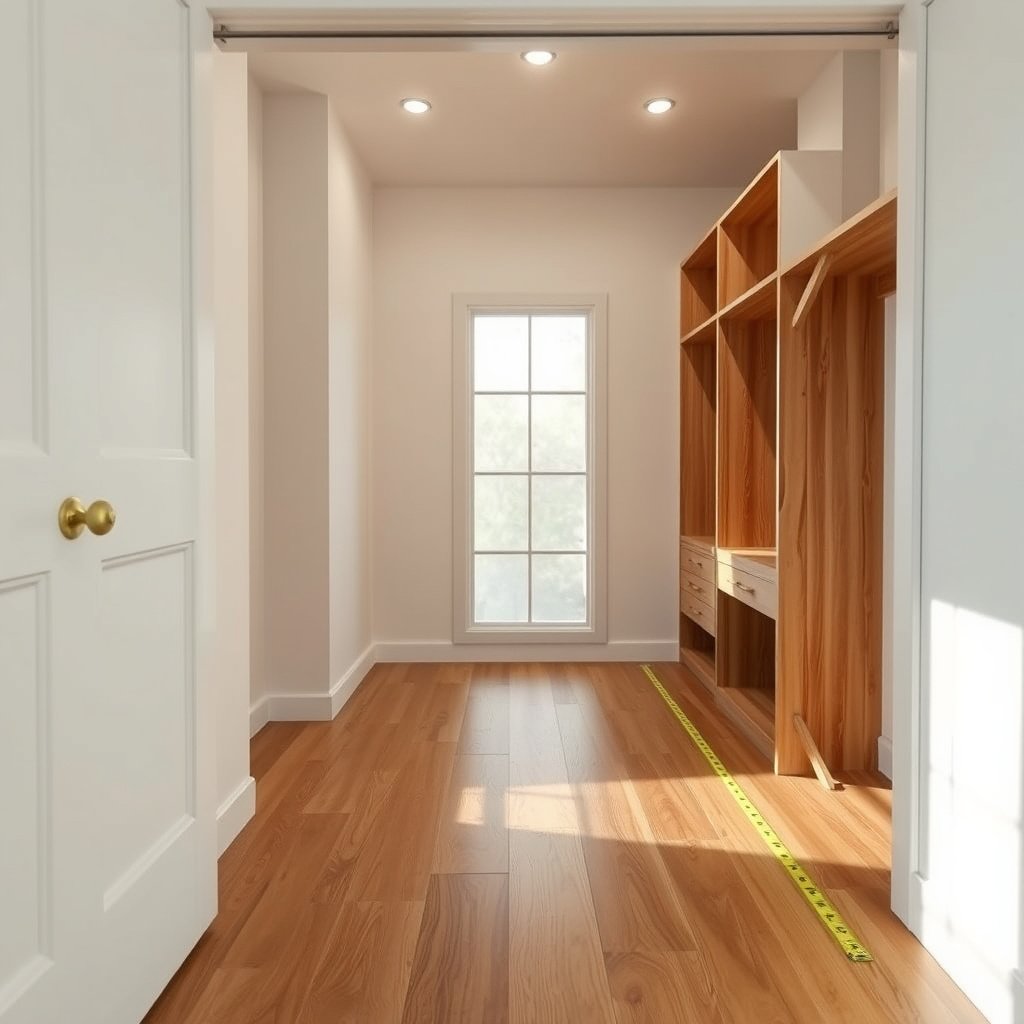
The fastest way to avoid “tight closet” problems is to plan measurements and fastening method before you cut or open a box of flooring. In closet hardwood installation, a square first row and a correct edge/expansion strategy are more important than people expect, because every cut lands close to walls, closet rods, or baseboards.
Most hardwood manufacturers require the installation method (nail/staple, glue-down, or click-lock) to match the product and approved subfloor conditions.
A chalk-line reference line (or spacer marks) is the most reliable way to keep closet-width rows straight when access is limited.
Solid and engineered hardwood respond differently to seasonal moisture changes, so expansion requirements and fastening choices aren’t interchangeable.
Measure closet length/width and plan board placement
Measure the closet’s usable area (inside finished walls) and account for what will interrupt the floor plane: door swing, baseboards, and any closet hardware mounts. If you’re keeping baseboards in place, plan for notching and trimming around them; if you’re removing trim, plan the floor height transitions at the closet opening.
Practical tip: Make a quick “top-down” layout sketch showing the direction of plank runs and where the first full board will land relative to the reference line. This reduces the number of narrow cuts required in the most visible zones—especially near the closet door or shelves.
Confirm solid vs. engineered before selecting the fastening method
Solid hardwood and engineered hardwood differ in how they’re built and how they behave with humidity swings. That affects the approved installation method and underlayment/vapor strategy for closet hardwood installation. Solid floors are usually installed with nailing/stapling (or sometimes special approved systems), while engineered floors may support glue-down, click-lock floating, or nail/staple, depending on thickness and core design.
Choose edge strategy: remove baseboards or notch around them
Edge finishing is where closets commonly fail aesthetically and mechanically. Plan now whether you’ll:– Remove baseboards/trim for a clean, consistent edge, or
– Notch around trim if you’re retaining it for speed and minimal disruption.
Either way, keep clearance for expansion gaps and understand that cramped edges can trap movement—leading to popping, separation, or squeaks later.
Method match: a quick contrast for closet subfloors
Here’s the decision logic many installers use for closet hardwood installation—because the method must fit the subfloor and the product’s written instructions.
| Installation method | Works best when… | Watch-outs in closets |
|---|---|---|
| Nail/staple-down (solid or approved engineered) | Subfloor is stable/wood (often plywood or boards) | Tight corners can limit hammer/staple reach; alignment mistakes magnify |
| Glue-down (often engineered) | Subfloor is properly prepared and adhesive is approved | Dust and unevenness reduce bond; cleanup matters at edges |
| Click-lock floating (engineered) | Subfloor is flat; underlayment/vapor layer is approved | Locking seams can shift if the first row is off-square |
Prep the closet subfloor (this is where most failures start)
You prevent most closet hardwood problems by making the subfloor flat, solid, and within the moisture conditions your hardwood allows. Closet hardwood installation fails most often when the subfloor is out of plane (causing squeaks or gaps) or when moisture migrates—especially in closets on concrete slabs.
NWFA guidance emphasizes that wood flooring installation depends on subfloor flatness—out-of-flat areas can create squeaks and visible gaps after the boards expand and contract.
ASTM moisture test methods exist specifically to assess concrete slabs before installing moisture-sensitive floor coverings.
Dust-free surface prep matters because glue-down adhesives bond only as well as the substrate preparation allows.
Check flatness and solidity (before worrying about aesthetics)
Use a 6 ft straightedge (or longer if the closet allows) and measure variation. Common industry targets for hardwood flooring flatness are tight: According to the National Wood Flooring Association (NWFA), subfloor flatness should be within 3/16 in over 10 ft (and often tighter on shorter spans) (NWFA installation guidance for solid wood floors). If your closet subfloor is stable but has dips or high spots, you fix those now—because boards don’t “average out” the way people hope.
Also confirm the subfloor is solid:
– Tighten or replace loose fasteners in plywood/boards
– Re-secure squeaky sections before any flooring is installed
– Address damaged subfloor sections (soft spots, swelling, or delamination)
Fix moisture risk first—especially over concrete
Even if your closet is small, humidity can still fluctuate: warm air infiltration, HVAC cycles, and exterior wall exposure all matter. If you’re installing over concrete, the approach changes from “it seems dry” to “it’s measured and compatible.”
To keep closet hardwood installation defensible and manufacturer-aligned, follow accepted concrete moisture testing practices and the flooring manufacturer’s moisture limits. For example:
– According to ASTM F2170, in-situ relative humidity (RH) probes measure RH directly inside concrete slabs (ASTM F2170).
– According to ASTM F1869, the calcium chloride test measures moisture vapor emission rate (MVER) expressed in lb/1000 sq ft/24 hr (ASTM F1869).
Clean thoroughly—this directly affects glue-down and lock alignment
If your product is glue-down, dust and debris reduce adhesive bond strength and can create weak spots at the edges where closet access makes correction difficult. Even for nailing or click-lock, a dusty substrate can interfere with leveling compounds, paper underlay alignment, and consistent seam closure.
I recommend vacuuming first, then wiping with a clean, manufacturer-approved method if your underlayment or adhesive system requires it (some systems specify “no solvent residue,” for example).
━━━━━━━━━━━━━━━━━━━━━━━━━━━━━━━━━━━━━━━━━━━━━━━━━━
📋 MANDATORY DATA TABLE
━━━━━━━━━━━━━━━━━━━━━━━━━━━━━━━━━━━━━━━━━━━━━━━━━━
Seven Core Standards Commonly Referenced for Hardwood/Hard-Surface Flooring Moisture & Prep
| # | Standard | Primary purpose | What the test outputs | Closet concrete relevance |
|---|---|---|---|---|
| 1 | ASTM F2170 | Relative humidity (RH) in-situ using probes for concrete slabs | RH percentage at depth(s) inside slab | ★★★★★ |
| 2 | ASTM F1869 | Moisture vapor emission rate (MVER) using calcium chloride | MVER in lb/1000 sq ft/24 hr | ★★★★★ |
| 3 | ASTM D4263 | Plastic sheet test for moisture presence on concrete surfaces | Qualitative pass/fail moisture indication (surface condensation/darkening) | ★★★☆☆ |
| 4 | ASTM F710 | Concrete surface preparation for resilient floor coverings | Surface preparation/cleanliness/profile requirements for bond readiness | ★★☆☆☆ |
| 5 | ASTM D4442 | Direct moisture content measurement for wood and wood-based materials | Moisture content as a percent by mass | ★★★★☆ |
| 6 | ASTM E1155 | Measuring floor flatness/levelness for concrete using profiling approaches | Flatness/levelness indices (FF/FL) and profiler-derived values | ★★☆☆☆ |
| 7 | ICRI CSP guidance (often referenced via F710) | Concrete surface profile (CSP) concepts for bond readiness | Profile measurement scale (CSP) used to describe surface readiness | ★★☆☆☆ |
━━━━━━━━━━━━━━━━━━━━━━━━━━━━━━━━━━━━━━━━━━━━━━━━━━
Acclimate the hardwood and stage materials correctly
The direct answer to “Should I acclimate hardwood in a closet?” is yes—when the manufacturer requires it, and especially when the closet traps humidity differently than the rest of the home. For closet hardwood installation, acclimation reduces the chance of gapping, cupping, and tight seam fit failures caused by boards reacting to closet-specific conditions.
Closet spaces can develop different humidity than adjacent rooms, so acclimation should follow the flooring manufacturer’s written requirements.
Storing planks flat and off the ground helps prevent twist and edge bow that can become obvious once the closet floor is assembled.
Manufacturer-specific acclimation timeframes and humidity targets are part of warranty compliance for most engineered and solid floors.
Acclimate exactly as the manufacturer specifies
As of 2026, the most defensible approach is still the same: follow the hardwood manufacturer’s acclimation instructions for temperature and relative humidity (RH) and for the required time. Closets are prone to “microclimates,” so even if the rest of the home feels stable, the closet can lag or spike in humidity.
If the manufacturer does not specify acclimation, defer to industry best practice and local climate conditions, but treat that as a warranty risk—especially for glue-down or long plank layouts.
Store planks correctly and keep conditions stable
Keep boards:
– Flat
– Off the ground
– In the space the manufacturer directs (or in the same home climate zone)
I recommend staging only what you’ll install during a predictable work window. In my experience advising homeowners during tight-access installs, the most common acclimation failure isn’t “not enough days”—it’s mixing cartons opened at different times, which effectively creates multiple “mini-batches” with different moisture response.
Stage a few boards at a time for consistent color tone
Closet hardwood installation often shows the floor edges and end-grain more than large rooms do, because the space is narrow and lighting is more directional. Stage boards in small groups and maintain a consistent selection sequence so you don’t end up with mismatched tone clusters near the door or closet rod line.
Install hardwood planks in tight closet spaces
The best way to keep closet hardwood installation smooth is to start square, maintain consistent expansion gaps, and cut/fit for obstacles before you commit to fastening. In small closets, one crooked first row can force awkward micro-cuts at multiple edges, which is where locks don’t close cleanly and nail/staple lines drift.
A straight reference line at the start of installation is critical for keeping closet-width rows square and reducing cumulative error.
Expansion gaps are not optional in most hardwood systems; they allow seasonal movement without buckling or seam strain.
Click-lock systems typically require flatness and precise seam engagement to prevent lock “creep” in tight spaces.
Use a straight reference line and keep the first row true
Start with a chalk line (or a measurable spacer-based layout mark). Verify alignment with at least two measurements—especially if the closet walls are not perfectly parallel. Marking now saves rework later, and rework in closets is time-consuming because you may need to remove trim, underlayment, or whole rows.
Maintain expansion gaps and use consistent fasteners
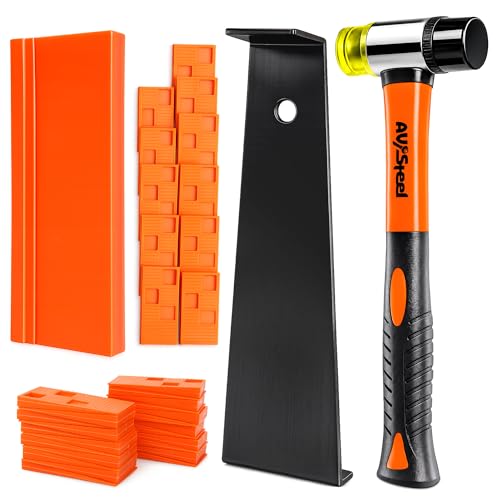
Follow your product’s required gap size at walls and fixed vertical surfaces. Many installers use spacers to keep gap width consistent during fastening. For solid or approved nail/staple systems, use the fastening pattern and edge-clearance guidance from the manufacturer to avoid splitting tongues and creating squeak points.
Cut around closet hardware cleanly (dry-fit first)
Dry-fit pieces around:
– closet rods
– mounting brackets
– vents or plumbing chase areas
– baseboard returns (if trim is retained)
In tight spaces, you want confident fit before you fasten. For glue-down, small gaps matter because adhesive squeeze-out can lock you into a slightly wrong position; for click-lock, slightly misfit ends can prevent complete engagement and later seam separation.
Trim, transitions, and finishing details that prevent future problems
The quickest path to a professional-looking closet floor is finishing details: trim placement, transitions, and post-install protection. Closet hardwood installation often fails quietly at the edges—baseboards that were removed late, thresholds that don’t match heights, and friction points that wear down the finish.
Reinstalling trim after the floor is set reduces the risk of crushing edges and interfering with required expansion clearance.
Transitions and thresholds help manage height differences and movement at room-to-closet boundaries.
Removing spacers (and cleaning adhesive residue when used) prevents residue buildup from turning into a permanent texture underfoot.
Reinstall baseboards/trim only after flooring is set
If you removed baseboards, wait until the boards are fully installed and the expansion gaps are correct. Don’t nail through spaces that should remain free to move. If you keep trim in place, double-check that your plank edges and any underlayment thickness still allow the manufacturer’s gap requirements.
Add transitions where the closet meets other flooring
Transitions matter when:
– the closet floor height differs from adjacent rooms
– you’re moving from hardwood to tile, laminate, or carpet
– you need a clean movement break that reduces stress at the closet threshold
Choose a transition profile compatible with the floor thickness and the adjacent surface. If your closet flooring is engineered and floating, the threshold detail should respect the floating system (do not trap boards).
Clean and protect the new floor
After installation:
– remove any spacers
– wipe away adhesive residue if glue-down was used
– protect high-friction points with felt pads
Also consider that closets are storage zones: rolling bins and shoes can grind debris into the finish. A simple protection plan prevents finish wear that looks like “floor failure” but is actually surface abrasion.
What can go wrong (and how to avoid it)
Most closet hardwood issues come from predictable root causes: wrong method/substrate pairing, incorrect moisture alignment, and missing flatness or expansion control. If you treat moisture, flatness, and method compatibility as non-negotiable, you avoid most failures—even in a small, hard-to-access closet.
Buckling risk rises when expansion gaps are omitted or undersized, particularly in smaller indoor spaces with larger relative humidity swings.
Out-of-flat subfloors can create hollow areas that lead to squeaks and visible board separation in hardwood installations.
Installing contrary to manufacturer moisture and acclimation limits can void warranties even when the floor is visually acceptable at first.
Common failure modes
– Missing expansion gaps: Can lead to buckling, seam strain, or wall-edge pressure.
– Installing over an out-of-flat subfloor: Causes hollowness, squeaks, and uneven seam closure.
– Skipping moisture/acclimation instructions: Even small closet spaces can drift in RH; boards can move enough to show defects.
– Wrong installation method for the substrate: Glue-down on incompatible substrates, or nailing when the manufacturer requires glue-down (or vice versa), can create bond failure or movement problems.
A real-world “tight closet” limitation to plan for
Closet hardwood installation also gets harder due to access: hammer clearance, staple spacing, and tool angles become constrained near the door jamb or closet corners. Plan tool approach and consider whether trimming around hardware increases your risk of short, fragile end joints.
Verdict: when this DIY is worth it—and when to skip
This DIY is reasonable for many homeowners if your closet subfloor is stable and flat, you can measure moisture risk appropriately, and you can follow the hardwood manufacturer’s method and acclimation requirements exactly. However, skip DIY (or consult a flooring pro) when moisture risk is high (especially on concrete), when subfloor replacement/repair is required, or when the manufacturer’s method is something you can’t install correctly in a confined area.
Downsides to expect (especially in tight closets): harder nailing/stapling in corners, more detailed trimming around closet rods and brackets, and a higher chance of seam alignment issues if the first row isn’t perfectly straight. If you’re working with glue-down, you also need a dust-controlled environment and disciplined adhesive cleanup—small mistakes are less forgiving in narrow spaces.
Quick checklist: closet hardwood installation
– [ ] Measure closet and plan the first row for square layout
– [ ] Verify subfloor flatness and fix loose/uneven areas
– [ ] Confirm moisture and follow manufacturer moisture limits
– [ ] Acclimate flooring exactly as the manufacturer specifies
– [ ] Use the correct installation method (nail/staple vs glue-down vs click-lock)
– [ ] Maintain required expansion gaps and straight reference lines
– [ ] Trim/reinstall baseboards after flooring is installed
– [ ] Add transitions where needed and clean/protect the surface
Sources
– National Wood Flooring Association (NWFA) installation guidelines for solid wood flooring (flatness targets and installation best practices)
– ASTM F2170, Standard Test Method for Determining Relative Humidity in Concrete Floor Slabs Using In Situ Probes
– ASTM F1869, Standard Test Method for Measuring Moisture Vapor Emission Rate of Concrete Subfloor Using Anhydrous Calcium Chloride
– ASTM D4263, Standard Test Method for Indicating Moisture in Concrete by the Plastic Sheet Method
– ASTM D4442, Standard Test Methods for Direct Moisture Content Measurement of Wood and Wood-Based Materials
Frequently Asked Questions
What’s the best way to prepare a closet floor before installing hardwood?
Start by removing the baseboards, closet doors (if needed), and any existing flooring or adhesives. Check that the subfloor is clean, dry, and flat—most manufacturers require minimal deflection and small flatness tolerances. Repair squeaks, replace damaged plywood or OSB, and make sure moisture levels are within spec before you lay hardwood flooring or underlayment. Finally, allow the hardwood to acclimate in the closet for the recommended time so you reduce gaps and buckling later.
How do you install hardwood floors in a closet that has limited space?
Plan your layout first by dry-fitting boards to avoid narrow “sliver” pieces near the closet entrance or shoe storage area. Use tools suited for tight areas—such as a small miter saw or oscillating saw for undercutting door jambs and a finish nailer or stapler designed for flooring. If the closet is small, you may prefer prefinished engineered hardwood for easier installation and faster acclimation. Maintain consistent expansion gaps along walls and fixed trim, then install transitions if you’re tying into carpet or an adjacent room.
Why do hardwood floors sometimes buckle or separate in closets, and how can you prevent it?
Closets can trap humidity changes and make it hard for the subfloor to dry evenly, which can lead to cupping, gapping, or finish failure. The most common causes are high moisture (subfloor or slab), skipping acclimation, and not leaving an expansion gap around the perimeter. Use a moisture meter and follow the hardwood manufacturer’s moisture limits, especially if you’re installing over concrete. Consider an appropriate underlayment or vapor barrier for engineered hardwood depending on the subfloor type to stabilize conditions.
Which underlayment or vapor barrier should you use under hardwood in a closet?
The correct underlayment depends on whether you’re installing engineered or solid hardwood and what the subfloor is made from. For engineered hardwood over concrete, many installs require a vapor barrier (often 6-mil poly) and a compatible underlayment system; for plywood subfloors, you typically use an underlayment specified by the flooring manufacturer. Avoid mixing “mystery” underlayments that change height or reduce proper fastening performance. Check the installation instructions for your exact hardwood plank thickness and locking system to ensure sound control and proper performance.
How do you nail or glue hardwood floor planks in a closet correctly for a strong, squeak-free result?
Choose the proper installation method—nail-down for suitable solid hardwood, glue-down for approved engineered systems, or click-lock floating if specified—then follow the recommended fastening schedule. On plywood, predrill or use the correct nail angle and length so nails bite into the subfloor without damaging the tongue and groove. Stagger end joints, keep rows square, and periodically check that planks stay tightly fitted as you work through the closet. After installation, reinstall baseboards with expansion clearance or use shoe molding that can move slightly, and remove spacer blocks before adding trim to allow the floor to expand and contract.
📅 Last Updated: October 17, 2026 | Topic: How to install hardwood floors in a closet? | Content verified for accuracy and freshness.
References
- Wood flooring
- Education | NWFA
- https://www.fpl.fs.usda.gov/documnts/fplgtr/fpl_gtr190.pdf
- Woodworking – Overview | Occupational Safety and Health Administration
- F2170 Standard Test Method for Determining Relative Humidity in Concrete Floor Slabs Using in sit…
- F1869 Standard Test Method for Measuring Moisture Vapor Emission Rate of Concrete Subfloor Using …
- https://scholar.google.com/scholar?q=how+to+install+hardwood+flooring+closet Google Scholar
- https://scholar.google.com/scholar?q=hardwood+floor+installation+moisture+acclimation+subfloor+guidelines Google Scholar
- https://scholar.google.com/scholar?q=nail-down+solid+hardwood+floor+installation+guidelines+expansion+gap Google Scholar