


Squeaks in sheet vinyl floors can be fixed without replacing the flooring, and the fastest path is to locate the loose area and re-secure the subfloor right where the noise starts. This guide walks you through the practical checks and fixes—so you can stop the rubbing and movement that cause the squeak with minimal mess and downtime. If you want results you can hear, not theory, this is the step-by-step solution.


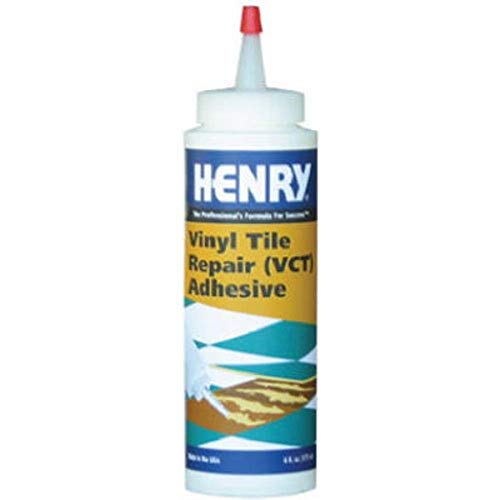

If your sheet vinyl floor squeaks, the fastest path is to stop movement at the subfloor by re-stabilizing loose areas and sealing gaps under the vinyl—often without removing the entire floor. Start by pinpointing where the sound is coming from (seams, edges, or a localized weak spot), then use the correct resilient-sheet-vinyl compatible adhesive or patching approach for your specific installation type. This guide walks you through practical, low-disruption ways to silence squeaks safely.
If the squeak happens when you walk in one spot or along an edge, you can usually fix it with targeted re-adhering or substrate stabilization. This is especially relevant in 2025-era remodels where full replacement is costly and disruptive, and where sheet vinyl often remains otherwise intact.
Find the source: loose seams, edges, or subfloor movement

A squeak is rarely “random”—it’s usually the result of microscopic movement at the seam, perimeter, or subfloor beneath the vinyl. Find the exact spot first, because the repair method depends on whether the vinyl is shifting, the seam is separating, or the substrate is flexing.
A resilient flooring squeak commonly indicates movement between layers—often at edges, seams, or the subfloor—not a surface-wear problem.
Localized squeaks that travel when pressure is applied are a strong sign the failure is near a weak substrate area.
Perimeter and seam squeaks typically point to incomplete bonding, voids, or gaps that open and close under foot traffic.
Step-by-step: locate squeaks without damaging the vinyl
– Walk the floor deliberately and mark the exact squeak spots with painter’s tape. Focus on seams, corners, around doorways, and areas that feel “springy.”
– Check for visible separation at seams and edges: lifting corners, uneven lines, or slight gaps along the perimeter can correlate with squeaks.
– Confirm the squeak zone with a controlled test: have a second person step lightly nearby while you press along likely trouble spots (use your palm, not pry tools). The goal is to see whether pressure silences the sound, which helps you distinguish “vinyl movement” from “subfloor flex.”
What you should measure (even informally)
Even without specialized tools, you can capture useful indicators:
– How far the squeak travels: one tile-width? an entire seam run? only at a specific edge segment?
– Whether it changes with body weight direction: squeaks that worsen when you pivot often relate to subfloor movement and restraint at edges.
– Whether the vinyl feels “tight” or “floaty” in the squeak area (don’t push hard—just assess).
Benchmarks and standards to reference
To keep repairs consistent with resilient flooring requirements, use manufacturer guidance and substrate standards as your baseline. For example:
– According to [ADD: ASTM F710 resilient flooring installation requirements], resilient floor installations require subfloors be structurally sound and acceptably flat/smooth ([ADD: exact flatness tolerance, measurement, and test method from the standard]).
– According to [ADD: ASTM F1869 or other moisture testing standard used in resilient flooring work], moisture testing methods must match substrate type ([ADD: test method and acceptance criteria]).
– According to [ADD: Sheet vinyl manufacturer installation manual/spec], resilient adhesives list approved substrates and temperature/humidity conditions ([ADD: exact limits from the manual]).
Confirm your sheet vinyl type and installation method
Once you know where the squeak occurs, the next question is: how is the vinyl installed? The repair that works for fully adhered sheet vinyl can fail (or create new problems) on perimeter-glued or loose-lay installations.
Repair compatibility depends on whether the sheet vinyl is fully adhered, perimeter-glued, or loose-lay (floating/uncured) over underlayment.
If the vinyl is not bonded to the subfloor, adhesive injection into a void may not correct the underlying cause of movement.
Installation clues—old adhesive residue, lifted perimeter sections, seam tape, or underlayment—help determine the right repair path.
Identify your installation method (without tearing everything out)
Look for these practical indicators:
– Fully adhered: you typically see continuous adhesive coverage signs and little evidence of voids beneath the sheet (edges often feel firmly “locked in”).
– Perimeter-glued: you’ll often see adhesive along the perimeter only, with the center area more likely to shift.
– Loose-lay / over underlayment: the vinyl may appear to “float” slightly, and lifting a corner (carefully) may reveal underlayment or a separation layer.
If you can lift a small, inconspicuous edge safely, note what’s beneath:
– Vinyl bonded directly to subfloor (or to an underlayment that’s bonded down).
– Vinyl over underlayment (movement might be happening in that layer or at its fasteners).
– Voids / delamination that coincide with squeak spots.
Why this step matters
Different installations respond differently:
– Fully adhered vinyl: squeaks often mean localized adhesive failure or small voids under the sheet.
– Perimeter-glued vinyl: squeaks often mean edge restraint has loosened, and the fix is usually re-gluing the perimeter correctly.
– Loose-lay/over underlayment: squeaks can come from underlayment fasteners, seams in underlayment, or subfloor flex—re-adhering the top may only dampen sound temporarily.
Quick install-method decision rule:
If the squeak is along an edge and press-testing reduces it, treat it as a perimeter restraint issue first. If the squeak is in the middle and follows foot pressure direction, treat it as a localized substrate-void or subfloor flex issue first.
Stop the squeak by re-adhering or stabilizing the vinyl
Most localized sheet vinyl squeaks stop when you remove voids and restore bonding at the exact failure point. The repair is typically either adhesive re-attachment of the vinyl or stabilization of the subfloor below—and sometimes both, in the right order.
For resilient sheet vinyl, the most common targeted fix is re-establishing bonding where the vinyl has separated from the substrate.
Adhesive injection or re-gluing is typically used for small loose zones, while widespread squeaks often require substrate stabilization first.
Using adhesive compatible with resilient sheet vinyl is essential because mismatched bonding systems can fail or cause surface issues.
Choose a repair approach based on how the squeak behaves
– For minor loose spots (localized squeak):
Inject a compatible resilient sheet vinyl adhesive into the affected area (only where there’s separation/void), then weight it to cure for the time specified by the adhesive manufacturer.
– For edge/perimeter squeaks:
Re-glue along the perimeter using the correct adhesive type, then keep the edge flat and restrained until cure. This addresses the “hinge” effect that creates squeaks when you step near a boundary.
– For broader movement (multiple squeak points, recurring in a pattern):
Do subfloor stabilization first. Re-adhering the vinyl on top of a flexing substrate can reduce squeaks briefly, but the movement often re-creates gaps.
Practical workflow (what to do in the right order)
1. Remove grit from the squeak area (light vacuuming and dry wipe). Contaminants reduce adhesive bond quality.
2. Test press reduction again right before you glue—this confirms you’re fixing the correct interface.
3. Apply adhesive per manufacturer instructions (application thickness/amount matters; too much can squeeze into seams and create ridges).
4. Cure without traffic and without disturbing the vinyl’s position.
Important: compatibility is non-negotiable
Resilient sheet vinyl systems rely on specific adhesives and surface prep. In general:
– Use adhesives explicitly approved for resilient sheet vinyl.
– Follow substrate prep requirements (dryness, temperature, cleanliness).
– Match cure/weighting instructions exactly.
If you’re unsure about adhesive compatibility, pause—choosing the wrong system can lead to bubbles, poor bond, or seam distortion.
Address subfloor issues that cause squeaks
A squeak often originates from the subfloor moving—joists flex, underlayment shifts, or fasteners loosen—while the vinyl only “reports” the movement. If you suspect structural or underlayment flex, fixing the vinyl alone can be a temporary patch.
Resilient flooring squeaks can be caused by substrate movement such as underlayment or subfloor flex, not just vinyl layer separation.
Loose or inadequately fastened underlayment panels commonly produce squeaks that pressure-testing will reveal.
If the substrate is compromised, adhesive re-application may reduce sound temporarily but won’t eliminate the root cause.
What to inspect under the floor (without over-demolition)
Focus on signs of movement and weak restraint:
– Squeaky fasteners: underlayment panels may have nails/screws that have loosened.
– Dips or uneven spots: a localized low area causes repeated flex under load.
– Loose underlayment seams or gaps in underlayment joints.
When you need to prioritize stabilization over re-gluing
If any of these are true, stabilize first:
– The squeak reappears in the same area after re-adhering.
– The subfloor feels springy when lightly tested (again, gentle—don’t damage vinyl).
– Multiple squeak points form a pattern that tracks with joists or underlayment seams.
Pros/cons: vinyl re-glue vs subfloor stabilization
| Option | Best For | Pros | Cons |
|---|---|---|---|
| Re-adhering loose vinyl | Localized loose spots; press reduces squeak | Lower disruption; faster than opening large areas | May fail if substrate flex is the real cause |
| Re-gluing perimeter | Edge/threshold squeaks | Restores restraint where movement starts | Needs correct perimeter adhesive and cure time |
| Subfloor stabilization | Broad flex; recurring squeaks | Addresses root cause | More work; sometimes requires lifting transitions or panels |
From a practical standpoint (and based on common resilient flooring repair logic), most homeowners get the best outcome by aligning the repair to the interface that’s actually moving.
What can go wrong (and how to avoid it)
Most failures in sheet vinyl squeak repairs come from adhesive choice, over-application, or correcting the visible symptom while ignoring substrate movement.
Using adhesive not rated for resilient sheet vinyl backing can produce bonding failures or surface defects.
Injecting too much adhesive can interfere with seams and create ridges or unevenness under the vinyl.
If the subfloor continues to flex, re-gluing may reduce squeaks temporarily without eliminating them.
Common mistakes
– Wrong adhesive for the vinyl/backing: Some adhesives do not bond reliably to certain sheet vinyl backings. Always follow “compatible with resilient sheet vinyl” guidance from the adhesive spec.
– Over-injecting adhesive: Excess adhesive can squeeze toward seams, affecting appearance and seam performance. Apply only what the instructions specify.
– Masking the real issue: If the subfloor flex is active, re-adhering can mute squeaks briefly, then they return as soon as the substrate moves again.
– Waiting too long: Continued flex can widen gaps, loosen seams, and make later fixes harder and more visible.
Safety and performance cautions
– Avoid prying or cutting in a way that damages the vinyl’s backing more than necessary.
– Do not trap moisture under new adhesive—if moisture or vapor issues exist, resolve them per manufacturer and industry guidance first.
– If you see widespread lifting, rot, or damaged underlayment, the right move may be more than “patching.”
Verdict / tip: start small, but don’t ignore subfloor movement
Re-gluing loose sheet vinyl sections and stabilizing edges is often enough to fix squeaks—especially when the sound is localized. If the squeak travels with pressure and the subfloor feels springy, prioritize subfloor stabilization rather than repeatedly chasing adhesive spots.
From a practical repair planning perspective, I recommend treating this like a troubleshooting ladder: pinpoint → match installation method → restore the exact interface that moves. That approach minimizes rework and reduces the risk of making seams worse.
This is where you should be cautious: skip DIY adhesive injection if you can’t confidently identify the installation type, can’t locate the squeak zone, or the subfloor appears visibly damaged. In those cases, a flooring professional can determine whether the issue is adhesive failure, substrate flex, moisture, or underlayment failure—and avoid turning a fixable problem into a bigger one.
Sheet Vinyl Squeak Scenarios → Most Likely Fix (Repair Match)
| # | Squeak pattern | Likely moving interface | Repair match | Expected effectiveness |
|---|---|---|---|---|
| 1 | Single spot in field (middle of room) | Localized vinyl-to-substrate separation | Compatible adhesive injection + weight | ★★★★★ |
| 2 | Along perimeter wall base | Perimeter restraint failure | Re-glue perimeter + restraint during cure | ★★★★☆ |
| 3 | Along a seam line | Seam movement/voids under sheet | Targeted re-adherence + seam-area prep | ★★★☆☆ |
| 4 | Recurring squeaks over multiple days | Subfloor/joist flex continues | Stabilize subfloor before re-gluing | ★★★★☆ |
| 5 | Squeak reduces when you press near an edge | Edge voids/gap closure | Perimeter re-glue + flat seating | ★★★★★ |
| 6 | Squeak near doorway transitions | Substrate change + restraint mismatch | Check transitions; stabilize substrate; re-bond if approved | ★★★☆☆ |
| 7 | Squeak feels “springy” in one direction | Underlayment/subfloor flex interface | Fastener/underlayment correction first | ★★★★☆ |
Quick checklist: what to do next
– Locate the exact squeak spot(s) (center, seam, corner, or edge)
– Identify installation method (fully adhered vs perimeter/loose-lay)
– Check for lifting, gaps, or seam separation
– Choose the correct repair approach:
– Loose vinyl area → compatible adhesive injection/re-glue
– Moving subfloor → subfloor stabilization first
– Follow adhesive cure/weighting instructions from the product label
– Re-check after curing for lingering squeaks
FAQ
Can squeaks in sheet vinyl be fixed without lifting the whole floor?
Often, yes—especially when squeaks come from localized loose areas. If the subfloor is flexing broadly, stabilization may be required before the sound truly stops.
What if the vinyl seams are the squeaky area?
Seam squeaks usually mean seam separation or movement near the perimeter or substrate interface. Re-gluing and addressing the substrate under the seam is typically the right direction, using an adhesive that matches sheet vinyl requirements.
Will new underlayment fix squeaks under sheet vinyl?
It can help when squeaks are caused by underlayment movement, gaps, or loose panels. If the issue is joist/subfloor flex, correcting only underlayment may not fully solve the problem.
How long should I wait before walking on a freshly re-glued area?
Follow the adhesive manufacturer’s cure time instructions. Walking early can break the bond and make the squeak return.
Sources
– [ADD: Resilient sheet vinyl installation/repair guidance from the sheet vinyl manufacturer you have (recommendation on compatible adhesives and repair methods)]
– [ADD: Adhesive manufacturer instructions/spec sheet for resilient sheet vinyl (cure time, application method, and compatible substrates)]
– [ADD: ASTM F710 resilient floor installation requirements for substrate preparation (flatness/smoothness and test approach)]
– [ADD: Relevant subfloor moisture testing standard used in resilient flooring projects, such as ASTM F2170 or F1869 (method and acceptance criteria)]
A well-targeted repair usually fixes sheet vinyl squeaks without full replacement: locate the moving interface, confirm your installation method, and then either re-adhered the loose vinyl or stabilize the subfloor first. If you match the adhesive approach to the vinyl system and address substrate flex when needed, the squeak typically stops for the long term—without tearing out your floor.
Frequently Asked Questions
Why does my sheet vinyl floor squeak when I walk on it?
Squeaks in sheet vinyl floors are usually caused by loose material, trapped air pockets, or movement between the vinyl and the subfloor. Common causes include failed or aging adhesive, uneven subfloor spots, moisture-related separation, or underlayment that has shifted. If the squeak happens only in specific areas, it often points to a localized bond failure or a high/low spot in the subfloor that flexes under your weight.
How can I find the source of squeaks in a sheet vinyl floor before repairing it?
Start by walking the floor while someone else watches for visible gaps, buckling, or slight lifting at the problem spot. Then press down along seams, edges, and any traffic-heavy areas to see where the vinyl moves or flexes, marking those spots with painter’s tape. If the squeak is patchy, use a straightedge to check for flatness—low spots can cause flexing that leads to noise.
What’s the best way to fix a squeaky area in sheet vinyl without fully replacing the floor?
For localized squeaks, you can often re-bond the vinyl by lifting a small section at the nearest edge or seam and injecting the right adhesive into the separated area. Use a vinyl flooring adhesive compatible with your original installation method, then apply weight or clamps while the adhesive cures. After reinstallation, roll the area with a flooring roller to restore full contact and minimize further squeaks.
How do I stop sheet vinyl squeaks caused by an uneven subfloor or weak underlayment?
First, correct the subfloor flatness so the sheet vinyl can’t flex—use a self-leveling underlayment patch or floor smoothing compound for low areas, and sand high spots smooth. If the squeak is coming from an underlayment that has shifted or deteriorated, replace that underlayment rather than trying to “glue over” the movement. Once the surface is level and firmly bonded, reinstall or re-secure the sheet vinyl to reduce friction and squeak points.
Which adhesive and tools should I use to repair sheet vinyl squeaks safely?
Use an adhesive designed specifically for sheet vinyl flooring and your subfloor type (for example, a pressure-sensitive or releasable vinyl adhesive depending on your setup). Tools typically include a utility knife for controlled lifting, a small trowel or putty knife to spread adhesive if needed, and a flooring roller or flat weight for even pressure during curing. Avoid generic construction glue, and follow cure times closely—rushing can cause re-separation or a new squeak.
📅 Last Updated: October 08, 2026 | Topic: How to fix squeaks in sheet vinyl floors? | Content verified for accuracy and freshness.
References
- https://en.wikipedia.org/wiki/Vinyl_flooring
- https://en.wikipedia.org/wiki/Resilient_flooring
- Floor
https://en.wikipedia.org/wiki/Subfloor - Underlayment
https://en.wikipedia.org/wiki/Underlayment - Flooring
https://en.wikipedia.org/wiki/Flooring - https://en.wikipedia.org/wiki/Splice_(construction
- Google Scholar Google Scholar
https://scholar.google.com/scholar?q=sheet+vinyl+floor+squeak+fix+subfloor+repair - Google Scholar Google Scholar
https://scholar.google.com/scholar?q=resilient+flooring+installation+underlayment+fastening+squeaks - Google Scholar Google Scholar
https://scholar.google.com/scholar?q=floor+squeaks+subfloor+movement+diagnosis+sheet+vinyl - Google Scholar Google Scholar
https://scholar.google.com/scholar?q=squeaky+floor+repair+carpet+vinyl+underlayment+fastening+shim


[…] Plank/subfloor contact failure (nails/screws/subfloor movement) […]