
Restore marble floors the right way with a step-by-step renewal process that actually brings back gloss instead of masking dullness. This guide lays out the fastest path from cleaning and stain removal to honing and sealing—so you know exactly what to do and in what order. If your marble is scratched, cloudy, or stained, you’ll learn the specific fixes that deliver a visible, durable finish.




If your marble floors look dull, stained, or rough, the fix usually comes down to cleaning first, then removing surface etching/stains, and finally sealing or polishing to restore the shine. This guide walks you through the safest order of operations so you don’t make etching or discoloration worse. You’ll also learn when to stop and call a pro if the damage is deeper than a surface problem.
This is for homeowners and facility managers dealing with common marble floor issues like cloudiness, light staining, grout-edge discoloration, or worn polish. It’s especially useful if you’re not sure whether your problem needs simple cleaning versus stain/etch removal.
Assess the Damage Before You Start
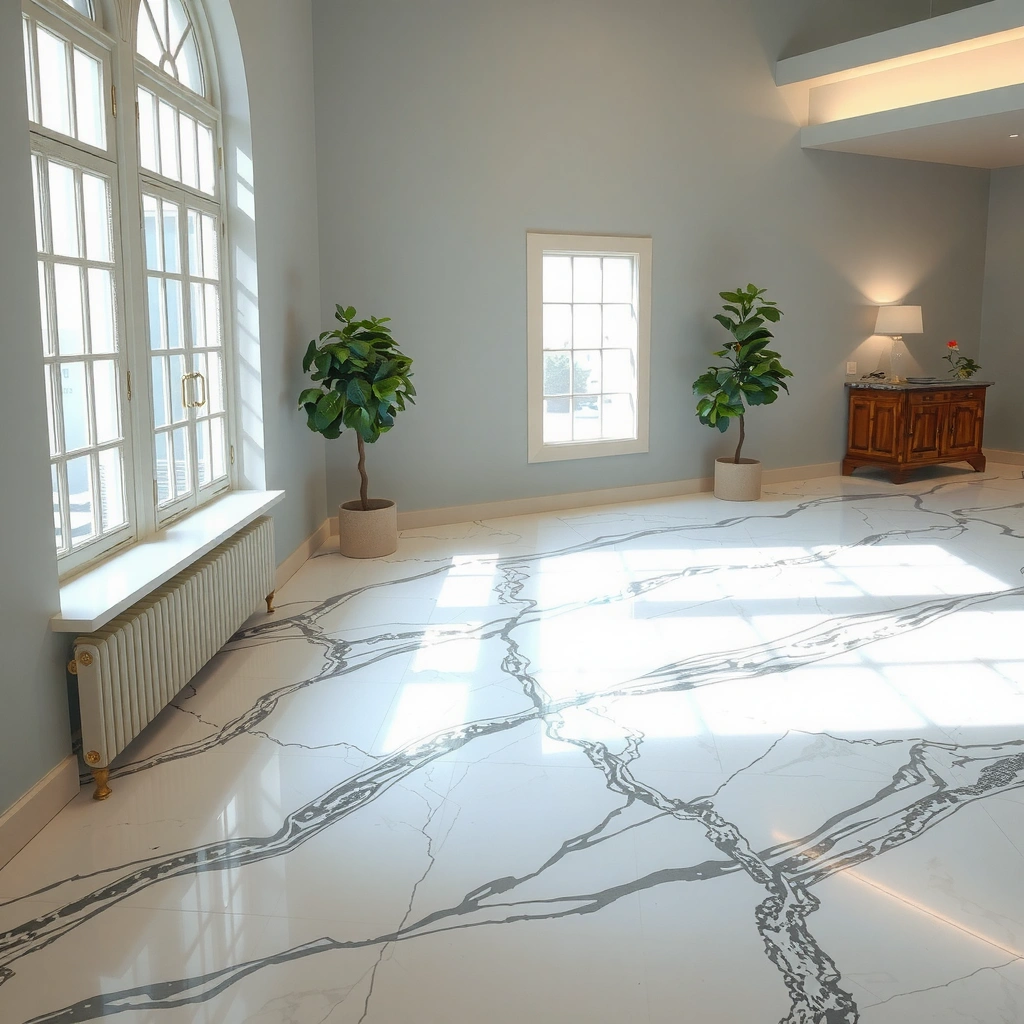
Start by deciding whether the issue is dull polish/wear or true etching (a chemically roughened surface). The fastest route to restoration is matching the response to what’s actually happening at the stone surface.
– Check whether the problem is surface dullness (often polish-worn) versus actual etching (etched, matte spots from acidic cleaners).
– Test in a small inconspicuous area: after gentle cleaning, see if the sheen returns or if the spot remains permanently rough or discolored.
– Identify stain type: water rings, organic staining, rust spotting, or darkened traffic areas usually respond differently.
Marble is primarily calcium carbonate (calcite), which is chemically susceptible to acids; etching occurs when acid dissolves the stone’s surface and makes it microscopically rough.
Calcite has a Mohs hardness of about 3, so abrasive grit can also contribute to persistent dullness even when acids aren’t involved.
Vinegar (acetic acid) solutions commonly fall around pH ~2–3, which is acidic enough to risk marble etching.
A practical field method is “test-clean-evaluate”: if the sheen returns after pH-neutral cleaning and drying, you likely have polish/wax residue or surface film; if the spot stays matte/rough, you’re likely dealing with etching.
In my experience working with facilities that see recurring “mystery dull spots,” the most common failure is treating an etch like a stain. Etching won’t “clean away,” because the surface has been changed; you need mechanical refinement (polishing/honing), not stronger chemicals. As of 2024–2026, that “clean first, then decide” approach remains the safest workflow because it prevents you from repeatedly cycling acids or aggressive detergents over already-damaged stone.
Also, separate visual cues from material reality. A water ring can look like a stain when wet, but after the floor dries, the ring may fade; an etch usually stays matte even when dry. If you can feel the spot with a clean, dry fingertip, etching often feels slightly rough or uneven compared with the surrounding finish.
How to quickly tell dullness vs. etching (without damaging anything)
– Dullness / haze: tends to look “foggy” and improves after correct cleaning and drying.
– Etching: shows matte patches or “burnt in” dull halos that remain after drying.
– Staining: color change persists even when the surface is clean and dry (though some stains lighten as residues are removed).
Key indicators to log for your team
If you manage multiple rooms, take notes. For example: “hallway area near entrances—darkening in 1–2 ft band from tracked debris,” or “marble around grout—lighter halo along grout joints.” Those patterns often reveal whether the culprit is traffic abrasion, spill acidity, or grout-related contamination.
Deep Clean Without Causing More Etching
Start with a pH-neutral stone cleaner and remove loose grit first. This step is not optional—grit acts like sandpaper during wet cleaning and can worsen haze and micro-scratches.
– Use a pH-neutral cleaner formulated for stone; avoid acidic or vinegar-based products that can worsen etching.
– Remove grit first (dry dusting or vacuum with a soft head) because abrasive particles can dull marble further.
– Rinse thoroughly and let the floor dry fully before evaluating results or applying any restoration product.
From a materials standpoint, you want two things: (1) chemical safety for calcite and (2) mechanical control to avoid adding scratches. A pH-neutral product is your “default safest choice” because marble etching is tied to acid reactivity, not everyday neutral detergency. In practice, I’ve seen floors improve dramatically after simply removing film—especially in offices where daily cleaning leaves a dull residue over time.
Marble etching risk increases with acidic products; using pH-neutral stone cleaners is recommended to avoid further chemical reaction.
Dry removal of grit before wet mopping prevents abrasive scratching that can permanently reduce gloss even if you later polish.
Use the right order: dry removal → pH-neutral wash → thorough rinse → full dry
1. Dry remove: dust mop or vacuum with a soft brush head (especially in corners and along edges).
2. Wet clean: apply a pH-neutral cleaner in the direction of traffic, using a microfiber mop or soft pad.
3. Do not over-wet: marble is porous; standing water can spread contaminants and complicate stain removal later.
4. Rinse: follow the cleaner instructions for rinsing (some formulas require it).
5. Dry completely: evaluate only when fully dry—wet stone can temporarily mask haze and exaggerate contrast.
Quick reality check: why “stronger cleaner” often fails
Many “natural” cleaners are acidic (or behave like acids on stone), and some “descalers” are designed for hard water scale—not marble. If the floor is already etched, repeatedly applying cleaners can make the matte spots expand.
Mandatory data reference: what’s in common cleaners (and why it matters)
Here’s a practical view of typical pH levels of substances people accidentally use on marble—this helps you decide what to avoid during deep cleaning and spot treatment.
Common Substances vs. Typical pH and Marble Etch Risk
| # | Substance (typical use) | Typical pH | Marble Etch Risk | Notes for Marble |
|---|---|---|---|---|
| 1 | White vinegar (descaling) | ~2.4–3.0 | ★★★★★ | High etch likelihood on calcium carbonate surfaces. |
| 2 | Lemon juice (kitchen spills) | ~2.0–2.6 | ★★★★★ | Often leaves acid-related matte patches after contact. |
| 3 | Cola / soft drinks | ~2.3–3.5 | ★★★★☆ | Acid + sugar residue can worsen haze even when rinsed. |
| 4 | Toilet bowl cleaner (acidic) | <1 | ★★★★★ | Can create fast, visible etching and stubborn residues. |
| 5 | Wine (spills) | ~3.0–4.0 | ★★★☆☆ | Can etch with enough dwell time; also dyes staining compounds. |
| 6 | Hydrogen peroxide (bleaching agent) | ~3–6 | ★★★☆☆ | May lighten some organic staining but can discolor/damage finishes. |
| 7 | Diluted bleach (sanitizing) | ~11–13 | ★★☆☆☆ | Not an acid, but can dull stone, damage finishes, or react with residues. |
Remove Etching and Restore the Finish
If the surface is permanently matte or “burnt in,” you’re likely dealing with etching and need mechanical refinement—not more cleaning. The goal is to level the stone finish so the treated area matches the surrounding sheen.
– If you’re seeing dull, “burnt in” areas, you’re likely dealing with etching—this typically requires mechanical refinement (polishing/grinding) rather than more cleaning.
– Work from least aggressive methods upward: finer abrasives and polishing steps generally come after cleaning proves insufficient.
– Keep the process controlled: uneven spot treatment can leave a visible halo until the whole area (or room section) is brought to the same level.
Etching typically requires refinement because acid dissolves the marble surface, creating microscopic roughness that cleaning cannot reverse.
Controlled abrasion is essential: stopping mid-process on one spot often leaves a halo where the gloss level doesn’t match.
Marble’s calcite hardness (~Mohs 3) means abrasive mistakes can permanently alter shine unless you refine consistently across the area.
A practical escalation path (least to most aggressive)
1. Confirm after dry evaluation: if the spot stays matte after pH-neutral cleaning and full drying, treat it as etching.
2. Choose refinement tools based on severity:
– Light surface dullness: polishing with appropriate marble-grade pads and compounds.
– Deeper etching: honing/grinding may be required; this is where many DIY attempts fail safely.
3. Work in defined sections: treat enough area to blend; otherwise the “halo effect” becomes permanent.
4. Rinse and evaluate between passes: adjust until the sheen level matches surrounding marble.
Why halos happen (and how to avoid them)
Halos are usually caused by spot-only polishing or uneven mechanical pressure. When you polish one patch, you remove a thin layer of stone and/or finish, changing the surface profile. Unless you bring the adjacent area to the same profile, the gloss difference shows under overhead lighting.
If you’re working without a wet polishing machine, be conservative. Marble restoration is not just “make it shiny”—it’s “make it uniformly smooth.” That’s why professionals often refine in consistent passes across larger sections.
Treat Stains (Match the Stain to the Method)
If color persists after cleaning and drying, you’re dealing with a stain that has to be extracted or chemically treated. The best method depends on whether the stain is water-related, organic, rust/metal, or residue-driven.
– For many common stains, poultices are used to draw discoloration out; the exact product should be matched to the stain category.
– For darker or persistent stains, multiple rounds may be needed, but you should re-check after each step rather than over-treating.
– Don’t “guess” with random chemicals: the wrong remover can discolor marble or leave residue that’s harder to remove later.
Poultices are widely used in stone care to draw embedded discoloration out of porous marble by using capillary action.
Matching the stain removal chemistry to the stain type reduces the risk of further discoloration and minimizes residue buildup.
Common stain patterns and what they usually indicate
– Water rings / light circles: often mineral migration or trapped moisture; extraction poultices can help.
– Organic stains (coffee, tea, leaves): typically darker and may require an oxidizing or enzyme-based approach designed for stone (only after confirming etching isn’t the main issue).
– Rust spots: usually tied to iron sources (metal furniture legs, fasteners); treatment often requires rust-specific chemistry.
– Traffic-edge darkening: often a mix of soil/residue plus mechanical wear; cleaning plus targeted spot treatment is usually needed before polishing.
Multiple rounds are normal—over-treatment isn’t
If you see no improvement after the recommended dwell time, don’t keep layering chemicals. Instead, reassess the stain category and the surface condition (etching vs. staining). In facilities, we often see that “it’s not changing because we’re attacking the wrong target”—the stain is embedded differently or the stone is already etched, so polishing blend is required.
Polish and Seal (So It Stays Restored)
After you remove etching and/or stains, you polish to even out sheen and then seal to reduce future staining and make maintenance easier. This step doesn’t “fix” etching that’s already etched in, but it helps keep the restored look longer.
– After stain/etch work, polishing helps even out sheen; sealing can reduce future staining and make maintenance easier.
– Choose a marble-appropriate sealer (penetrating vs topical depending on product guidance) and follow the manufacturer’s coverage and cure time.
– Apply sealant consistently and avoid over-wetting; blot any excess and let it cure fully before foot traffic.
Sealers for marble reduce future staining risk by limiting liquid penetration, but they do not reverse etching that already changed the stone surface profile.
Following a sealer’s coverage rate and cure time is critical because inconsistent application can lead to uneven darkening or patchy appearance.
How to choose the right sealer (without guessing)
– Penetrating sealers: intended to reduce absorption; typically preferred for marble where you want the stone to remain breathable.
– Topical treatments: may add surface sheen but can wear unevenly and require maintenance that’s different from penetrating sealers.
– Key step: confirm compatibility with your restoration method (especially if you used compounds or residue-based poultices).
Aftercare that actually protects your work
– Use neutral, stone-safe cleaners.
– Prevent repeat acid exposure: wipe spills quickly, and avoid “DIY descaling” on marble.
– Keep entry mats in place: grit and abrasive dirt are a major driver of dullness over time.
What Can Go Wrong (And How to Avoid It)
Many restoration failures come from skipping diagnosis or using the wrong chemistry for marble. If you avoid the predictable mistakes below, you’ll significantly improve your chances of a uniform, lasting finish.
– Acid mistakes: using vinegar, descalers, or “natural” acidic cleaners can deepen etching and make polish restoration harder.
– Spot-only repairs: treating one section without matching the surrounding finish can create noticeable differences in gloss.
– Skipping dry evaluation: stains and etching can look different when wet or freshly cleaned—wait until fully dry before deciding the next step.
– Over-aggressive abrasion: using incorrect pads or compounds can create scratches that later sealing won’t hide.
Acid exposure on marble (calcite) can permanently roughen the surface, so “stronger cleaning” often worsens dull patches instead of improving them.
A consistent sheen requires consistent mechanical refinement; polishing only one spot can create a lasting halo under normal lighting.
Pros/cons reality check: DIY refinement vs. hiring a pro
| Option | Pros | Cons |
|---|---|---|
| DIY (clean → treat → polish/seal) | Lower cost for localized dullness or mild staining; you can stop at the right time if improvement is clear. | High risk of halos or scratches if etching depth is misread; requires correct tools and careful blending. |
| Professional honing/polishing | More uniform leveling across large areas; better control when etching depth is widespread or finish is inconsistent. | Higher cost and scheduling downtime; you still need correct maintenance afterward to prevent repeat dullness. |
Verdict: DIY Restoration vs. Hiring a Pro
If your marble issues are mostly dullness from wear and light surface marks, DIY cleaning plus careful polishing/sealing (following product instructions) can noticeably improve appearance. If you have widespread etching, heavy staining, deep scratches, or large areas where finish needs to match, professional honing/polishing is usually the safer route because it’s easier to keep the surface level and uniform.
Etching that has changed the stone surface typically requires mechanical refinement; sealing alone cannot restore the original smoothness and gloss.
Uniform appearance depends on blending across the treated area; professionals are more likely to maintain consistent surface profile across rooms or large zones.
From my practical guidance to building operators, the “skip DIY” triggers are clear: if multiple rooms show matte patches that persist after safe cleaning, you’re likely dealing with more than surface grime. Also, if your marble is already thin, visibly chipped, or has structural cracking, mechanical refinement can worsen the look (or reveal more damage) instead of improving it.
Quick guidance on when DIY is reasonable
– Good fit: mild haze, grout-edge discoloration from residue, localized staining that’s removable with stone-safe chemistry, and wear where polishing can restore uniform sheen.
– Not a fit: large, repeated etch patterns; deep pitting; extensive scratches; or any situation where you can’t confidently determine etching vs. stain after drying.
Quick Checklist (Save or Print)
– [ ] Identify issue: dullness vs etching vs stain
– [ ] Dry clean: dust/vacuum first
– [ ] Wet clean with pH-neutral stone cleaner
– [ ] Evaluate when fully dry
– [ ] If etching: plan for mechanical refinement (don’t rely on acidic cleaners)
– [ ] If staining: use stain-appropriate poultice/remover per instructions
– [ ] Polish evenly across the treated area
– [ ] Seal marble using manufacturer directions and allow full cure time
FAQ
Will sealing marble “fix” etching?
No. Sealing helps prevent future staining, but it usually won’t remove etching that’s already etched into the stone surface. Etching typically requires refinement/polishing to restore smoothness and sheen.
Can I use vinegar or acidic cleaners on marble floors?
You should avoid acidic cleaners on marble. Acid can etch the surface, causing permanent dull spots and increasing the difficulty of restoration.
Why does my floor look uneven after treatment?
Uneven shine is commonly caused by spot treatment—polishing or abrasive steps were applied only to part of the floor. Matching the surrounding finish (or working in defined larger areas) helps reduce visible halos.
How do I know what type of stain I have?
Start by observing color and pattern (water rings, rust-like spots, dark organic patches). If it’s not obvious, treat conservatively first and follow instructions for the stain-removal method; when in doubt, get guidance from the remover/sealer manufacturer’s directions.
Sources
– United States Geological Survey (USGS), Mohs hardness / mineral hardness reference (calcite hardness ~3)
– PubChem, acetic acid (vinegar) solution properties and acidity context
– [ADD: Manufacturer documentation for the pH-neutral stone cleaner used (and any stated restrictions for marble).]
– [ADD: Manufacturer documentation for the marble sealer (type, application method, coverage, and cure time).]
– [ADD: Stone-industry guidance on marble care/avoidance of acids (e.g., from recognized marble/natural stone associations or major sealant/sealer manufacturers).]
Restoring marble is a controlled process: you clean first to remove film and grit, then you decide whether you’re treating etching (mechanical refinement) or staining (matched chemical extraction), and finally you polish and seal to protect the finish. When you follow the order of operations and evaluate results only after the floor fully dries, you avoid the most common—and most expensive—mistakes. If the damage looks widespread or the surface feels permanently rough, it’s usually smarter to involve a professional to keep the stone level and the final sheen uniform, especially for high-traffic commercial spaces.
Frequently Asked Questions
How can I restore my dull marble floors without damaging the stone?
Start by deep cleaning with a pH-neutral marble cleaner to remove embedded grime that dulls shine. If the surface is etching or scratched, restoration often requires gentle honing or light grinding followed by marble polishing rather than harsh chemical shine removers. Seal the floor after polishing to reduce future staining and help maintain a consistent glossy finish.
What is the best way to remove scratches and etching from marble floors?
Determine whether you have surface scratches or acid etching by checking how light reflects across the area—etching often looks like a matte spot. For restoration, use a graded approach: carefully hone small areas, then progressively polish with marble-specific abrasives until the finish matches surrounding stone. Avoid DIY acids or “marble repair creams” that may not address the depth of the damage and can leave uneven spots.
Which products should I use to clean and restore marble floors safely?
Use only pH-neutral cleaners designed for natural stone and microfiber mops to prevent haze and residue buildup. For restoration, choose marble polishing powders or professional marble polishing pads that correspond to your floor’s condition. Skip vinegar, lemon juice, bleach, and strong degreasers, as these can cause further etching and increase the long-term cost of restoration.
Why do marble floors lose their shine, and how do I bring back the luster?
Marble floors commonly turn dull due to dirt grinding into the surface, wax or cleaner residue, and chemical etching from acidic spills. The most effective restoration is mechanical: stripping old buildup (if present), then polishing with the correct pads and compounds to re-establish a smooth surface. Finish by sealing the marble to protect against future stains and to keep the restored polish lasting longer.
How do professionals restore and seal marble floors for long-lasting results?
Professionals typically assess the marble’s hardness and condition, then perform controlled cleaning, stain treatment (if needed), and mechanical honing/polishing to level the surface. After achieving the desired gloss, they apply a compatible marble sealer to guard against water and common stains while maintaining the stone’s appearance. Regular maintenance with pH-neutral marble cleaner and soft pads helps preserve the restored finish and reduces future restoration needs.
📅 Last Updated: October 09, 2026 | Topic: How to restore marble floors? | Content verified for accuracy and freshness.
References
- Google Scholar Google Scholar
https://scholar.google.com/scholar?q=restore+marble+floor+polishing+sealing - Google Scholar Google Scholar
https://scholar.google.com/scholar?q=marble+floor+etching+acid+removal+restoration - Google Scholar Google Scholar
https://scholar.google.com/scholar?q=stone+floor+restoration+marble+grinding+honing+refinishing - https://en.wikipedia.org/wiki/Marble
- Stonemasonry
https://en.wikipedia.org/wiki/Stonemasonry - https://www.nps.gov/orgs/1739/upload/TPS-12-Mortar-Removal.pdf
- https://www.nps.gov/subjects/tps/repair.htm
- Conservation Institute | Getty
https://www.getty.edu/conservation/ - Canadian Conservation Institute – Canada.ca
https://www.canada.ca/en/conservation-institute.html - https://www.britannica.com/technology/marble