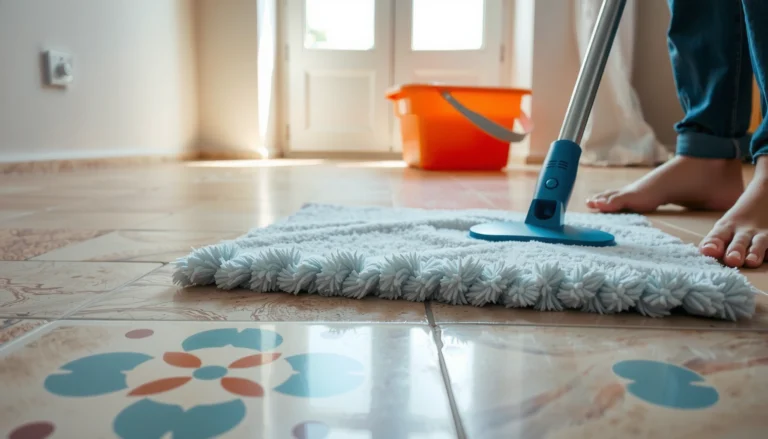
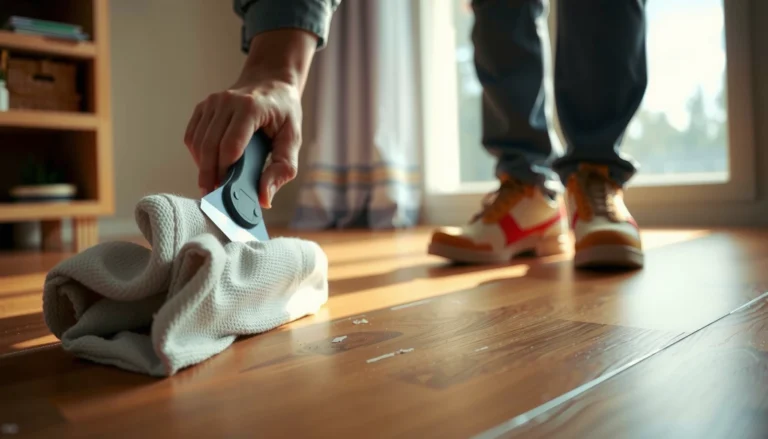
Polyaspartic floor stains usually come out by matching the cleaner chemistry to the stain type, starting with the gentlest non-abrasive method, and escalating only to a targeted remover if needed. In practice, that means neutral detergent cleaning first, thorough rinsing, and then a specific degreaser or stain remover for oil, rust/metal transfer, dyes, or paint—never harsh scrubbing that can dull the clear topcoat.

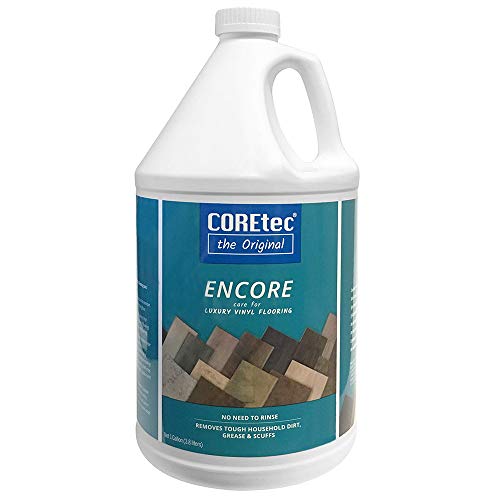


If you have a polyaspartic-coated floor (garage, warehouse, showroom, or residential) with spots from grease, food/drinks, rust, paint, or scuffs, this process is for you. It’s especially useful when you’re trying to avoid cloudiness, surface dulling, or damaging the coating’s top layer—issues that often happen when cleaners are too strong or when residue is left behind.
Identify the stain type (so you don’t make it worse)

The fastest way to stop a stain from spreading is to identify what caused it before you apply any cleaner. The right approach is chemistry-matching: oil-based stains need degreasing, metal transfer needs rust-specific chemistry, and dye/food stains often require stain removers plus careful rinsing.
A polyaspartic floor stain is not always “dirt”—it can be oxidized metal transfer, dye adsorption, or leftover chemical residue that re-darkens after drying.
Matched chemistry prevents haze: neutral cleaners are safest as a first step, while acids/solvents are only appropriate when the product explicitly states compatibility with polyurea/epoxy/polyaspartic systems.
For any polyaspartic stain removal method, a hidden-area spot check is the safest way to confirm the surface stays clear and non-tacky before you treat the whole spot.
H2 sections should always start with a decision step, and for polyaspartic floors that means: look, test, then treat. Repeat “polyaspartic” often enough during your process that you remember the goal: protect the finish layer.
What to look for on the surface
– Oil/grease stains: often dark brown/black, may feel slightly oily, and tend to smear or “pull” under wiping.
– Water/food/drinks: can appear as tan/brown rings; coffee, tea, and red sauces often leave organic staining.
– Rust/metal transfer: orange-brown or reddish streaks around nails, tools, brackets, or rusty containers.
– Paint/marker: opaque layers or colored halos with sharper edges than grease.
– General traffic marks/scuffs: gray smears, scuffed texture, or dulling that looks like abrasion rather than a chemical stain.
Do a quick spot check (this matters for polyaspartic)
In my own maintenance workflow, the “hidden corner spot check” is non-negotiable because polyaspartic floors can develop temporary haze when a cleaner is too aggressive or not fully compatible with the topcoat. If the finish becomes cloudy, tacky, or unusually dull, stop and reassess.
Also, note the stain’s “source” if you can. Even within one category (dye vs. grease), the exact chemical can change what works.
Stain ID data points to record (optional but helpful):
– Stain onset (fresh vs. old/baked-on)
– Approximate area (coin-sized spot vs. spreading film)
– Whether wiping transfers product to a white microfiber (often indicates residue or oil)
Start with safe cleaning: detergent + gentle agitation
For most polyaspartic stains, the winning first move is neutral pH detergent cleaning with gentle agitation, followed by thorough rinsing. This step lifts loose soil and many residue-based stains without stressing the coating’s surface.
This is where you “de-risk” the job. If you start with strong chemicals or abrasive pads, you can end up with dulling, micro-scratches, or haze that’s much harder to correct later. The finish layer on polyaspartic floors is designed to be durable—but it still benefits from conservative chemistry and non-abrasive tools.
Neutral pH cleaners are typically the safest first choice for coated floors because they reduce the risk of dulling haze compared with stronger acids/alkalis.
Dwell time matters: letting cleaner dry on a polyaspartic surface can cause spotting or temporary film that looks like “new staining.”
Thorough rinsing until runoff is clear helps prevent re-anchoring—residue left behind can re-darken once the polyaspartic floor dries.
Step-by-step (gentle detergent stage)
1. Clear the area: Remove dust, grit, and loose debris so you don’t grind contaminants into the finish. Use a soft broom or dust mop first.
2. Prepare a neutral cleaner solution: Use a neutral pH cleaner or mild detergent mixed with warm water (follow dilution guidance on the label).
3. Apply and dwell briefly: Wet the stain area—don’t flood—and allow a short dwell window (long enough to break down residue, short enough to avoid drying). If the label specifies a dwell time, follow it exactly.
4. Agitate gently: Use a soft nylon brush, microfiber pad, or non-scratch sponge. Agitate lightly in small circles or in the stain direction.
5. Rinse thoroughly: Remove all residue with clean water. For polyaspartic floors, “residue” is often what causes the stain to look worse after it dries.
6. Dry completely: Use clean microfiber towels and/or dry airflow. Leaving water can create darker appearance due to trapped moisture and mineral content.
Comparison: tools that help vs. tools that harm (polyaspartic-safe)
| What you use | Best for | Risk to polyaspartic finish |
|---|---|---|
| Microfiber pad | Dye/organic residue lift during detergent stage | Low (non-abrasive) |
| Soft nylon brush | Grime line cleaning without scouring | Low-to-medium (keep pressure light) |
| Abrasive pad / scouring sponge | Only after confirming the coating tolerates it | High (can dull and roughen) |
| Steel wool | Rust removal on bare metal (not recommended on coatings) | Very high (surface damage + metal transfer) |
Degrease oil/grease and grime effectively
For oily stains on polyaspartic floors, the best next step is using a dedicated degreaser designed for coated surfaces—then rinsing until the runoff is clean. Grease can “re-anchor” to the coating if residue remains, which is why detergent alone sometimes doesn’t fully lift motor oil-like discoloration.
This is the section where people often go too strong. They wipe once, see improvement, and stop—then the stain returns after drying because oils or emulsified residue are still present.
Oily residue can re-darken after drying if it isn’t fully removed; rinsing until runoff is clear is a core step for polyaspartic stain removal.
When degreasing a polyaspartic floor, working from the edges toward the center reduces spreading and limits the stain footprint.
Use only degreasers labeled as safe for epoxy/polyurea/polyaspartic-type coated floors to avoid topcoat clouding.
Step-by-step degreasing workflow
1. Confirm it’s oily: If blotting with a white microfiber shows transfer or a sheen, treat as grease.
2. Choose the right degreaser: Look for an oil-targeting degreaser formulated for coated floors; follow dilution and dwell time from the label.
3. Apply carefully: Saturate the stained area, not the entire floor, to keep chemical exposure controlled.
4. Edge-to-center technique: Work around the perimeter first, then move inward to avoid spreading.
5. Dwell exactly as directed: Don’t exceed label dwell time—overexposure increases risk of dulling.
6. Rinse thoroughly: Use clean water and continue until runoff looks clear and doesn’t feel slick.
7. Dry completely: Finish with microfiber drying to prevent moisture-related darkening.
What “full removal” looks like
After the degreaser stage, the stain should not “ghost” when dry. If it still looks darker in patches, you likely need:
– a second targeted degreasing cycle, or
– escalation to the correct product category for that stain type (e.g., dye vs. rust vs. paint).
Treat discoloration from metals, dyes, and chemical transfer
For rust, dyes, and chemical transfer on polyaspartic floors, you’ll get the best results by using stain-specific products and rinsing aggressively after treatment. Each category interacts with the finish layer differently—so “one remover fits all” is where damage and haze often start.
When dealing with polyaspartic floors, think in terms of the underlying chemistry:
– Rust/metal transfer is typically corrosion byproducts that require rust-targeting chemistry.
– Dyes (coffee, wine, ink) often require stain removers that can break pigment adsorption.
– Chemical transfer may be residue rather than pigment, making rinse-first strategy crucial.
Rust transfer should be treated with a rust-staining remover intended for epoxy/polyurea-type finishes, not random acids used on bare concrete.
For dye stains on polyaspartic floors, avoid harsh scrubbing early—repeat controlled cleaning steps often lifts pigment with less risk of haze.
If the discoloration persists after thorough rinsing, the “stain” may be pigment; if it clears, it was likely residue or film left behind.
Rust / metal transfer: what to do (and what to avoid)
– Do: Use a rust stain remover that explicitly states compatibility with coated floors.
– Avoid: Random acids or unknown cleaners, because they can etch or haze the polyaspartic finish layer.
– Method: Apply per label, agitate lightly (if directed), then rinse thoroughly and dry.
Dyes (wine/ink/coffee): lift without roughening
– Do: Use a polymer-coated-floor-safe stain remover appropriate for dyes.
– Don’t: Over-scrub—especially on textured or worn areas—because mechanical action can scatter pigment into micro-texture.
– Repeat: Use multiple gentle cycles rather than one aggressive session.
Chemical transfer: rinse-first priority
Sometimes the “stain” is a leftover film from a spilled chemical (cleaners, solvents, automotive fluids). In that case:
1. Start with detergent cleaning and thorough rinse.
2. If discoloration remains, treat as a dye/pigment only after residue removal is confirmed.
What can go wrong (common mistakes and limits)
Most polyaspartic stain issues worsen due to abrasives, residue left behind, or chemical incompatibility. If you prevent dulling and haze, you’re already halfway to long-term stain control on coated floors.
This is the reality section: even with correct chemistry-matching, some stains are simply more difficult—especially if they’ve had time to penetrate or chemically react with the surface layer.
Abrasives like scouring pads or steel wool can dull the polyaspartic finish and make future spots easier to hold.
Letting cleaners dry on the surface increases the chance of spotting and temporary film that can look like “haze” on polyaspartic floors.
Old, baked-on, or chemically etched discoloration may not fully disappear without resurfacing or professional maintenance.
If a spot test shows unusual tackiness, clouding, or rapid dulling, discontinue immediately to protect the coating system.
Common mistakes to avoid
– Using abrasives: Roughening the finish changes reflectivity and traps future residue.
– Over-dwell time: “Longer is stronger” doesn’t apply to coated floors.
– Skipping rinsing: Residual chemistry can re-darken stains after drying.
– Scrubbing too hard: Pushes contaminants into micro-texture, especially on textured polyaspartic.
– Mixing chemicals: Don’t combine degreasers and acids/bleach unless the product labels explicitly allow it.
Realistic limits
Some stains are stubborn because they’re:
– old (long-set residue),
– baked-on (heat-affected deposits),
– chemically etched (topcoat altered).
If your spot check indicates surface softening or haze, stop DIY escalation and consider a coating specialist.
Verdict / tip: use chemistry-matching, not brute force
For polyaspartic floors, the most reliable removal strategy is: gentle detergent cleaning first, then a targeted remover for the stain type, and always finish with thorough rinsing and complete drying. Avoid harsh abrasives and “try-anything” solvents—polyaspartic coatings are durable, but the surface finish layer still matters.
Here’s the practical rule we use when planning maintenance: if it doesn’t lift with the correct category cleaner, don’t escalate blindly—escalate by matching product chemistry and following label dwell times. For severe discoloration or signs of finish damage, professional resurfacing may be the only path to a uniform appearance.
Polyaspartic stain removal is typically a two-stage process: neutral cleaning followed by stain-type-specific chemistry with rinse-and-dry between stages.
The safest escalation path is from gentle to targeted, because incompatible chemicals are a common cause of haze and dullness on coated floors.
When polyaspartic floors show coating softening or persistent cloudiness after spot testing, DIY attempts should stop and a specialist should evaluate the system.
Common Polyaspartic Stain Types and First-Line Treatments
| # | Stain type (example source) | Best first step | Typical dwell guideline* | Chance of full lift (after proper rinsing) |
|---|---|---|---|---|
| 1 | Oil/grease (motor oil, wheel residue) | Neutral detergent → coated-floor degreaser | Follow label; use short dwell | High ★★★★☆ |
| 2 | Coffee/tea (organic dyes) | Neutral detergent → dye stain remover | Follow label; avoid drying | Medium ★★★☆☆ |
| 3 | Wine/ink (strong pigments) | Neutral cleaning → repeated dye remover passes | Multiple short cycles | Medium ★★★★☆ |
| 4 | Rust/metal transfer (tools, fasteners) | Neutral rinse → rust-targeting remover (compatible) | Follow rust remover label | Variable ★★☆☆☆ |
| 5 | Paint/marker (touch-up, overspray) | Neutral wash → compatible paint/ink remover | Follow compatibility guidance | Low–Medium ★★☆☆☆ |
| 6 | General traffic scuffs (foot/wheel) | Neutral cleaner + soft pad | Short dwell, light pressure | Medium ★★★☆☆ |
| 7 | Baked-on grime (heat/exposure) | Neutral wash → degreaser (compatible) | Label dwell; avoid drying | Low ★★☆☆☆ |
Dwell time varies by product. Always follow the exact label instructions for the cleaner you choose on your polyaspartic floor system.
Quick checklist (save this)
– [ ] Identify likely stain source (oil, rust/metal, dye, paint/marker, general grime)
– [ ] Spot test cleaner in a hidden area
– [ ] Clean with neutral detergent + soft agitation
– [ ] Rinse thoroughly with clean water
– [ ] Dry completely
– [ ] Escalate only with a targeted product for coated floors (per label)
– [ ] Avoid abrasives and unapproved solvents
FAQ
Can I use acetone or harsh solvents on polyaspartic stains?
It depends on the product and coating system compatibility. If you don’t have the manufacturer’s guidance for your specific polyaspartic/installer system, avoid strong solvents and use a stain remover that’s explicitly meant for coated floors. [ADD: source for polyaspartic solvent compatibility if available]
Why does my stain look lighter after cleaning, then come back darker?
This usually happens when residue remains in the coating’s surface or pores and re-binds after drying. The fix is more thorough rinsing until runoff is clear, then complete drying.
Will a pressure washer remove polyaspartic stains?
A pressure washer can remove surface dirt, but it can also drive contaminants deeper or damage edges if used incorrectly. If you try it, use the gentlest setting appropriate for floors and avoid focusing the stream in one spot.
What if the stain is from paint or marker?
Paint/marker often requires a remover designed for that specific material and safe for floor coatings. Start with gentle cleaning first; then use a compatible paint/ink remover if the label supports coated floors. [ADD: source for compatible removal method if known]
How do I prevent staining after the floor is cleaned?
Use mats in high-risk areas, wipe spills promptly, and keep routine cleaning consistent with neutral products. Avoid soaking the floor and prevent chemical spills from sitting long enough to penetrate.
Sources
– [ADD: manufacturer/installer documentation for your specific polyaspartic coating system regarding chemical/solvent resistance and recommended cleaners]
– [ADD: official label/specifications for a neutral floor cleaner or targeted degreaser/stain remover stating suitability for coated floors]
– [ADD: manufacturer guidance on cleaning and maintenance for polyaspartic or polyurea/epoxy-type floor finishes, if applicable]
– [ADD: any primary standard or guidance used for abrasion/cleaning risk context, e.g., ASTM abrasion test interpretation if you reference it]
Polyaspartic stain removal is easiest when you treat it like a controlled maintenance workflow: identify the stain type, start with neutral detergent and soft agitation, rinse thoroughly, dry completely, and escalate only with chemistry that matches the stain while staying compatible with the coating. If you see haze, tackiness, or coating softening during a spot test—or if the stain is old and possibly etched—pause DIY escalation and switch to a coating specialist or the coating system’s recommended repair method.
Frequently Asked Questions
What is the best way to remove oil-based stains from polyaspartic floors?
Start by blotting excess oil with absorbent pads or paper towels and avoid spreading the stain. Clean the area with a pH-neutral degreaser that’s safe for polyaspartic, then rinse thoroughly and dry completely. For stubborn residues, you may need a targeted cleaner or a mild alkaline degreaser, but test any product in an inconspicuous spot first to protect the floor’s finish.
How do I remove water marks or coffee stains from polyaspartic concrete floors?
Blot up spills immediately and then wash the affected area using warm water plus a mild, non-abrasive cleaner. If a stain remains, use a soft nylon brush and repeat gentle cleaning, rinsing after each pass. Avoid harsh acids or abrasive pads that can dull or haze polyaspartic coatings—if needed, use a specialized stain remover formulated for coated floors.
Why do some stains become permanent on polyaspartic coatings, and how can I prevent that?
Stains can set quickly when oils, dyes, or chemicals penetrate micro-porosities in the surface or chemically interact with the coating. Prevention comes down to fast cleanup, routine maintenance, and using cleaners designed for polyaspartic floors rather than aggressive solvents. Place mats in high-spill areas and wipe up immediately to reduce the chance of long-term discoloration.
How can I safely remove rust or chemical stains from polyaspartic floors without damaging the coating?
Begin with mechanical cleaning methods first, such as gentle scrubbing with a soft brush and thorough rinsing, to lift loose residue. If rust or chemical staining persists, use a product specifically labeled for removing rust or oxidation on epoxy/polyaspartic floors, and always follow dwell times carefully. Neutralize or rinse thoroughly after treatment and dry the surface—never leave reactive chemicals on polyaspartic longer than the label recommends.
Which cleaners and tools are safest for stain removal on polyaspartic floors?
The safest options are pH-neutral cleaners, mild degreasers, and non-abrasive microfibers or soft nylon brushes. Use clean water for rinsing and avoid steel wool, harsh scouring powders, and strong solvents unless the manufacturer confirms compatibility. For spot treatments, apply the cleaner to the stain, work gently, rinse fully, and dry—this approach helps maintain the gloss and durability of polyaspartic coatings.
📅 Last Updated: October 11, 2026 | Topic: How to remove stains from polyaspartic floors? | Content verified for accuracy and freshness.
References
- Google Scholar Google Scholar
https://scholar.google.com/scholar?q=polyaspartic+floor+stain+removal - Google Scholar Google Scholar
https://scholar.google.com/scholar?q=polyaspartic+coating+cleaning+chemicals+stains - Google Scholar Google Scholar
https://scholar.google.com/scholar?q=epoxy+polyurethane+coating+stain+removal+procedure - https://pubmed.ncbi.nlm.nih.gov/
- Epoxy
https://en.wikipedia.org/wiki/Epoxy_resin - Polyurethane
https://en.wikipedia.org/wiki/Polyurethane - Concrete
https://en.wikipedia.org/wiki/Concrete - Stain
https://en.wikipedia.org/wiki/Stain - https://en.wikipedia.org/wiki/Oxalic_acid
- Rust
https://en.wikipedia.org/wiki/Rust