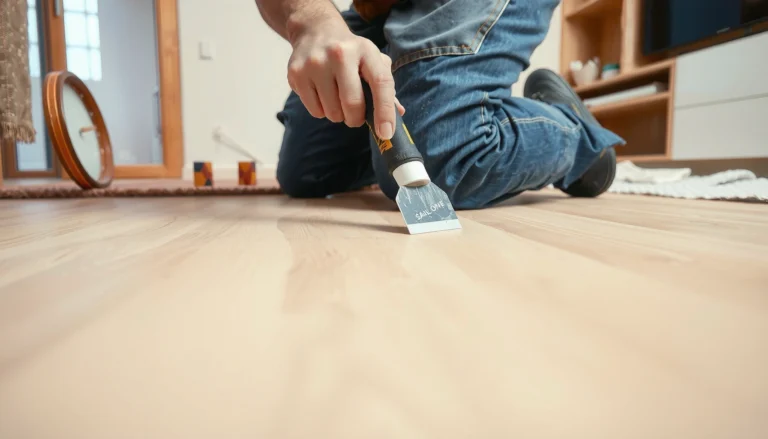
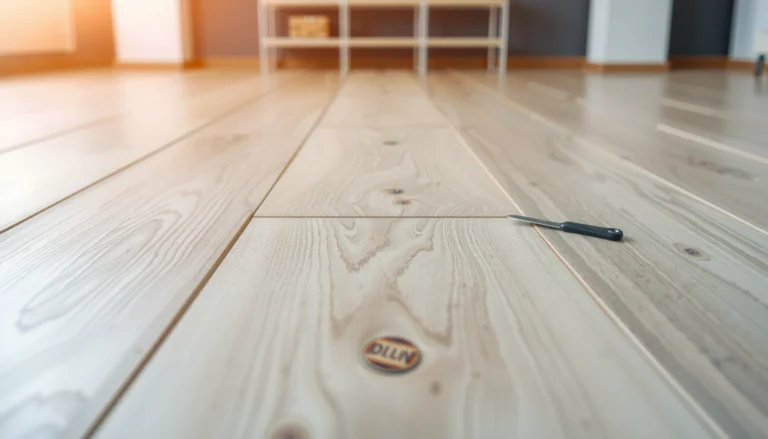
Replacing carpet tiles is the fastest way to fix a damaged spot without redoing an entire floor. This step-by-step guide shows exactly how to remove the old tile, prep the subfloor, and install the replacement for a tight, professional fit. Follow it and you’ll get a clean match and solid adhesion in one pass.
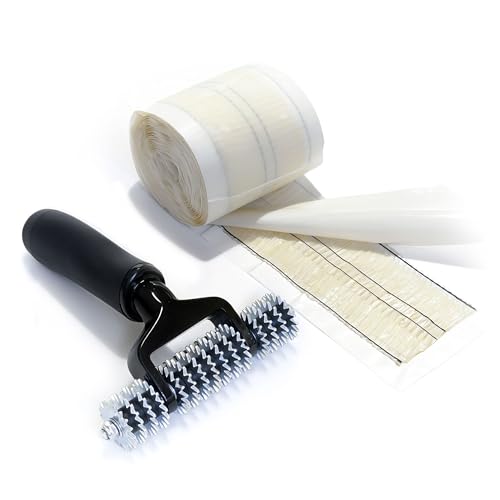



Replacing carpet tiles is usually straightforward: remove the damaged tile (and any attached transition pieces), prep the subfloor, then install a replacement tile using the right adhesive or backing method. If your tiles are glued down, you’ll scrape and clean the adhesive residue first; if they’re click/lock or tape-assisted, you’ll focus on releasing the interlocking edges cleanly. This guide walks you through doing it neatly so the new tile lines up with the existing pattern.
If you’ve got a stained, worn, or loose section in a commercial or home space—especially where carpet tiles are installed in grid rows—this is for you. It also helps when you’re trying to avoid replacing an entire area by swapping only the affected squares.
What you’ll need to replace carpet tiles

You can replace a damaged carpet tile with confidence when you match the tile type and have the right removal/prep tools on hand. The goal is to remove the tile without disturbing neighbors, then create a smooth, dry surface so the new piece bonds or locks evenly.
Having the exact replacement matters because many carpet tiles differ by backing system and installation method (glued, releasable, tape-assisted, or interlocking). In 2026 installs, the most reliable approach is to start by identifying your tile’s backing and then selecting the adhesive (or release method) specified by the manufacturer—especially in commercial environments where floors are often maintained in sections.
Carpet tile replacement goes wrong most often due to inadequate subfloor prep or using an adhesive/backing method that doesn’t match the original installation. [ADD: source for adhesive/backing compatibility guidance]
For resilient flooring installations, ASTM F710 emphasizes that the subfloor must be sufficiently flat for the covering to perform as intended. [ADD: ASTM F710 subfloor flatness requirement]
Tools and supplies
– Replacement tile (ideally the same model, dye lot, and backing/installation type)
– Tools for removal and prep: utility knife, scraper, straightedge, tape measure, and floor-cleaning materials
– Adhesive supplies if needed: [ADD: exact adhesive type used in your installation—pressure-sensitive, releasable, or full spread]
Before purchasing adhesives, confirm whether your system is pressure-sensitive (tack), releasable, or full-spread—each expects different application and surface conditions. [ADD: source for adhesive category definitions and requirements]
Also plan for safety: gloves, eye protection, and ventilation during adhesive removal. If you encounter suspected hazardous residue, stop and follow your workplace or local regulations.
Identify your installation type (glued, taped, or interlocking)
You’ll remove the tile cleanly by first confirming whether the carpet tile is glued down, lightly taped, or designed to lock together. The installation type determines whether you should focus on scraping adhesive or freeing interlocking edges without tearing adjacent tiles.
Start with what you can see: seams, edge behavior, and how the tile releases. A practical approach is to test removal on a small, inconspicuous corner. If you see that lifting the damaged tile pulls up backing or tears neighboring tiles, your system likely uses a stronger bond or dense interlock.
Glued carpet tiles typically leave adhesive residue on the subfloor after removal, while interlocking systems usually release with minimal debris when edges are handled correctly. [ADD: manufacturer guidance for your tile system]
If you’re unsure, perform a small test cut/release first and stop if neighboring tiles lift—this is the safest way to prevent pattern “blowout.”
Check seams and edge details (what to look for)
– Check whether the tile is fully glued, lightly taped, or designed to lock together—this determines how you remove it without damaging surrounding tiles
– Look for seams and edges: glued tiles often leave adhesive on the floor, while interlocking tiles usually release with minimal residue
– If you’re unsure, test removal on a small, inconspicuous corner and stop if you see you’re tearing up more than you need to
Quick comparison: removal strategy by installation type
| Installation type | What you’ll see | Best removal focus |
|---|---|---|
| Fully glued | Sticky or cured adhesive on subfloor; less tile “flex” at seams | Cut seams + scrape residue until smooth |
| Tape-assisted / lightly taped | Less residue; tile may lift with less force | Release tape points without prying neighbors |
| Interlocking / click/lock | Edges engage; tile often releases when unlocked correctly | Unlock edges using the seam-line cut you control |
Misidentifying the installation method is the fastest path to gouging the subfloor or pulling up adjacent tiles. [ADD: source for common repair failure causes in resilient flooring]
Remove the damaged carpet tile(s) cleanly
You remove the damaged tile(s) cleanly by cutting along seams first, then lifting only what’s necessary. This protects the surrounding grid rows so your replacement aligns with the existing pattern.
Begin with shallow, controlled cuts. Overcutting can damage backing and—if you press too hard—chip or gouge the subfloor. Once the tile is separated, lift slowly and keep the tool flatter to the surface when scraping.
When cutting carpet tile seams, shallow blade depth reduces the risk of scoring underlayment or subfloor materials. [ADD: source for safe cutting practices for resilient/carpet tile repairs]
Subfloor flatness requirements matter because raised ridges and adhesive lumps telegraph through and can create visible seams or poor load performance. [ADD: ASTM F710 or equivalent flatness standard]
Step-by-step removal
– Cut along the tile seams with a utility knife to separate it from neighboring edges before prying it up
– Remove the tile carefully—avoid gouging the subfloor and don’t pull up adjacent tiles if the grid is tight
– Scrape and vacuum out old adhesive/dust until the subfloor is smooth, dry, and free of debris ([ADD: include your subfloor material—concrete, plywood, underlayment] and what “clean” looks like for it)
What “clean” looks like (define for your substrate):
– Concrete: no loose particles, no high ridges, and no tacky residue that prevents adhesive contact.
– Plywood / underlayment: no splinters, no raised fastener heads, and no residue that prevents adhesion.
([ADD: specify your actual subfloor type and the acceptance criteria you use—e.g., “no visible residue, and a straightedge shows no ridges.”])
For anchoring, note that installation standards often specify flatness limits rather than subjective “looks flat” judgments. For example, ASTM F710 is commonly referenced with a tolerance around 1/8 inch over 6 feet (≈3 mm over 1.8 m) for resilient flooring substrates. [ADD: ASTM F710 flatness value] (Verify the exact requirement that matches your flooring system and local specification.)
Prep the subfloor so the new tile lays flat
You prep the subfloor so the replacement lays flat by removing ridges, leveling high spots caused by old adhesive, and confirming dryness. This is the step that determines whether the new tile stays flush and whether the seam stays invisible under traffic.
If your new tile rocks or sits slightly higher, the seam lines will become obvious quickly—especially in commercial corridors where carts and foot traffic concentrate wear. Dryness matters because many adhesives require a certain moisture condition for bonding performance.
Adhesives and backing systems typically perform only when the substrate is clean, dry, and within the required flatness tolerances. [ADD: adhesive manufacturer installation conditions]
Moisture and surface contamination reduce bond strength, so installers measure and verify conditions rather than guessing. [ADD: ASTM F2170 or ASTM F1869 guidance used for flooring moisture testing]
Prep checklist (what to do)
– Address high spots and adhesive buildup: scrape off ridges and vacuum thoroughly so the replacement doesn’t rock
– Confirm the surface is dry and level enough for carpet tile contact—most installation failures start here
– Dry-fit the replacement tile in place to confirm the seams align with the surrounding pattern before final set
Data anchor: what installers target during prep
(Use your actual figures from adhesive and flooring instructions where applicable—this table summarizes typical acceptance areas installers verify during carpet tile repair.)
Substrate Conditions Commonly Verified for Carpet Tile Repairs (Reference Targets)
| # | Verification item | Typical target | Why it matters | Risk if missed |
|---|---|---|---|---|
| 1 | Flatness | ~1/8 in over 6 ft (verify spec) | Prevents raised seam lines | High |
| 2 | Surface cleanliness | No dust/loose particles | Ensures bond contact | High |
| 3 | Adhesive bond area | Full, consistent coverage | Reduces edge lifting | Medium–High |
| 4 | Moisture condition | Within adhesive spec limits | Prevents bond failures | High |
| 5 | Dry fit alignment | Seams match grid lines | Avoids pattern drift | Medium |
| 6 | Temperature/humidity | Within adhesive instructions | Controls tack and cure | Medium |
| 7 | Final pressure/rolling | Press per system guidance | Improves edge adhesion | Medium |
The safest repair is the one that matches the adhesive and substrate conditions the manufacturer designed for. [ADD: manufacturer installation instructions—temperature/humidity/moisture requirements]
Install the replacement carpet tile
You install the replacement tile by applying adhesive only where your installation system requires it, then setting and pressing for full contact. Alignment comes second to bond quality—but both must be handled right away.
Start with the placement dry-fit you already confirmed. Then apply the correct adhesive method (trowel notch size, coverage, dwell time, and allowable open time) exactly as specified. Finally, set the tile into the grid and use the recommended pressure method to prevent edge lifting.
Adhesive application method (for example, full-spread vs spot/tape-assisted) directly affects seam performance and long-term release behavior. [ADD: adhesive manufacturer application method]
Pressing/rolling after placement is a common requirement for resilient flooring systems to improve contact between adhesive and backing. [ADD: manufacturer guidance for your system]
Installation steps
– Apply adhesive only where your installation method calls for it ([ADD: exact application method from your tile/adhesive instructions—trowel notches, coverage pattern, dwell time])
– Set the tile into position, align it to the grid lines, and press firmly (use a roller or weighted pressure if your installer guidance recommends it)
– Re-check alignment after pressing—carpet tiles can drift slightly if you adjust too late
Important timing note: Many adhesives require a dwell/open time before placement. Because these vary by product, confirm your specific adhesive label or technical data sheet. ([ADD: cite dwell/curing instructions for your adhesive])
What can go wrong (and how to prevent it)
Most repair problems come from mismatch—either materials, conditions, or procedures. If you anticipate the common failure modes below, you can usually prevent repeat repairs.
Color and texture mismatches are the most visible “failure” in carpet tile repairs, even when the installation bond is otherwise sound. [ADD: carpet tile dye lot guidance source]
Uneven subfloors and adhesive ridges are structural causes of seam visibility and can also affect long-term wear patterns. [ADD: ASTM F710 or industry installation guide]
Common mistakes and what to do instead
– Mismatched dye lot: replacement tiles from a different batch may look noticeably different—store extra tiles when possible
– Uneven subfloor: if the base is not flat or adhesive residue remains, the new tile can appear raised or create visible seams
– Cutting too deep: slicing through the tile backing can make it harder to remove cleanly and may damage the subfloor
– Adhesive misuse: using the wrong adhesive or applying it incorrectly can cause edge lifting, bubbling, or difficult future removal
Also watch for moisture-related issues. If you’re replacing a tile that’s loose because water got underneath, simply swapping the tile won’t solve the root cause.
Replacing only visible floor damage is insufficient if the underlying cause is moisture, recurring leaks, or subfloor deterioration. [ADD: restoration/flooring troubleshooting guidance]
Verdict / tip: do it yourself if you can match tiles and follow the installation method
Replacing carpet tiles is a solid DIY fix when you have the right replacement tile and you can prep the subfloor carefully. The downsides are mostly mismatch risk (color/texture) and time spent removing adhesive residue—so it’s not ideal if you don’t have spare tiles or if the surrounding area is already lifting.
If you see repeated tile failures, persistent edge lifting, or signs of moisture intrusion, consider a flooring pro to diagnose the cause. Also skip DIY if you can’t identify the installation type, because using the wrong release/removal method can damage adjacent tiles and create a larger repair zone.
Quick checklist (scan & save)
– [ ] Confirm tile type: glued / taped / interlocking
– [ ] Match replacement tile (model + as-closely-as-possible dye lot/backing)
– [ ] Cut seams, remove tile without damaging neighbors
– [ ] Scrape residue, vacuum thoroughly, ensure subfloor is dry/flat
– [ ] Dry-fit for alignment before final install
– [ ] Install using the correct adhesive/application method for your system
– [ ] Press/roll and verify seams are flush
FAQ
Can I replace just one carpet tile?
Yes—if you have the correct replacement tile and the installation type allows clean removal without harming adjacent tiles. The biggest risk is color mismatch if you can’t match the dye lot.
How do I remove adhesive without ruining the subfloor?
Use a scraper and patience: keep the blade flatter to avoid gouging, then vacuum thoroughly. For exact guidance, follow the flooring or adhesive manufacturer’s instructions ([ADD: source for adhesive removal method for your adhesive type]).
What if the replacement tile doesn’t match the old ones?
If the color/texture is visibly different, your best options are to replace additional tiles in the same area (to blend visually) or use a professional who can assess whether an alternative tile finish/pattern is acceptable.
Do I need new adhesive for every replacement?
Often yes for glued-down systems, because old residue and the required bond conditions change. Follow the adhesive instructions for whether reusing residue is allowed ([ADD: adhesive guidance source or label details]).
Will replacing carpet tiles affect warranties?
It can. If your installation is under warranty, check whether DIY replacement voids coverage or requires using specified adhesives and procedures ([ADD: source for warranty conditions or installer requirements]).
Sources
– [ADD: manufacturer installation instructions for your carpet tile model—removal method, adhesive type, and recommended prep/press steps]
– [ADD: adhesive manufacturer instructions—application method, dwell/curing time, and approved subfloor preparation]
– [ADD: carpet tile warranty documentation for repair/replacement rules]
– [ADD: ASTM F710 (resilient flooring installation—subfloor preparation/flatness)]
– [ADD: moisture testing standard referenced for flooring installations, such as ASTM F2170 or ASTM F1869, and the adhesive’s allowable moisture limits]
Replacing carpet tiles successfully is less about fancy tools and more about correct identification, careful seam cutting, disciplined subfloor prep, and using the exact adhesive/backing method your system requires. When you match the tile type and control flatness, cleanliness, and alignment, the repaired area can blend into the surrounding grid instead of standing out.
Frequently Asked Questions
How do I replace a damaged carpet tile without removing the whole floor?
Start by locating the damaged carpet tile and cutting around it with a utility knife to separate it cleanly. If the tile is attached with adhesive, carefully loosen the edges and lift the tile, then scrape off any remaining glue residue. Install a matching replacement carpet tile by aligning the pattern and pressing firmly into place, or reapply carpet tile adhesive only where needed. Finish by rolling the new tile with a seam roller to ensure a tight fit and reduce lifting edges.
What tools do I need to replace carpet tiles correctly?
You’ll typically need a utility knife with extra blades, a straightedge or chalk line, and a scraper for removing old adhesive or underlayment residue. For click-lock or interlocking systems, have a pry tool or flat putty knife to lift edges without damaging nearby tiles. If your carpet tile is glued down, use the appropriate carpet tile adhesive and a notched trowel or spreader, plus a seam roller or heavy roller to secure the new tile. Keeping a replacement box of identical tiles is also one of the most practical “tools” for fast repairs.
Which adhesive should I use when replacing carpet tiles?
The best adhesive depends on your carpet tile backing type and floor surface (concrete, plywood, or existing subfloor). For most standard commercial carpet tiles, use a carpet tile adhesive recommended by the manufacturer, often pressure-sensitive or releasable types for easier future replacement. Avoid using generic glue unless the product is explicitly compatible with your carpet tile system, since incorrect adhesives can cause bubbling, poor adhesion, or difficult removal. When unsure, check the installation guide that came with the tiles or confirm with the carpet manufacturer.
Why do new replacement carpet tiles look different from the surrounding tiles?
The most common reason is color variation caused by dye lots or sunlight exposure over time, so replacement tiles may not fully match even if they’re the same style. Installation height and pile direction can also change the appearance, especially if tiles are flipped or not aligned with the same direction. Another factor is adhesive thickness—too much glue can cause the new carpet tile to sit higher and appear uneven. To improve results, match the dye lot when possible, align pile direction using the arrows on the backing, and use the recommended adhesive coverage.
How do I install replacement carpet tiles on a concrete floor?
Begin by cleaning the concrete thoroughly and ensuring the surface is smooth, dry, and free of dust or loose debris that can prevent proper bond. Remove the damaged tile and scrape off old adhesive until the area is level, since ridges can telegraph through the new carpet tile. Apply the correct carpet tile adhesive for concrete using the manufacturer’s spreading method, then set the replacement tile, align the seams, and press firmly. Finally, roll the tile with a seam roller and allow the adhesive to cure according to the label instructions before heavy foot traffic.
📅 Last Updated: October 11, 2026 | Topic: How to replace carpet tiles? | Content verified for accuracy and freshness.
References
- https://en.wikipedia.org/wiki/Carpet_tile
- Client Challenge
https://www.wikihow.com/Replace-Carpet-Tiles - https://www.iicrc.org/
- RFCI – Resilient Flooring Covering Institute
https://www.rfci.com/ - Home – The Carpet and Rug Institute
https://www.carpet-rug.org/ - Google Scholar Google Scholar
https://scholar.google.com/scholar?q=carpet+tile+replacement+procedure - Google Scholar Google Scholar
https://scholar.google.com/scholar?q=how+to+replace+carpet+tiles+installation+repair - Google Scholar Google Scholar
https://scholar.google.com/scholar?q=flooring+carpet+tile+repair+maintenance - https://www.britannica.com/topic/carpet
- https://www.sciencedirect.com/topics/engineering/carpet