
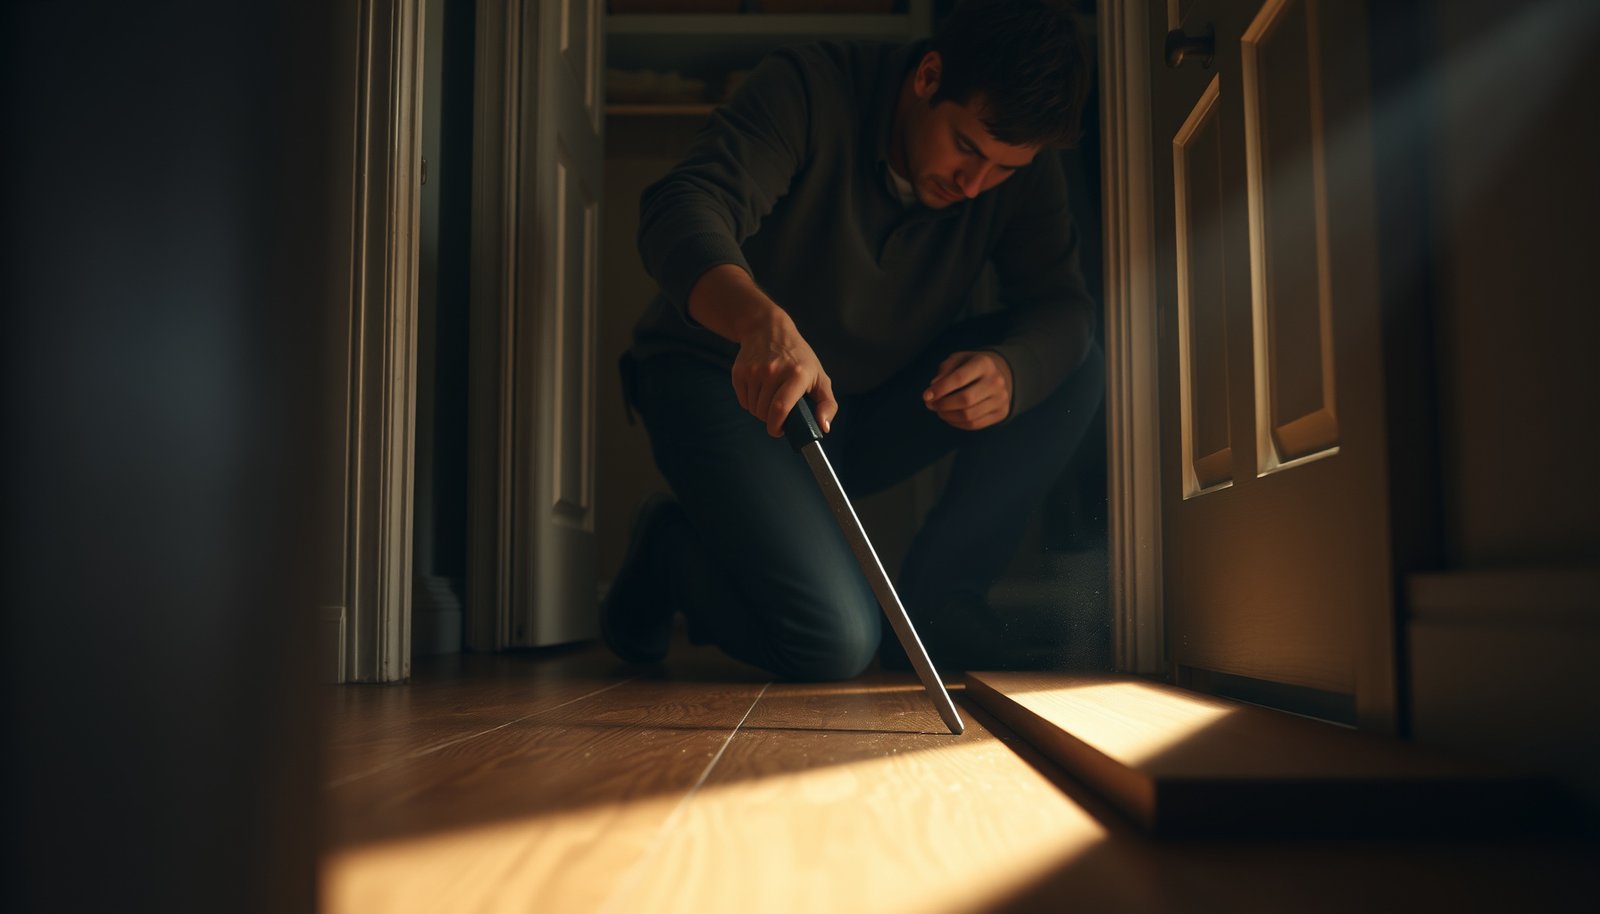

Want to remove hardwood floors from a closet without damage or wasted effort? This step-by-step guide walks you through the fastest, safest way to pry, cut, and lift the planks while keeping subfloor cleanup manageable. You’ll learn the right tools to use, how to handle nail patterns and trim, and how to leave the closet ready for what comes next.
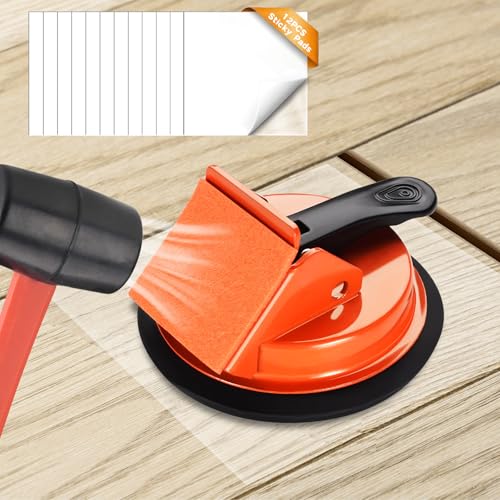

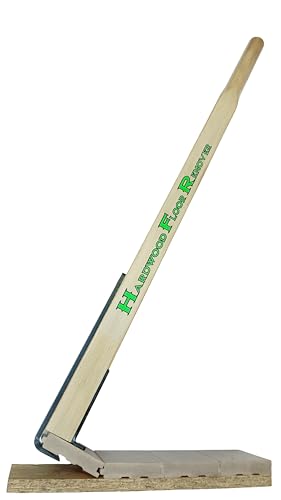

To remove hardwood floors from a closet with minimal damage, protect the subfloor first and work boards loose in the right order—trim first, then flooring boards. Removing hardwood floors from a closet is mostly about protecting the subfloor and working the boards loose in the right order (trim first, then boards). If your closet has nail- or staple-down hardwood, you’ll typically pry from the edge, cut where needed, and pull fasteners carefully rather than forcing planks up. In this guide, you’ll learn how to identify the floor type, disconnect trims, and remove boards with minimal damage.
Removing hardwood floors from a closet matters because closets are compact, often built around tight door casing, and usually have less visual “forgiveness” when you re-finish or replace subfloor. This is for homeowners tackling a closet demo themselves—especially when you want to reuse the space afterward (new subfloor, new flooring, or repairs). It’s also useful if you’re not sure whether the hardwood is glued, nailed, or floating, since the removal method changes.
Prepare the closet and gather the right tools
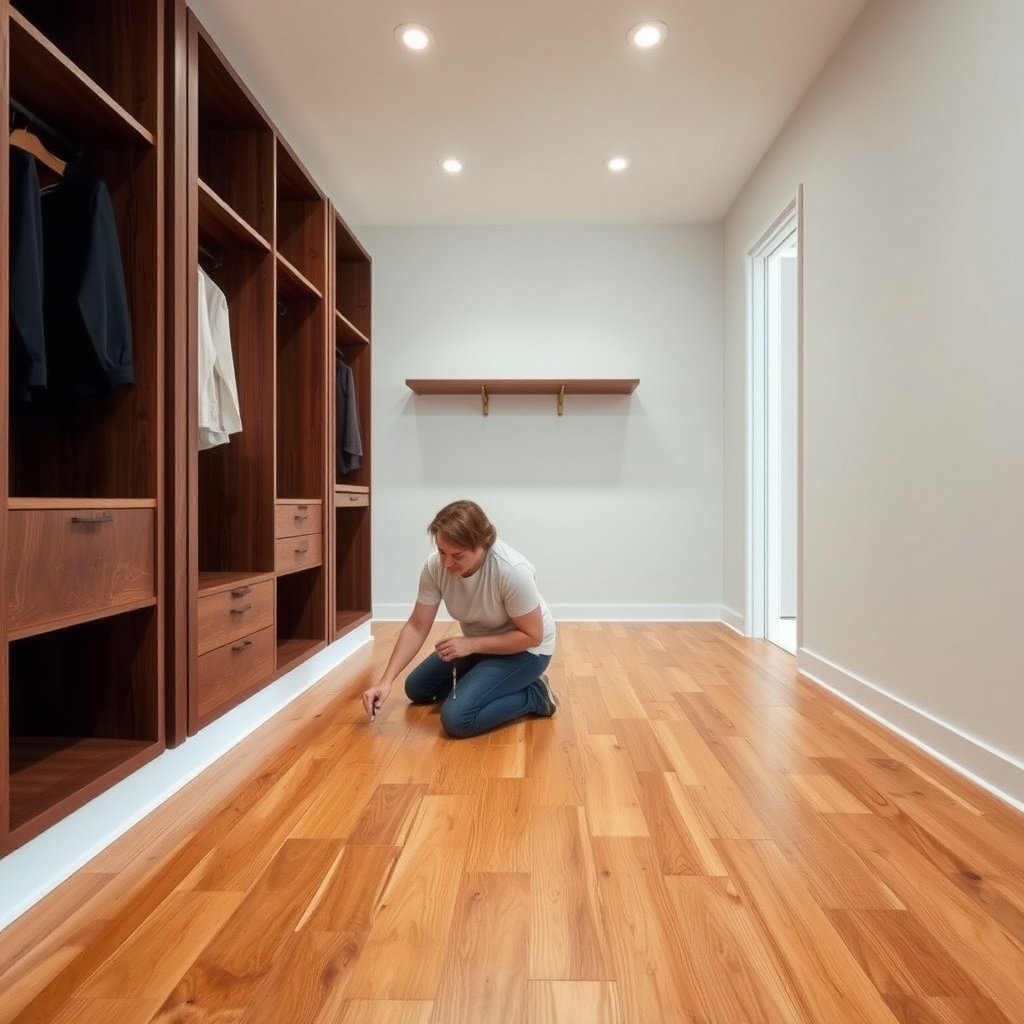
The quickest path to a clean removal is to control dust, protect adjacent finishes, and set up leverage tools before you touch the boards.
Before you pry anything up, treat the closet like a contained demolition zone. Clear the closet completely so you can access the full perimeter and start from the easiest edge. Then protect nearby surfaces with painter’s tape and plastic sheeting—especially drywall edges, baseboards, and any shelving brackets you’re trying to keep.
“Even careful hardwood removal produces fine dust; a HEPA-filtered vacuum is the practical baseline for cleanup and re-install readiness.”
“Removing trim/casing first reduces the chance of cracking drywall edges and splintering the first row of boards.”
“According to OSHA’s respirable crystalline silica standard (2016), the 8-hour PEL is 50 µg/m³, reinforcing why dust control matters during demolition.”
According to OSHA 29 CFR 1910.1053 (2016 silica rule), the respirable crystalline silica PEL is 50 µg/m³ for an 8-hour TWA (final rule issued in 2016). While hardwood isn’t stone, cutting and scraping can still generate hazardous dust mixtures, so dust control remains a core safety step as you work.
Use PPE and dust controls that match the task
Hardwood demolition is not just “wood dust on the floor.” When you cut caulk lines, trim fasteners, or scrape adhesive, you can create airborne particles that linger. As of 2026, many homeowners still underestimate how quickly dust settles into baseboard edges and HVAC returns during a closet demo—plan your dust barrier before the first pry bar swing.
For filtration targets, use particulate respirator guidance from NIOSH. According to NIOSH particulate respirator filter efficiency definitions, N95-type filtering facepieces are rated for at least 95% filtration efficiency; higher classes provide higher efficiency (see the table below).
NIOSH Particulate Filter Classes Used During Wood-Dust Cleanup
| # | NIOSH filter class | Minimum efficiency (≥% @ 0.3 µm) | Oil resistance | Protection rating |
|---|---|---|---|---|
| 1 | N95 | 95% | Not oil-resistant | ★★☆☆☆ |
| 2 | R95 | 95% | Oil-resistant | ★★☆☆☆ |
| 3 | P95 | 95% | Oil-proof | ★★☆☆☆ |
| 4 | N99 | 99% | Not oil-resistant | ★★★★☆ |
| 5 | P99 | 99% | Oil-proof | ★★★★☆ |
| 6 | N100 | 99.97% | Not oil-resistant | ★★★★★ |
| 7 | P100 | 99.97% | Oil-proof | ★★★★★ |
“According to EPA guidance on HEPA filtration, HEPA systems target very small particles (commonly cited as 0.3 microns) with 99.97% capture efficiency.”
According to U.S. EPA guidance on HEPA filtration, HEPA systems are commonly described as achieving 99.97% particle capture efficiency at 0.3 microns (EPA guidance describes the standard benchmark used for HEPA media).
What tools you’ll actually use
– Clear the closet completely and protect nearby surfaces with painter’s tape and plastic sheeting.
– Use a pry bar (flat), hammer, pry pads or scrap wood for leverage, and a utility knife/multi-tool if you need to cut caulk or underlayment edges.
– Plan for dust: even with careful removal, hardwood demolition creates fine debris—use a shop vac with dust bag/filter if possible.
Identify how the hardwood is installed (nail-down, glued, or floating)
The right first decision is to identify the installation method, because nail-down, glue-down, and floating hardwood each require different “release” techniques.
Start at the closet entrance and edges. Look for exposed nails or staples, underlayment seams, or any board patterns that indicate locking tongues. Because closets are enclosed, you often have fewer transitions—meaning clues near door casing and adjacent hallway flooring matter more than you’d expect.
“Nail-down and staple-down hardwood typically shows fastener points along the face or tongue area, so boards will lift only after you remove or loosen those fasteners.”
“Floating/click-lock floors are designed to disengage mechanically; if you don’t remove the perimeter trim, the boards often can’t float free.”
Nail- or staple-down: expect controlled fastener removal
– Nail- or staple-down: boards are usually fastened through the face or tongue area—expect to remove nails/staples as you lift.
Floating/click-lock: perimeter access is everything
– Floating/click-lock: boards often pop up after you remove base/trim; glued-down will require cutting and more patience.
If you’re unsure, test in a hidden area first (like behind a shelf) before committing to the whole closet.
Quick “what to try first” comparison
Instead of guessing, match the method to what you see:
- If you see metal fasteners near board edges:
- Plan for nail/staple removal as boards lift; don’t pull hard on the first row.
- If boards resist and the seam won’t open after trim removal:
- Assume hidden glue or adhesive; cut along seams before prying.
- If boards lift once trim is off:
- Likely click-lock/floating; release boards from the perimeter and proceed row-by-row.
Terminology that matters
“Tongue-and-groove” refers to the interlocking edge profiles on many solid hardwood boards. If you pry directly against the tongue, you can splinter it even when the floor isn’t glued—so identification isn’t just about glue vs nails; it’s also about where you apply force.
Remove trim and break the seal before prying boards
The cleanest removal starts by disconnecting the perimeter—trim, caulk, and paint lines—so the floor has room to release without tearing drywall or casing.
Closets usually have a door casing/base trim line that holds the edges of the hardwood in place or traps expansion space. If you pry before cutting that seal, the first row often cracks at the wall line even when everything is nail-down.
“Cutting caulk/paint lines before prying prevents drywall paper and joint compound from delaminating.”
“Removing the casing/base trim first gives you a controlled starting point for the first row, reducing edge blowout.”
– Remove the closet door casing/base trim first (or whatever borders the floor) so you can lift the first row without cracking the edges.
– Cut through caulk or paint lines where trim meets the floor/wall (utility knife or multi-tool helps) to prevent drywall damage.
– Start lifting from the easiest edge—usually near the closet opening or where boards are already separated—so boards don’t wedge or splinter.
Why “seal breaking” changes outcomes
Even floors that are mechanically fastened can be “sealed” at the perimeter by paint, caulk, or adhesive residue left from underlayment. In 2026, many closet renovations still reuse older trim pieces, and the fastest way to preserve them is to cut through the bonded perimeter first, then lift.
Lift boards and pull fasteners with minimal damage
The best way to preserve boards (or at least avoid major subfloor gouges) is to lift slowly, use a pry pad, and free hidden glue/fasteners by cutting seams instead of forcing planks.
Work incrementally. Closets limit your leverage, so the temptation is to “get it over with” by pulling harder. That usually leads to split tongues, bent nails, or gouged subfloor divots that you then have to repair before reinstalling underlayment.
“Using a scrap block or pry pad under a pry bar spreads load and reduces chipping at the board edges.”
“If a nail-down floor won’t lift after perimeter trim removal, hidden glue is often the cause—cut seams before prying.”
– Use the pry bar with a scrap block/pry pad to distribute force and reduce chipping; work slowly and alternate pressure to avoid splitting tongues.
– For nail-down/staple-down floors, pull fasteners as you go (a nail puller or pliers can help), and keep your pry strokes controlled to avoid gouging the subfloor.
– If boards resist, don’t yank—cut along seams/edges with a multi-tool or utility knife to free hidden glue or fasteners.
A practical release sequence (works for most closets)
1. Start at the accessible perimeter edge (door side often works best).
2. Lift just enough to expose the next fastener or separation line.
3. Remove fasteners as you go (don’t chase one board at a time if it’s holding adjacent planks).
4. If you hit resistance mid-row, pause and cut the seam—then pry again.
Protecting the subfloor while pulling boards
The goal is to preserve the subfloor “working surface,” especially if you’re reusing it. Subfloor gouges often force additional patching, and uneven transitions can telegraph through new flooring.
Handle the subfloor, cleanup, and next steps
The critical follow-through is inspecting the subfloor for remaining fasteners, residue, and flatness—then cleaning thoroughly before underlayment or new flooring goes down.
After board removal, the subfloor becomes the “baseline.” If it’s uneven, new flooring will squeak, gap, or fail to seat properly. If it has leftover staples/nails, new underlayment can tear during installation or leave ridges that become visible.
“Leaving protruding nails/staples can prevent underlayment from sitting flat and can damage new flooring during installation.”
“Vacuuming after scraping residue is essential because dust and grit interfere with adhesive transfer and underlayment adhesion.”
– After board removal, inspect the subfloor for remaining staples/nails, glue residue, or raised edges.
– Scrape off adhesive carefully (only as needed for your next flooring) and vacuum thoroughly so dust doesn’t interfere with underlayment or new flooring.
– Address subfloor flatness before reinstalling anything—out-of-level areas can cause squeaks, gaps, or poor bonding later.
Flatness: the “silent failure” factor
Even when you remove every visible board cleanly, leftover adhesive ridges or divots can undermine the next step. If you’re planning new flooring, follow your underlayment and flooring manufacturer’s flatness guidance (often specified as a maximum allowable variation across a measurement span). If that guidance isn’t available, your installer or local flooring distributor can help you match expectations.
Cleanup also affects indoor air
As of 2026, many closet remodels include HVAC vents and return grilles nearby, so dust tracking becomes a whole-room issue. Sealed vacuum bags, frequent filter checks, and damp cleanup of surrounding surfaces can reduce “mystery dust” later—especially if you’re installing engineered flooring that’s sensitive to debris under it.
What can go wrong (and how to avoid it)
Most problems come from skipping perimeter cuts, prying against tongues, or assuming a resisting section is “stuck because it’s old.” The fix is to slow down, identify the hold points, and cut seams when the board won’t release.
This section is where you save time and money. If you rush the first row, you can lose trim pieces and end up patching subfloor you didn’t intend to disturb.
“Splintered hardwood often results from prying directly on thin tongue edges—trim removal plus pry pads are the preventive step.”
“Drywall damage is commonly caused by prying before scoring caulk/paint joints; score those joints first.”
“If a section won’t lift, cut for hidden glue or reinforcement rather than increasing pry force; otherwise you risk subfloor divots and damaged fasteners.”
Common failure modes
– Splintered board edges: Usually caused by prying directly on thin tongues or forcing the first row—use trim removal + pry pads and go slow.
– Damaged drywall or casing: Happens when you skip cutting paint/caulk lines. Score those joints first.
– Subfloor gouges: Over-aggressive prying can leave divots that must be filled before new flooring.
– Hidden glue or fasteners: Some closets have reinforcement near doorways or transitions. If a section won’t lift, cut and search rather than brute force.
– Uneven floor transitions: Removing only part of a hardwood run can leave height changes—plan how you’ll handle transitions afterward.
Pros/cons: choosing the DIY approach by installation type
- Nail-down removal (typical):
- Pros: Often removable row-by-row with controlled pry + fastener pull. Cons: Fasteners can bend or break if you yank; subfloor still needs inspection.
- Glue-down removal (common surprise):
- Pros: You can sometimes preserve edges if you cut cleanly. Cons: Expect more adhesive residue and more subfloor scraping.
- Floating/click-lock removal:
- Pros: Perimeter-first unlocking can be fast and relatively low-damage. Cons: If you don’t remove trim first, boards can chip or jam.
Verdict / tip + scanable checklist
If you want the best chance of preserving hardwood boards (or at least minimizing subfloor damage), start by identifying the installation method, remove trim cleanly, and lift boards slowly from the most accessible edge.
That said, this is not the best DIY choice if:
– The closet floor is heavily glued, you need the boards to remain reusable, and you don’t have cutting tools.
– There’s water damage, major subfloor deterioration, or suspect mold—those situations often call for professional assessment.
– The room has complicated built-ins and you’re working around fragile cabinetry.
Quick checklist (save this)
| Task | Done? |
|---|---|
| Clear closet + protect walls/floor | ☐ |
| Determine installation type (nail/staple/glue/floating) | ☐ |
| Remove trim/casing; cut caulk/paint lines | ☐ |
| Start prying from an accessible edge (use pry pad) | ☐ |
| Remove fasteners as you lift boards | ☐ |
| Cut hidden seams instead of forcing stuck sections | ☐ |
| Inspect subfloor; remove remaining nails/staples/glue | ☐ |
| Vacuum thoroughly; check flatness before installing next floor | ☐ |
Frequently Asked Questions
How do I remove hardwood floors from a closet without damaging the subfloor?
Start by removing the baseboards and any trim, then locate the fastening method (nails or staples) under the edge of the hardwood. Use a pry bar and a thin puller bar to lift boards gradually, working from the closet entrance or wall where you can get the best leverage. If the boards are nailed, pull nails as you go and avoid gouging the subfloor with the pry tool; for glue-down planks, you’ll need heat or a floor scraper to prevent tearing the underlayment. Finish by scraping residue and checking the subfloor flatness before installing new flooring.
What tools do I need to remove hardwood flooring in a closet?
You’ll typically need a pry bar, flat bar, hammer, utility knife, flooring scraper, and a crowbar or demolition tool for stubborn sections. For nail-down hardwood, an oscillating multi-tool helps cut into caulk or adhesive seams near the walls and trim. If the hardwood is glued, use a heat gun or floor heat blanket plus a scraper to loosen adhesive, and wear gloves and eye protection throughout. Have a dust mask or respirator ready—closet demo can still create a lot of fine debris.
Which is easier to remove: nail-down hardwood floors or glue-down hardwood floors in a closet?
Nail-down hardwood is usually easier to remove because each board can be lifted after you find and pull nails or staples near the seams. Glue-down hardwood requires more time because adhesive must be softened or scraped off without damaging the subfloor. In a closet, limited access can make glue removal more difficult, so consider using heat to reduce adhesive resistance and minimize gouging. If you plan to reuse the hardwood, nail-down boards have a higher chance of coming up intact.
Why is removing hardwood from a closet tricky, and how can I avoid common mistakes?
Closets often have tighter clearance, thicker trim, and built-in features like shelves that complicate prying and board removal. A common mistake is prying too aggressively near the wall, which can splinter hardwood or leave chunks of subfloor behind. To avoid this, cut caulk and finish nails/fasteners at the edges first, work slowly board-by-board, and use a scraper carefully around the perimeter. Finally, vacuum thoroughly and inspect the subfloor for nails or glue ridges before installing replacement flooring.
Best practices for removing hardwood floors in a closet when you need to reuse the boards?
To reuse hardwood flooring, remove trim carefully, then start lifting from the least visible wall so you can control the pry angle and protect the tongue-and-groove edges. Use a tapping block and slow pry technique, pulling fasteners as you go to prevent board warping or cracking. For glued hardwood, avoid forcing the boards—use heat to soften adhesive and scrape residue gently to preserve the surface. Once removed, stack boards flat with spacers and label them by location so reinstalling your closet hardwood floors is easier.
📅 Last Updated: October 17, 2026 | Topic: How to remove hardwood floors from a closet? | Content verified for accuracy and freshness.
References
- Wood flooring
- https://extension.umn.edu/maintaining-home/refinishing-hardwood-floors
- Asbestos | US EPA
- Lead | US EPA
- Lead Renovation, Repair and Painting Program | US EPA
- About Childhood Lead Poisoning Prevention | Childhood Lead Poisoning Prevention | CDC
- https://www.cdc.gov/niosh/topics/wooddust/
- https://scholar.google.com/scholar?q=how+to+remove+hardwood+floors+from+closet Google Scholar
- https://scholar.google.com/scholar?q=hardwood+floor+removal+process+pry+bar+nails+staples+subfloor Google Scholar
- https://scholar.google.com/scholar?q=best+practices+for+removing+wood+flooring+without+damaging+subfloor Google Scholar



[…] you need to waterproof hardwood floors in a closet, this step-by-step guide shows the exact materials and process to seal the boards so water can’t seep into the wood or […]