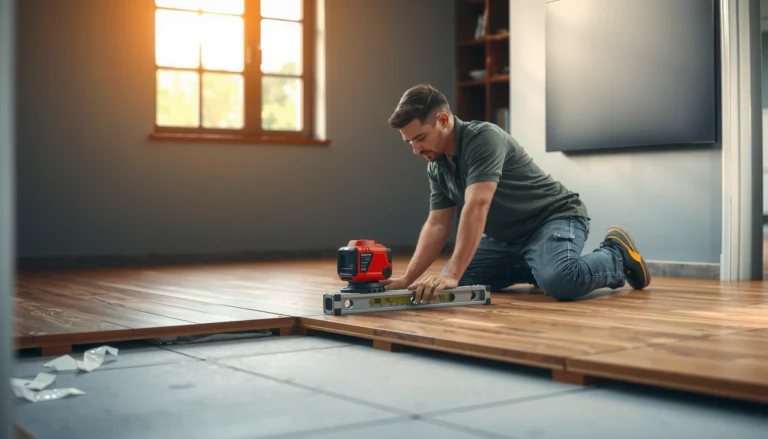
Need to replace engineered wood floors in a playroom? This step-by-step guide walks you through removing the old boards, prepping the subfloor, and installing new planks with the right underlayment and expansion gaps—so the floor stays stable under heavy foot traffic. If you want the fastest, cleanest path to a durable, kid-friendly finish, you’ll get the exact sequence and key checkpoints before you start.
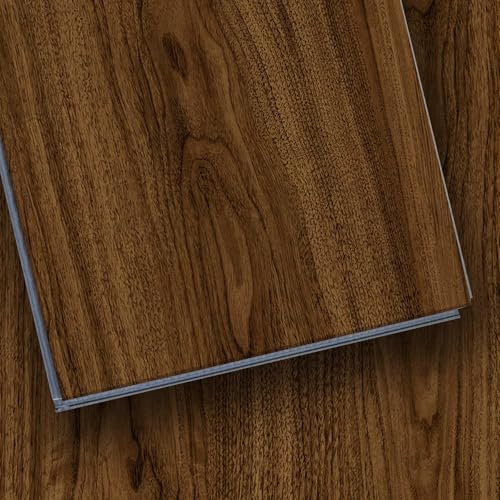



Replacing engineered wood floors in a playroom usually comes down to three actions: confirm whether your new planks are click-lock “floating” or glue-down, remove the old floor with tight dust control, and prep the subfloor so it’s flat and stable. Do those in the right order and you dramatically reduce squeaks, gaps, and early failures—especially important in 2026 when playroom traffic and cleanup cycles are relentless.
Who this is for / when it applies

This guide is for homeowners replacing engineered wood flooring in a kid-focused room where you want a predictable, low-drama process. It applies best when you’re fully replacing the floor, the subfloor is accessible for inspection and repairs, and you can follow the specific manufacturer requirements for expansion gaps, underlayment, and adhesive (if glue-down).
Engineered wood floors can perform very differently depending on whether the system is click-lock “floating” or glue-down, so matching the installation method is not optional. manufacturer installation instructions (engineered wood floor system requirements)
Moisture testing standards like ASTM F2170 (in-slab RH probe) and ASTM F1869 (calcium chloride) exist because slab moisture is a leading cause of early adhesive and flooring failures. ASTM F2170; ASTM F1869
If you’re dealing with an active playroom, you also need to plan around downtime. Demolition, plank installation, and (for glue-down) adhesive cure all affect when kids can safely return to the space. In practice, homeowners who schedule around curing and ventilation avoid rework and odor complaints from lingering adhesive or trapped moisture.
Plan the replacement before you pull up anything
You’ll save the most time by planning first—especially by confirming the exact installation type (floating click-lock vs glue-down) before you buy parts or start demo. Once the system is confirmed, the rest of the workflow—underlayment choice, adhesive approach, expansion gaps, and subfloor prep—becomes much easier to execute correctly.
ASTM F2170 measures in-slab relative humidity (RH) using probes, which helps determine whether a slab is within the moisture limits for the flooring/adhesive system. ASTM F2170
ASTM F1869 uses anhydrous calcium chloride to estimate moisture vapor emission, offering an alternative slab moisture evaluation method. ASTM F1869
Identify your engineered floor type (floating vs glue-down)
Start by locating the manufacturer’s installation instructions for your existing and new flooring. Engineered wood products may look similar, but the installation method changes the subfloor prep expectations and failure points. For floating click-lock floors, the system relies on proper locking and an underlayment that supports the planks without creating movement. For glue-down, the adhesive layer and moisture management become central—especially on concrete.
Check the subfloor before you budget time for install
Subfloor flatness and stability are where squeaks, gaps, and “clicking” usually originate. Before removal turns into chaos, inspect:
– Loose subfloor fasteners (squeaks often track straight to this)
– High spots (they telegraph and stress the new boards)
– Low areas (they prevent proper support and encourage flex)
– Surface contamination (paint, sealers, drywall mud, adhesive residue)
If you’re on concrete, your moisture plan should start here. Moisture testing requirements aren’t “nice to have”—they’re how you avoid cupping or delamination later.
Plan for “playroom downtime”
Make a schedule for demolition, board installation, and—if glue-down is involved—adhesive cure and safe traffic. Use the exact cure and first-occupancy timing from the adhesive/flooring manufacturer because it varies by product chemistry, temperature, and ventilation.
From a practical standpoint, I recommend you also plan what will happen with toys and storage during install: playrooms become “construction zones” quickly, and moving everything late usually adds hours you didn’t account for.
Remove old engineered wood safely (and keep dust under control)
You want the old floor out without damaging the subfloor—while controlling dust so the playroom stays safe for kids (and your HVAC). The best demo strategy depends on whether the existing floor was installed floating or glue-down, and what type of underlayment or adhesive residue is present.
OSHA regulates wood dust exposure; the 8-hour time-weighted average PEL is 5 mg/m³ for respirable wood dust and 15 mg/m³ for total dust. OSHA 29 CFR 1910.1000 Table Z-3
HEPA filtration is designed to remove at least 99.97% of particles at 0.3 micrometers, which matters when you’re capturing fine construction dust. U.S. Department of Energy (HEPA definition)
Use proper protection and hazard checks
Wear eye protection, gloves, and a respirator appropriate for fine particulate dust. For nuisance dust, many crews use N95-class respirators, but your exact selection should follow your local rules and the respirator program requirements. NIOSH-approved filtering facepiece respirators are rated for minimum filtration performance.
N95-class respirators are required to filter at least 95% of test aerosol particles, making them a common baseline for nuisance dust control when used correctly. NIOSH / 42 CFR Part 84
If you suspect hazardous materials in the existing floor or underlayment (for example, older adhesives or layered materials), test and abate per local guidance before you disturb anything.
Remove the floor methodically to protect the subfloor
Where possible, remove plank-by-plank (especially for click-lock floors). If the existing material is glued down, use the gentlest effective removal technique that won’t gouge plywood or concrete. Stop if you see substrate damage—because repairing the subfloor after the fact is always more expensive than protecting it during demo.
Plan for residue removal too:
– Dry scraping often creates more dust.
– Heat and chemical residue removers introduce additional considerations (ventilation, compatibility, and surface prep requirements).
Contain debris and vacuum during cuts
Set up containment (plastic sheeting, closed doors, and negative airflow if you have it). Use a shop vacuum with an appropriate filter. Bag debris promptly so it doesn’t become a secondary dust source.
To make dust control more “systematic,” here’s a practical planning aid for choosing particulate respirator classes while you cut, scrape, or sand engineered-wood materials:
NIOSH Particulate Respirator Classes Used for Construction Dust (Minimum Filtration & OSHA APF)
| # | Respirator class | Minimum filtration | Oil resistance | Typical OSHA APF | Fit-for-dust rating |
|---|---|---|---|---|---|
| 1 | N95 | 95% | Not resistant | 10 | ★★☆☆☆ |
| 2 | N99 | 99% | Not resistant | 20 | ★★★☆☆ |
| 3 | N100 | 99.97% | Not resistant | 50 | ★★★★☆ |
| 4 | R95 | 95% | Resistant | 10 | ★★☆☆☆ |
| 5 | R99 | 99% | Resistant | 20 | ★★★☆☆ |
| 6 | R100 | 99.97% | Resistant | 50 | ★★★★☆ |
| 7 | P95 | 95% | Oil proof | 10 | ★★☆☆☆ |
Prep the subfloor, then install the new engineered boards
Your new floor only performs as well as what’s underneath it, so the subfloor prep step is where the “quiet, gap-free” outcome is won. After prep, install using the correct system rules—locking pattern and underlayment for floating floors, or adhesive spread/coverage and moisture-safe practices for glue-down.
If the subfloor isn’t flat enough, engineered wood floors are more likely to flex, leading to squeaks and seam gapping even when the planks are installed correctly.
Glue-down systems depend on adhesive compatibility and moisture management, which is why manufacturers require specific moisture tests and limits. manufacturer installation instructions (moisture requirements and adhesive system)
Get the surface ready
Start by removing adhesive residue and anything that prevents full contact—paint overspray, drywall mud ridges, staples that are proud of the surface, or high spots. Repair low areas with the right patch/leveler per the flooring instructions (and per the leveler manufacturer’s guidance).
If moisture is a concern, follow the new flooring’s specified test method and interpret results using the required limits.
Acclimation and expansion gap
Many engineered floors require acclimation in the room before installation. More importantly, almost all systems need an expansion gap at walls and vertical surfaces to allow seasonal movement. Use your manufacturer’s exact gap specification (width, product thickness, and room geometry can matter).
In a playroom, it’s tempting to “tighten everything up” against baseboards. Don’t—if you eliminate the expansion path, stress shows up as lifted edges, buckling, or separated joints.
Install with the correct system (floating vs glue-down)
For floating floors:
– Follow the locking pattern exactly
– Use the manufacturer-required underlayment (wrong foam thickness/density can create movement)
– Keep plank alignment true so you don’t fight the joints later
For glue-down:
– Spread adhesive exactly as directed (type, notch size, open time, and coverage)
– Avoid trapping excess moisture by following the system requirements
– Work in manageable sections so you don’t exceed adhesive working time
What can go wrong in a playroom—and how to avoid it
The most common failures in kid-used rooms are avoidable: most come from skipping flatness/moisture checks, incorrect expansion gaps, or installing over a substrate that doesn’t match the floor system. When you diagnose early issues, treat your install like a system—not just a single board problem.
Gaps and seam separation are frequently traced to incorrect expansion gaps or an unflat substrate that increases plank stress. manufacturer installation instructions (expansion and subfloor requirements)
Moisture-related failures (cupping, delamination, adhesive breakdown) are why manufacturers require moisture tests using defined ASTM methods like F2170 and F1869. ASTM F2170; ASTM F1869; manufacturer installation instructions
Gaps, popping clicks, and loose boards
These typically trace back to:
– Installing over a subfloor that isn’t sufficiently flat or stable
– Ignoring expansion gap requirements at walls and transitions
– Using the wrong underlayment thickness/density for a floating system
– Not following the click-lock alignment and locking pattern instructions
Squeaks and movement
Squeaks are usually mechanical: loose fasteners, voids in the underlayment/subfloor interface, or insufficient subfloor preparation. Even with a “good” floating floor, a loose base layer will transfer movement into the plank joints.
Moisture/vapor problems (especially on concrete or basements)
Moisture problems can be silent at first and then show up after the first heating/cooling cycles, or after an unnoticed spill. In slab/basement scenarios, follow the testing method and limits required by the flooring manufacturer—don’t rely on “feels dry” checks.
Verdict / tip (what I’d do—and when to skip DIY)
If your subfloor is accessible and you can match the installation method exactly (floating vs glue-down), replacing engineered wood in a playroom is a reasonable DIY project. The biggest determinant of success is still the same: correct system matching plus a flat, stable, moisture-compliant subfloor.
For engineered flooring longevity, following the manufacturer’s installation system (floating vs glue-down, underlayment/adhesive, expansion gap, and moisture testing) is the most defensible way to prevent early failure. manufacturer installation instructions (system requirements)
Because wood dust exposure is regulated and can exceed acceptable levels during cutting/sanding, dust control (containment + filtered vacuum + proper respiratory protection) is a core part of DIY floor safety. OSHA 29 CFR 1910.1000 Table Z-3
DIY vs hiring a pro: what I’d weigh
Here’s the trade-off in a way that’s easy to scan:
| Option | Pros | Cons / risk points |
|---|---|---|
| DIY replacement | Lower cost, full control of scheduling, and you can focus on dust containment and subfloor corrections. | Mistakes in moisture testing, expansion gaps, or adhesive spread can cause failure that you won’t see until months later. |
| Hire an installer | Faster installation, experience diagnosing squeaks/flatness issues, and better consistency with manufacturer systems. | You still need to ensure they use the correct moisture test method, correct cure/downtime schedule, and correct expansion gap details for your specific product. |
Skip DIY (or bring in help) if:
– You find structural subfloor damage, persistent moisture, or unclear hazard risks in existing materials.
– You’re installing over concrete/slab where moisture mitigation details require expertise you can’t verify.
– You can’t follow cure/downtime guidance due to family schedule—improper timing can ruin the floor before it stabilizes.
From my experience talking homeowners through playroom projects, the schedule is usually the hidden risk: if kids return before adhesive and finish systems are stable, you’ll often pay for it later with shifts, seam issues, or surface problems.
Quick checklist (scan before you start)
| Step | What to confirm | Notes |
|---|---|---|
| Floor type | Floating vs glue-down | Match underlayment/adhesive to the new product |
| Safety | Dust control + PPE | Use vacuum during cuts; bag debris immediately |
| Subfloor | Flatness + repairs | Fix low/high spots before installing |
| Moisture | Test method + limits | Follow flooring manufacturer requirements |
| Expansion | Gap size at walls | Use the exact gap spec from installation instructions |
| Installation | Correct pattern/adhesive | Spread and placement per manufacturer directions |
| Downtime | Cure + traffic schedule | Use the adhesive/finish cure time sources |
Sources
– Manufacturer installation instructions for the specific engineered wood flooring and any underlayment/adhesive system being used ().
– ASTM F2170: Standard Test Method for Field Determination of Relative Humidity in Concrete Floor Slabs Using In-Situ Probes.
– ASTM F1869: Standard Test Method for Measuring Moisture Vapor Emission Rate of Concrete Subfloor Using Anhydrous Calcium Chloride.
– OSHA regulations for respirator program requirements and selection: OSHA 29 CFR 1910.134.
– OSHA exposure limits for wood dust: OSHA 29 CFR 1910.1000 Table Z-3.
– NIOSH/42 CFR Part 84 definitions for particulate respirator classes (e.g., N95, N99, N100).
– U.S. Department of Energy HEPA definition (99.97% at 0.3 micrometers) for filtration performance.
Replacing engineered wood floors in a playroom is absolutely doable when you treat it like a system: match floating vs glue-down requirements, remove the old flooring without contaminating the subfloor with dust, and prep the base until it’s flat, stable, and moisture-compliant. If you do those three things carefully—and respect expansion gaps and cure/downtime rules—you get the best chance of a quiet, gap-resistant result that holds up to everyday kid impact.
Frequently Asked Questions
What’s the best way to replace engineered wood floors in a playroom?
Start by matching the new engineered wood flooring to your existing board thickness, wear layer, and locking system so the seams and transitions look seamless. Remove the baseboards or quarter-round carefully, then lift the damaged sections—either by pulling planks with the click-lock method or by cutting and removing sections if the boards are glued. Before installing, check subfloor flatness and moisture, because a playroom is prone to spills and seasonal movement that can cause squeaks or gaps.
How do you remove damaged engineered wood planks without damaging the subfloor?
For floating click-lock engineered wood, use a pry bar and pull planks in a systematic row-by-row method, starting at the nearest accessible edge. If the flooring is nailed-down or glued, you’ll typically need to cut damaged planks into smaller sections and use a floor scraper to remove residue. Always inspect and clean the subfloor thoroughly, then replace any water-damaged underlayment or subfloor patches before installing replacement engineered wood floors.
Which underlayment should you use when replacing engineered wood in a playroom?
Choose an underlayment that matches your original installation type and addresses sound, comfort, and moisture—especially for a high-traffic play area. If your room has concrete or is prone to dampness, look for an engineered wood underlayment with an attached vapor barrier to help prevent swelling or cupping after spills. Confirm the product is compatible with your engineered wood flooring manufacturer guidelines to avoid warranty issues and uneven flooring.
How do you handle gaps, transitions, and height differences when installing replacement engineered wood?
Measure the height difference between the existing and replacement sections to ensure flush transitions at doorways, hallways, or tile edges. Use the correct expansion gap around the perimeter, and install transition strips or reducer thresholds as needed to prevent tripping and to keep the floor from rubbing. After installation, allow the engineered wood to acclimate to the playroom’s temperature and humidity so joints don’t open or lift.
Why might your replaced engineered wood floors look uneven, and how can you fix it?
Uneven results often come from subfloor dips, missing underlayment, debris under planks, or incorrect installation over an uneven subfloor. Check flatness with a straightedge and address low spots with approved leveling compound, then reinstall any planks that have lifted or won’t lock properly. If the wear layer is exposed and the surface is compromised, consider replacing the affected planks again rather than trying to patch engineered wood, since a playroom’s heavy foot traffic will reveal imperfections quickly.
📅 Last Updated: October 19, 2026 | Topic: How to replace engineered wood floors in a playroom? | Content verified for accuracy and freshness.
References
- Engineered wood
- Wood flooring
- https://www.epa.gov/indoor-air-quality-iaq/volatile-organic-compounds-vocs
- https://www.epa.gov/indoor-air-quality-iaq/formaldehyde-and-other-volatile-organic-compounds
- https://www.cdc.gov/niosh/topics/wooddust/
- https://www.osha.gov/laws-regs/regulations/standardnumber/1910/1910.1052
- https://www.epa.gov/lead/renovation-repair-and-painting-program
- https://scholar.google.com/scholar?q=engineered+wood+floor+installation+acclimation+subfloor+moisture Google Scholar
- https://scholar.google.com/scholar?q=wood+floor+replacement+dust+containment+renovation+homes Google Scholar
- https://scholar.google.com/scholar?q=engineered+hardwood+floor+VOC+formaldehyde+emissions Google Scholar