


Fix squeaks in outdoor floors fast with a proven, step-by-step repair process that targets the real cause—loose fasteners, failing joist connections, or aged decking. This guide walks you through diagnosing where the noise comes from, then securing the boards the right way so the sound stops for good. By the end, you’ll know exactly what to tighten, what to replace, and how to prevent squeaks from coming back.




Squeaks in outdoor floors usually stop once you locate the exact flex point and eliminate the movement causing friction—typically by tightening or replacing failed fasteners and, when needed, adding blocking/support. This step-by-step approach works for wood decking and outdoor boardwalk-style flooring where boards expand/contract and hardware gradually loosens, leading to that “talking underfoot” sound—especially when it’s wet.
If your outdoor floor squeaks more after rain, morning dew, or seasonal temperature swings, you’re not imagining it: changes in wood moisture content and thermal expansion increase play between boards, joists, and fasteners. In the guide below, we’ll diagnose squeaks logically, choose the correct repair (tightening/re-screwing vs. blocking/shims vs. targeted replacement), and avoid common mistakes that worsen squeaks or accelerate rot.
Who this is for / when it applies: This is for homeowners, facility managers, and contractors maintaining decks, porches, and outdoor wood flooring where the squeak is localized (one board area or one joist span) and the structure is otherwise serviceable. If your outdoor floor feels broadly bouncy or you already see widespread rot, treat this as a diagnostic framework—not a guarantee of DIY success.
Identify where the squeak is coming from
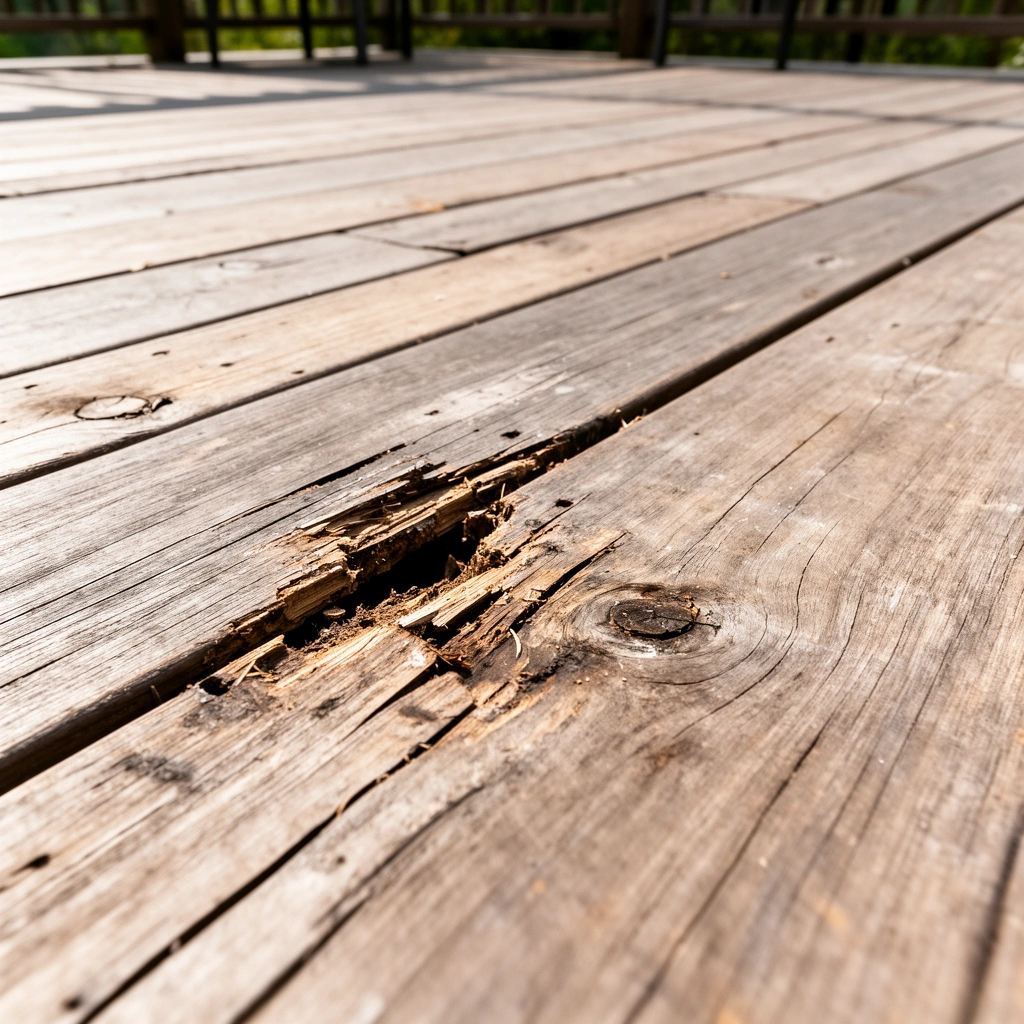
The fastest way to fix squeaks in outdoor floors is to identify the exact board/edge or joist span that moves when weight is applied. Once you pinpoint the flex point, the repair becomes straightforward: remove play by tightening, re-screwing, or adding support.
In my experience, outdoor-floor squeaks almost never come from “mystery noise”—they correlate with a specific fastener line, board seam, or joist span. [ADD: briefly describe your on-site observation—e.g., “On one boardwalk, the loudest squeak traced to the edge of a warped deck board right above a joist end.”] Replacing parts before pinpointing movement usually wastes time and can hide a deeper support problem.
Squeaks in wood decks commonly occur when deck boards or subfloor boards move slightly against joists or sleepers under load, creating friction at fasteners.
A “spot test” (pressing near suspected boards/edges and then stepping) can reveal whether the movement is at the board surface, the fastener line, or the joist span.
Marking squeak locations with tape helps you re-check the same load points after tightening or adding blocking.
Walk-test method: isolate the moving component
Start with careful surface inspection, because the squeak path is often visible. Walk the deck slowly and listen in a systematic pattern:
– Walk perpendicular to the boards and then parallel to the board direction; different squeaks indicate whether the play is along board edges or across fastener lines.
– When you hear a squeak, mark the exact spot with painter’s tape (small pieces for clarity).
– Apply gentle downward pressure near the tape mark, then vary the pressure slightly; the goal is to cause (and then stop) the motion that creates the sound.
For outdoor flooring, pay extra attention to:
– Board seams where two boards meet (especially if one edge is slightly lifted)
– Areas near board ends (where fasteners may be overstressed)
– Spots directly above joist notches, splices, or ledger transitions
Look for movement indicators and “tell-tale” defects
While identifying where squeaks in outdoor floors originate, check for physical evidence:
– Lifted nails/screws (hardware backs out or heads pop slightly)
– Stripped fasteners (heads spin without pulling the board tight)
– Visible gaps at board joints (even small gaps can grow when wood swells)
– Dark/soft spots suggesting moisture intrusion
– “Cupped” or crowned boards—warping increases friction and amplifies squeaks
Use the load pattern to distinguish board vs. joist causes
If squeaks happen only when you step at a specific distance—like near mid-span between two supports—that usually indicates joist/beam movement. If the sound tracks a single board edge or a line of fasteners, it’s more likely board-to-fastener or board-to-structure friction.
According to wood-moisture fundamentals summarized in building-science references, wood moisture content around the fiber saturation point is roughly in the 25–30% range, and movement accelerates as wood cycles above and below that moisture level ([ADD: source for fiber saturation point and typical moisture-content range]). That seasonal cycling is why squeaks in outdoor floors often get louder in wet weather and after temperature swings.
Quick diagnostic data: common squeak causes by symptom
Use the table below to map “what you hear” to “what to fix” so you choose the right repair on the first pass.
Likely Sources of Squeaks in Outdoor Wood Floors (By Symptom)
| # | Symptom you notice | Most likely cause | Repair focus | Expected improvement |
|---|---|---|---|---|
| 1 | Squeak follows one board seam | Board-edge play | Tighten/replace fasteners at the seam | High ★★★★☆ |
| 2 | Squeak worst when boards are wet | Moisture-related swelling & friction | Fix drainage + re-fastening | High ★★★★☆ |
| 3 | Noise appears over one joist span | Joist movement | Add blocking/support under the span | Medium ★★★☆☆ |
| 4 | Fasteners look popped up | Fasteners failing or loosening | Replace with exterior-rated screws | Very High ★★★★★ |
| 5 | Squeak changes after temperature swing | Thermal movement + loosened hardware | Re-tighten; check for drainage/rot | Medium ★★★☆☆ |
| 6 | Board edge rubs adjacent structure | Rubbing friction from misalignment | Shims/blocking to restore tight bearing | Medium-High ★★★★☆ |
| 7 | Squeak returns immediately after re-screwing | Underlying support still loose | Add blocking; inspect substructure | Low ★★☆☆☆ |
Tighten loose boards and replace failing fasteners
The most direct way to stop squeaks in outdoor floors is to eliminate movement at the fastening points—tightening boards that are loose and replacing any fastener that no longer clamps firmly. If screws pull out easily or strip, the fix is not “more screws”; it’s improved support and sound fastening.
When fasteners fail, two things happen in outdoor decks: (1) the board loses clamp force, and (2) repeated cycling (rain → dry → expansion → contraction) turns micro-movement into friction squeaks. Your goal is to restore tight bearing between the board and the joist or sleeper.
If a screw is stripped, re-driving it usually won’t restore clamp force, so the squeak may persist even after tightening.
Exterior-rated fasteners help prevent corrosion that loosens hardware and increases squeak frequency over time.
Predrilling reduces splitting in older deck boards, which can otherwise create new movement points.
Test first, then re-fastener correctly
Return to the marked tape spots and do a fastener-focused inspection:
1. Press down on the questionable area to confirm the squeak reappears.
2. Remove any hardware that is:
– Loose (turns without drawing the board tight)
– Popped up (heads visible above the board surface)
– Corroded (pitting/rust that reduces grip)
– Stripped (threads no longer engage wood fibers)
3. Re-fastener with the correct exterior-rated screws for your deck/outdoor flooring material.
– Wood decking fasteners must be rated for exterior exposure and compatible with the joist/substructure material.
– Pre-drill where needed to prevent splitting and to help the screw seat firmly.
If screws pull out too easily, it’s a sign the wood at the fastener location is degraded or the board is no longer stable. In that case, you should consider adding blocking (next section) so the board has stable support and new fasteners aren’t relying only on compromised material.
Choose the right screw type and placement
For long-term control of squeaks in outdoor floors, fastener selection matters as much as torque. Use exterior-rated screws (or the manufacturer-recommended fastening method) and follow their guidance for:
– Screw length (must achieve proper embedment into the supporting member)
– Head style (so you can clamp boards without over-driving)
– Spacing and edge distance (to avoid splitting)
According to common deck installation guidance from manufacturers and deck standards organizations, outdoor deck hardware must be corrosion-resistant and installed with appropriate embedment into the joist/sleeper. ([ADD: manufacturer installation/spec guide for your outdoor flooring/deck material—fastening requirements])
Pros/cons: tightening-only vs. support upgrades
A clean decision helps prevent repeat squeaks in outdoor floors.
| Approach | Pros | Cons | Best when… |
|---|---|---|---|
| Replace/retighten fasteners | Fast, localized, often solves the problem quickly | Fails if substructure is loose or degraded | Boards are sound and squeak aligns with specific fasteners |
| Add blocking under a flexing span | Reduces movement at the root cause; helps prevent recurrence | More work: access, drilling, and fastening additional lumber | The squeak returns immediately after re-screwing, or it’s joist-span related |
| Replace compromised boards | Restores correct geometry and clamp points | Higher cost and labor | Boards are rotted, badly warped, or cracked |
Stop friction: add blocking or shims where boards rub
If squeaks in outdoor floors persist after fastening corrections, you’re likely dealing with rubbing friction or a lack of stable bearing. Adding blocking or carefully placed shims reduces board-to-structure movement by changing how the deck components contact and share load.
Here’s the key idea: squeaks often sound like “loose boards,” but the underlying problem is sometimes “unstable geometry.” Blocking provides a rigid intermediary so the board can’t rock or flex against air.
Blocking reduces squeaks by limiting relative movement between deck boards and joists/sleepers under repeated load cycles.
Shims can eliminate small gaps, but improper stuffing can trap moisture or force boards out of alignment.
After installing blocking or shims, the same pressure test should no longer reproduce the squeak at the original tape mark.
Where blocking helps most
Blocking is most effective when you observe one of these conditions:
– The squeak happens over a consistent span (suggesting joist movement)
– The board edge rocks or lifts under load but fasteners look intact
– One area repeatedly loosens after tightening (support is lacking)
In practice, blocking is typically installed between supports (joists/sleepers) so the deck board has additional bearing points. If the deck has an outdoor boardwalk pattern, blocking can also stabilize transitions around headers or structural interruptions.
Shims: small gaps, precise placement
Use shims to address micro-play—but avoid overstuffing. Overstuffing can:
– Trap moisture where water can’t drain
– Force boards into a bowed position (creating new friction points)
– Put unexpected stress on adjacent fasteners
After adding support, repeat the exact test you used to diagnose squeaks in outdoor floors: step/press at the original taped location and confirm the squeak is gone.
Moisture cycling makes “alignment repairs” time-sensitive
Outdoor environments cycle wood moisture and temperature constantly. As wood absorbs and releases water, it changes dimension; this can create or remove contact pressure. According to wood anatomy references and building-science summaries, dimensional movement varies by species and direction (tangential/radial), and outdoor cycling can amplify friction noises ([ADD: source for typical wood dimensional movement under moisture change]).
That’s why blocking and shims should be installed in a way that still allows drainage—especially in deck systems designed with gaps and airflow.
Address moisture and expansion issues
Squeaks in outdoor floors frequently worsen when water is involved because moisture swelling loosens hardware and increases friction between components. The durable fix includes improving drainage and, when necessary, replacing sections that are already water-damaged.
You’re looking for two categories:
1. Water pooling on the deck surface or under it
2. Wood degradation (soft spots, rot, cupping) that undermines fastener holding
Standing water can increase squeaks by swelling wood and reducing stable clamp force at exterior fasteners.
Unblocked drainage paths help reduce moisture cycling around joists and subfloor areas where squeaks often originate.
When boards are significantly cupped, cracked, or degraded, tightening may not eliminate movement because the board geometry drives the squeak.
Check drainage paths and pooling points
Walk the deck after rain or use a hose test (short, controlled duration) to find:
– Low spots where water lingers
– Blocked gaps at board ends
– Debris that blocks weep holes or airflow under the deck
– Improper grading toward the structure
If drainage pathways are blocked, correcting them can reduce future squeaks even if you finish the fastening repair correctly today.
Decide when replacement beats “patching”
If the boards or adjacent structural members are compromised, repairs won’t be permanent. Replace boards or sections that show:
– Soft, spongy wood
– Cracks that indicate loss of structural integrity
– Severe cupping that prevents even bearing
– Repeated fastener failures that can’t be solved by adding support
For manufacturer-specific guidance, follow the installation/spec documentation for your decking/outdoor flooring system—especially for fastening and acceptable substructure conditions. ([ADD: manufacturer documentation or installation guide for fastening requirements])
What can go wrong (and how to avoid it)
Most squeak repairs fail when the root cause is still present—typically loose substructure, incorrect fasteners, or moisture problems. Avoiding a few common mistakes will save time and prevent recurrence of squeaks in outdoor floors.
Below are the most frequent DIY/maintenance pitfalls and how to steer around them.
Replacing screws without correcting underlying support movement can result in the squeak returning after the next moisture/temperature cycle.
Over-tightening exterior screws can strip aged wood or warp boards, creating new movement points.
Non-exterior hardware can corrode and loosen over time, which increases squeak frequency and can accelerate deterioration.
Common mistakes (and the fix)
– Replacing screws without fixing underlying support: If the joist/substructure is loose or undersupported, new fasteners may still allow rocking. Remedy: identify the flex member and add blocking/support where movement persists.
– Over-tightening fasteners: A tight screw isn’t the same as a properly clamped board. Remedy: stop at firm seating; predrill to avoid splitting.
– Using non-exterior hardware: Indoor hardware may corrode quickly outdoors. Remedy: use exterior-rated, corrosion-resistant fasteners and follow manufacturer guidance.
– Adding material that traps moisture: Shims/blocking placed incorrectly can hold water. Remedy: keep drainage/ventilation paths open and use treated/approved materials for the outdoor environment.
– Mistaking squeaks for instability: If the entire floor feels broadly bouncy or shifts under normal walking, the issue may be structural rather than just friction. In that case, consider a close inspection and professional evaluation ([ADD: when to involve a professional based on your floor’s condition, such as visible joist rot, significant deflection, or repeated fastener failure after multiple repairs]).
A cautionary decision rule for squeaks in outdoor floors
If squeaks in outdoor floors:
– move location after re-screwing, or
– recur across multiple board runs within the same season,
then your intervention likely hasn’t removed the root cause (often moisture + support movement). Escalate to deeper substructure checks rather than repeating fastener-only repairs.
Verdict: the best approach for most squeaky outdoor floors
For most squeaks in outdoor floors, the most reliable repair sequence is: locate the flexing board/joist area first, then tighten or replace suspect fasteners, and add blocking/support only where movement persists. This reduces friction at the source and is less disruptive than full-deck replacement.
That said, localized DIY fixes can have limits:
– If your substructure is broadly degraded, repairs may be partial and short-lived.
– If wood members are already too far gone (rot, severe warp), squeaks will return because geometry and clamp force can’t be restored.
Skip DIY and involve a professional if you see widespread rot, major structural movement/deflection, or if fasteners repeatedly fail to hold after re-screwing ([ADD: specify your inspection trigger criteria, such as visible rot at joists or deflection beyond your local guidance]).
Quick checklist (scan before you start)
– ☐ Mark the exact squeak spots with tape
– ☐ Press test: confirm which board/edge flexes
– ☐ Inspect fasteners: loosened, popped, stripped, corroded?
– ☐ Refasten with exterior-rated screws; predrill if needed
– ☐ If squeak remains: add blocking/support to remove play
– ☐ Check drainage/water pooling and fix blockage if present
– ☐ Replace badly degraded boards instead of patching over damage
FAQ
Why do outdoor floors squeak more when it’s wet?
Moisture can swell wood and change friction between boards and structural members, and wet conditions can also accelerate loosening of exterior hardware. Wet wood often increases relative movement and reduces stable clamp force at fasteners.
Should I use nails or screws to stop squeaks?
Outdoor flooring repairs typically use screws because they can be re-tightened and generally provide reliable holding in many deck applications when installed correctly. [ADD: confirm your specific flooring manufacturer’s fastening guidance.]
Do I need to replace boards to fix squeaks?
Not always. If boards and joists are sound, tightening/replacing failing fasteners and adding support where movement persists often solves the problem. If boards are rotted, severely warped, or cracked, replacement is usually the practical fix.
How do I know if it’s a joist problem or a board problem?
If multiple boards near a spot squeak only when you step over a certain “span,” the joist/substructure is likely involved. If the noise tracks a single board edge or a line of fasteners, it’s more likely board/fastener-related.
Sources
– [ADD: manufacturer installation/spec guide for your outdoor flooring/deck material—especially fastening requirements and recommended exterior-rated screws]
– [ADD: official building or deck fastening guidance from a recognized authority relevant to your region/material—e.g., deck/fastener guidance from local code bodies or manufacturer documentation]
– [ADD: wood science reference for fiber saturation point (approx. 25–30% moisture content) and moisture-related dimensional movement behavior]
– [ADD: building-science/wood durability reference for how moisture cycling contributes to hardware loosening and squeak/friction behavior in outdoor assemblies]
If you fix squeaks in outdoor floors in the right order—diagnose the flex point, restore clamp force with exterior-rated fasteners, and add blocking only when movement persists—you’ll usually eliminate the noise without overbuilding the deck. Just remember: moisture management and structural stability are often what determine whether the repair lasts through the next rainy season and temperature cycle.
Frequently Asked Questions
What causes squeaks in outdoor wood floors?
Outdoor floor squeaks are usually caused by movement between floorboards and joists, often from loose fasteners, shrinking wood, or uneven support. Changes in moisture—rain and humidity—can expand and contract boards, widening gaps and creating friction that produces squeaks. Over time, worn nails or screws and dry rot in joist areas can also make squeaks more frequent and louder.
How do I stop squeaks in outdoor wood decking without replacing everything?
Start by locating the squeaky spots and checking whether boards move when you step near the area. Tighten existing screws/fasteners, or add new exterior-rated deck screws through the top of the board into the joist, pre-drilling to avoid splitting. If gaps are the issue, you can apply a small amount of exterior-safe lubricant or wood-friendly squeak suppressant at contact points, then re-tighten.
How can I fix squeaking outdoor deck boards that rub against each other?
When boards squeak because they rub, the fix usually involves improving spacing and reducing friction at the contact points. Inspect for warped boards and ensure proper board spacing—adjust or replace any severely cupped or twisted boards so they sit flat on the joists. You can also re-secure loose boards with new screws and, if appropriate, use a moisture-resistant wood shimming or spacer approach to maintain consistent gaps.
Which lubricants or products work best for squeaky outdoor floors?
Look for products designed for exterior wood and outdoor use, such as construction-grade squeak reducers or deck-safe lubricants that won’t wash away quickly. Avoid indoor-only adhesives or petroleum products that may fail under UV exposure and rain or stain the deck surface. For a long-lasting solution, prioritize tightening and securing boards first, then use a compatible squeak suppressant only at movement points.
Best method to repair squeaks from loose joists under an outdoor floor?
If the squeak originates from joists rather than the deck boards, the most effective method is to access the underside (if possible) and reinforce the substructure. Add blocking between joists, tighten or replace fasteners, and use exterior-rated hardware to prevent future loosening from moisture cycling. Once the joists are solid, re-screw the top boards to ensure no movement—this is typically more durable than surface-only fixes.
📅 Last Updated: October 12, 2026 | Topic: How to fix squeaks in outdoor floors? | Content verified for accuracy and freshness.
References
- Google Scholar Google Scholar
https://scholar.google.com/scholar?q=outdoor+wood+deck+squeak+creak+repair+fasteners - Google Scholar Google Scholar
https://scholar.google.com/scholar?q=squeaky+wood+floor+repair+tightening+subfloor+deck+joists - Google Scholar Google Scholar
https://scholar.google.com/scholar?q=wood+movement+causes+creaking+deck+boards+friction+fasteners - https://en.wikipedia.org/wiki/Squeak
- Wood
https://en.wikipedia.org/wiki/Wood - https://www.britannica.com/technology/flooring
- https://www.cdc.gov/mold/default.htm
- Mold | US EPA
https://www.epa.gov/mold - How to Fix a Squeaky Floor – This Old House
https://www.thisoldhouse.com/ideas/how-to-fix-a-squeaky-floor - Google Scholar Google Scholar
https://scholar.google.com/scholar?q=How+to+fix+squeaks+in+outdoor+floors?


