
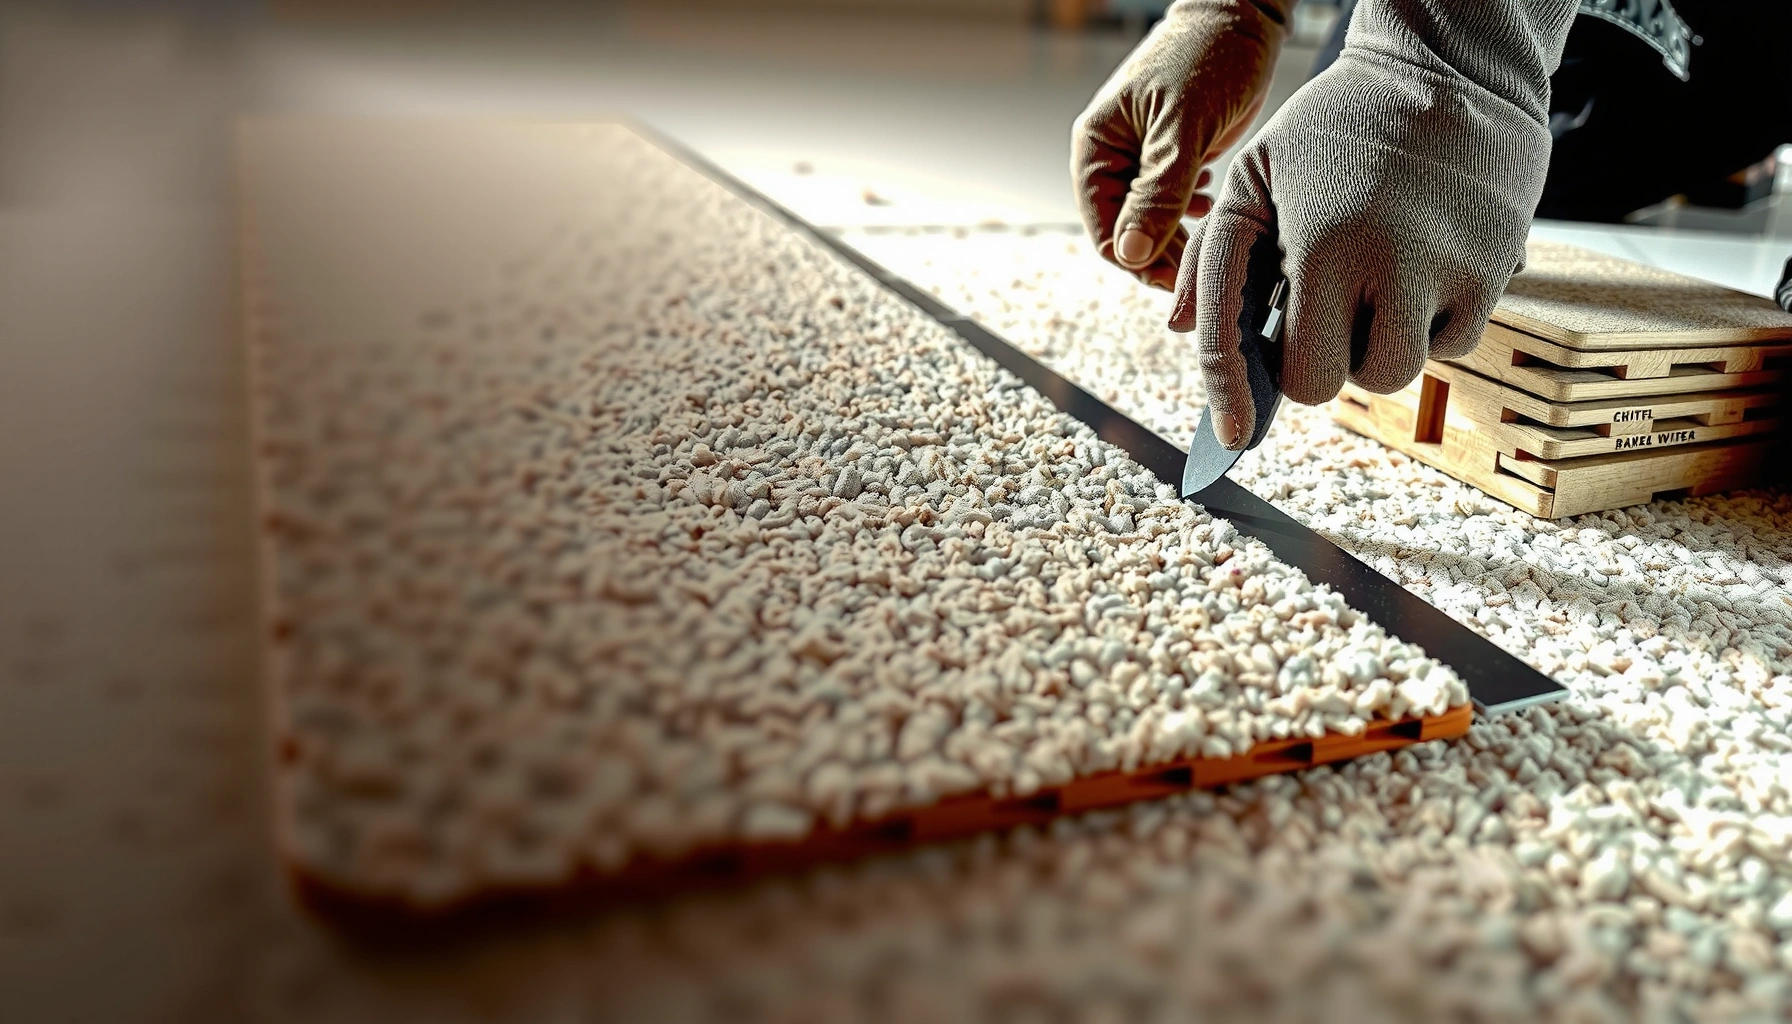

Cutting carpet tiles cleanly comes down to one proven approach: use a sharp utility knife and a straightedge to guide each cut, then trim any edge imperfections with a finish pass. This step-by-step method shows exactly how to cut carpet tiles for crisp lines that fit tight, even around corners and edges. If you want the cleanest results with the least waste, follow these simple steps first.


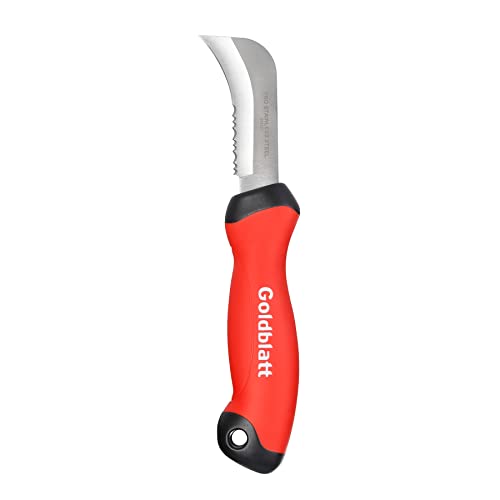

Carpet tiles cut cleanly when you measure carefully, mark the back, and use a sharp blade with gradual scoring passes. The fastest way to get tidy seams is to dry-fit border pieces first, then trim in small increments until the gaps are consistent along every wall and doorway.
If you’re installing carpet tiles in a room (home office, hallway, basement, or commercial space) and you’ve hit a wall where tiles need to fit around edges or obstacles, this is for you. The steps below assume you’re working with standard carpet tile formats and want a reliable method without specialty tools.
If you’re installing carpet tiles, plan for waste and “fit checks.” Carpet tile edges look best when the cut line is straight, the backing isn’t torn, and the finished piece sits flush without buckling—especially along thresholds and door swings.
What you need before you cut

You get the cleanest carpet tile edges by preparing the right tools and fresh blades before you make any first cut. For most modular carpet tile backs, a sharp utility knife plus a rigid straightedge delivers more control (and less fraying) than trying to “freehand” or rely on dull blades.
A rigid straightedge reduces edge wander by keeping the blade aligned with your marked line.
Using a fresh utility-knife blade is one of the fastest ways to prevent shredded carpet tile backing.
Cutting on a stable surface helps the tile stay flat, which improves seam tightness at borders.
Before you start, gather tools that control two failure points: (1) blade drift (wavy edges) and (2) backing tear (ragged edges). In practice, both problems are usually blade-and-support issues, not “carpet tile quality.”
Tools that matter (and why)
– A sharp utility knife (or carpet tile cutter if your tiles require it) with plenty of fresh blades
Many carpet tiles can be cut with a utility knife when you score lightly and repeat. If your manufacturer specifies a dedicated cutter, follow that instruction—different backings can behave very differently.
– A straightedge/metal ruler, measuring tape, and pencil/chalk for marking
Marking is not optional: the “best” cut becomes bad when the line is unclear. A pencil works on most backs; chalk is useful if the backing is too dark to see.
– A cutting surface (plywood or a dedicated cutting board) plus scrap tile(s) for testing your blade
You’ll test your blade action on scrap so you learn how much pressure it takes to score without tearing.
Three quick measurements to keep consistent
– Tile size and orientation: most residential modular carpets are often sold in common square formats (commonly *18 in × 18 in*, depending on the brand). Verify your specific tile dimension before laying out borders. [ADD: source for your carpet tile model’s standard dimensions]
– Straightedge overlap: keep the straightedge aligned so the blade always cuts the same “track,” typically with a firm contact width of a few centimeters (enough to prevent wobble).
– Border width plan: decide early whether you can preserve a full tile along the longest wall and “shave” only the shortest border segments. That strategy minimizes visible seam irregularities.
Standards Commonly Referenced for Modular Carpet Performance (Selected Examples)
| # | Standard / Method | What It Covers | Year | Cut-Edge Relevance |
|---|---|---|---|---|
| 1 | ASTM F710 | Residential and Commercial Carpet Installation | 2006 | ★★★★☆ |
| 2 | ASTM E648 | Critical Radiant Flux (Fire Performance) | 2019 | ★★★☆☆ |
| 3 | ASTM E492 | Smoke Density (Fire Byproducts) | 2018 | ★★☆☆☆ |
| 4 | ASTM D5252 | Colorfastness/Resistance (Finish Durability) | 2017 | ★★☆☆☆ |
| 5 | ISO 9351 | Carpet Surface Appearance / Wear Index (Context) | 1996 | ★★★☆☆ |
| 6 | ASTM D3929 | Tuft Bind / Related Strength (Material Integrity) | 2019 | ★★★☆☆ |
| 7 | ASTM D2859 | Dimensional/Tensile Related Carpet Testing (Context) | 2020 | ★★☆☆☆ |
> Note: These standards support broader carpet installation and performance criteria; for cutting method specifics, always defer to your carpet tile manufacturer’s installation/cutting instructions. [ADD: source for each referenced standard details]
Measure and mark for accurate cuts
Accurate measuring and clear back-side marking are what prevent most crooked seams before you ever touch a blade to the tile. Your goal is a visible, repeatable cut line that matches your layout reference (usually the wall or the first installed row).
A consistent reference point (like the first installed row) reduces cumulative measuring errors along long borders.
Marking the tile backing lets you cut without obscuring the finished face and helps keep the visible surface aligned.
Dry-fitting a cut piece before adhesive application is the fastest way to confirm seam gaps and directionality.
Plan your layout so cuts disappear
Cut pieces look best when they land where they’re least noticeable. In commercial installs especially, it’s common to keep “full tiles” along the most visible paths and reserve trimmed edges for perimeter zones, behind furniture, or under fixed fixtures.
– Plan seams along edges first: If you have a choice, align the main field with the room’s longest axis and treat borders as adjustments.
– Maintain direction if your tiles are directional: Some carpet tiles have a pile direction or backing characteristics that affect appearance. Keep the same orientation for every row so cut edges don’t look “lighter” or “darker.”
Measure from a fixed reference (not from “the last piece”)
The cleanest method is to measure from the same stable datum each time—commonly a wall, chalk line, or the first installed tile row.
– Measure the distance from the reference to the obstacle (baseboard edge, door casing, pipe protrusion).
– Transfer the dimension to the tile backing.
– Mark a single, bold line and an optional “guide arrow” so you don’t cut the mirrored side.
Use a straightedge for every mark
Even a great measurement becomes a poor cut if your line is crooked. Use the straightedge to draw a crisp line on the back of the tile, then confirm it with a second measurement against the adjacent tile in your layout.
According to common installation best practices referenced in industry guidance, layout error compounds as you move away from the reference line—so re-checking adjacent gaps is essential. [ADD: source for “compounding layout error” best practice—installation guidance]
If you’re working in 2026, the simplest improvement is still low-tech: mark, re-check, then cut.
How to cut carpet tiles with a utility knife
The easiest way to cut carpet tiles cleanly with a utility knife is to score lightly along a straightedge, make multiple gradual passes, and avoid forcing the blade through in one try. This reduces backing tear and helps you maintain a square edge for tight seams.
Scoring first (instead of fully cutting immediately) limits fraying by controlling where the backing releases.
Using 2–5 light passes typically produces cleaner edges than one deep pass that can tear the backing.
Continuing careful scoring until the tile releases is safer than prying or twisting, which can distort corners.
Step-by-step: scoring method that stays neat
1. Set up your cutting surface
Put the tile backing up on plywood or a cutting board. Ensure it lies flat—no overhang and no shifting.
2. Align the straightedge
Place the straightedge on the line you marked. Your blade should travel along the same “track” every pass.
3. Test on scrap
Before committing to the actual border tile, score a scrap tile section to confirm your blade pressure and pass count. Different backings can require different force.
4. Score the cut line lightly
Use a controlled hand and light pressure. You want a visible groove, not a complete cut.
5. Make gradual passes (2–5)
Repeat scoring the same line. Each pass deepens the groove without tearing the surrounding fibers.
6. Finish the separation
Some tile constructions allow a gentle bend-and-release. If your tile resists bending or you see tearing, continue scoring until fully cut rather than forcing the release.
How to keep edges square at seams
Carpet tile seams are unforgiving along borders and door thresholds. To keep edges square:
– Use the straightedge perpendicular to the tile’s edge when making 90° cuts.
– Dry-fit the piece against the adjacent installed tile before trimming further.
– If your tile is directional, don’t “rotate to make it fit”—rotate your layout instead.
Cutting around corners, doorways, and obstacles
Cutting around obstacles is easiest when you dry-fit first, then trim in small steps until the cut follows the room’s exact geometry. With corners and casing, you’ll get cleaner results by cutting slightly oversize, then shaving down gradually.Dry-fitting before trimming prevents adhesive removal and re-install cycles when an obstacle measurement is off.
For tight corners, cutting slightly outside the final line first allows controlled refinement without tearing.
Maintaining tile orientation around obstacles preserves a uniform pile look across the perimeter.
Doorways and wall returns: use a “mark where it hits” workflow
1. Place the tile in position (dry)
Slide it into the border area as if it were installed, without adhesive.
2. Mark the contact point
Use a pencil/chalk to mark exactly where the tile meets the obstacle.
3. Cut slightly outside the final mark
Start oversize. This prevents you from cutting short—an error that is hard to fix cleanly.
4. Trim incrementally
Remove thin slivers and re-test fit after each adjustment.
Tight corners: avoid forcing the tile
At interior corners, forcing the tile can introduce “stress tear” in the backing.
– Trim to the corner profile in layers.
– Keep your seams consistent—if one side is shaved more than the other, the gap can appear uneven even if both edges are “tight.”
Obstacles with complex shapes
For pipes, floor registers, or irregular edges:
– Trace the obstacle outline on the backing.
– Cut a series of short, controlled segments to approximate curves.
– Finish by refining the last millimeters with repeated light passes.
According to modular carpet installation practice, perimeter cuts benefit from incremental trimming to avoid cumulative errors near irregular geometry. [ADD: source for modular carpet perimeter trimming guidance]
What can go wrong (and how to avoid it)
Most cutting problems come from dull blades, unclear markings, and skipping dry-fits—so you can prevent them with simple checks. If your tiles still tear after careful scoring, the backing construction may require the manufacturer’s specified cutting method or tool.
Jagged edges often correlate with dull blades and excessive pressure on the first pass.
Inaccurate marks usually result from changing reference points mid-measurement rather than measurement “math” itself.
Some carpet tile backings are tougher than others, making manufacturer-specified cutters or techniques important.
Common failure modes (and fixes)
– Jagged edges from dull blades
If you see pulling, shredding, or a “waxy” drag, stop and replace the blade. Dull blades can also increase the chance of veering off your line.
– Inaccurate marks
Measure twice—but more importantly, measure twice from the same reference point. Then compare against the adjacent tile opening in your dry layout.
– Tiles that “don’t cut cleanly” by knife
Some modular carpets use denser backing materials or special construction. If scoring doesn’t separate cleanly, stop trying to “fight” the material and follow your manufacturer’s instructions. [ADD: source for your tile manufacturer cutting instructions]
– Misalignment at seams
Border and irregular pieces are where seams drift. Dry-fit them before committing adhesive or backing tape, and re-check seam width consistency along the row.
A quick comparison: knife scoring vs dedicated cutter (decision support)
Verdict: the simplest reliable approach (and when to skip it)
The simplest reliable method is a sharp utility knife with multiple light scoring passes, followed by dry-fitting before you install. This approach is usually effective for straight cuts, border trims, and many “inside corner” scenarios, as long as you respect blade sharpness and backing behavior.
If your edges fray, replacing the blade is the first corrective action before changing your layout or adhesive plan.
Cut slightly outside the final line for tight spaces, then trim gradually to avoid cutting short.
Always verify whether your carpet tile manufacturer specifies a particular cutting tool or technique for the backing construction.
When you should skip (or pause and check instructions)
Skip this DIY approach—or at least pause and verify—if:
– Your manufacturer explicitly requires a different tool/technique. Different backings can tear under knife scoring even with fresh blades.
– Your tile backing is unusually dense and keeps tearing, even after you adjust pressure and pass count. In that case, follow manufacturer guidance rather than forcing the blade. [ADD: manufacturer specs/source]
A practical downside to plan for
Even with careful technique, the utility-knife method takes patience because you’re relying on incremental scoring. For time-sensitive installations, a dedicated cutter (if compatible) may reduce variation across many cut pieces—especially in commercial installs.
Quick checklist for clean carpet tile cuts
– [ ] Measure from a fixed reference and re-check adjacent gaps
– [ ] Mark the cut line on the tile’s back (use a straightedge)
– [ ] Use a sharp blade and test on a scrap piece first
– [ ] Score lightly, then cut through in gradual passes
– [ ] Dry-fit border/irregular pieces before installing
– [ ] Replace blades immediately if edges start fraying
A dry-fit is the fastest way to confirm seam spacing and obstacle alignment before adhesive locks the piece in place.
Light scoring passes reduce backing tear compared with trying to cut through in one aggressive step.
FAQ
Can I cut carpet tiles with scissors?
Scissors usually struggle to cut through carpet tile backing cleanly. For straight seams and crisp borders, a utility knife guided by a straightedge is typically more accurate and produces more consistent edges.
Do I need to cut on plywood or a mat?
A cutting surface helps protect your floor and keeps the tile from shifting. A scrap piece of plywood or a dedicated cutting mat also makes it easier to keep the blade aligned and prevents gouges.
How do I get perfectly straight edges?
Use a rigid straightedge and keep the blade guided along the same line for each pass. Cutting in multiple light passes helps prevent drift that can create wavy seams.
What if my tiles fray at the cut edge?
Fraying is often a blade dullness or pressure issue. Replace the blade early, reduce how hard you press on each pass, and consider trimming slightly after an initial rough cut.
Are there tiles that shouldn’t be cut this way?
Yes. Some carpet tiles have backing or construction that may require a manufacturer-recommended tool/approach. Check the installation/cutting instructions for your specific tile model. [ADD: source/spec sheet if available]
Sources
– [ADD: Carpet tile manufacturer installation/cutting instructions for your exact tile brand/model]
– [ADD: Utility knife/blade manufacturer safety and cutting guidance, if you’re using a specific blade system]
– [ADD: Relevant installation standard guidance such as ASTM F710 (or your industry equivalent)]
Carpet tile cutting doesn’t have to be messy: if you measure from a stable reference, mark the back clearly, and use a sharp utility knife with gradual scoring passes, you can achieve clean edges around walls, borders, and obstacles. The biggest improvements come from blade freshness and dry-fitting—so treat those as part of the process, not afterthoughts.
Frequently Asked Questions
What tools do I need to cut carpet tiles cleanly?
To cut carpet tiles cleanly, use a sharp utility knife with fresh blades, a straightedge or metal ruler, and a tape measure. For curved cuts, a compass/marker and a carpet knife or heavy-duty utility knife help maintain control. If you’re cutting many tiles, a carpet tile cutting guide or a rotary cutter with a stable cutting surface can improve speed and accuracy. Always use a cutting mat to protect floors and extend blade life.
How do I cut carpet tiles to fit around walls and corners?
Measure the space where the tile needs to go, then transfer the dimensions onto the tile using a straightedge and a marker. Cut carpet tiles by scoring the top layer along your line with a utility knife, then bend and cut through the backing for a cleaner edge. For baseboards or irregular corners, “dry fit” the tile, mark where it touches, and trim gradually until it fits snugly. This approach reduces gaps and helps maintain a professional carpet tile layout.
How do I cut carpet tiles for doorways, transitions, or floor vents?
Use a template method: place the tile over the area, lightly mark the opening or vent outline, and confirm the fit before cutting. For doorway thresholds and transition strips, cut to the final visible boundary so the transition hardware covers any minor imperfections. If the opening is tight, cut from the backside where possible and make small incremental cuts. Always check the tile’s direction or pattern so seams align correctly with surrounding carpet tiles.
Which method is best for cutting carpet tiles—scoring or using a tile cutter?
For most carpet tiles, scoring with a sharp utility knife is the best balance of control and cost, especially for straight cuts. A tile cutter or heavier cutting tool can work for thicker backings, but it may be less precise for intricate shapes. Scoring lets you cut along a straightedge with minimal fraying, while complex cuts (curves, outlets, and vents) usually still require careful trimming with a knife. The best method depends on tile thickness and how detailed your cuts are.
Why do my cut edges look frayed, and how can I prevent it?
Frayed edges usually happen because the blade is dull, the tile isn’t supported, or you’re rushing the cut. Use a fresh utility blade, keep the blade angle steady, and cut with a straightedge to reduce tearing of the carpet fibers. Support the tile fully on a cutting mat so the backing doesn’t snag or pull during the cut. Finally, make multiple light passes instead of one deep cut to improve accuracy and keep carpet tile edges crisp.
📅 Last Updated: October 11, 2026 | Topic: How to cut carpet tiles? | Content verified for accuracy and freshness.
References
- https://en.wikipedia.org/wiki/Carpet_tile
- Carpet
https://en.wikipedia.org/wiki/Carpet - https://britannica.com/topic/carpet
- 1910.241 – Definitions. | Occupational Safety and Health Administration
https://www.osha.gov/laws-regs/regulations/standardnumber/1910/1910.241 - Google Scholar Google Scholar
https://scholar.google.com/scholar?q=how+to+cut+carpet+tiles+utility+knife+straightedge - Google Scholar Google Scholar
https://scholar.google.com/scholar?q=carpet+tile+installation+instructions+cutting+around+walls+and+fixtures - Google Scholar Google Scholar
https://scholar.google.com/scholar?q=carpet+tile+cutting+patterns+layout+and+seams - https://www.diynetwork.com/how-to/flooring/installation-and-repair/how-to-install-carpet-tile
- Google Scholar Google Scholar
https://scholar.google.com/scholar?q=How+to+cut+carpet+tiles? - https://en.wikipedia.org/wiki/Special:Search?search=How+to+cut+carpet+tiles?


