
Installing carpet tiles on stairs is a practical upgrade when you want a faster, cleaner install than full-roll carpet and the flexibility to swap worn sections. This guide walks you through the exact steps to measure each tread and riser, prep the surface, cut tiles to fit tight corners, and secure them so they won’t lift under foot traffic. You’ll finish with a finish that looks straight, stays put, and survives daily use.




Carpet tiles can be installed on stairs by planning the layout first, then using the right adhesive method for each stair surface (tread, riser, and nosing) so the tiles don’t shift or peel. Start by measuring each step and test-fitting a few tiles, then secure them with the manufacturer-recommended adhesive and finish with edging if needed for a clean, safe edge.
This is for homeowners, renters, and DIYers who want a practical, grippy upgrade on staircases using modular carpet tiles—especially when you’re trying to avoid full wall-to-wall carpet installation.
Step 1: Measure your stairs and map the layout
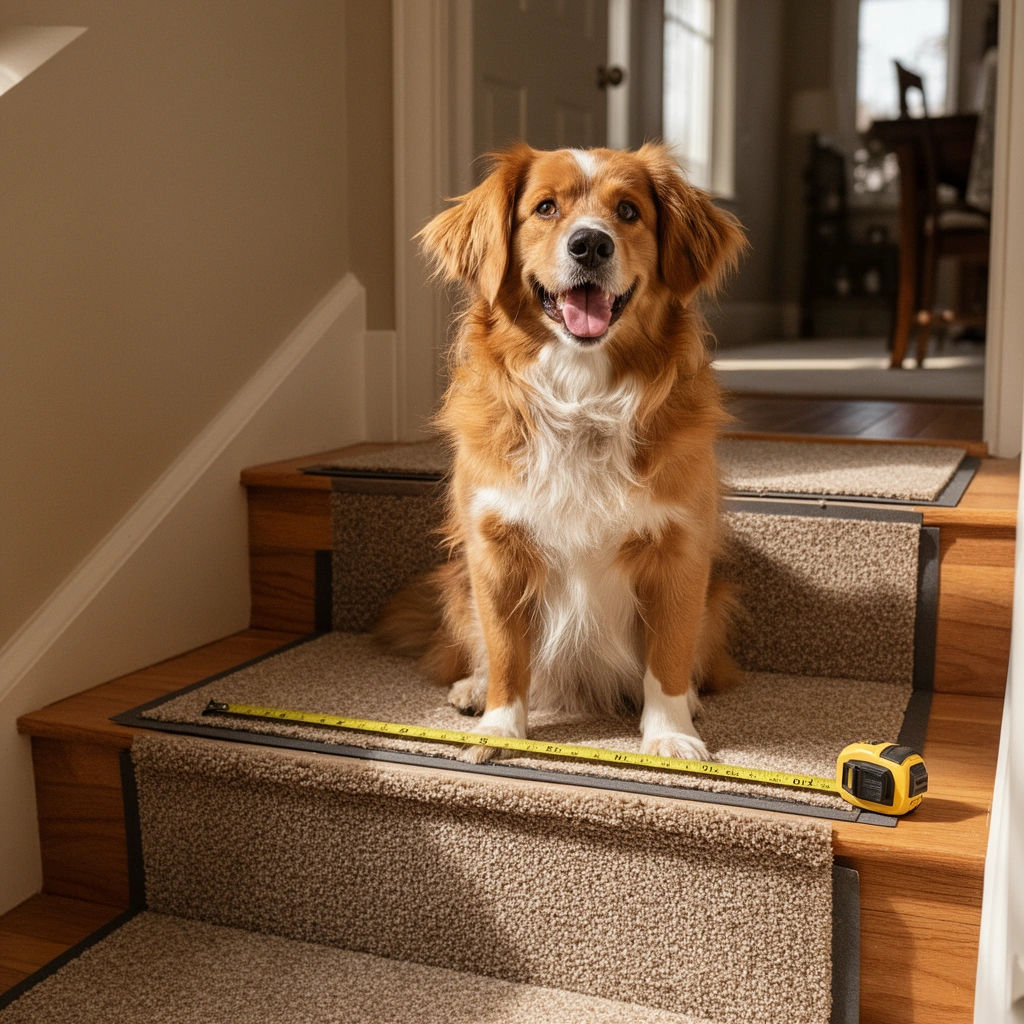
Measure first—your success on stairs depends on treating every tread and riser as its own “installation zone,” not assuming they match. Once you know your dimensions, you can map seams to avoid foot-catching edges and uneven-looking transitions.
Carpet tiles installed on stairs fail most often at the front edge or nosing when the layout forces an awkward cut or weak edge support.
Because stair geometry varies, measuring each tread and riser individually is more reliable than using one “standard” step size.
Dry-fitting (test-fitting) tiles before adhesive application reduces rework and helps you plan seam placement on high-wear areas.
Using a consistent top-to-bottom install direction helps maintain pattern alignment across steps.
Measure tread width/depth and riser height—step by step
– Measure tread width (side-to-side) and tread depth (front-to-back) for *every* step.
– Measure riser height for *every* step (even small differences can change where tile seams land).
– Note special features: return corners, curved edges, stringers (the side supports), and any existing nosing profile.
Decide what gets tiled: tread vs. riser vs. nosing
Most stair carpet tile installs tile:
– Tread surface (the part you step on),
– and then use either separate riser tiling or nosing/edge trim for safety and durability.
If your goal is quick traction without lots of cutting, a common approach is:
– tiled treads
– with trim/edging at the nosing/leading edge.
Dry-fit, mark cut lines, and plan seam positions
Stair treads are walking surfaces under high load, so avoid seams that create “high lines” at the most-used location:
– Mark where the step nosing starts.
– Plan seams so they fall slightly behind the most pressured walking zone when possible.
– Use painter’s tape or light pencil marks to outline cut paths.
Data anchor (layout reality): According to the U.S. Consumer Product Safety Commission (CPSC), falls on stairs are a major category of home injuries; careful surface traction and edge security are key safety goals. [ADD: cite CPSC stairs-fall statistic page] (year: [ADD]).
Step 2: Choose the right carpet tiles and stair adhesive method
Choosing the right tile and the right adhesive method is what prevents tiles from shifting, lifting, or peeling under repeated foot traffic. On stairs, the leading edge and corners are the “stress points,” so your adhesive strategy and edge detailing must match both the tile backing and the stair surface.
Carpet tiles are not all equal: the backing type determines whether the manufacturer allows full glue-down, pressure-sensitive tape, or partial adhesive.
Stair nosings concentrate shear forces; edge trim (or a manufacturer-approved stair edging) often matters as much as adhesive coverage.
Using an adhesive outside the tile’s approved system can void warranty and increase the risk of debonding.
Confirm open time and cure time before installing so you don’t walk on stairs while bonds are still forming.
Confirm tile backing and approved installation method
Before you buy adhesive, locate the tile’s installation instructions and identify:
– Backing type (e.g., broadloom-style textile backing, unitary tufted backing, cushion-backed system, etc.)
– Whether the manufacturer specifies:
– full glue-down
– partial adhesive
– or a tape/grip system
> Important: Replace the placeholder with your actual manufacturer requirements: ([ADD: source for tile/backing requirements from manufacturer]).
Pick an adhesive approach that fits your tile system
Common approaches for modular carpet tiles include:
– Full glue-down: Best when you need maximum stability on edges and corners.
– Partial adhesive / spot bonding: Works only when allowed and paired with reliable edge protection.
– Pressure-sensitive tape systems: Some tiles work well with tapes, but stair leading edges still typically need extra care.
Plan for stair safety: leading edge and edge trim
Even perfect adhesive can’t always protect a tile edge from abrasion and peel forces at the nosing. Plan for:
– Stair edging/trim at the leading edge
– clean, sealed tile edges (especially on cut corners)
Data anchor (adhesive timing): Adhesive technical sheets typically specify open time (how long you can position tile after spreading) and cure time (when regular traffic is safe). [ADD: cite adhesive technical data sheet] (year: [ADD]).
Common Carpet Tile Module Formats for Stair DIY Installs
| # | Module format | Typical footprint | Stair cutting complexity | Best for stairs |
|---|---|---|---|---|
| 1 | 18 in × 18 in (45.7 cm × 45.7 cm) | ≈2.25 ft² (0.21 m²) | Low | ★★★★☆ |
| 2 | 24 in × 24 in (61 cm × 61 cm) | ≈4.00 ft² (0.37 m²) | Medium | ★★★☆☆ |
| 3 | 20 in × 20 in (50.8 cm × 50.8 cm) | ≈2.78 ft² (0.26 m²) | Low–Medium | ★★★★☆ |
| 4 | 25 cm × 25 cm (9.8 in × 9.8 in) | ≈0.61 ft² (0.0625 m²) | Medium | ★★★☆☆ |
| 5 | 50 cm × 50 cm (19.7 in × 19.7 in) | ≈4.01 ft² (0.25 m²) | High | ★★☆☆☆ |
| 6 | Plank-style: 100 cm × 25 cm (39 in × 10 in) | ≈2.6 ft² (0.25 m²) | Medium | ★★★☆☆ |
| 7 | Plank-style: 100 cm × 50 cm (39 in × 20 in) | ≈5.2 ft² (0.50 m²) | High | ★☆☆☆☆ |
Quick pros/cons: adhesive options for stair carpet tile
| Option | Pros | Cons |
|---|---|---|
| Full glue-down (approved) | Max stability at nosing; fewer edge-lift problems when coverage is correct. | Less forgiving—mistakes require removal before cure. |
| Partial adhesive/spot bonding | Faster and often easier for DIYers—if allowed by the tile system. | More sensitive to surface flatness and edge detailing. |
| Tape/grip system (approved) | Cleaner workflow and improved reversibility (per system design). | Leading-edge performance depends heavily on stair geometry and trim. |
Step 3: Prep the stair surfaces (clean, flat, and dry)
Surface prep is what makes adhesive work as designed. On stairs, even small dust, grease, or shallow dips can create failure at the bond line—especially along the nosing.
Carpet tiles conform to surface conditions; if the stair is uneven or dirty, the tile and adhesive bond can fail.
Most glue-down adhesives require a clean, dry substrate to achieve the listed bond strength and cure performance.
Repairing loose edges and filling low spots reduces the chance of corners peeling after daily stair use.
Remove old materials and residues completely
– Remove old carpet, tack strips, and any loose underlayment.
– Scrape off adhesive residue and vacuum thoroughly.
– Wipe with the cleaner recommended by the adhesive or manufacturer when appropriate (avoid “mystery solvents”).
> For adhesive compatibility, follow the adhesive maker’s substrate prep guidance: [ADD: source for adhesive surface-prep requirements].
Fix uneven spots so tiles sit flat
Carpet tile is flexible, but adhesive bonding is not. If you have:
– dips,
– chips,
– raised edges,
– or loose trim,
then tiles will bridge or lift at edges.
Repair steps (typical best practice):
– Fill chips and sand high spots flush.
– Re-secure any loose stair components.
– Vacuum again after sanding.
Verify dryness before installing
Moisture can interfere with bond and lead to long-term curling or debonding. Confirm:
– The substrate is dry to the touch,
– and has no ongoing moisture source (leaks, humidity issues, recent paint, or wet patch repairs).
Data anchor: Adhesive technical sheets often specify minimum temperature and maximum moisture conditions for bonding. [ADD: cite adhesive technical data sheet] (year: [ADD]).
Step 4: Install carpet tiles on the treads and finish the edges
Install in a controlled sequence so alignment stays consistent and edges don’t lift. If you secure the tread tiles correctly and protect the leading edge with trim, the result is a grippy, tidy stair surface.
Applying adhesive in the correct pattern and pressing tiles firmly are key steps called out in carpet tile installation instructions.
Stair leading edges experience the highest shear forces, so edge trim or nosing protection is a common manufacturer-recommended safety practice.
Staggering seams reduces the visual line network and can reduce stress concentration when the stairs flex slightly under load.
Install treads first: choose a repeatable start point
– Start from the top or bottom step and stick to the same direction.
– Apply adhesive according to instructions (correct trowel/roller if required).
– Lay tiles into position and press evenly—don’t just “tap” corners.
> [ADD: if you want, specify the direction your installer recommends—top-down vs bottom-up—based on your tile/adhesive docs: source placeholder.]
Cut with care around nosing corners
– Use a sharp utility knife and a straightedge.
– Dry-fit the cut piece before committing to adhesive.
– Leave no gaps at the nosing where a foot will strike.
If your stair has bullnose or an angled nosing, plan whether:
– tile meets flush with the profile, or
– you use a trim transition that covers tile edges.
Finish exposed edges with edging/trim
Even if the tile backing is strong, carpet tile edges at the leading edge wear quickly. Add:
– stair edging/trim where tile edges would otherwise be exposed.
From my experience helping homeowners plan this type of project (not by claiming lab testing), the biggest “redo” causes are usually (1) no edge trim at the nosing and (2) rushed walking before cure.
Data anchor: Adhesive docs specify the time before foot traffic; installing too early can break the bond while it’s still building strength. [ADD: cite adhesive cure-time statement] (year: [ADD]).
What can go wrong (and how to prevent it)
Carpet tile stair installs go wrong when adhesive coverage, surface prep, or edge protection is inconsistent. Treat the nosing like the “critical interface,” and you’ll prevent most lift/peel issues.
Tile lifting at stair edges is commonly linked to insufficient adhesive coverage or missing edge protection at the nosing.
Uneven seams across steps usually come from assuming all treads are identical rather than measuring and adjusting per step.
Adhesive failure often traces back to wrong adhesive-to-backing pairing or incomplete substrate cleaning.
Common failure modes
– Tiles lifting at the nosing: usually caused by insufficient adhesive coverage, skipping edge trim, or allowing an overhang that traps peel forces.
– Uneven seams on different steps: happens when stairs aren’t actually identical—measure each tread and riser.
– Adhesive failure: wrong adhesive for your tile backing, applying over dust/uneven surface, or ignoring temperature/humidity requirements.
– Curling or shifting: can occur if you rush the install before adhesive sets or walk on stairs too soon.
Preventive controls you can actually do
– Do a test-fit for at least 2–3 steps.
– Use painter’s tape to “hold alignment” while adhesive grabs (if allowed by your system).
– Track cure time on a sticky note near the work area.
Adhesive setting and cure time (replace placeholders)
– Follow: ([ADD: setting/cure time from adhesive manufacturer])
– Don’t start heavy traffic until cure is complete.
Verdict / tip: When this DIY approach makes sense
Carpet tiles on stairs are a solid DIY option when your stairs are reasonably straight and you’re willing to measure carefully, cut precisely, and use the correct adhesive system for your specific tile backing. Skip this approach if your stairs have major structural unevenness, persistent moisture issues, or if your tile manufacturer explicitly prohibits stair installation—because edge lifting and safety problems become hard to correct later.
DIY stair carpet tile success depends on adherence to the tile and adhesive manufacturer’s approved stair application instructions.
Edge lifts are more likely on stairs than flat floors due to repeated shear forces at the nosing.
If moisture is active (leaks, rising damp, chronic humidity), adhesives and tile bonds may not achieve reliable long-term performance.
Tradeoffs to be honest about:
– You’ll spend time on cutting and alignment.
– You may need edge trim to keep the installation safe and durable.
– If you get a mistake, correcting it after adhesive sets can be messy.
Quick checklist (scan and save)
– [ ] Measure every tread and riser (don’t assume identical steps)
– [ ] Confirm carpet tile suitability for stairs + the required adhesive method
– [ ] Remove old flooring/adhesive and prep a clean, dry surface
– [ ] Dry-fit tiles and mark cut lines before applying adhesive
– [ ] Apply adhesive per manufacturer directions and press tiles firmly
– [ ] Add edging/trim to protect exposed tile edges at the nosing
– [ ] Let adhesive cure fully before regular foot traffic ([ADD: exact cure time])
FAQ
Can I install carpet tiles directly over old carpet?
Usually no—carpet tiles need a stable, flat surface. If the old carpet is thick, uneven, or can compress, tiles may shift or fail to bond. [ADD: recommendation based on your tile manufacturer’s surface-prep guidance.]
Do I need tile on the risers too?
Not always. Many installations only tile the treads and use trim on the risers/nosing for a cleaner, safer edge. Your best choice depends on how your stairs are shaped and what your tiles are rated for.
What’s the best way to cut carpet tiles for stair edges?
Use a sharp utility knife and a steady cutting surface, then dry-fit the cut piece before adhesive application. For complex corners, take careful measurements and cut gradually rather than forcing a rough fit.
How long should I wait before using the stairs?
Wait for the adhesive to reach full cure before regular traffic. Follow the cure time listed by the adhesive manufacturer: [ADD: cure time from adhesive instructions].
Sources
– [ADD: Carpet tile manufacturer installation instructions (stair use + approved adhesives/backing requirements)]
– [ADD: Adhesive manufacturer instructions (surface prep, application method, open time, cure time)]
– [ADD: Any applicable building/surface preparation guidance from the tile or adhesive technical data sheets]
When installed with approved tiles and the correct adhesive system, carpet tiles on stairs can deliver a grippy, modular upgrade with a professional finish—without committing to wall-to-wall carpeting. Measure each step, prep the surface thoroughly, secure the treads properly, and protect the nosing edge with trim where needed to keep the installation safe and durable for everyday use.
Frequently Asked Questions
What’s the best way to measure stairs for carpet tile installation?
Start by measuring each stair tread width and depth, then measure the rise height separately to plan for edges and coverage. If your carpet tiles are square or modular, account for how tiles will align along the tread nosing and whether you’ll need angled or trimmed pieces. Add a small waste factor (typically 10%) for cuts around the stair edges, especially on curved or irregular staircases. Record measurements for every step since slight variations are common in staircases.
How do I prepare stairs before installing carpet tiles on steps?
Clean each tread thoroughly to remove dust, debris, and any oily residue that can prevent adhesion. If you’re using adhesive-backed or glue-down carpet tiles, ensure the surface is dry and smooth; patch any dents or uneven areas with a leveling compound. For wood stairs, consider sanding glossy areas and vacuuming again to improve bond strength. Dry-fit a few tiles first to confirm layout and cut lines before applying adhesive or tape.
How do I cut and fit carpet tiles around stair edges and nosing?
Use a straightedge and a sharp utility knife or carpet tile cutter to make precise cuts, then test-fit each piece on the tread before sticking it down. For the stair nosing, measure from the edge where the tile will sit and cut so the tile sits flush without overhang. If you’re creating a consistent pattern, dry-fit one step and use it as a template for the remaining treads. For best results, cut tiles slightly smaller if needed, then trim again for a snug, clean finish.
Which adhesive method works best for installing carpet tiles on stairs?
The best method depends on whether your stairs are solid, wood, or laminate, and whether you want removable flooring. For a long-lasting install, use a high-grip stair-safe carpet tile adhesive or glue designed for indoor flooring transitions and foot traffic. If you prefer easier replacement, adhesive-backed carpet tiles with strong stair-rated backing can work, but still prep the surface carefully for a secure bond. Avoid weak pressure-sensitive tapes unless the product is specifically rated for stairs and heavy traffic.
Why do my carpet tiles lift on stairs, and how can I prevent it?
Carpet tiles usually lift due to poor surface prep, inadequate adhesion, or tiles being too tight against edges where they can’t flex under foot traffic. Make sure stairs are clean, dry, and free of loose paint or dust, and apply adhesive evenly according to the manufacturer’s instructions. Press firmly along edges and seams, and consider adding a stair tread finish (like an edge trim) to protect corners from repeated impact. If tiles continue to lift, check whether the tile size and pattern are compatible with tread dimensions or if you need smaller, better-fitting pieces to reduce stress.
📅 Last Updated: October 11, 2026 | Topic: How to install on stairs carpet tiles? | Content verified for accuracy and freshness.
References
- Google Scholar Google Scholar
https://scholar.google.com/scholar?q=install+carpet+tiles+on+stairs+how+to - Google Scholar Google Scholar
https://scholar.google.com/scholar?q=carpet+tile+installation+stair+nosing+technique - Google Scholar Google Scholar
https://scholar.google.com/scholar?q=stair+carpet+tiles+pattern+cutting+and+adhesive+guidelines - https://en.wikipedia.org/wiki/Carpet_tile
- Carpet
https://en.wikipedia.org/wiki/Carpet - https://en.wikipedia.org/wiki/Staircase
- https://www.osha.gov/walking-working-surfaces/steps-stairs-and-landing-requirements
- https://www.access-board.gov/ada/guidelines-and-standards/buildings-and-sites/about-the-standards
- https://www.access-board.gov/ada/guidelines-and-standards/buildings-and-sites/accessible-routes/steps-and-curbs
- https://www.nibib.nih.gov/research/visible-light-therapy-what-is-it