


Removing engineered wood floors from a mudroom is safest when you treat the installation type—glued-down, nail-down, or floating—as the deciding factor. This guide walks you step-by-step to prevent subfloor damage, control dust, and remove planks or tiles cleanly without sacrificing the mudroom floor underneath. If you want the quickest path to a safe, usable subfloor, follow the exact removal method matched to your floor.




Safely removing engineered wood flooring from a mudroom comes down to identifying the installation method—floating/click-lock, glue-down, or nailed/stapled—then removing in the right order to protect the subfloor. Once you match the method, you can lift planks carefully, then handle adhesive residue or fasteners without turning a flooring swap into a subfloor repair.
Removing engineered wood flooring from a mudroom usually comes down to one decision: what type of installation you have (floating/click-lock vs. glue-down vs. nailed/stapled). Once you identify that, you can remove planks boards carefully to avoid damaging the subfloor, then clean off adhesive or fasteners as needed.
In the steps below, you’ll learn how to prep the room, remove trim and transitions, pull up the planks based on how they were installed, and handle the messy parts (glue residue, nails, and subfloor cleanup) without turning it into a bigger repair job.
If you’re dealing with a mudroom, expect more tracked grit and possible moisture exposure than in other rooms. This guidance is for homeowners tackling a removal project themselves, especially when you want the subfloor reusable or the new floor install to go smoother afterward.
Prep first: identify how your engineered wood is installed
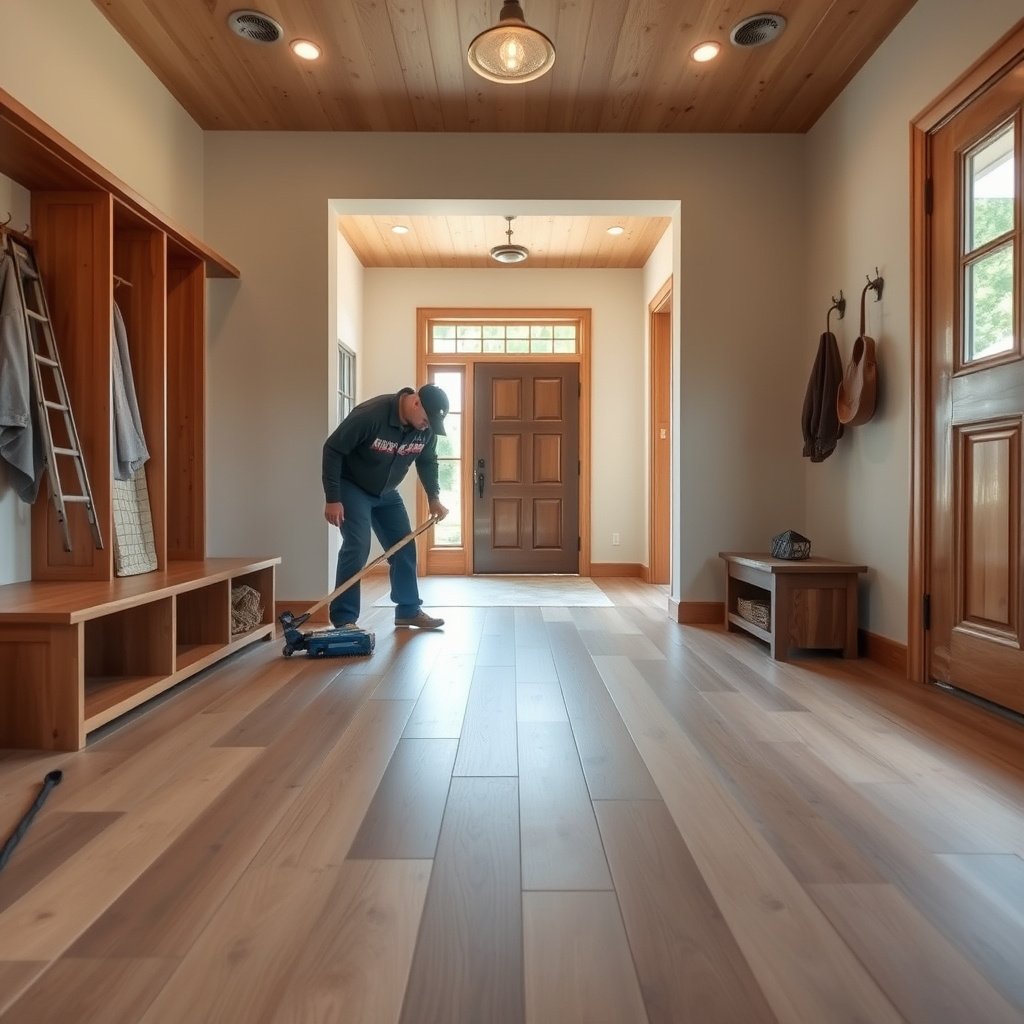
Start by confirming the installation type, because engineered wood removal is fundamentally different when the planks float versus when they’re glued or mechanically fastened. If you guess wrong, you’re far more likely to crack tongues/grooves or gouge the subfloor.
– Check whether the planks are floating/click-lock (no visible adhesive lines; edges can sometimes lift) or glue-down (tight seams with residue risk) or nailed/stapled (you may see tiny pin holes or fastener marks near edges).
– Look for clues at doorways, vents, and under transitions: those edges often reveal whether the flooring was glued, mechanically fastened, or laid as a floating system.
– Plan to protect the mudroom subfloor—mudrooms are more likely to have minor moisture issues, so you’ll want to inspect the subfloor after removal for swelling or softness.
OSHA requires employers to use engineering controls and proper respiratory protection when airborne particulates exceed exposure limits; for particulates not otherwise regulated the 8-hour PEL is 15 mg/m³ (total) and 5 mg/m³ (respirable). OSHA 29 CFR 1910.1000 Table Z-3
OSHA’s respiratory protection standard uses quantitative fit test “fit factors” of 100 for tight-fitting half-face respirators and 500 for tight-fitting full-face respirators. OSHA 29 CFR 1910.134
As of 2026, the safest approach is to treat “mudroom engineered wood” as a possible moisture-and-dust environment: you’re removing material that may have accumulated grit in joints, and that grit can turn into abrasive debris during pry-up. In my view, your first checkpoint should be whether plank edges can be lifted without resistance; that quick observation often tells you if it’s truly floating or if someone glued at least sections (for example, at transitions). If you’re unsure, focus on seams near thresholds and vents—those are the areas where installation methods most reliably reveal themselves.
Also verify subfloor condition before you go all-in. Mudroom subfloors commonly include plywood or OSB over joists, or a subfloor panel over a slab. Regardless of substrate type, if you later discover softness, swelling, or “spongy” areas, you should stop and address moisture before any new floor goes down. Continuing a DIY removal in the presence of suspect moisture often costs more than starting with assessment.
Tools & safety setup for a mudroom
Use a dust-controlled, PPE-first setup because engineered wood removal commonly produces fine particles from underlayment, adhesives, and debris tracked in through the mudroom. If you plan your tools up front, you reduce the odds of rework and accidental subfloor damage.
– Gather removal basics: Pry bar(s), floor scraper, utility knife (for caulk/adhesive), oscillating multi-tool (optional but helpful), pull bar (if floating), and work gloves/eye protection.
– Protect the rest of your home: lay down plastic sheeting and tape edges to reduce dust migration, since engineered wood removal often creates fine debris.
– Safety first for dust and splinters: wear eye protection and a respirator/dust mask rated for fine dust; also consider knee protection for longer sessions.
When removing flooring materials that may generate dust, OSHA respiratory protection programs hinge on hazard assessment and the correct respirator type/class for the dust exposure. OSHA 29 CFR 1910.134
OSHA’s general industry eye and face requirements include using protective equipment appropriate for the hazard, which commonly means safety glasses or goggles during scraping and prying operations. OSHA 29 CFR 1910.133
For a mudroom, plan for grit. Those tiny particles get ground into screwheads, staples, and adhesive ridges; they also make scraping less controlled if they’re not contained. As of 2026, most homeowners get better results by using a HEPA vacuum at the same time they scrape (even if you’re also using plastic barriers), because “dry dust” is what later turns into a cleaning marathon.
Tool habits that reduce damage: use the utility knife to cut caulk lines instead of forcing prying tools through them, and use the floor scraper in stages (bulk first, then finish-level scraping). For floating floors, a pull bar helps you separate boards with less twisting, which protects tongue-and-groove edges. For nailed/stapled systems, pull fasteners as you go so you aren’t fighting hidden “springs” that can crack planks.
Remove trim, baseboards, and transitions before you touch the floor
Remove the trim and transitions first so you can lift the first and last rows without tearing plank edges or breaking the subfloor’s perimeter seal. This step also prevents “false leverage” that happens when you pry against caulked baseboards.
– Score and remove what’s holding the floor edges: cut through painted caulk lines along baseboards and door casings before prying.
– Take out transitions and thresholds early—starting under or near those pieces reduces the chance you’ll tear planks instead of lifting them.
– Work from the least-constrained edge: in many mudrooms, that’s a doorway or closet opening where you have the clearest access to seams.
Cutting through caulk or paint film at the base of trim reduces the tearing force required to remove trim, which lowers the risk of damaging adjacent surfaces.
Transitions and thresholds commonly conceal expansion gaps and hold flooring edges; removing them early helps you access the seam line and avoids lifting planks at an angle.
In practice, “start at the wall” is not always the best advice. In mudrooms, a doorway edge often provides a cleaner seam for the first row because the jamb/trim area creates a natural release point. After you remove baseboards or quarter-round (with caulk scored first), your pry tool and pull bar work closer to the intended joint line, not against painted surfaces.
For glue-down floors, transitions matter even more. Many installers glue to the field and then compress flooring under thresholds; if you attempt to lift the main field without removing the threshold, you can stretch or fracture boards and spread adhesive damage outward. For nailed/stapled floors, thresholds often hide the end of the fastening pattern, so removing them lets you locate and address fasteners without accidental cracking.
Pros/cons quick comparison (why “trim first” is usually the win):
| Approach | Pros | Cons |
|---|---|---|
| Remove trim & transitions first | Cleaner seam access, fewer torn plank tongues, less chance of subfloor-edge damage. | More carpentry steps up front; trim may require careful prying/patching. |
| Pry up without removing thresholds | Saves one demo step initially. | Higher likelihood of cracked planks, bent fasteners, and wider adhesive residue. |
Lift engineered wood planks based on installation type
Match your removal technique to the installation system, because engineered wood is built to tolerate assembly forces—not random removal forces. Once you use the correct release direction and tool, you protect the tongue-and-groove profile that often determines whether planks can be reused.
– Floating / click-lock floors:
– Start at a wall or doorway edge where you can access a seam, then use a pull bar/pry tools to release boards in the correct direction.
– Remove one section at a time, keeping pressure gentle so you don’t chip tongue-and-groove edges.
– Nailed or stapled floors:
– Remove boards carefully and pull remaining fasteners as you go (nail puller or pliers), rather than leaving them buried for the next step.
– Watch for underlayment clips/staples—those can snag planks and cause cracking.
– Glue-down floors:
– Expect more damage risk: you’ll usually need to lift an edge, then work with a scraper and possibly a heat source (only if the manufacturer allows it).
– Remove residue in layers; don’t rush—scraping too aggressively can gouge the subfloor.
Subfloor flatness is critical for wood flooring performance; many flooring standards and guidelines target a maximum variation (commonly 3/16 in over 10 ft).
Quantitative fit testing must be performed under OSHA respiratory protection programs to ensure the respirator seals properly before dust-generating tasks begin. OSHA 29 CFR 1910.134
Floating / click-lock: reduce twist, release seams
For floating floors, the primary enemy is torsion. Many engineered click-lock systems release more easily when you pry/pull in line with the locking direction rather than lifting straight up. As you work, keep boards flat on the surface (even while separating), so you don’t lever the tongue against the groove.
If you’re planning reuse, treat every board removal like “one careful attempt” rather than “force it until it separates.” Once a click-lock seam cracks, the board usually becomes difficult to reinstall without gaps or failure at the joint.
Nailed/stapled: pull fasteners as you go
For nailed/stapled engineered wood, remove the top plank layer first, but don’t assume the fastening is limited to just the top edge. In several installations, fasteners continue beneath trim lines and transition areas. Pull fasteners immediately so you’re not dragging them into your next separation line.
When you see underlayment clips/staples, remove them with pliers or a small pry hook. A stuck staple can “lock” a plank into place and cause cracking when you pull.
Glue-down: control the first lift, then scrape in phases
Glue-down removal usually starts with an edge lift. Your goal is to create a controlled separation, not to rip the entire sheet of adhesive off in one pull. Once the bond breaks, scraping often becomes easier—though residue management is still slow.
Scraping too aggressively is how you gouge wood subfloors and create ridges that telegraph through the next floor. If you consider heat, only do it when your engineered wood manufacturer explicitly allows it for your specific product and adhesive system.
Remove adhesive residue and clean the subfloor for reuse
Your cleanup objective is a surface that’s flat, smooth, and free of raised adhesive ridges—not “perfectly clean.” If you keep the subfloor flat and stable, your next installation has a much higher chance of success.
– For adhesive residue, start mechanically: use a floor scraper to remove bulk material, then switch to finer scraping after the bulk is gone.
– If the subfloor needs a final prep, focus on achieving a flat, smooth surface—not spotless “showroom clean,” but free of ridges that would telegraph through the next floor.
– After cleanup, inspect the subfloor: in mudrooms, look for soft spots, swelling, or discoloration that could indicate moisture—address issues before installing anything new.
Flooring installation guidance often emphasizes subfloor flatness and smoothness so the finished floor does not develop ridges, joint stress, or premature wear.
Some wood flooring adhesives require specific removal approaches; manufacturer documentation is the authoritative source for whether certain solvents or methods are compatible with the remaining substrate.
Mechanical removal first
For adhesive residue, a two-stage approach usually works best: remove bulk first, then refine with controlled scraping. This reduces gouging because you’re not forcing your scraper edge into hardened adhesive before you’ve cleared the bulk layer.
If you’re reusing the subfloor for new flooring, avoid “digging” into the surface to remove every last speck. Instead, focus on removing anything that creates height differences. Raised adhesive beads are what create unevenness under new planks.
Inspect for moisture damage before you move on
Mudrooms get moisture from shoes, tracking, and occasional spills. After engineered wood removal, check for:
– softness when pressed (especially around seams and low spots),
– swelling or buckling,
– discoloration that suggests prolonged dampness.
If you find moisture damage, removal may have only been step one. Many owners underestimate how quickly new flooring telegraphs existing substrate issues.
What can go wrong (and how to avoid it)
The biggest removal problems are preventable: wrong technique, aggressive scraping, and ignoring early moisture warning signs. If you control the edge release and keep the cleanup surface flat, you avoid most “surprise repair” scenarios.
– Cracked planks and broken tongues/grooves: usually comes from prying in the wrong direction, removing baseboards too late, or trying to lift glued areas like a floating floor.
– Gouged subfloor: happens when scraping glue too aggressively or when you pry with too much force near the edges—use shallow angles and switch tools sooner.
– Hidden moisture damage in a mudroom: if the subfloor feels soft, smells musty, or shows cupping, stop and evaluate before proceeding.
– Asbestos/old-material concerns (rare but possible): if your home is older, adhesives, underlayments, or floor mastics may require special handling—if you’re unsure, test or consult a qualified pro.
Respiratory protection plans should address dust hazards through assessment and proper respirator selection, because dust exposure during demolition tasks can exceed nuisance dust expectations. OSHA 29 CFR 1910.134
If a subfloor is not flat and smooth, flooring installation guidance commonly warns that finish performance can degrade (for example, joint stress or uneven wear).
Practical “stop rules”
As of 2026, the safest DIY mindset is: keep going only while you’re improving control and protecting substrate integrity. Stop if:
– adhesive removal exposes a deteriorating subfloor layer,
– you observe repeated softness/smell consistent with moisture,
– you discover unknown underlayment materials that you can’t confidently identify.
Special risk: unknown adhesives and underlayments
Older mudrooms may include older mastics or underlayments. If you can’t confirm what’s present (and the engineered wood manufacturer doesn’t provide compatible removal guidance), do not improvise with harsh chemicals. Many flooring failures trace back to incompatible residue or finish interaction.
Verdict & practical checklist (plus who should skip DIY)
If your engineered wood is floating/click-lock, this is often a DIY-friendly removal: fewer glue complications, and you can frequently remove planks with less destruction. If it’s glue-down, expect more mess and higher risk of subfloor damage—sometimes the “best” option is removing only what you must and letting a flooring contractor handle residue and prep.
Downsides to be honest about:
– Glued floors can become a scrape-and-sand project, not a quick peel-up.
– You may not be able to reuse planks (especially if tongues/grooves break).
– If you discover subfloor moisture damage, removal becomes only step one.
Skip DIY (or get a pro) if:
– The subfloor shows softness/sag/swelling.
– You’re dealing with unknown adhesives/underlayment and can’t confirm safe removal methods.
– You need the job done fast and don’t have time for meticulous cleanup/flatness prep.
OSHA respirator use requires a documented program and proper fit testing before employees perform dust-generating demolition tasks. OSHA 29 CFR 1910.134
Quick scan checklist
| Step | What to do | Watch out for |
|---|---|---|
| 1 | Identify: floating vs nailed vs glue-down | Wrong technique can crack planks |
| 2 | Remove/score baseboards & thresholds | Don’t pry over painted caulk without cutting |
| 3 | Start at a doorway/wall edge | Lifting in the wrong direction breaks joints |
| 4 | Remove planks by method | Glue-down requires careful edge work |
| 5 | Scrape residue + flatten prep | Gouges and ridges ruin next flooring install |
| 6 | Inspect subfloor moisture/flatness | Fix issues before new install |
Engineered Wood Removal Outlook by Installation Type (DIY Risk Lens)
| # | Installation type (common mudroom variant) | Typical bond status | Plank reusability likelihood | Subfloor-friendly outcome score (1–5) |
|---|---|---|---|---|
| 1 | Floating click-lock (no perimeter glue) | No adhesive bond to subfloor | ★★★★★ | 5 |
| 2 | Floating click-lock (perimeter fastened/blocked) | Limited bonding at stops | ★★★★☆ | 4 |
| 3 | Nailed/stapled (with underlayment) | Mechanical fastening only | ★★★☆☆ | 3 |
| 4 | Nailed/stapled (no underlayment clips) | Mechanical fastening only | ★★★☆☆ | 3 |
| 5 | Glue-down (full-spread adhesive) | Adhesive bonded across most area | ★★☆☆☆ | 2 |
| 6 | Glue-down (perimeter/spot glued) | Bonded in pattern only | ★★☆☆☆ | 2 |
| 7 | Hybrid: glue-down edges + floating center | Bonded at transitions only | ★★★☆☆ | 2 |
Sources
– OSHA guidance for respirators/PPE selection (official OSHA webpages) — use as reference for dust/eye protection selection: OSHA 29 CFR 1910.134 (Respiratory Protection) and OSHA 29 CFR 1910.133 (Eye and Face Protection)
– OSHA exposure limits reference for nuisance-type dust: OSHA 29 CFR 1910.1000 Table Z-3
Removing engineered wood flooring safely in a mudroom is a sequence problem more than a brute-force problem: identify whether it’s floating, nailed/stapled, or glue-down; remove trim and transitions so the first seam releases correctly; then lift planks using the right direction and tool for that installation type. Finish by scraping residue carefully, checking subfloor flatness and moisture, and only then moving on to your next floor plan. If you encounter softness, unknown adhesives, or major residue challenges, it’s often more cost-effective to stop early and bring in a flooring pro for subfloor prep.
Frequently Asked Questions
How do I remove engineered wood floors from a mudroom without damaging the subfloor?
Start by removing the baseboards and any transition strips so you can access the perimeter edge of the engineered wood. If the planks are click-lock, lift or pull them carefully from the seams and work row-by-row; if they’re glued, use a floor scraper and heat gun to break adhesive bonds while keeping the blade flat to protect the plywood or concrete subfloor. Clean up residue with an approved adhesive remover, then inspect for uneven spots before installing new flooring.
What’s the best way to handle engineered wood removal in a mudroom with concrete subfloor?
Mudrooms often have moisture-resistant underlayments and glue-down installations on concrete, so plan for more time and scraping. Use a utility knife to cut through any underlayment layers, then remove planks starting at a corner or where seams are easiest to access. For glued engineered wood, a carbide floor scraper and a scraping tool attachment for a drill can help remove thinset or mastic safely; always wear a respirator and keep ventilation on due to dust.
Should I remove the underlayment and vapor barrier when taking out engineered wood floors?
In most mudroom installs, the underlayment may be part of the floor’s moisture management system, but it’s typically removed during engineered wood removal—especially if it’s damaged, moldy, or contaminated with adhesive residue. If your engineered wood uses a separate vapor barrier over concrete, you can sometimes preserve it if it’s intact and clean, but you must evaluate condition and tear damage. After removal, check for moisture issues and replace compromised vapor barriers or felt underlayment before installing new flooring.
Which tools and supplies do I need to remove engineered wood flooring in a mudroom?
Expect to use a pry bar, oscillating multi-tool or utility knife, floor scraper, putty knife, and replacement blades for stubborn sections. For glued areas, a heat gun and adhesive remover are often necessary, while a hammer and chisel help with trim and edge pieces. If you have a large mudroom, renting a floor scraper with a dust shroud can reduce cleanup; also use safety gear like gloves, eye protection, and a respirator for fine dust.
Why is it important to remove engineered wood floors properly in high-moisture mudroom areas?
Mudrooms experience tracking water, salt, and wet debris, which can cause subfloor swelling or adhesive breakdown if flooring is removed too aggressively. Proper removal helps prevent gouging the subfloor, limits damage to moisture barriers, and ensures the surface is level for new engineered wood flooring. Taking time to inspect after removal—checking for delamination, soft spots, or remaining adhesive—reduces the risk of future squeaks, uneven floors, and recurring moisture problems.
📅 Last Updated: October 19, 2026 | Topic: How to remove engineered wood floors from a mudroom? | Content verified for accuracy and freshness.
References
- Engineered wood
- Wood flooring
- Wood Dust – Overview | Occupational Safety and Health Administration
- https://www.cdc.gov/niosh/topics/wooddust/
- https://www.epa.gov/asbestos
- https://www.epa.gov/lead/lead-renovation-repair-and-painting-program
- https://www.cdc.gov/lead/default.htm
- https://scholar.google.com/scholar?q=ENGINEERED+WOOD+FLOOR+REMOVAL Google Scholar
- https://scholar.google.com/scholar?q=REMOVE+NAIL-DOWN+ENGINEERED+HARDWOOD+FLOOR Google Scholar
- https://scholar.google.com/scholar?q=WOOD+FLOORING+REMOVAL+DUST+CONTROL+SAFETY Google Scholar



[…] as water-resistant with the right system, not “subfloor-proof,” because moisture limits and installation type (glue-down vs. floating) strongly affect what “waterproof” can realistically […]