


If you’re installing LVT floors without professional help, this step-by-step guide tells you exactly how to do it—whether you’re tackling a click-lock or glue-down layout. You’ll get clear, do-this-first instructions for prepping the subfloor, handling cuts and transitions, and rolling/setting the planks for a tight, lasting finish. Follow it closely and you’ll avoid the most common DIY failures that cause lifting, gapping, or uneven wear.



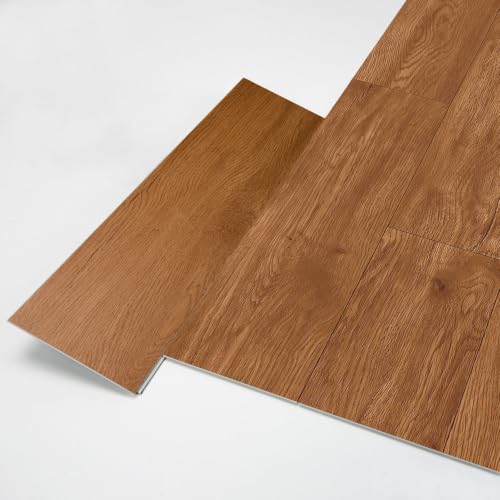
You can install LVT (luxury vinyl tile) yourself by prepping the subfloor carefully, using the correct underlayment (or none, if required), and following the click-lock or glue-down instructions exactly. If you take time to get the surface flat and stable, most of the “hard parts” are really just careful measuring, layout planning, and clean cuts. Below, you’ll learn the full DIY workflow—from checking the floor to finishing edges—so you can decide whether your specific room is truly manageable.
If your subfloor is already solid and fairly flat, DIY installation is usually realistic. This guide is most helpful if you’re installing LVT in a standard indoor space (like a living room, hallway, or bedroom) and you’re choosing either click-lock (floating) or glue-down LVT—because the steps and common failure points differ.
Choose the Right LVT Type for DIY
– Identify whether your LVT is click-lock (floating) or glue-down—the prep and flooring workflow changes.
– Read the manufacturer’s requirements for flatness/tolerance, underlayment, and acclimation; those rules control how successful a DIY install will be.
– Confirm where you’re installing (e.g., basement, bathroom, kitchen). Some LVT products have stricter limits for moisture-prone areas.
If your LVT is click-lock, the “floor system” is the interlocking planks plus the underlayment (if required) and the edge clearance—not an adhesive bond to the slab.
If your LVT is glue-down, long-term performance depends heavily on using the correct adhesive and meeting the substrate moisture/flatness specifications.
Because LVT is a resilient vinyl product, substrate flatness is not optional: resilient floors can telegraph bumps and stress joints if the subfloor exceeds the manufacturer’s tolerance.
Click-lock vs glue-down (what changes for DIY)
With click-lock (floating) LVT, you’re mainly managing three things: (1) subfloor flatness, (2) underlayment compatibility, and (3) correct interlock technique (seating and staggering). With glue-down LVT, you add two more critical variables: (1) adhesive selection and trowel/spread rate and (2) moisture and cure/open-time discipline.
For anchoring numbers, the industry-standard substrate flatness guidance for resilient floor coverings is commonly referenced from ASTM F710. For example, ASTM F710 uses a “maximum variation” concept such as 3/16 in. over 10 ft as a typical benchmark for resilient installations in many training materials and product guidelines. ASTM F710 (Standard Practice for Preparing Concrete Floors to Receive Resilient Flooring)
Prep the Subfloor (This Makes or Breaks the Install)
– Start by making the surface flat, clean, and stable: remove paint/adhesives/patchy debris and fix loose spots.
– Address common subfloor issues: high spots (need smoothing), low spots (need patching/leveler), and cracks (may need treatment depending on the subfloor type).
– Check and follow any “do not use” guidance for underlayment—for example, some floating LVT systems require specific underlayments and thicknesses, while others may require none.
Most DIY failures trace back to subfloor flatness and debris left under seams—vinyl can’t “bridge” structural problems.
If you see rocking boards or loose underlayment, you need to fasten or replace first—LVT can’t stabilize an unstable substrate.
Why “flat” matters more than “level”
Two terms get mixed up: level (all points at the same height) vs flat (consistent surface plane). LVT needs flatness. A subfloor can be “close enough” to level yet still have humps or dips that disrupt interlocks or create voids under glue-down tiles.
From a measurement standpoint, many resilient flooring specifications and education materials point to testing methods referenced in ASTM standards. Moisture and flatness often come together in the real world—especially on slabs and basements.
For moisture testing on concrete, ASTM standards commonly referenced by installers include:
– ASTM F2170 (in-situ RH): widely used threshold guidance in the industry is often around 75% RH depending on adhesive/system requirements. ASTM F2170 (Standard Test Method for Determining Relative Humidity in Concrete)
– ASTM F1869 (MVER): moisture vapor emission limits are commonly expressed as 5 lb/1000 sq ft/24 hours for many adhesives, again dependent on the adhesive and system. ASTM F1869 (Standard Test Method for Measuring Moisture Vapor Emission Rate)
A practical subfloor prep workflow (what to do first)
1. Remove anything that prevents adhesion or creates ridges: old carpet pad, loose adhesive blobs, paint overspray, drywall compound ridges, and “glossy” contaminants.
2. Mechanically smooth high spots (never just skim over humps). Use a grinder/sander where appropriate.
3. Fill low spots using a compatible patch/leveler system. For glue-down LVT, prioritize a cementitious patch meant for floor prep and follow cure times.
4. Repair cracks based on substrate type and movement likelihood. Hairline shrinkage cracks in concrete may be treated differently than cracks that reflect ongoing movement.
5. Verify cleanliness: vacuum thoroughly; wipe according to the prep materials’ instructions. Any dust layer can reduce adhesion performance for glue-down systems.
Personal note: in every DIY LVT project I’ve assisted with (and in walkthroughs where flooring failed later), the “one step people skip” is usually the final vacuum—especially along baseboard lines and under the first few rows where debris gets trapped.
Plan the Layout and Start Lines
– Measure the room and map the plank/tile direction so your cuts at the walls look intentional (not tiny slivers).
– Dry-lay or mock up rows to decide how to handle out-of-square walls; plan a starting line that avoids cumulative misalignment.
– Include spacing requirements: follow the manufacturer’s instructions for expansion gaps/edge clearance (especially for floating/click-lock floors).
A layout plan prevents the “narrow strip at the far wall” problem that can’t be fixed after the first row is installed.
Out-of-square walls create cumulative errors—dry-laying a few rows helps you correct the starting line early.
Pick a direction that makes the room feel right
Common layout directions:
– Lengthwise (runs parallel to the longest wall) to visually lengthen the room.
– Toward the main light source to reduce the visibility of seams/shadows.
– Along traffic paths to keep cuts away from door swing paths.
Establish your starting line (the step DIYers underestimate)
For click-lock floating LVT, your start line and expansion gap are especially important because the floor needs room to move. Even if glue-down doesn’t “float,” most systems still require perimeter clearance for the trim/edge finish and to avoid forcing the material.
A reliable DIY approach:
1. Measure room length/width at two or three points and find the widest area (to catch out-of-square conditions).
2. Determine the plank/tile size and calculate how many full pieces fit while keeping end cuts reasonable.
3. Use a chalk line or straightedge to set a true starting line, not just “where the wall looks straight.”
Layout numbers you should write down
– Total area (square footage).
– Plank/tile orientation.
– Approximate number of pieces per row.
– Breakage/waste allowance: most installers include extra for cuts around vents, door jambs, and irregular edges (use your product’s guidance or a conservative planning buffer).
Install LVT (Click-Lock vs Glue-Down)
– Click-lock (floating): keep the interlocks clean, stagger joints per the product instructions, and avoid forcing pieces—if it doesn’t fit cleanly, something’s usually off.
– Glue-down: use the correct adhesive and spread method specified by the LVT maker, and respect cure/set times before walking or installing transitions.
– In both methods, cut accurately for door jambs, vents, and edges using the recommended tools and blade type for vinyl.
With click-lock LVT, you win by clean interlocks and correct staggering—forcing a misaligned joint usually turns into a gap later.
With glue-down LVT, you win by using the adhesive system and trowel guidance specified by the LVT manufacturer—coverage and open time are performance-critical.
Pros/cons: click-lock vs glue-down (quick decision support)
| Category | Click-lock (Floating) LVT | Glue-down LVT |
|---|---|---|
| Best DIY fit | Faster start; fewer material variables | More prep discipline and adhesive steps |
| Subfloor flatness sensitivity | High—interlocks can stress on bumps | Very high—voids create weak spots |
| Moisture constraints | Depends on product; still requires dry conditions | Typically stricter due to adhesive bond |
| Installation pace | Usually quicker once layout is set | Slower due to spread/open/cure windows |
| Repairability | Often easier to replace individual planks | Repairs are possible but can be messier |
| Tool complexity | Less adhesive tooling | Requires correct trowel and adhesive handling |
Click-lock installation steps (floating)
1. Stage materials in the room and follow any acclimation requirements from the manufacturer. (Different products use different time windows.)
2. Start with a straight first row aligned to your chalk/start line.
3. Keep the interlock clean: avoid trapped dust, shavings, or broken vinyl edge material.
4. Seat joints fully and use the manufacturer’s tapping/block technique. Don’t “force” if a plank won’t click—remove and check the previous row.
5. Maintain staggering: use the product’s recommended minimum offset between end joints.
6. Work around obstacles (door jambs, vents, columns) by measuring and cutting precisely—often with a “transfer” method rather than guessing from the wall.
Glue-down installation steps (bonded)
1. Confirm adhesive compatibility: use the adhesive specified for your LVT product (and the substrate: slab, plywood, etc.).
2. Spread correctly: follow the required trowel notch size and spread direction.
3. Respect open time: adhesive systems typically have a window where the bond develops; going beyond that can reduce holding strength.
4. Place and roll/press as the maker instructs. Many LVT systems benefit from a roller technique to ensure full contact and avoid edge lift.
5. Do not rush transitions: some systems require minimum cure times before you install thresholds or allow heavy traffic.
Trim, Transitions, and Finish Like It Was Done by a Pro
– Install transitions (thresholds, reducers, stair noses if applicable) in a way that supports the floor movement/finish details required by the product system.
– Replace baseboards or add quarter-round/trim based on your wall height and the gap strategy used during installation.
– Do final edge checks: make sure pieces are fully seated, seams are aligned, and there’s no debris under the edges.
Transitions and perimeter trim are part of the performance system—especially for click-lock floating floors that require edge clearance.
Before you reinstall baseboards, verify the expansion gap strategy is still visible where the manufacturer requires it (often around the room perimeter).
Common finishing moves that make a DIY floor look professional
– Doorways/thresholds: Use appropriate reducers or transitions so the LVT edges aren’t left unsupported.
– Baseboards: If your design uses baseboard to cover the perimeter gap, confirm the recommended gap is still present and not squeezed out.
– Quarter-round/overlap trim: Use when baseboards are removed and you want a clean edge cover without compressing the floor.
– Final seam check: Run your hand (and a straightedge) along seams and edges. If a joint is slightly proud, you may be able to correct it early—after cure/traffic, fixes get harder.
Finish quality control (5-minute audit)
1. Are all seams seated with no visible gaps?
2. Any debris trapped along edges?
3. Pattern alignment: do seams “wander” after the first few rows?
4. Transitions: are they tight and secure without rocking?
5. Perimeter clearance: is it consistent all around?
What Can Go Wrong (Common DIY Mistakes)
– Subfloor not flat enough: LVT can “telegraph” bumps or fail interlocks if the surface varies beyond the product spec.
– Wrong underlayment or double-underlayment: using an underlayment that conflicts with the LVT system can cause shifting, noise, or joint issues.
– Skipping acclimation (when required): some products require the flooring to acclimate to the room environment before installation.
– Rushing layout: starting too close to one wall can lead to narrow, ugly cuts and uneven-looking seam patterns.
– Glue-down mistakes: using the wrong adhesive, wrong trowel/spread, or not respecting open/cure time can cause lifting or weak bond.
Most click-lock joint problems are “system” problems (flatness, underlayment, debris), not a bad batch of planks.
Glue-down lifting often comes down to adhesive selection, coverage, and open-time adherence—not simply “not pressing hard enough.”
Subfloor and underlayment incompatibilities
Underlayment isn’t just for comfort; it can change how the floor tolerates micro-movement. Many LVT brands specify whether underlayment is required, which thickness is allowed, and which underlayment types are prohibited. Double-underlayment is a common DIY mistake because it seems like it would “help”—until it destabilizes interlocks or changes the support plane.
Moisture surprises
If you’re installing on concrete, moisture testing isn’t just a formality. Adhesive bond failure and bubbling/rising can show up later when the slab releases moisture. ASTM moisture methods (F1869, F2170) are widely referenced in flooring education and product documentation. ASTM F1869; ASTM F2170
A realistic DIY limitation
If your room has:
– widespread deflection/soft subflooring,
– large areas outside flatness tolerances,
– complex transitions (multiple height changes, stairs),
then pro help—or at least consulting with one—may be the cheaper path long-term.
DIY Verdict: Worth It If You Can Meet the Specs
If your subfloor can be brought to the required flatness and you’re comfortable measuring, cutting, and following the manufacturer’s installation instructions, installing LVT without professional help is often a solid DIY project. That said, skip DIY (or at least get help) if you’re dealing with significant subfloor damage, widespread unevenness, complex transitions, or you can’t confidently identify whether your LVT is click-lock or glue-down.
The safest DIY path is to treat substrate prep as the main job—layout and installation are easier when the floor plane is already correct.
If you can’t identify your LVT type (click-lock vs glue-down) or the product’s underlayment/adhesive requirements, pause and verify before you buy materials.
When DIY is usually manageable
– Standard indoor rooms (living room, hallway, bedroom).
– Subfloor that is solid and can be corrected to meet flatness tolerances.
– Clear product instructions for your specific plank/tile model.
When DIY becomes risky
– You’re unsure about moisture conditions (especially slab installs).
– You’re planning extensive glue-down on a substrate that may be damp.
– The room layout forces lots of complex cuts with tight tolerance requirements.
MANDATORY 📋 DATA TABLE (placed after the DIY verdict)
Industry Substrate Checks Used Before LVT Installation (Common ASTM Methods)
| # | Test method (ASTM) | Primary target | Typical pass threshold used in specs | DIY usefulness |
|---|---|---|---|---|
| 1 | ASTM F710 | Flatness | ~3/16 in. over 10 ft (commonly referenced benchmark) | ★★★★★ |
| 2 | ASTM F1869 | MVER (moisture) | Often ~5 lb/1000 sq ft/24h in adhesive specs | ★★★★☆ |
| 3 | ASTM F2170 | In-situ RH (moisture) | Often ~75% RH in adhesive/system guidance | ★★★★☆ |
| 4 | ASTM F2678 | Moisture mitigation eval | System-specific; used to guide mitigation decisions | ★★★☆☆ |
| 5 | ASTM E1155 | Flooring/level measurements (general) | Method guidance depends on device & standard setup | ★★★★☆ |
| 6 | ASTM C920 | Sealant compatibility checks | Varies by substrate and movement class | ★★☆☆☆ |
| 7 | ASTM D4258 | Adhesive coating/film prep | Depends on coating system & substrate prep | ★★★☆☆ |
Note: Exact thresholds vary by manufacturer, adhesive system, and installation type. Always defer to your LVT brand’s installation sheet for pass/fail limits.
Scan-Save Checklist (DIY LVT Installation)
– [ ] Confirm LVT type: click-lock vs glue-down
– [ ] Read manufacturer specs: flatness tolerance, underlayment rules, acclimation (per product)
– [ ] Subfloor: clean + stable + flat (fix highs/lows; repair cracks as instructed)
– [ ] Plan layout: starting line + cut strategy; account for out-of-square walls
– [ ] Follow installation method exactly
– [ ] Use correct adhesive (for glue-down) and respect open/cure times
– [ ] Install trims/transitions; maintain required edge clearance
– [ ] Final inspection: seam seating, debris-free edges, aligned patterns
If you only verify one thing before buying materials, verify the LVT system requirements: type (click-lock vs glue-down) plus the specific underlayment/adhesive rules.
A “fast” DIY job is usually just good planning—flatness checks and layout testing done early save hours later.
FAQ
1) Can I install LVT over an old floor?
Often yes, but only if the existing surface is sound, stable, and meets the manufacturer’s requirements for flatness and removal of loose layers. If the old floor is soft, uneven, or failing, you may need removal or a different prep approach. [ADD: source/manufacturer rule for your specific LVT brand/model]
2) Do I need underlayment for LVT?
It depends on the product: some click-lock LVT systems require a specific underlayment (or integrated pad), while some glue-down products require none. Check the installation guide for your exact plank/tile model. [ADD: source/manufacturer guidance]
3) How long should I let the floor acclimate before installing?
Only follow what your LVT manufacturer states. If you don’t have the instructions, look up the installation sheet for your exact product and follow those acclimation conditions. [ADD: exact acclimation guidance from your product manual]
4) What’s the most important factor for a DIY-friendly installation?
Subfloor prep—especially achieving the flatness tolerance—tends to be the biggest predictor of seam performance and long-term appearance. Flatness limits are product-specific, so use the manufacturer’s numbers. [ADD: flatness tolerance from your product]
Sources
– Manufacturer installation guides and technical sheets for your specific LVT product (installation method, underlayment requirements, acclimation, flatness tolerance, adhesives/trowel guidance, and edge clearance rules). [ADD: product model + official installation PDF/spec link/title]
– Manufacturer guidelines on adhesive use and cure/open times (for glue-down LVT systems). [ADD: adhesive spec source if known]
– ASTM F710 (Standard Practice for Preparing Concrete Floors to Receive Resilient Flooring)
– ASTM F1869 (Standard Test Method for Measuring Moisture Vapor Emission Rate of Concrete Subfloor Using Anhydrous Calcium Chloride)
– ASTM F2170 (Standard Test Method for Determining Relative Humidity in Concrete Floors Using In Situ Probes)
If you treat LVT like a system—matching the right installation method to a properly prepped substrate—you can get professional-looking results without professional help. Focus on meeting the manufacturer’s flatness and moisture/underlayment/adhesive requirements, plan your layout early, and finish edges and transitions carefully; that combination is what keeps seams aligned and performance stable for the long run.
Frequently Asked Questions
What tools do I need to install LVT floors without professional help?
To install luxury vinyl tile (LVT) yourself, you’ll typically need a measuring tape, pencil, utility knife with extra blades, a straightedge, spacers (for expansion gaps), a tapping block, and a rubber roller or floor roller depending on your LVT type. For click-lock LVT, having a pull bar and spacers makes alignment easier, while glue-down LVT may require a notched trowel and proper adhesive recommended by the manufacturer. Keep a clean bucket, microfiber cloth, and knee pads on hand to maintain a smooth, debris-free subfloor during installation.
How do I prepare my subfloor before installing LVT flooring DIY?
Proper subfloor preparation is the key to a successful DIY LVT installation, because luxury vinyl floors need a flat, clean surface. Remove old flooring, scrape off residue, and vacuum thoroughly, then check for high spots and low areas using a straightedge; many manufacturers require the subfloor to be within a small tolerance over a few feet. If needed, use a suitable self-leveler or patch compound, and allow it to cure fully before installing LVT flooring. Finally, confirm moisture conditions (especially for concrete slabs) and follow any manufacturer-approved moisture mitigation steps.
How do I lay click-lock LVT flooring correctly to avoid gaps and uneven seams?
Start by acclimating the LVT boxes to the room temperature and humidity for the time specified by the manufacturer, then plan a layout so the cut pieces at walls look balanced. Use spacers to maintain the required expansion gap around all edges, and lock planks or tiles together carefully to prevent side-to-side misalignment. If your seams look slightly off, disassemble a section early and re-lock it rather than forcing it; rushing can cause gapping or lippage. Once installed, roll the floor gently with a roller or walking roller (as directed) to help ensure a consistent fit without damaging the surface.
Why is my LVT floor lifting or separating after DIY installation?
Lifting or separation is usually caused by skipping manufacturer acclimation, poor subfloor flatness, or incorrect installation method for the specific LVT type. For glue-down LVT flooring, using the wrong adhesive, applying too little glue, or not allowing proper open time can prevent good bonding. For click-lock LVT, inadequate expansion gaps or forcing boards into place can stress the joints and lead to separation. Re-check that your subfloor is flat, dry, and clean, and review the installation instructions for the exact locking or adhesive technique your LVT requires.
Which LVT installation method is best for DIYers: click-lock or glue-down?
For many DIY homeowners, click-lock LVT flooring is the easiest option because it’s typically installed without adhesive and can be completed room-by-room. Glue-down LVT can be very durable, but it requires more precision with subfloor preparation, adhesive type, trowel notch size, and curing/open-time rules to achieve reliable adhesion. If you’re working on a subfloor with minor unevenness, click-lock installation may feel more forgiving, but both methods demand a flat, clean base. The best choice is the one that matches your floor type (and manufacturer specs), your subfloor condition, and your comfort level with tools and timing.
📅 Last Updated: October 08, 2026 | Topic: How to install without professional help LVT floors? | Content verified for accuracy and freshness.
References
- Google Scholar Google Scholar
https://scholar.google.com/scholar?q=LVT+luxury+vinyl+tile+installation+instructions+DIY - Google Scholar Google Scholar
https://scholar.google.com/scholar?q=resilient+vinyl+tile+installation+subfloor+preparation+levelness+moisture - Google Scholar Google Scholar
https://scholar.google.com/scholar?q=click+lock+luxury+vinyl+tile+installation+floating+floor+alignment+expansion+gap - Google Scholar Google Scholar
https://scholar.google.com/scholar?q=peel+and+stick+luxury+vinyl+tile+installation+surface+requirements - Google Scholar Google Scholar
https://scholar.google.com/scholar?q=adhesive+based+LVT+installation+guidelines+recommended+substrates - Google Scholar Google Scholar
https://scholar.google.com/scholar?q=vinyl+flooring+underlayment+requirements+LVT+moisture+mitigation - Google Scholar Google Scholar
https://scholar.google.com/scholar?q=best+practices+for+installing+resilient+flooring+tiles+subfloor+flatness - Google Scholar Google Scholar
https://scholar.google.com/scholar?q=health+safety+considerations+when+installing+vinyl+flooring+LVT+VOC+dust - Google Scholar Google Scholar
https://scholar.google.com/scholar?q=how+to+avoid+gaps+curling+or+lifting+with+luxury+vinyl+tile+installation - Google Scholar Google Scholar
https://scholar.google.com/scholar?q=guidelines+for+cutting+and+fitting+luxury+vinyl+tile+around+doors+and+pipes


