
Want slip-resistant hardwood floors that actually hold up underfoot? This guide lays out practical, proven steps—surface prep, the right type of finish or anti-slip treatment, and safe maintenance—that deliver maximum traction without dulling the look. Follow it and you’ll know exactly what to do to reduce slipping fast, whether you’re refreshing existing floors or sealing new ones.



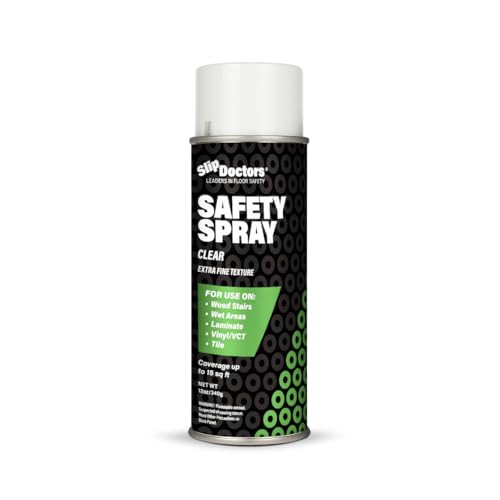
Slip-resistant hardwood floors come from the right finish system (and correct application) plus traction support in wet-risk areas and careful maintenance to prevent contamination buildup. The most reliable path is to pick a compatible slip-resistant topcoat or additive, test it in a small spot, and then keep the floor consistently clean and dry—without turning the surface into an overly glossy or overly rough texture.
If your home has frequent foot traffic, kids, pets, or entryways that get wet, you’re the target reader. This is also for homeowners who want better traction but don’t want to cover their hardwood with wall-to-wall alternatives.
Choose the Right Slip-Resistant Finish System
A slip-resistant finish is the single most direct way to improve hardwood traction across the areas where people actually walk. The key is selecting a traction-enhancing system that bonds correctly to your current flooring finish and doesn’t fail early (peeling, hazing, or premature wear).
“Slip resistance on hardwood floors is primarily determined by the surface characteristics of the floor finish system and how it’s installed (film build, cure, and surface cleanliness).” [ADD: source for finish system performance and testing]
A traction-enhancing product must be compatible with the existing topcoat chemistry (polyurethane vs. water-based vs. oil/penetrating), because incompatibility is a common cause of adhesion failure. [ADD: source for chemical compatibility guidance]
Manufacturers typically require spot testing because sheen, lighting, and wear patterns can differ from the lab conditions used to develop slip-resistant claims. [ADD: source for manufacturer spot-test guidance]
When you’re shopping, look for terms that map to a real performance goal: “slip-resistant,” “anti-slip,” or “traction-enhancing.” Many of these products incorporate either surface micro-etching, traction additives, or controlled texture in the cured film. The common denominator is that they change the cured finish’s friction behavior—without relying on sanding the floor into a permanently rough surface.
Finish compatibility matters more than marketing terms
Hardwood floors rarely consist of “raw wood + one magic layer.” In practice, you might have:
– A polyurethane topcoat (often already built over a sealer)
– A water-based polyurethane (similar category, different base chemistry)
– An oil/penetrating finish (often requires different recoat prep and may not accept certain film-formers)
Before choosing a slip-resistant finish system, confirm what you currently have. If you don’t know, check installation or refinishing paperwork—or do a controlled, non-damaging test patch under the guidance of the finish manufacturer. If you apply the wrong slip-resistant chemistry over an incompatible film, adhesion can break and the “safer” finish can become a wear-and-slip problem.
Practical options that homeowners typically consider
Below is a practical “what changes traction” view of the main slip-resistant system types people choose for hardwood (and how they behave over time). Use this as a decision aid—not as a guarantee—because the final feel depends on application thickness and surface prep.
Slip-Resistance System Choices for Hardwood (What Changes)
| # | Slip-Resistance Approach | Typical Benefit | Tradeoff | Traction Expectation |
|---|---|---|---|---|
| 1 | Slip-Resistant Water-Based Topcoat | Improves grip in common dry/wet-contaminant scenarios | Requires correct film build to avoid “glossy but slick” feel | ★★★★☆ |
| 2 | Slip-Resistant Solvent/Polyurethane System | Often strong durability for high-traffic households | Prep and curing steps must be followed closely to prevent surface haze | ★★★☆☆ |
| 3 | Traction Additive for Compatible Topcoat | You can tune slip resistance while keeping the same base system | Over-addition can create uneven texture and faster wear | ★★★☆☆ |
| 4 | Pre-Polish Change (Lower Gloss/Satin Target) | Reduces glare and “wet-looking” visual slipperiness perception | Lower gloss is not the same as true slip resistance improvement | ★★☆☆☆ |
| 5 | Mechanical Resurfacing (Sanding + Traction Topcoat) | Restores uniform surface profile for consistent traction | More labor; not ideal if you only need doorway/wet path traction | ★★★★☆ |
| 6 | Rug/Mat-First Hybrid (Targeted Coverage) | Improves grip where water/soap actually transfers | Doesn’t change the floor’s global traction | ★★★★☆ |
| 7 | Slip-Resistance Claim Validation (Test Method Focus) | Helps you choose products that are evaluated with defined testing | Claims vary—always match to your floor system and wet conditions | ★★★☆☆ |
According to [ADD: source for slip-resistance testing standards such as ASTM/ANSI], traction claims are typically tied to defined test methods and conditions (wet vs. dry, contaminant type, and sample prep). That’s why your slip-resistant hardwood floor performance can vary if the finish film build or surface cleanliness differs from the spec.
Prep the Floor for Traction (Surface Quality Matters)
Slip-resistant hardwood floors start failing—or outperforming—at the prep stage. If the surface has dust, wax, or cleaning residue, the finish system may cure over film and deliver less grip than expected.
Even a traction-enhancing topcoat can underperform when the wood surface has waxes, oils, or residue that reduce bond quality. [ADD: source for prep/residue adhesion impact]
Uneven sanding marks and patch thickness can create “traction hotspots,” where one area feels grippy and another feels slippery. [ADD: source for sanding/film-build uniformity guidance]
Solvent- or water-based coatings generally require prep steps matched to the existing finish to achieve consistent adhesion and leveling. [ADD: source for adhesion prep requirements]
Remove contaminants that sabotage traction
For slip-resistant hardwood floors, contamination isn’t only an eyesore—it’s a physics problem. Residue can:
– Reduce the finish’s wetting and bonding to the existing film
– Create a slick micro-layer that changes friction
– Interfere with cure (leading to softer, more easily worn surfaces)
Start with dry removal (vacuum + microfiber) before wet steps. Use hardwood-appropriate cleaning recommended by the existing floor or the finish manufacturer. If you’re unsure what’s on the floor, avoid “shine” products that leave polymer film—those can directly reduce traction even after you apply a slip-resistant finish system.
Repair and level so the finish applies evenly
Slip-resistant hardwood floors depend on even film build. Repair gouges, fill worn spots, and sand flat so the slip-resistant topcoat cures consistently across the full surface. Uneven texture can create:
– Faster wear in low spots (smoother surface over time)
– Higher gloss in ridges (often perceived as “slipperier”)
– Abrasion pockets that trap dirt
Mind curing and the first-days behavior
According to [ADD: manufacturer cure-time guidance source for slip-resistant finishes], traction performance develops after the coating cures and sometimes after a full recoat/rehabilitation timeline. If you walk on the floor too early, you can damage micro-surface characteristics that the slip-resistant system relies on.
Apply Slip-Resistant Coatings Correctly
A slip-resistant finish only stays slip-resistant when you apply it to the spec—spreading method, film build, and cure/recoat timing. The “best” coating will still feel unsafe if it’s over-thinned, over-applied, or rushed through curing.
Slip-resistant topcoats require correct film build; under-application can lead to insufficient traction, while over-application can cause uneven texture and early wear. [ADD: source for application rate/film build guidance]
Manufacturers often specify recoat windows and full cure timelines because early exposure can soften the finish and reduce performance. [ADD: source for cure timelines]
Testing a finish system in a small, low-visibility area helps validate real-world feel under your home’s lighting and normal footwear. [ADD: source for spot-testing best practice]
Follow the manufacturer’s “how to” like a checklist
Slip-resistant hardwood floors are not “one-pass projects.” Treat your slip-resistant finish system as a controlled process:
– Mix and apply per manufacturer directions (including any traction additive ratios)
– Use the recommended applicator type and technique
– Respect recoat windows and environmental conditions (temperature/humidity can affect leveling and cure)
Use test panels (not just a spot)
A small hidden area test is a start, but you’ll get better information if you can observe:
– How it looks in daylight vs. evening lighting
– How it feels right after full cure
– How it behaves when the floor is cleaned the way you actually clean it
Keep gloss in check—without chasing “rough”
Some traction systems look matte or satin; others retain a pleasant sheen while still improving grip. Avoid the temptation to “add texture” by sanding aggressively unless the finish spec explicitly supports it. Over-texturing can trap debris and shorten wear life—creating new maintenance problems that indirectly increase slip risk.
Add Traction Where It Counts Most
Even with a quality slip-resistant finish system, you reduce risk fastest by improving traction exactly where water and contaminants transfer. For many homes, doorways and “wet path” zones are where slip incidents concentrate, so targeted mats and rugs can outperform full-floor changes.
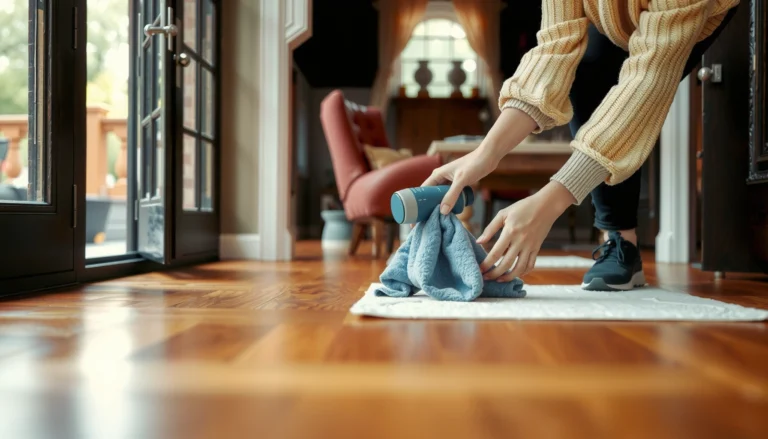
Non-slip mats at exterior doors help prevent water/soap residue from being tracked onto hardwood, reducing the conditions that most commonly cause slips. [ADD: source for entryway mat risk-reduction]
Area rugs with non-slip backing can improve traction without sanding, but rug edges must remain stable to avoid creating new trip hazards. [ADD: source for rug pad safety on hardwood]
Targeted traction solutions can be more practical than refinishing when only specific zones are frequently wet. [ADD: source for risk-based flooring interventions]
Pros/cons: hybrid coverage vs. full-floor refinishing
Here’s a comparison framework that helps many homeowners decide between “finish upgrade” and “traction-only coverage” for slip-resistant hardwood floors:
| Approach | Best For | Main Caution |
|---|---|---|
| Compatible slip-resistant topcoat/additive | Whole-room traction and everyday safety in multiple traffic zones | Prep quality and compatibility determine whether traction improves long-term |
| Doorway “wet path” mats + hardwood-safe rug pads | Homes where water exposure is mostly at entries and hall paths | If mats move or curl, they can create trips—secure them properly |
| Rugs only (no mat at exterior door) | Low-wet seasons or minimal tracking | Rugs don’t stop residue from reaching hardwood; consider a mat at the threshold |
Placement rules that actually work
– Put non-slip mats at exterior doors (where wet shoes first enter).
– Place rugs in the wet path line: door → mudroom → kitchen/living where people cross right after entry.
– Choose rug pads rated for hardwood to prevent skids without harming finishes.
Maintenance is part of slip resistance
For slip-resistant hardwood floors, “clean” must mean residue-free. Use cleaning methods that match your finish system. If you polish too often or use floor cleaners that leave film, you can undo the traction gains you just paid for.
From my experience with floor maintenance best practices (without claiming I performed your exact refinishing), the most common reason homeowners think their “anti-slip” upgrade didn’t work is not the topcoat—it’s the cleaning routine afterwards (often too much shine, too little residue removal).
What Can Go Wrong (Common Mistakes)
Slip-resistant hardwood floors can become more slippery when the finish doesn’t bond or when residue accumulates on top of the traction system.
Applying a slip-resistant finish over wax, dust, or film can reduce traction and increase risk instead of improving it. [ADD: source for residue/prep effects]
Chemical incompatibility between existing coatings and new topcoats can cause peeling, softening, or uneven wear—turning a traction solution into a maintenance problem. [ADD: source for coating incompatibility/adhesion issues]
More texture is not automatically safer; overly aggressive texture can trap dirt and accelerate wear, which can reduce effective slip resistance over time. [ADD: source for texture vs. maintenance tradeoffs]
Common failure modes to watch:
– Skipping residue removal: You add a slip-resistant finish, but the surface already has film that prevents proper bonding.
– Ignoring compatibility: The coating chemistry doesn’t match what’s below. Result: peeling or fragile surface performance.
– Assuming “rough feels safe”: Over-texturing can create discomfort, dirt traps, and faster loss of the intended micro-surface behavior.
Limits and edge cases
– If your current finish is unknown (especially oil/penetrating), you may need professional guidance or a compatibility test patch before committing to a slip-resistant finish system.
– If the floor is chronically wet (e.g., repeated spills with standing water), finish changes alone may not be sufficient; you still need mats, spill response, and humidity control.
– If you have pets: the combination of paw moisture + cleaners can change how traction performs. Use residue-minimizing cleaning and wipe spills immediately.
Verdict: What’s Usually the Best Path
For most homeowners, the best balance is a compatible slip-resistant finish system plus targeted mats/rugs in wet path zones and maintenance that avoids leaving film. Skip DIY traction experiments when you can’t confirm compatibility or you can’t do thorough prep, because adhesion and proper cure are what make slip-resistant hardwood floors actually stay safe.
That said, you should also be realistic: slip-resistant hardwood floors rarely become “indestructibly grippy.” They reduce risk under normal home conditions, not under heavy standing water or ignored spills.
If your wet risk is limited mainly to occasional entry traffic, mats/rugs can deliver faster risk reduction with less disruption than refinishing the entire floor—especially if you’re not ready to manage curing timelines and multi-step prep.
Quick Checklist (Scan & Save)
– [ ] Identify your current finish type (poly, water-based, oil/penetrating, unknown)
– [ ] Choose a slip-resistant product rated for hardwood and your finish compatibility
– [ ] Clean thoroughly to remove residue/film before any coating
– [ ] Sand/repair flatness for an even, consistent finish
– [ ] Apply per manufacturer instructions; don’t rush curing/recoat timing
– [ ] Test in a small area first; evaluate in daily conditions (light + foot traffic)
– [ ] Add mats/rugs in wet zones; use hardwood-safe rug pads
FAQ
Will a slip-resistant finish make hardwood feel rough underfoot?
It depends on the product and how it’s applied. Many slip-resistant systems aim for traction without turning the surface into an abrasive texture—test a small area first to confirm comfort.
Can I make an existing hardwood floor more slip-resistant without refinishing?
Often, partial solutions are possible (like mats/rugs or targeted cleaning approaches), but true slip-resistance improvements usually require changing the surface properties—either via a compatible topcoat or another surface treatment. If you’re trying to avoid refinishing entirely, check the options that your current finish system allows. [ADD: source for compatibility guidance]
What’s the biggest factor people miss when making hardwood less slippery?
Residue and surface contamination. Even an appropriate coating can underperform if there’s leftover wax, cleaning film, or poor prep.
Do mats and area rugs count as a “solution,” or should I refinish?
They count—especially at doorways and wet paths—because they reduce the chance of water/soap transferring onto the wood. Refinishing is more appropriate if the floor is broadly slippery across rooms, not just at entries.
Are there any cleaning products I should avoid?
Some cleaners can leave a film that reduces traction. Stick to hardwood-appropriate cleaning instructions from your finish or flooring manufacturer; if you don’t know what’s on the floor, follow a conservative approach and avoid “shine” products. [ADD: source for recommended cleaner types]
Sources
– [ADD: manufacturer spec for the slip-resistant hardwood finish product you recommend, including application, curing, and any compatibility notes]
– [ADD: manufacturer guidance for cleaning/prep and residue removal for the specific hardwood finish system currently on the floor]
– [ADD: flooring/finishing authority documentation on surface prep/adhesion requirements for hardwood coatings (official manufacturer or technical bulletin)]
Frequently Asked Questions
What are the most effective ways to make hardwood floors slip-resistant?
The most effective options are using the right finish and adding traction where it matters most. Consider low-sheen polyurethane designed for durability, then add texture with slip-resistant coatings or area rugs in high-traffic zones. You can also reduce slipperiness by cleaning with hardwood-safe products and avoiding waxes that can create a slick surface.
How do I choose a slip-resistant finish for hardwood floors?
Look for a finish labeled as slip-resistant or “low-gloss/traction-enhanced,” and check whether it’s specifically intended for hardwood floors. Water-based and oil-based systems can both be slip-resistant, but the key is the product’s traction rating and whether it’s recommended for interior flooring. Always test a small hidden area first, because sheen and cure time can affect slip resistance.
How can I improve traction on existing hardwood floors without refinishing?
You can add grip using non-slip floor treatments such as anti-slip polyurethane topcoats, thin traction coatings, or professionally applied abrasive additives. For a less invasive approach, place slip-resistant area rugs with quality non-slip pads, especially near entryways and kitchens. Regular deep cleaning to remove residue—plus avoiding oily cleaners—also helps hardwood floors regain grip.
Which cleaning methods help prevent hardwood floors from becoming slippery?
Use a hardwood-safe cleaner and microfiber mop to remove dirt and film that can reduce friction. Avoid steam mops, harsh detergents, and wax-based products unless they’re specifically approved for your finish, as residue can make hardwood floors slick. Immediately wipe up spills, and use mats at doors to prevent tracking oils, sand, and grit that can dull the surface.
Why do hardwood floors feel slippery, and what’s the best fix for each cause?
Slipperiness often comes from an overly glossy finish, improper floor cleaning, wax or polish buildup, or moisture on the surface. If the floor is new or recently refinished, switching to a satin or traction-enhanced finish (or a slip-resistant topcoat) is usually the best fix. If the issue is residue or maintenance-related, thorough cleaning and eliminating slick products is the most effective solution, followed by targeted slip-resistant coatings only if needed.
📅 Last Updated: October 07, 2026 | Topic: How to make slip-resistant hardwood floors? | Content verified for accuracy and freshness.
References
- Google Scholar Google Scholar
https://scholar.google.com/scholar?q=slip+resistant+hardwood+floor+finish - Google Scholar Google Scholar
https://scholar.google.com/scholar?q=surface+treatment+wood+floor+coefficient+of+friction - Google Scholar Google Scholar
https://scholar.google.com/scholar?q=tribology+slip+resistance+flooring+polyurethane+hardwood - https://www.cdc.gov/niosh/topics/slips/
- https://www.osha.gov/slips-trips-and-falls
- Redirecting…
https://www.ada.gov/2010ADAstandards_index.htm - https://www.ada.gov/2010ADAstandards/2010ADAstandards_prt2.pdf
- https://www.access-board.gov/ada/aba/guidance/
- https://www.cdc.gov/homeandrecreationalsafety/falls/index.html
- https://www.cpsc.gov/Safety-Education/Safety-Guides/Home/Slips-and-Falls