
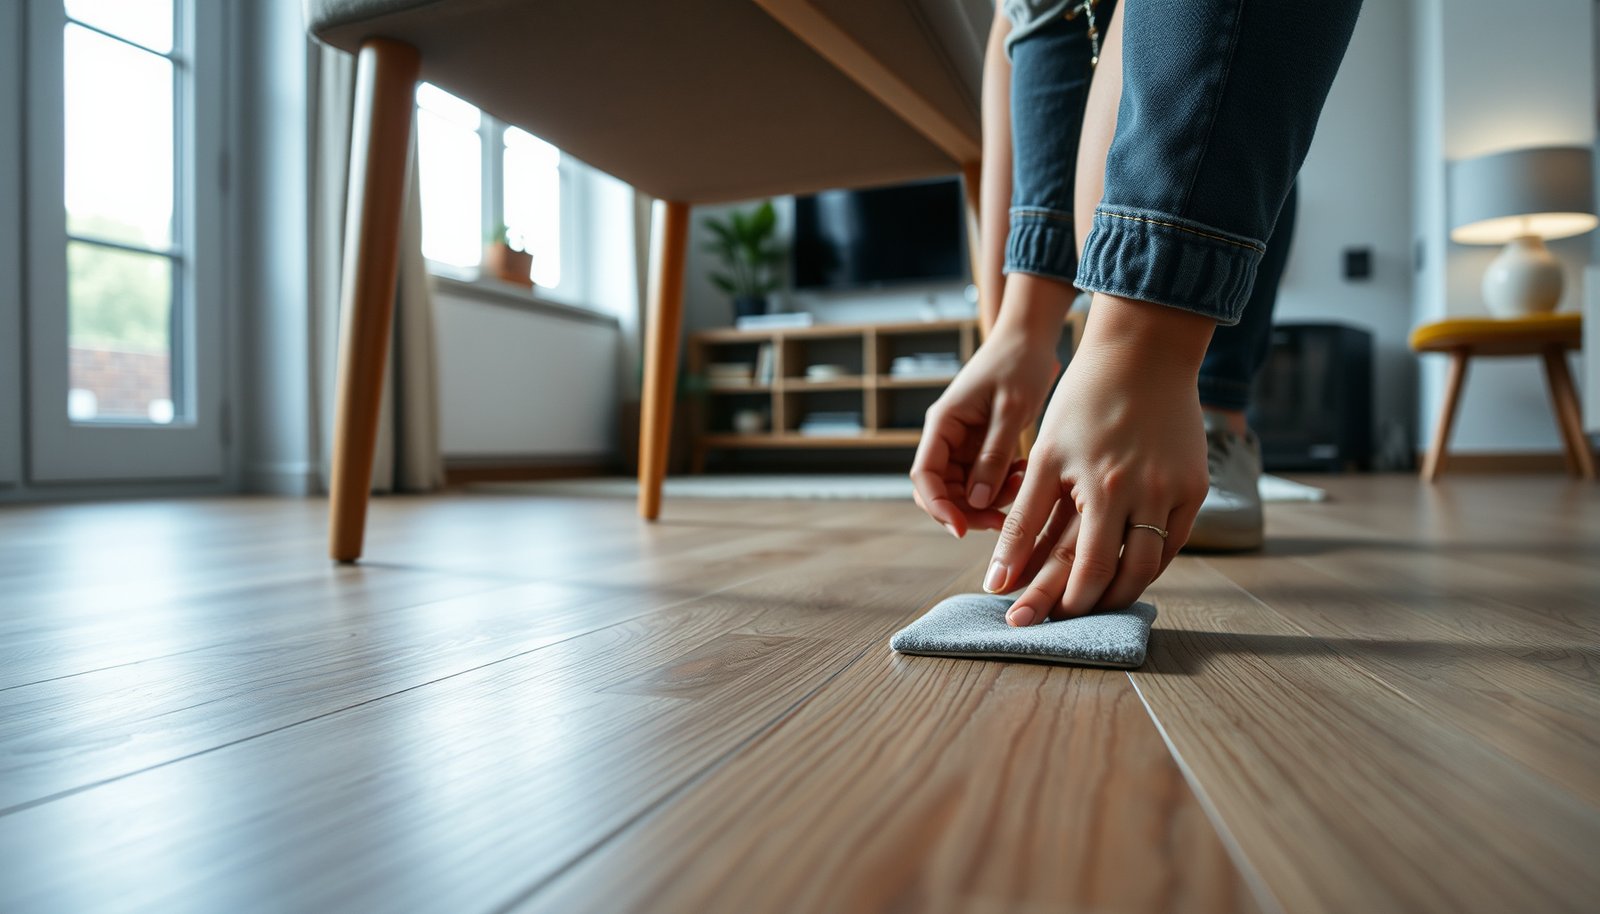

Protecting vinyl floors in a living room is easiest when you focus on two moves: stop dirt abrasion and block moisture. Use felt pads on every chair and use a quality entry mat to trap grit before it grinds into the surface. For scuffs and spills, keep cleaning simple—use vinyl-safe products and wipe quickly—so your floor stays glossy and intact for years.
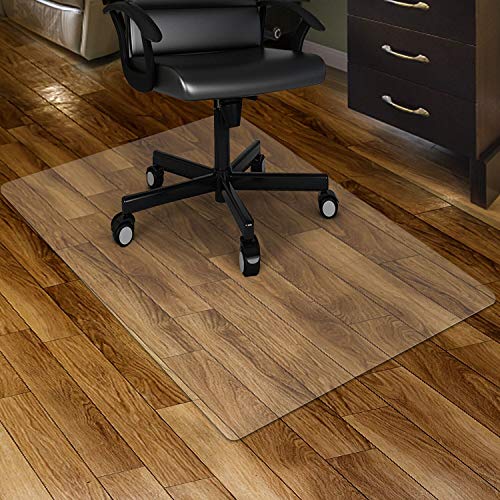



Protecting vinyl floors in a living room comes down to three habits: block grit before it grinds the wear layer, clean gently enough to avoid dulling, and keep moisture from sitting along seams. When you combine entry mats, felt chair pads, and fast spill cleanup, vinyl floors typically stay brighter and more scratch-resistant through everyday life—especially in high-traffic households. This guide walks you through what to do (and what to avoid) in a living room setup.
If your vinyl is luxury vinyl plank (LVP), luxury vinyl tile (LVT), or sheet vinyl, the basics are similar: protect the surface wear layer, keep it clean without harsh chemicals, and avoid moisture buildup. This is especially helpful if you have pets, kids, rolling furniture, or lots of foot traffic.
If you’re shopping for a practical care routine (not a complicated “refinish every year” plan), you’ll get the most value from the steps below. These are written for real-world living room conditions—tracked dirt, chair movement, and the occasional spill—while staying aligned with manufacturer-style guidance used across major resilient floor brands.
Reduce scratches and grit at the source

Yes—scratches on vinyl floors usually start with abrasive grit that’s dragged in by shoes, paws, and carts. The most effective strategy is prevention-first: stop sand, soil, and road particles at the doorway and high-traffic paths before they reach the wear layer.
According to the U.S. Department of Agriculture (USDA), soil texture classes define sand as 0.05–2.0 mm, silt as 0.002–0.05 mm, and clay as <0.002 mm (2017). This helps explain why tracked “dirt” behaves like micro-sand on vinyl floors.
According to the U.S. Environmental Protection Agency (EPA), PM10 refers to particulate matter with aerodynamic diameter ≤10 µm (2024). These fine particles are small enough to travel deep into everyday traffic paths on vinyl floors.
According to the EPA, PM2.5 refers to particulate matter with aerodynamic diameter ≤2.5 µm (2024). When such particles accumulate on vinyl floors, they can contribute to dull-looking surface wear over time.
Build your “grit barrier” in layers
In practice, vinyl floors don’t get scratched uniformly; they get abraded along traffic corridors—door-to-sofa, door-to-coffee table, and around seating. That’s why the top priority for vinyl floors is controlling what arrives first.
– Put a quality entry mat at the main doorway and add a smaller mat inside if your living room gets heavy traffic.
Choose a mat with good coverage and a stable backing so grit actually falls out of shoes and gets held in the mat fibers rather than transferred onto vinyl floors. If your entry is long, use a two-stage approach (outside mat + inside mat) to remove both larger and smaller particles.
– Use felt or rubber floor protectors under furniture to prevent micro-scratches when items shift.
On vinyl floors, the “scratches” you notice later often start as tiny, repeated scuffs caused by furniture feet that slide a fraction of an inch. Felt chair pads reduce friction during normal movement, while proper protectors also help when someone bumps a chair leg during daily use.
– Keep sand, dirt, and grit off the floor with regular sweeping or vacuuming (use a soft brush attachment if your vacuum has one).
For vinyl floors, microfiber mops and wet cleaning don’t replace dry grit control. Dry cleaning prevents abrasive particles from becoming a grinding paste when you later introduce water.
Soil Particle Sizes Most Likely to Track Onto Vinyl Floors (USDA Soil Textures, 2017)
| # | Tracked grit category (soil-derived) | Typical size range | Why it matters for vinyl floors | Entry mat capture ease |
|---|---|---|---|---|
| 1 | Very coarse sand | 1,000–2,000 µm | High abrasion potential; behaves like small “grains” on the wear layer | High |
| 2 | Coarse sand | 500–1,000 µm | Can scratch during shoe “drag” and chair-leg micro-movements | High |
| 3 | Medium sand | 250–500 µm | Still abrasive; accumulates quickly on vinyl floors in traffic lanes | High |
| 4 | Fine sand | 50–250 µm | More likely to “pack” into mat edges and transfer indoors | Moderate |
| 5 | Coarse silt | 20–50 µm | Fine enough to remain suspended in dust layers that dull vinyl floors | Low–Moderate |
| 6 | Fine silt | 2–20 µm | Can slip past coarse matting and build a “haze” on vinyl floors | Low |
| 7 | Clay-size particles | <2 µm | Least “grain-like,” but still contributes to soiling and dulling without faster cleaning | Low |
Use mats, chair pads, and “rolling” safety
Yes—vinyl floors need protection under movement, not just underfoot. Mats catch incoming grit, while chair pads and proper glides prevent the repeated micro-scuffing that eventually makes vinyl look worn and uneven.
Resilient floor care guidance commonly emphasizes entry mats and dry cleaning first, because tracked grit is the leading driver of surface abrasion on vinyl floors.
Furniture glides are designed to reduce friction during everyday movement; without protectors, small shifts can create repeated scuffs on vinyl wear layers over time.
Rug backing and rug edges can trap grit; once it transfers from the rug boundary onto vinyl floors, abrasion continues even if the main rug area looks clean.
Choose the right floor protection for the job
When you protect vinyl floors at contact points, you reduce both visible scratches and the “dull haze” that shows up after months of use.
– Choose chair glides/caster wheels designed for hard floors; avoid rough plastic that can scrape.
Hard-floor casters typically have smoother rolling surfaces and softer wheel materials. If you have chairs with wheels, check what’s installed today—many standard furniture wheels are meant for carpet and can transfer scuffing energy to vinyl floors.
– If you move furniture often, consider temporary protective coverings (like a smooth floor protector sheet) during rearranging.
When vinyl floors are exposed during rearrangement, dust and fine grit from moving tools and boxes can land and get dragged. A temporary protector acts like a “sacrificial layer,” which is especially helpful for sectional sofas and heavy entertainment centers.
– Don’t rely on throw rugs alone—rug corners and trapped grit can still grind the vinyl’s surface.
If you love rugs on vinyl floors, keep them clean and vacuum the rug edges often. Also ensure the rug’s bottom doesn’t have abrasive backing; look for rug pads designed specifically for hard surfaces.
Clean safely (routine that won’t dull the finish)
Yes—cleaning vinyl floors is mostly about using the right chemistry and the right amount of water. When you clean gently with a manufacturer-recommended or pH-neutral cleaner and avoid soaking, you reduce dulling, residue buildup, and long-term edge wear.
Many manufacturer care guides for resilient flooring advise using a pH-neutral or manufacturer-recommended cleaner to avoid damaging the wear layer on vinyl floors.
Microfiber mops trap loosened debris; regularly changing pads helps prevent dragging grit across vinyl floors during wet cleaning.
Avoiding waxes, oil-based polishes, and abrasive pads is a common resilient-floor instruction because these can leave residue or dull the finish system on vinyl floors.
A simple routine that’s hard to mess up
A consistent cleaning routine is more protective for vinyl floors than occasional “deep cleaning” with stronger products.
– Use a manufacturer-recommended cleaner or a pH-neutral cleaner; avoid “unknown” degreasers and heavy-duty solvents.
The wear layer on vinyl floors may have specific chemistry compatibility. If a cleaner is meant for stone, grease, or industrial jobs, it can react differently with vinyl’s surface system—even if it doesn’t cause immediate discoloration.
– Mop with a well-wrung microfiber mop and change pads often so you’re not dragging dirt around.
“Well-wrung” matters because excess water increases the chance of moisture migrating into seams and joints. If you do a living room cleanup and the water stays very dirty, swap pads and continue with fresh microfiber.
– Skip waxes, oil-based polishes, and abrasive pads unless your vinyl manufacturer specifically says they’re compatible.
Wax and polish can create a film that collects soil and makes vinyl floors appear cloudy. Abrasive pads can wear down the finish and shorten the life of the surface appearance.
Practical note for LVP/LVT vs sheet vinyl
Vinyl floors aren’t all installed the same way. LVP/LVT typically involves plank/tile seams where water can migrate; sheet vinyl can also be vulnerable if moisture sits at edges. That’s why a “barely damp” approach is safest for all common vinyl floor formats.
Control moisture and spills fast
Yes—moisture control is one of the biggest long-term protectors for vinyl floors in living rooms. The safest approach is quick spill response and controlled mopping so water doesn’t sit along seams or edges.
Resilient floor care guidance commonly warns against standing water on vinyl floors because moisture can work its way toward seams and joints.
Using minimal water during damp mopping reduces the risk of moisture migration on vinyl floors, particularly near edges and transitions.
Humidifiers, wet cleaning tools, and repeated damp contact create “moisture hotspots” that can accelerate wear in vinyl-floor seam areas.
Treat spills like an immediate maintenance event
Living rooms get the occasional spill—drinks, pet accidents, muddy footprints that “dry then smear,” and wet umbrellas. Your goal for vinyl floors is to stop moisture from lingering.
– Wipe spills immediately and dry the area thoroughly—standing liquid is a common cause of edge lifting and long-term wear.
Start with a clean cloth or paper towels, then finish with a dry microfiber. If the spill includes sugars or oils (juice, soda, sauces), residues can also attract more dirt—so after drying, do a gentle spot clean using a cleaner compatible with your vinyl floor.
– For damp mopping, use minimal water and avoid flooding the floor.
Think “light dampening,” not “washing.” If you need to remove heavy soil, clean in passes—re-wring the mop and replace pads—rather than turning the floor into a wet surface.
– Be extra careful around windows, humidifiers, and wet cleaning tools: water that seeps into seams can become a bigger problem later.
Condensation can repeatedly wet vinyl floors near glass. If you use humidifiers, ensure they’re positioned and maintained so they don’t create repeated dampness at the same floor spots.
Add protection where it actually helps (and know when it won’t)
Yes—extra protection only works when it complements the vinyl floor’s existing wear layer. In many cases, focusing on correct cleaners and preventing grit/water is more effective than chasing “restorers” or coatings.
Many luxury vinyl systems use a factory-applied wear layer; adding aftermarket coatings is often unnecessary and may conflict with manufacturer warranty terms for vinyl floors.
If vinyl floors are dulling, prevention typically matters more than aggressive “restoration,” because finish wear from grit and incompatible cleaners is difficult to reverse safely.
Damaged areas—like chips, lifting edges, or deep scratches—usually require targeted repair or replacement; surface fixes depend on the vinyl system and installation.
– Many vinyl floors have a factory wear layer; in those cases, “extra coating” isn’t always recommended and can void warranties.
If you want a coating, start by checking your flooring manufacturer’s specific approval list or guidance. Even when a product looks “resilient-floor safe,” it may not match your finish system.
– If your floor is dulling, focus on prevention (grit control, correct cleaners) rather than chasing harsh “restorers.”
Dulling is often the result of microscopic abrasive wear or residue film. When you stop the abrasive source and use compatible cleaning, vinyl floors usually look noticeably better within normal cleaning cycles.
– For damaged areas (chips, lifting edges, or deep scratches), plan for repair/replacement—surface fixes depend on your specific vinyl type and installation method.
Each manufacturer and installer may have different instructions for LVP/LVT edge lifting, plank replacement, or underlayment-related moisture issues.
Quick comparison: what tends to help vs. what can backfire
Below is a simple decision guide for vinyl floors when you’re choosing “protection” steps.
| Approach | Pros for vinyl floors | Cons / risks | Best use |
|---|---|---|---|
| Entry mats + routine dry cleaning | Reduces tracked grit; prevents abrasive wear | Requires consistency (weekly cleaning of mats, quick vacuuming) | Every living room with foot traffic |
| pH-neutral cleaner + microfiber | Cleans without residue-driven dullness | Not ideal for grease/unknown stains without manufacturer-approved spot steps | Daily/weekly living room maintenance |
| Wax/polish/restorer products | Sometimes improves appearance short-term (if compatible) | Can leave film, accelerate soiling, or conflict with warranty; may dull long-term | Only if your vinyl manufacturer explicitly approves |
What can go wrong (and when to stop)
Yes—vinyl floors most commonly get damaged by heat, soaking, abrasion, and wrong chemicals. If you’re troubleshooting dullness or edge issues, stop and switch approaches before you accidentally worsen the wear layer or encourage moisture migration.
Many vinyl care instructions discourage steam mops because heat and moisture can damage vinyl flooring systems and increase risk near seams and edges.
Abrasive scrubbing pads can wear down the wear layer on vinyl floors and turn a surface from “matte clean” to “permanently scuffed.”
Excess cleaner residue can cloud vinyl floors and attract more dirt, making the floor look dull even after cleaning.
– Using steam mops or soaking the floor can damage vinyl and is commonly discouraged in vinyl care instructions. If you’re unsure, check your product’s manual/warranty before using steam.
Steam mops introduce heat and moisture. Even if the surface looks fine immediately, moisture exposure can create delayed problems around seams, transitions, and installation edges.
– Scrubbing with abrasive pads or “magic erasers” can polish off the finish/wear layer over time.
“Magic erasers” can behave like fine abrasives. On vinyl floors, that can mean a gradual loss of protective surface clarity—especially in high-scrub areas like entry corridors and under coffee tables.
– Over-applying cleaners can leave residue that makes floors look cloudy and attracts more dirt.
When you clean too often with too much product, you don’t just reduce cleaning effectiveness—you often increase the cycle of re-soiling. On vinyl floors, “less product, more precision” is usually the safer direction.
Verdict/tip
The most reliable protection for a living room is a “prevention-first” routine: mats + felt protectors, gentle regular cleaning, and fast spill drying. Skip treatments like wax/polish/restorers unless your floor’s manufacturer explicitly allows them—those are the steps most likely to create long-term issues or warranty problems. If your vinyl floors have active lifting edges or repeated moisture sources, don’t keep “covering up” the symptom; address the moisture cause first and follow manufacturer repair guidance.
Quick checklist (scan + save)
| Area | What to do | Why it helps |
|---|---|---|
| Entry & traffic paths | Use mats; sweep/vacuum regularly | Keeps grit from grinding the wear layer |
| Furniture feet | Felt pads / proper chair glides | Prevents scuffs and surface scratches |
| Cleaning | pH-neutral cleaner + microfiber, barely damp | Cleans without leaving residue or excess moisture |
| Spills | Wipe immediately + dry | Reduces risk of seam/edge issues |
| Avoid | Steam-soaking, abrasives, wax/polish unless approved | Prevents finish/wear-layer damage |
Sources
– Armstrong Flooring — Luxury Vinyl Floor Care & Maintenance (manufacturer care documentation; verify for your specific product)
– Shaw Floors — Care & Maintenance for resilient/vinyl flooring (manufacturer documentation)
– Mohawk Flooring — Care & Maintenance guidelines for LVP/LVT (manufacturer documentation)
– Resilient Floor Covering Institute (RFCI) — Industry guidance on resilient floor care (RFCI published guidance)
A protection routine built around vinyl floors’ real failure points—abrasive grit and persistent moisture—stays effective as your living room changes across 2026. If you want the best results, prioritize entry matting, furniture contact protection, compatible pH-neutral cleaning, and immediate drying of spills—then adjust only when your specific manufacturer instructions say to.
Frequently Asked Questions
What are the best ways to protect vinyl flooring in a living room?
Use felt or microfiber pads under all furniture legs to prevent scratches and dents, and choose a quality doormat at entryways to reduce grit and sand. Sweep or vacuum regularly with a soft brush attachment to avoid abrasive particles wearing down the wear layer. For added protection, consider a vinyl-safe floor protector or sealant that’s compatible with your specific flooring type and warranty.
How can I prevent scratches and scuffs on my vinyl floor?
Add furniture sliders and ensure legs are clean and rounded to minimize point pressure. Use area rugs in high-traffic zones (like near sofas or media units) and avoid dragging chairs, stools, or heavy items across the floor. For minor scuffs, clean the area with a vinyl floor-safe cleaner and avoid harsh abrasives, which can dull the finish over time.
Which cleaning products are safe for vinyl floors in a living room?
Stick to manufacturer-recommended vinyl floor cleaners or pH-balanced, vinyl-safe solutions that won’t leave residue. Avoid steam mops, abrasive scrubbers, and strong chemicals like bleach or ammonia, as they can damage the surface and affect the protective wear layer. For everyday cleaning, warm water with a mild cleaner is usually enough, followed by proper drying if the product suggests it.
Why does vinyl flooring need protection from grit and dirt?
Sand and small debris act like sandpaper, grinding into the wear layer every time you walk across the living room. This is especially common near doors, hallways, and under frequently moved furniture. Place mats at entrances, take shoes off when possible, and maintain a consistent cleaning routine to keep vinyl floors looking new longer.
How do I protect vinyl plank or sheet vinyl floors from water damage?
Although many vinyl floors are water-resistant, standing water can seep at seams or edges and cause long-term issues like lifting or warping. Clean spills promptly using a soft cloth or mop, and avoid soaking the floor during mopping—use only lightly damp methods. If your living room has high humidity or frequent spills, use a dehumidifier as needed and verify that the installation method and seam integrity remain intact.
📅 Last Updated: October 24, 2026 | Topic: How to protect vinyl floors in a living room? | Content verified for accuracy and freshness.
References
- Vinyl flooring
- https://www.armstrongflooring.com/support/care-and-maintenance.html
- MohawkFlooring
- https://www.cdc.gov/coronavirus/2019-ncov/community/disinfecting-building-facility.html
- https://scholar.google.com/scholar?q=protecting+vinyl+floors+living+room+scratch+prevention Google Scholar
- https://scholar.google.com/scholar?q=luxury+vinyl+plank+floor+care+maintenance+do+and+don%27ts Google Scholar
- https://scholar.google.com/scholar?q=resilient+flooring+care+and+maintenance+moisture+and+stain+prevention Google Scholar


[…] microfiber mops or soft microfiber cloths, and choose a pH-neutral hardwood floor cleaner; these help lift soap […]