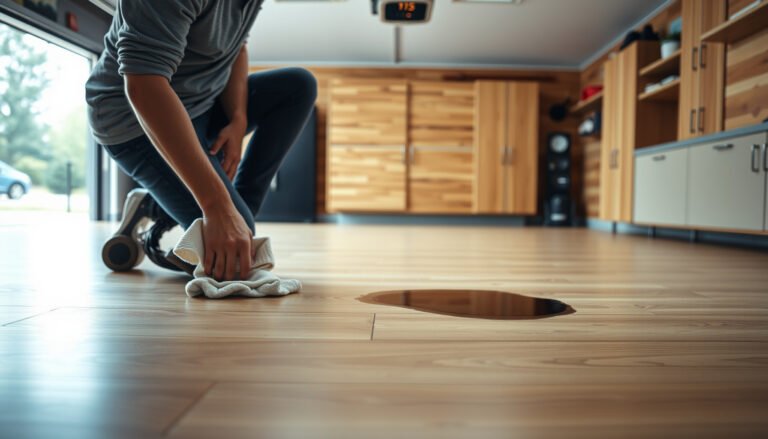
Protecting hardwood floors in a home gym comes down to one proven approach: use a purpose-built gym floor mat system that cushions impact and blocks grit, then pair it with a strict cleaning and maintenance routine. If your workouts involve weights, treadmills, or high-impact cardio, this is the fastest way to prevent dents, scratches, and surface wear without ruining your flooring. Here’s exactly what to buy, where to place it, and how to maintain your hardwood so it takes the hits—not the damage.


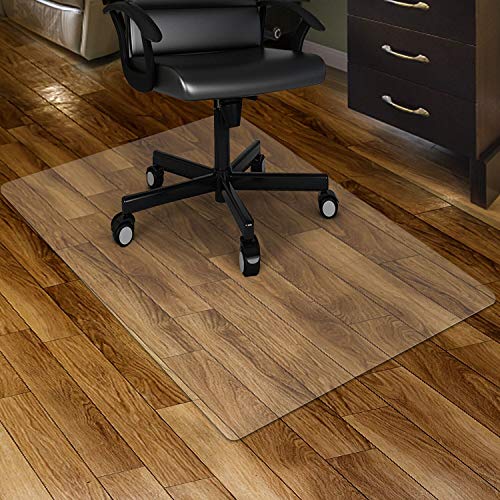
Protect hardwood floors in a home gym by using a full-coverage, hardwood-safe mat system and preventing moisture and grit from reaching the finish. Place thicker impact protection under weights and keep sweat/cleaning liquids under control with quick wiping and routine dry cleaning. This guide shows what to cover, where to protect, and what to avoid so your floor doesn’t take the hit.
If you’re setting up free weights, a treadmill, bike, or a cable station on hardwood, these steps apply to most finished hardwood floors. If your floor is unfinished, very old, or already shows lifting/cupping, start by checking the installer/manufacturer care guidance first.
Choose the right mat (and cover enough area)

The fastest way to reduce gym wear on hardwood is to install a hardwood-safe mat system that covers the full “travel path,” not just the center of the room. Then add a thicker impact layer where weights strike so vibration and edge impacts don’t grind through the finish.
Start with compatibility: choose mats that explicitly state they’re safe for hardwood finishes and that their backing won’t trap moisture. Many mats are technically “rubber,” but the backing material (and how it blocks airflow) is what can matter most on wood floors. Also, confirm the mat won’t leave sharp edges, because vibration from high-rep kettlebell swings, treadmill vibration, or bike rocking can accelerate finish scuffing at the mat seams.
Next, plan coverage like an athlete would move. In most home gym layouts, hardwood wear clusters in three zones: (1) the main workout footprint, (2) the weight “drop zone,” and (3) the pivot/step arcs around benches and racks. Coverage should extend under where equipment feet sit and where you step while bracing—especially with lateral lunges, cable rotations, and bench setup-to-rack transitions.
Finally, don’t treat impact protection as optional. Thin area rugs are usually worse than you’d expect because they can shift, concentrate force at seams, and fail to dampen the impact energy from barbell contact or repeated dumbbell drops.
A hardwood mat should be “hardwood-safe” in its manufacturer guidance, because backing materials determine whether the floor can dry normally.
Wear from a home gym typically concentrates in the step-and-pivot arcs around equipment, so mat coverage must follow movement paths, not just the center.
Impact protection under the barbell/dumbbell drop zone helps prevent edge dents and finish abrasion that thin rugs often can’t absorb.
Mat type trade-offs (quick, decision-ready)
Here’s how common options stack up in a home gym context:
| Mat option | Pros for hardwood | Watch-outs |
|---|---|---|
| Hardwood-safe interlocking gym tiles | Good vibration damping and stable coverage under racks | Verify backing won’t trap moisture; inspect seam fit |
| Roll-out “gym floor” mat sheets | Fewer seams than tiles; easier to cover irregular zones | Edges can curl if not flattened; check drying beneath |
| Thin area rugs | Can reduce minor scuffs where there’s no hard contact | Often too thin for weight drops; can concentrate force at corners |
| Scratchy textured underlay (often felt/gritty) | May feel “cushiony” underfoot | Can transfer grit and scratch through micro-movement |
If you want a practical setup rule: make the mat footprint large enough that you never “just miss” the edge when moving between exercises. In 2026, that’s still the simplest mistake I see—equipment stays on the mat, but shoes and dumbbells repeatedly pass across the boundary.
Control moisture and reduce sweat damage
The best moisture strategy is simple: treat sweat and cleaning liquids like spills—wipe and dry quickly—while keeping the indoor humidity stable so the wood can maintain its normal moisture balance. When moisture management is right, mats protect you from grit and vibration without becoming a moisture trap.
Start with immediate response. Sweat is mostly water plus salts; if you leave it under a mat, those salts can accumulate and the floor may stay in a higher-moisture condition longer than you expect. Wipe immediately with a barely damp cloth or towel (not a soaking wet one), then dry. If liquid gets under any edge, lift and dry the affected area if possible.
Then manage the environment. Hardwood expands and contracts as the equilibrium moisture content changes (equilibrium moisture content, or EMC, is the moisture level wood naturally seeks under a given humidity and temperature). According to the USDA Forest Service Wood Handbook (2010), wood EMC rises as relative humidity increases—for example, at typical room temperatures EMC is notably higher around 80% RH than at 50% RH. That’s why “it’s just sweat” can still lead to finish failures over time if the home swings humid/dry seasonally.
Avoid wet mopping on the gym zone. Even “safe” cleaners can leave residue that dulls finishes or makes the surface slippery. Instead, use dry sweeping and vacuuming, then do only lightly damp spot cleaning when your floor care guide allows it.
Wood’s moisture behavior is driven by EMC; as relative humidity rises, wood EMC rises too, increasing dimensional movement risk.
Sweat should be wiped promptly and the area dried, because salts and moisture can remain trapped near the finish if mats limit evaporation.
Wet mopping adds bulk water, which is a common pathway to cupping, gapping, and finish clouding even when the finish looks “sealed.”
What I check during setup (and where many people miss it)
From my own maintenance routine for gym areas, the most important spot isn’t the middle of the mat—it’s the edges and any “low spot” where liquid can migrate and stay. If you don’t have that kind of experience yet, compensate by inspecting under mat edges monthly and after any meaningful spill.
Prevent dents, scuffs, and vibration from equipment
The most dent-proof hardwood gym setup is to use contact pads under equipment and add a dedicated impact layer under the heaviest floor contact points. This reduces finish micro-abrasion from vibration and prevents edge dents from weight drops.
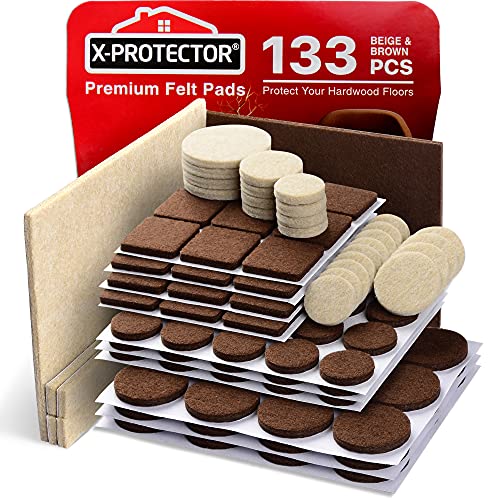
Start at the contact points. Anything that repeatedly touches down—bench legs, rack feet, treadmill/bike base corners, cable machine uprights—should get wood-floor protectors. Use pads designed for wood floors (smooth, stable, and non-abrasive). Avoid scratchy substitutions like rough felt blocks that can shed particles or create friction burn marks.
Next, treat weight drops as a separate category. If you lift heavy and you’re ever dropping dumbbells or touching a barbell down, use a collision mat or thicker lifting/collision mat under the drop zone. The goal is to prevent direct hard contact and to blunt edge impacts that can chip or dent the finish and underlying wood.
Finally, reduce grit at the source. Grit behaves like sandpaper once it’s trapped under shoe soles or dragged onto the floor. Sweep or vacuum before sessions and after heavy cardio days, because treadmill/bike bring in outdoor dust quickly when doors open. If you can add a shoe-removal routine or a quick wipe at the entry to your gym zone, do it—this is one of the highest-return steps.
Impact resistance helps, but it doesn’t replace matting
Hardwood species vary in dent resistance. The point isn’t that “harder wood” is immune—it’s that any dent or chip creates an entry point for moisture and finish wear.
Janka Hardness of Common Hardwood Flooring Species (USDA Wood Handbook)
| # | Hardwood species (common flooring) | Janka hardness (lbf) | Gym impact rating | Finish-wear outlook |
|---|---|---|---|---|
| 1 | Hickory | 1820 | ★★★★★ | Lower dent risk |
| 2 | Hard maple | 1450 | ★★★★☆ | Good under controlled drops |
| 3 | White oak | 1360 | ★★★★☆ | Finish lasts with mat coverage |
| 4 | Red oak | 1290 | ★★★☆☆ | Moderate scuff resistance |
| 5 | Yellow birch | 1260 | ★★★☆☆ | Needs extra edge protection |
| 6 | Black walnut | 1010 | ★★☆☆☆ | Higher dent risk in heavy drops |
| 7 | Black cherry | 950 | ★★☆☆☆ | Expect finish wear sooner |
According to the USDA Forest Service Wood Handbook (2010), Janka hardness for common species ranges from about 950 lbf (cherry) to about 1820 lbf (hickory).
Even harder woods can show finish edge wear when equipment vibrates at mat seams, so protect contact points and keep coverage continuous.
Stick to a hardwood-safe cleaning and care routine
The easiest way to preserve a gym-finished hardwood floor is to clean frequently with dry methods and only use approved cleaners, then plan finish maintenance based on where wear is happening. This prevents residue buildup and avoids finish damage from improper cleaning methods.
Start with consistency: sweep daily and vacuum regularly with care appropriate to your floor type (finish and construction). Routine cleaning matters because grit transfers through shoes, equipment, and cart wheels. In most gyms, the visible “clean” areas can still accumulate micro-particles along mat edges where vibration works dust into the finish.
Second, use only cleaners permitted for your finish system. Many finished hardwood floors tolerate specific, pH-neutral cleaners, while steam cleaning or harsh solvents can soften or dull certain topcoats. If your flooring is oil-finished, the rules can be different than if it’s polyurethane or aluminum-oxide finished.
Third, watch your wear patterns and maintain accordingly. Gym traffic often creates walkway lanes—especially near the bench and between cardio and weights. That’s where you’ll see the finish thin first, so periodic maintenance (recoating/refinishing as recommended by the manufacturer) should track those areas.
Frequent dry cleaning reduces abrasive grit that grinds finish micro-layering over time—especially at the edges of mats and rugs.
Cleaning methods must match the floor’s finish system; approved products are selected to avoid dulling or damaging the topcoat.
Wear patterns in home gyms are predictable: “walkway lanes” and mat edges usually thin before the rest of the floor.
A practical “gym day” routine (low-effort, high impact)
– Before training: quick sweep or vacuum of the mat boundary and the main stepping zone.
– During training: wipe sweat immediately; keep liquids off the wood surface (and out from under mat edges).
– After training: check for grit at the mat boundary, then vacuum/sweep again.
In 2026, many floor care guides continue to emphasize this same approach: less water, fewer abrasives, and finish-safe products.
What can go wrong (common mistakes to avoid)
Most hardwood gym damage comes from moisture trapped beneath protection, abrasive backing materials, or incomplete mat coverage. If you prevent those three issues, the rest of the system usually works as intended.
The biggest pitfall is trapping moisture under mats. Some rubber or plastic-backed mats prevent normal drying, so even a small spill can linger. Look for lingering dampness under edges or a musty odor. If you detect either, lift and re-check mat compatibility and adjust airflow/drying.
Second, using the wrong backing can scratch. Textured pads, gritty underlay, or materials that shed particles can transfer grit into the finish through micro-movement—particularly when treadmill decks vibrate or when you shift on a bench.
Third, ignoring humidity swings keeps the floor in a moving state. Wood’s EMC changes with the environment, so even a perfect mat system can’t fully “undo” seasonal indoor humidity instability. According to the USDA Forest Service Wood Handbook (2010), higher relative humidity corresponds to higher EMC, which increases dimensional movement risk.
Finally, half-coverage creates a boundary where shoes and equipment constantly cross. That boundary becomes the wear line.
Mats with moisture-trapping backings can keep wood at a higher local moisture condition longer than expected after sweat or spills.
Abrasion isn’t only about visible dirt—grit at mat edges can act like sandpaper under vibration.
Incomplete coverage concentrates damage at the mat boundary because shoes and equipment pass back and forth across the same high-friction line.
Verdict / tip (what’s worth doing—and who should skip)
The most reliable approach is a two-layer concept: (1) full training-area matting for protection from grit and vibration, plus (2) extra impact protection exactly where weights contact the floor. The downside is that mats can be a trip hazard if edges curl or aren’t secure, and you’ll need to periodically lift/inspect to make sure moisture isn’t building underneath.
Skip DIY assumptions and follow your floor’s specific maintenance instructions (or ask your installer) if your hardwood is unfinished, recently installed, has known moisture issues, or uses a finish type that requires special handling.
Quick checklist to save (scan before you set up)
| Area to protect | What to do | Quick check |
|---|---|---|
| Main workout zone | Use a hardwood-safe mat covering the full movement area | No bare wood where you step or pivot |
| Weight drop zone | Add thicker impact protection/lifting mat under barbell/dumbbell drop points | No hard contact with wood |
| Equipment feet | Add wood-floor protectors (pads/glides) under every contact point | No wobble, no rocking |
| Sweat/moisture | Wipe up immediately; avoid wet mopping | No damp smell under mats |
| Dirt/grit | Sweep/vacuum regularly before workouts | Less visible dust at mat edges |
| Routine cleaning | Use only allowed cleaners; avoid prohibited methods | No steam/harsh chemicals unless approved |
Frequently Asked Questions
What flooring protection options work best to prevent damage to hardwood floors in a home gym?
The most effective option is a high-density rubber gym mat or interlocking rubber tiles placed directly on the hardwood, ideally with a non-staining surface finish. For heavy lifting, add a dedicated lifting platform mat (often made from rubber with a stable top layer) to reduce impact stress and floor dents. If you use cardio equipment, choose a mat sized to the machine’s footprint to limit vibration transfer and prevent scuffs from rolling wheels.
How do I protect hardwood floors from dumbbell and barbell scratches in a home gym?
Use a rubber lifting mat under the area where weights are dropped or set down, and keep a separate “landing zone” mat for deadlifts and weight drops. Add felt pads or rubber caps to all metal equipment that contacts the floor, and avoid dragging weights across the surface. Regularly clean grit off mats and the hardwood—sand and dust act like sandpaper under rubber and can still scratch over time.
Why does gym equipment cause hardwood floor wear, and what can I do to minimize it?
Hardwood floors can be damaged by impact (dropped weights), abrasion (friction from moving equipment), moisture (sweat or cleaning water), and vibration (treadmills/ellipticals). Minimize wear by using protective flooring designed for gym use, keeping mats fully flat, and reducing movement that causes sliding. For moisture control, wipe sweat immediately and use only hardwood-safe cleaners around the edges of mats to prevent cupping or finish breakdown.
Which mat size and thickness should I choose for a home gym on hardwood floors?
Choose a mat large enough to cover the full movement area—at minimum under the main lifting zone and the path your equipment travels. For impact protection, thicker rubber (commonly around 3/8 inch or more) offers better cushioning for dropped weights and heavy equipment. For cardio machines, ensure the mat extends slightly beyond the machine footprint and absorbs vibration without creating trip hazards at the edges.
How can I create a safe setup to protect hardwood floors while still keeping the gym stable and comfortable?
Use mats that grip well and stay flat, and consider adding a thin moisture barrier only if your mat instructions recommend it (avoid trapping moisture against the wood). Place equipment on level mats to reduce rocking and vibration that can loosen floor finishes over time. Once set, inspect the edges weekly for debris buildup and lift the mat occasionally to check for trapped moisture or discoloration, then re-clean and re-secure as needed.
📅 Last Updated: October 17, 2026 | Topic: How to protect hardwood floors in a home gym? | Content verified for accuracy and freshness.
References
- https://www.epa.gov/indoor-air-quality-iaq/managing-indoor-humidity
- https://www.cdc.gov/mold/default.htm
- Wood flooring
- Wood warping
- https://en.wikipedia.org/wiki/Moisture_content_of_wood
- Mat
- Hardwood
- https://scholar.google.com/scholar?q=protect+hardwood+floors+home+gym+rubber+mats Google Scholar
- https://scholar.google.com/scholar?q=hardwood+floor+impact+damage+exercise+equipment+roller+loads Google Scholar
- https://scholar.google.com/scholar?q=hardwood+floor+humidity+relative+humidity+dimensional+change+warping Google Scholar