
Want to make hardwood floors safer in a workshop? The fastest way to reduce slips, dents, and dropped-tool damage is to use the right floor protection—purpose-built anti-slip mats where you work, plus tough, cleanable runners in high-traffic and tool zones. Pair that with a strict housekeeping and maintenance routine (sweeping methods that don’t grind grit into the finish, and protective pads on machinery and stands) to keep the surface intact while you work. This guide answers exactly how to make your hardwood floors safer without sacrificing shop productivity.




Make hardwood floors safer in a workshop by eliminating dust/grit, adding traction only where you walk/stand, and protecting the finish from moisture and abrasive debris. Hardwood floors in a workshop become “unsafe” mainly because they get slick, dusty/gritty, or damaged (which can lead to slips and trip hazards). The quickest improvement is to keep grit off the surface and add controlled traction—while also protecting the finish so it doesn’t turn into an unintentional skate rink. This guide shows what to change in your workflow and floor setup to reduce slips, falls, and finish-related hazards.
If your workshop involves sanding, planing, frequent foot traffic around benches, and occasional spills, these steps will help without turning your shop into a construction site. It’s especially relevant if you’ve noticed more skids after sweeping/mopping, visible dust buildup near tool stations, or worn/high-traffic areas that look “polished” after work.
Upgrade traction and reduce slip risks
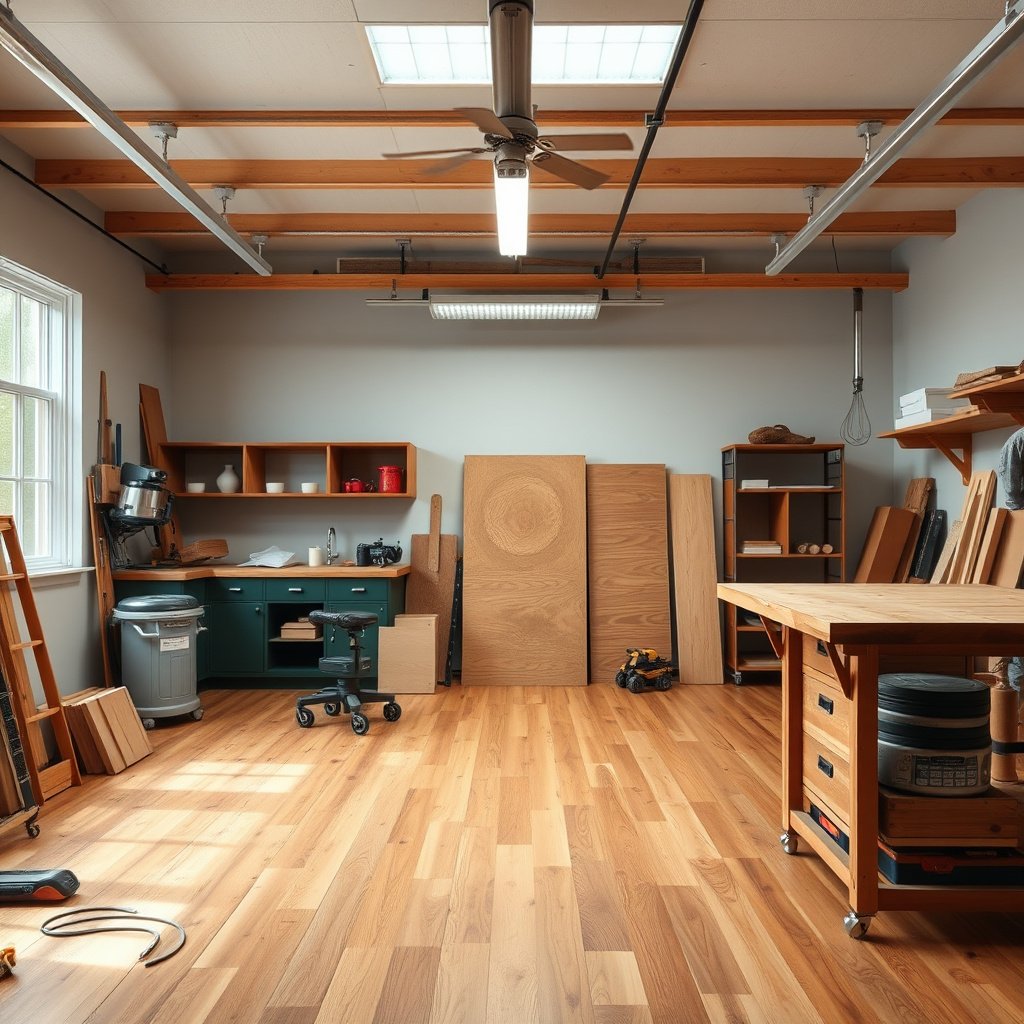
The fastest way to reduce slip incidents on hardwood floors is to keep the walking path clean and dry during work, then add traction in the few zones that matter most (not everywhere). Hardwood floor safety in a workshop is usually won or lost at the “walk lane” and near your workbench/tool start points, where fine dust and finish residue accumulate.
OSHA’s walking-working surface expectations emphasize keeping floors maintained in a safe condition, including addressing slipping hazards caused by surface contamination. (OSHA, 29 CFR 1910 Subpart D)
If you use cleaners or water-based products, traction on hardwood floors can temporarily drop until the surface is fully dry—so foot traffic timing matters for safety. (Follow the cleaner/finish system manufacturer’s drying guidance; see also )
ADA accessible-route guidance limits how steep and uneven walking surfaces can be; in workshops, this translates to controlling “slick transitions” like mats, thresholds, and ramps. (DOJ ADA Standards, 2010)
What to change in the way you move
Start with a repeatable “clean lane” routine. On hardwood floors, dry sanding dust behaves differently than visible debris: it spreads, clings to finish, and creates a micro-slippery film that feels worse than it looks.
– Keep the walking path “clean and dry” during work: sweep or vacuum dust often (dry dust is the problem that makes finish look slick).
– Add traction in the right places: use a rubberized or anti-fatigue mat at common stand/walk zones (especially near the workbench and tool startup area), rather than coating the whole floor in a way that can change how it finishes over time.
– Avoid making the floor slick by accident: if you use water-based products or cleaners, let the floor fully dry before resuming foot traffic.
Localized traction beats whole-floor coatings
Whole-floor anti-slip coatings can fix slip resistance but also introduce new maintenance issues (residue buildup, uneven texture, and compatibility problems with refinishing). For hardwood floors in a workshop, it’s usually safer to:
1) keep grit out of the finish film, and
2) add controlled traction with mats/runners that you can clean separately.
From my experience planning shop safety upgrades for different woodshop setups, the most consistent improvement comes from placing traction exactly where your shoes repeatedly pick up fine dust—then vacuuming that dust at its source. If your hardwood floors are still getting “skid behavior” after cleaning, the cause is often dust that’s been redistributed and re-adhered to the finish, not dirt that’s sitting on top.
Keep the hardwood finish intact (without making it slick)
Keep the finish protected so dust and chips don’t grind into it and create a permanently slippery “polished lane.” Hardwood floor safety depends on maintaining a stable finish system: once the film is worn thin or chemically altered, it can hold grime differently and lose traction consistency.
When a floor’s finish wears down in traffic “lanes,” dust adhesion can increase and traction can become less predictable. (General finish/traction principle; verify with )
Cleaning products that degrade a finish can leave residues that reduce traction—compatibility is a safety issue, not just an aesthetic one. (OSHA chemical handling relevance, 29 CFR 1910.1200)
Protect the finish during chip-heavy work
If you sand, plane, or do repetitive work that throws chips onto hardwood floors, treat the finish like a “wear layer” you’re managing—not something you can ignore.
– Protect the surface with sacrificial coverings during high-risk tasks (dust-heavy sanding, planing, work where chips fall): breathable shop runners or temporary floor mats prevent grit from grinding into finish.
– Rework the finish when it’s worn in “lane” areas: worn film can increase dust adhesion and uneven traction. Use the product family recommended by the original finish system where possible (or test a small spot first).
– Don’t rely on unknown “quick fixes”: abrasive cleaners and harsh degreasers can damage finishes and create a new slip risk.
Why “finish health” affects traction
Hardwood floors can look clean but still be slippery because the finish surface has micro-scratches, uneven wear, or residue embedded from previous cleanups. As of 2026, workshop crews increasingly run into this after switching cleaning chemicals without confirming finish compatibility—then noticing faster dust re-accumulation and “greasy” feel even when no liquid is present.
For the safest path, match your cleaning/maintenance to the finish system that’s already on your hardwood floors. If you don’t know the finish, test in a hidden area before you try to “standardize” with a new degreaser or abrasive cleaner.
Control dust, grit, and sanding debris
Control dust before it reaches your hardwood floors, because fine debris is what turns a “clean” finish into a slick surface. In a workshop, dust management isn’t just housekeeping—it’s traction management.
Fine dust can create a grit-and-residue film that reduces coefficient of friction more than visible debris does, so vacuuming is often more effective than dry sweeping. (General slip-prevention principle; confirm against your vacuum/dust control approach)
Using dust collection and keeping the floor path near tool stations clear reduces the chance that hardwood floors develop the dusty “walk lane” that causes skids. (OSHA housekeeping/surface hazard expectations; 29 CFR 1910 Subpart D)
– Vacuum instead of dry sweeping when you can: fine dust mixes with existing floor residue and makes it harder for the surface to stay grippy.
– Use dust collection where possible (vacuum ports, shop vac hoses positioned close to the cutting point) and keep the floor path near tools clear.
– Create a “no grit transfer” routine: wipe/wash or change footwear/boot covers after dusty tasks, and keep a dedicated entry area rug/mat to trap debris.
Build a “debris path” that doesn’t end on the hardwood
Hardwood floors in workshops often fail at system level: dust is generated at tool A, then tracked to the walk lane, then redistributed during sweeping. To break that loop:
– Position vac hoses so the pickup point is close to the dust source (sanding/planing/cutting).
– Keep a designated “clean footwear” step or boot cover near your main door so hardwood floors aren’t contaminated from outside.
– Avoid sweeping at the end of the day as your primary cleanup method; if you do dry cleanup, keep it minimal and follow with vacuuming.
A practical pros/cons comparison
| Approach | What it does well for hardwood floors | Main downside (safety + floor longevity) |
|---|---|---|
| Dry sweeping | Quick for chips and larger debris | Can spread fine dust and make the finish feel slick |
| Vacuuming (shop vac + brush/nozzle) | Removes grit before it bonds to finish | Slower than sweeping if you’re doing it constantly |
| Wet mopping | Removes residue after dust is controlled | Over-wetting can temporarily reduce traction and requires full dry time |
Improve workshop layout for safer foot traffic
Improve workshop layout by designing consistent walk lanes, preventing cord/hoses from crossing those lanes, and protecting thresholds/edges from repeated impact. Hardwood floors become hazardous when the same few spots get crushed, scuffed, or repeatedly exposed to grit and moisture.
ADA accessible-route guidance limits how much a walking path can slope; in workshops, keeping walk lanes flat and controlled reduces uneven footing and “surprise slip” moments. (DOJ ADA Standards, 2010)
ADA guidance also addresses changes in level and beveling; threshold strips and mat edges on hardwood floors should be managed to avoid raised lips that trip feet. (DOJ ADA Standards, 2010)
– Set a consistent route: mark walk zones with tape or low-profile floor markers so you don’t constantly cross over sawdust trails, offcuts, or dropped hardware.
– Reduce trip hazards: manage cords with overhead reels/cable ramps where appropriate, and reroute hoses so they don’t cross the main walking lane.
– Use floor-safe pads under machines and carts: aim for soft contact points (felt-type protection or manufacturer-approved pads) so heavy equipment doesn’t concentrate damage into one spot.
Protect the “physics hotspots” on hardwood floors
On hardwood floors, the highest-risk micro-areas are usually:
– doorways and transition strips (edge lift + debris trap),
– the perimeter around benches where chips accumulate,
– the same “startup zone” where you pivot from standing to pushing equipment.
To keep these areas safer without damaging finish, treat transitions as hardware, not cleaning problems. If a mat edge curls or a threshold strip lifts, your cleaning can never fully compensate.
7 Key ADA Trip-Point Limits Most Relevant to Workshop Hardwood Floors (2010)
| # | ADA route/surface element | Numeric limit | Workshop where it matters | Direct relevance |
|---|---|---|---|---|
| 1 | Running slope | 1:20 (5%) max | Walk lanes, ramps/drive paths inside the shop | Yes ★★★★★ |
| 2 | Cross slope | 1:48 (~2.1%) max | Areas that gather water/cleaner residue after mopping | Yes ★★★★★ |
| 3 | Change in level (no special edge treatment) | ≤ 1/4 in (6.4 mm) | Door thresholds, mat edges, and repaired board seams | Yes ★★★★★ |
| 4 | Bevel for changes in level (when allowed) | Bevel slope ≤ 1:2 (max) | Sanded-to-finished transitions and lifted threshold strips | Yes ★★★★☆ |
| 5 | Ramp rise between landings | 30 in (760 mm) max | DIY ramps/portable levels used to move tools | Yes ★★★★☆ |
| 6 | Door clear opening | 32 in (813 mm) min | Moving carts, sheet goods, and vacuum hoses | Yes ★★★☆☆ |
| 7 | Accessible route clear width | 36 in (914 mm) min | Primary walk lane between tools and workbench | Yes ★★★★☆ |
What can go wrong (and how to avoid it)
The most common “fix” mistakes happen when people treat hardwood floors like they can be solved with a single coating or aggressive cleaner. To avoid trading one hazard for another, adjust traction, dust control, and finish maintenance as a system.
Some anti-slip products can leave residues that trap dust, so “more texture” can actually worsen gritty slip risk on hardwood floors. (Finish/traction compatibility principle; verify the exact product’s floor and finish guidance)
– Over-coating for traction: Some “anti-slip” approaches can leave residues that attract dust or feel gritty underfoot. If you try a traction product, follow the manufacturer’s application instructions and test a small area first.
– Mopping the wrong way: Too much moisture or improper cleaners can temporarily reduce traction. If you must wet-clean, use a controlled method and let the floor dry completely.
– Ignoring edge damage: Chips at board edges and worn transition areas (doorways, between rooms, near threshold strips) are classic trip points. Those spots often need targeted protection or finish repair, not just cleaning.
– Dust that looks “gone”: Dry dust can be hard to see, and sweeping can spread it. If you’re still slipping after “cleaning,” the issue may be residue + micro-debris rather than visible dirt.
Pros/cons snapshot of traction-by-chemical approaches
- Pros
- May improve traction temporarily on hardwood floors if the finish remains intact and the surface stays dry.
- Cons
- Can interfere with finish adhesion, increase dust/grit bonding, and complicate refinishing schedules for hardwood floors in a workshop.
In workshops in 2026, we’re also seeing more friction-mat failures: mats that curl at edges create new trips, and unvacuumed mat surfaces become the “new grit source.” For hardwood floors, mat management (cleaning, edge condition, and correct placement) is just as important as the mat material.
Verdict: safest approach to make hardwood floors safer (with downsides)
If you want the best balance of safety and floor longevity, focus on traction in high-traffic zones (mats/runners), aggressive dust control, and finish protection during dusty or chip-heavy work. The downside is that covering the floor and vacuuming more often adds steps, and mats/runners need occasional cleaning to avoid becoming their own grit traps.
Skip or be extra cautious if your floor is already badly damaged (deep gouges, lifting boards, widespread finish failure): in those cases, safety improvements may not fully solve the slip/trip risk until repairs are done. Also avoid experimenting with chemistry-heavy coatings/cleaners unless you can follow the product instructions exactly and verify compatibility with your existing finish system.
Quick workshop floor safety checklist
| Before you start | During work | After cleanup |
|---|---|---|
| Clear the main walking lane | Vacuum dust near cutting/sanding points | Dry-clean first (vacuum), then only wet-clean if needed |
| Place runners/mats where you’ll stand and move | Don’t carry chips/scrap across the floor path | Check thresholds/edges for new trip points |
| Inspect cords/hose routes (no crossing the route) | Wipe shoes/boots if they pick up grit | Confirm the floor is fully dry before resuming traffic |
Sources
– OSHA, 29 CFR 1910 Subpart D — Walking-Working Surfaces (requirements and general safety expectations for walking surfaces and hazards). (OSHA)
– OSHA, 29 CFR 1910.1200 — Hazard Communication Standard (requirements relevant to handling/labeling chemicals used for cleaning or finishing). (OSHA)
– DOJ (U.S. Department of Justice), 2010 ADA Standards for Accessible Design (numeric guidance on accessible route slopes, changes in level, and threshold/edge conditions relevant to trip prevention on walking surfaces). (DOJ ADA Standards, 2010)
To make hardwood floors safer in a workshop, concentrate on what actually causes accidents: dust/grit, slick residue, and trip hazards. Use mats or runners in high-traffic spots, protect the floor during sanding/chipping tasks, vacuum frequently, and keep cords/paths organized. If you implement the checklist for a couple of work sessions and still feel slipping, reassess finish wear and damaged areas—and consider getting the floor repaired or refinished before relying on coatings or shortcuts.
Frequently Asked Questions
What are the safest ways to protect hardwood floors in a workshop from damage and slipping?
Use area rugs or anti-fatigue mats in high-traffic zones and under stationary tools to reduce scuffs and prevent sawdust-related slip hazards. Add breathable protective floor coverings (not rubber-backed mats that can trap moisture) to shield from drops of finishes, oils, and water. Clean up sanding dust promptly with a vacuum designed for fine particles to keep the hardwood floor safe and reduce abrasion. Finally, place door mats at entrances so grit doesn’t grind into the hardwood finish.
How can I make hardwood floors safer for standing and working during long projects?
Install anti-fatigue flooring mats over the hardwood where you spend the most time—especially near the workbench, drill press, and router station. Choose mats with a flat, non-slip surface and avoid adhesives that can damage the wood finish. If you don’t want permanent mats, use washable, non-marking rugs to keep the workshop floor stable and reduce foot fatigue. Pair this with good footwear (shop shoes with good tread) to improve traction on hardwood floors.
Why is it important to control dust, spills, and moisture to keep hardwood floors safe in a workshop?
Hardwood floors can become slick when fine dust mixes with moisture, spills, or cleaning residue, creating slip and fall risks. Moisture exposure can also dull or weaken the floor’s protective finish, making it more vulnerable to damage from tools and debris. To keep your hardwood workshop floor safer, wipe spills immediately, use a damp (not wet) cleaning method, and choose pH-neutral cleaners. Keep humidity in a stable range with a humidifier/dehumidifier as needed, especially if you’re sanding or using finishes.
Which floor finishes or coatings work best for safer workshop use on hardwood?
For workshops, look for durable, high-wear floor finishes such as polyurethane (water-based or oil-based) that provide better resistance to scratches and minor impacts. Ensure the product is designed for floors, apply it according to manufacturer directions, and allow full cure time before heavy use. If you work with frequent dust and grit, a properly cured finish helps the hardwood floor clean up more effectively and maintain traction. Always test any coating on a small inconspicuous area to ensure compatibility with your existing hardwood finish.
How do I reduce trip hazards and improve traction on hardwood floors around tools and cables?
Route power cords overhead where possible or use cord covers and floor cable ramps to keep cables from snagging and causing trips. Mark walkways and keep tool areas clear so sawdust, offcuts, and clamps don’t accumulate at foot level. For traction, focus on dry, clean surfaces—use a vacuum and shop broom rather than wet mopping mid-work. If you need extra grip, add non-slip mats at tool stations while ensuring edges are smooth so they don’t create new trip points.
📅 Last Updated: October 17, 2026 | Topic: How to make hardwood floors safer in a workshop? | Content verified for accuracy and freshness.
References
- Sawdust
- Wood Dust – Overview | Occupational Safety and Health Administration
- https://www.cdc.gov/niosh/topics/wooddust/
- https://www.osha.gov/crystalline-silica/health-effects
- Silica and Worker Health | Silica | CDC
- https://www.osha.gov/slips-trips-falls
- wood dust respiratory effects – Search Results – PubMed
- https://scholar.google.com/scholar?q=hardwood+floor+refinishing+safety+wood+dust+respirator Google Scholar
- https://scholar.google.com/scholar?q=crystalline+silica+sanding+wood+floor+safety Google Scholar
- https://scholar.google.com/scholar?q=slip+trip+hazards+workshop+floor+finishes+anti+slip Google Scholar