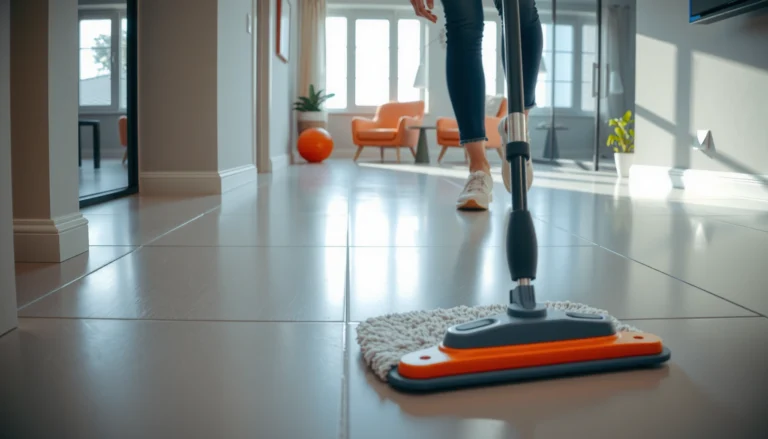
Prevent water damage to LVP in a bedroom by stopping moisture at its source and acting fast on any spills or leaks. Keep water off the seams/edges, use the correct underlayment and moisture barrier (if your LVP requires it), and clean with minimal moisture—no soaking or “wet mopping.” If you’re dealing with day-to-day spills, bathroom-adjacent bedrooms, or common leak risks (AC condensation, humidifiers, plumbing), this guide covers the practical steps that reduce the chances of swelling, loose planks, and edge lifting.




Who this is for / when it applies

This is for anyone installing (or maintaining) LVP in a bedroom where moisture can reach the floor surface, perimeter, or seam lines. The biggest wins come from controlling humidity/condensation and responding quickly when water reaches LVP edges and the underlayment.
According to the U.S. EPA, indoor relative humidity should typically be kept in the 30–50% range to help reduce mold growth risk (2024).
According to the U.S. CDC, wet materials from water damage should generally be dried within 24–48 hours to help reduce the risk of mold (updated guidance varies by publication cycle).
For many resilient-floor systems, including LVP, installation instructions emphasize using the manufacturer-required underlayment/moisture barrier and leaving expansion gaps to prevent perimeter moisture issues.
This advice applies well to most LVP systems where planks expand slightly and seams can be exposed to moisture from the floor surface or edges. It’s especially useful if your bedroom has a window A/C unit, humidifier, basement/ground-level subfloor, or carpet/rug pads that trap water. In my experience, the “failure pattern” on LVP in bedrooms usually isn’t from a single splash—it’s from repeated small exposures that eventually work their way into seam lines and perimeter transitions.
Seal and prepare the subfloor before you lay LVP
You prevent most LVP water damage before the first plank clicks in by starting with a dry, flat, properly sealed base. If moisture is present in the subfloor or the installation ignores the required moisture barrier/underlayment, water can migrate upward and collect at seams and edges.
ASTM standards commonly used for resilient flooring moisture testing (e.g., ASTM F2170 for in-situ RH or ASTM F1869 for calcium chloride) exist because slab moisture can vary widely even under “normal” living conditions.
Installation systems for floating LVP typically require an expansion gap around walls and fixed objects so the floor can move without being forced tight at the perimeter.
Resilient flooring manufacturers often specify underlayment thickness and moisture-barrier performance because underlayment acts as part of the moisture-management system, not just a sound layer.
– Confirm the subfloor is dry and flat; trapped moisture and unevenness increase the risk of planks separating at seams.
– Use the moisture-control underlayment/moisture barrier required by your LVP manufacturer (follow their thickness and placement rules). A “similar-looking” underlayment can fail to provide the moisture performance the spec calls for.
– Allow proper expansion gaps around walls/fixtures so moisture can’t push planks into tighter contact than the system is designed for. If the perimeter is jammed tight, water movement and seasonal expansion can contribute to edge lifting.
Control the main moisture sources in a bedroom
You reduce LVP water damage most effectively by controlling the moisture sources that create condensation, dripping, or frequent small exposures. When moisture enters the room as humidity or airborne condensation, it still ends up as liquid at the coldest surfaces—often the floor edges near exterior walls and windows.
The U.S. EPA notes that mold can grow when moisture levels are high; indoor RH management (often targeting 30–50%) is a core control approach (EPA guidance).
Condensation risk increases when warm, humid indoor air contacts a cooler surface; window/curtain areas and exterior walls are common condensation zones for bedrooms.
AC and dehumidifier systems can produce condensate; if drainage is misrouted, overflow or slow leaks can wet the perimeter area before anyone notices.
– Place a mat or rug at entry points and under high-risk spots (near a door, windowsill condensation, or where a humidifier sits). For LVP, the goal is to reduce wetting at the seam lines that run across the floor.
– Reduce condensation:
– Empty/maintain a window unit tray and confirm drainage is handling condensate correctly.
– Route A/C condensate correctly (especially if tubing runs near the floor edge or through a wall cavity).
– Keep humidifiers at appropriate levels for the room; if you don’t use a hygrometer, you’re guessing—guessing is how RH ends up too high for long enough to create condensation.
– Keep water away from the perimeter—install/maintain caulk where applicable around transitions and avoid letting spills run under baseboards. Baseboards and shoe molding hide moisture transfer routes that don’t dry as quickly as the open floor.
Clean and maintain without over-wetting the floor
You protect LVP by cleaning it with damp methods, not by saturating it. Over-wetting doesn’t just “make it messy”—it drives moisture into joints, underlayment, and seam edges where drying is slower.
The RFCI’s maintenance guidance for resilient floors emphasizes avoiding excessive water during cleaning because resilient flooring systems rely on installation and moisture control.
Steam mops can introduce concentrated heat and water exposure that may move moisture into seams and underlayment areas if your LVP system doesn’t explicitly permit steam cleaning.
For floating LVP, water trapped at seam lines can persist longer than water on the surface, increasing swelling and joint separation risk.
– Use a manufacturer-recommended cleaner and damp (not wet) mopping approach; never leave puddles to evaporate on their own. “Damp” means the mop leaves floors clean without water pooling along seams.
– Avoid steam mops and aggressive soaking—LVP and the underlayment area can be more vulnerable at seams and edges. Even if the top surface looks fine, moisture can travel into the installation layer below.
– Use felt pads under furniture and keep rugs from backing up moisture (some rug pads can hold dampness against the floor). If you’ve ever lifted a wet rug pad and found moisture discoloration beneath, you already know why this matters for bedrooms.
Here’s a quick contrast that helps staff and family members stay consistent:
| Cleaning method | Moisture exposure risk to LVP seams | Recommended for most bedrooms? |
|---|---|---|
| Damp mop with manufacturer cleaner | Low (if no pooling occurs) | Yes |
| “Wet mopping” / frequent water rinses | Moderate to high (pooling increases) | No |
| Steam cleaning | High (water/heat drive into seams) | Only if explicitly permitted |
Fix leaks fast—and handle spills the “right way”
You stop LVP water damage by treating standing water and ongoing leaks as time-sensitive problems. If moisture reaches the perimeter or seam lines, the floor system may not dry quickly enough on its own.
The U.S. CDC advises drying water-damaged areas promptly (commonly within 24–48 hours) to help reduce mold risk (CDC guidance).
Small recurring leaks can be more damaging than a single spill because LVP and underlayment accumulate moisture through repeated wet/dry cycles.
For any spill, the “fast response” step is removing the water first, then drying along seam lines and perimeter areas rather than only mopping the surface.
– Treat any standing water like an emergency: remove it immediately and dry the area thoroughly, including along seams and edges. Use towels or a wet/dry vacuum rated for water pickup—then verify you’ve removed moisture from the perimeter zone.
– For recurring issues (plumbing, HVAC condensation, window leaks), identify the source first—repeated wetting will eventually overwhelm normal cleaning. If the cause is ongoing, your “spill cleanup” becomes a repeated bandage.
– If a spill soaked into the perimeter area, check for dampness under/around transitions before moving furniture back. In many LVP bedrooms, the perimeter is where drying is slowest because it’s blocked by baseboards, trim, and limited airflow.
What can go wrong (common mistakes and edge cases)
You usually get LVP water damage from preventable installation and maintenance choices—especially when underlayment/moisture barriers are wrong or cleaning adds too much water. The floor may look fine for weeks while moisture works its way into joints, then symptoms appear as loose planks or lifted edges.
A major cause of resilient-floor failures is moisture management mismatch—using underlayment/moisture barriers that don’t meet the manufacturer’s installation requirements.
“Water resistant” is not the same as “water proof”; standing water at seams and edges is where damage typically starts because drying is slow in those zones.
Bedrooms with exterior walls, window A/C units, or window condensation are higher-risk because cold surfaces promote condensation and surface wetting patterns.
– Using the wrong underlayment or skipping the moisture barrier when your manufacturer requires one.
– Cleaning methods that introduce too much water (wet mopping, leaving cleaner to sit, steam).
– Assuming “water resistant” means “water proof”—water sitting at seams is where damage usually starts.
– Edge cases:
– Radiant heat: temperature cycling can increase expansion movement at seams and change how quickly moisture evaporates.
– Bathrooms just off the bedroom: moisture migration can happen through doors, HVAC pathways, or shared ventilation.
– Concrete slabs with documented moisture problems: concrete can carry moisture; strict moisture testing and installation steps may be required—follow the LVP manufacturer’s requirements.
Bottom line (practical verdict)
For most bedrooms, the best approach is simple: control humidity and condensation, prevent water from reaching the perimeter/seams, and clean with damp methods only. Skip this plan if your LVP manufacturer explicitly forbids certain cleaners or underlayment conditions you can’t meet, or if you already have a confirmed leak—fixing the source comes first, or moisture will keep finding its way into the LVP system.
Quick checklist to prevent water damage (scan/save)
Use this checklist to keep LVP in “dry control mode” in 2026—especially around seams, edges, and any area where condensation or drips can occur.
– Fix the source first: leaks/condensation > cleaning.
– Keep moisture off seams/edges: no puddles, damp cleaning only.
– Dry promptly: remove water fast; don’t wait for it to “dry out.”
Moisture Benchmarks that Matter for LVP in Bedrooms
| # | Moisture control target | Metric | Why it matters to LVP | Priority |
|---|---|---|---|---|
| 1 | Recommended indoor humidity band | 30–50% RH | Less condensation risk | ★★★★★ |
| 2 | Mold growth risk threshold (humidity) | ~60% RH and above | Higher moisture availability | ★★★★☆ |
| 3 | Drying window after water damage | 24–48 hours | Reduces sustained wet conditions | ★★★★★ |
| 4 | Perimeter expansion gap concept | Manufacturer-specified (often ~6–10 mm) | Prevents perimeter pressure + edge issues | ★★★★☆ |
| 5 | Calcium chloride test result unit | lbs/1,000 sq ft/24 hr | Helps quantify slab vapor drive | ★★★☆☆ |
| 6 | In-situ RH probe result metric | % RH at depth | Measures internal slab moisture pressure | ★★★☆☆ |
| 7 | Cleaning principle | Damp, not pooling | Limits seam saturation | ★★★★☆ |
| Situation | What to do immediately | Prevent it next time |
|---|---|---|
| Small spill | Blot/wipe up right away; don’t let it spread | Use a tray/mat under nightstands near water sources |
| Standing water | Remove + dry along seams/edges | Check HVAC condensate and humidifier placement |
| Rug pad holds moisture | Lift rug, dry floor, switch to breathable pad | Choose rug pads made for resilient floors |
| Window A/C condensation | Empty tray; dry the surrounding area | Schedule regular maintenance; route drainage properly |
Sources
– Resilient Floor Covering Institute (RFCI), Recommended Maintenance of Resilient Flooring (general guidance on avoiding excessive moisture for resilient floors).
– U.S. EPA, Indoor moisture and humidity guidance for mold risk (including recommended RH ranges and moisture control principles).
– U.S. CDC guidance on mold and water-damaged materials, including prompt drying concepts (often framed around 24–48 hours).
Keeping water away from LVP is mostly about prevention and speed: manage condensation and leaks, avoid soaking during cleaning, and dry spills quickly—especially at seams and edges. Review your LVP manufacturer’s installation and maintenance instructions (because details vary by brand and core type), then use the checklist above to build a simple, repeatable routine. And if moisture keeps showing up, address the source first—“after-the-fact” cleaning can’t reliably undo repeated wetting in the seam/perimeter zones.
Frequently Asked Questions
What are the best ways to prevent water damage to LVP floors in a bedroom?
Start by controlling moisture at the source: fix leaks under sinks, seal plumbing penetrations, and use bathroom-grade caulk where needed. Use non-slip felt pads under furniture legs and area rugs with waterproof backing to reduce spills and prevent water from pooling. For LVP, prompt cleanup is key—wipe standing water quickly and dry the area thoroughly to protect seams and the subfloor.
How can I protect LVP flooring from spills and standing water in a bedroom?
Keep a microfiber mop and absorbent towels near likely spill areas so you can blot, not scrub, right away. Use a towel to soak up any liquid at the seam lines, and then run a fan or dehumidifier to dry the floor and subfloor if the spill is significant. Avoid steam mops and leave no damp spots under furniture or rugs, since moisture can seep through edges over time.
Why do LVP floors still need moisture precautions, even though they’re water-resistant?
Many luxury vinyl plank (LVP) products are water-resistant, not waterproof, meaning water can still penetrate through seams, edges, or damaged areas. High humidity, long exposure to dampness, or wet subfloors can lead to swelling, warping, or mold growth underneath. Moisture control and quick spill response help prevent issues that compromise the click-lock joints and overall performance.
Which underlayment and installation steps help prevent moisture-related problems with LVP in bedrooms?
Use the manufacturer-recommended underlayment, ideally one that includes a moisture barrier if your subfloor needs it. During installation, follow expansion gap requirements and avoid using excess adhesive or blocking perimeter gaps that allow safe movement. Check that subfloor is level and dry before laying LVP, because uneven areas can create gaps where water collects and migrates toward seams.
How should I maintain LVP flooring to prevent water damage over the long term?
Clean with a manufacturer-approved LVP cleaner and keep the floor damp-free—use minimal water and ensure the surface dries quickly after mopping. Regularly inspect around baseboards, closets, and any water-using appliances for signs of seepage or gaps, and re-caulk where appropriate. If you notice bubbling, lifting seams, or persistent dampness, address the moisture source immediately and dry the subfloor to prevent further damage.
📅 Last Updated: October 27, 2026 | Topic: How to prevent water damage to LVP floors in a bedroom? | Content verified for accuracy and freshness.
References
- Vinyl flooring
- https://www.epa.gov/mold/moisture-control-home
- https://www.cdc.gov/mold/default.htm
- Mold – Overview | Occupational Safety and Health Administration
- https://www.fema.gov/fact-sheet/mold
- https://scholar.google.com/scholar?q=how+to+prevent+water+damage+to+luxury+vinyl+plank+flooring Google Scholar
- https://scholar.google.com/scholar?q=resilient+flooring+installation+subfloor+moisture+vapor+barrier+guidelines Google Scholar
- https://scholar.google.com/scholar?q=lvp+floor+water+leak+prevention+care+and+maintenance Google Scholar